I ruined teriyaki chicken for an entire year before I finally got it right.
Not in the dramatic, smoke-alarm-blazing way you might imagine. No, my failure was quieter and honestly more frustrating. The chicken was always dry. The sauce would separate into this greasy, watery mess that looked nothing like the glossy, sticky perfection I was chasing. I’d stand over the stove, fork in hand, poking at another sad, pale piece of chicken swimming in a thin, salty liquid, wondering why something that looked so simple on TikTok felt like advanced chemistry in my own kitchen.
Here’s what took me way too long to figure out: the problem wasn’t the ingredients. It was me. I was rushing. I was using the wrong heat. I was crowding the pan. I was treating the sauce like an afterthought instead of the star of the show. And most importantly, I was using store-bought teriyaki sauce that was loaded with preservatives and corn syrup, which never caramelized properly. Once I started making my own sauce (which takes all of five minutes, by the way), everything clicked.
These Easy Teriyaki Chicken Meal Prep Bowls with Rice are the result of all those failed experiments. They’re forgiving enough for a busy Tuesday but impressive enough that you’ll actually look forward to eating them cold from the fridge the next day. The chicken stays juicy. The sauce thickens into that perfect, clingy glaze. And the whole thing comes together in about 20 minutes, which means you have no excuse not to prep your lunches for the week.
Honestly, I make these bowls almost every Sunday now. They’ve saved me from more sad desk salads than I can count.
Why You’ll Love These Easy Teriyaki Chicken Meal Prep Bowls
Let me tell you why this recipe has earned a permanent spot in my weekly rotation. I’ve tested this one on picky eaters, meal prep skeptics, and even my mom who usually hates leftovers. Everyone agrees these bowls are special.
- Ready in 20 Minutes: From cutting board to lunch container in the time it takes to watch one episode of a sitcom. This is weeknight cooking at its finest.
- Simple Pantry Ingredients: Soy sauce, honey, rice vinegar, garlic, ginger, and chicken. You probably have most of this stuff already. No trips to specialty stores required.
- Perfect for Busy Weeks: Make a batch on Sunday, and you’ve got four days of lunches sorted. Grab and go, no thinking required.
- Way Better Than Takeout: The homemade sauce is fresher, less sugary, and actually sticks to the chicken instead of pooling at the bottom of the container.
- Budget-Friendly: One batch costs a fraction of what you’d pay for delivery, and you get way more food.
What makes this recipe different from all those other teriyaki chicken recipes out there? Two things. First, the sauce-to-chicken ratio is perfectly calibrated so you get enough glaze without the rice getting soggy by day three. Second, I use a clever trick of reserving some sauce to drizzle fresh over the bowls right before eating, which makes every bite taste like you just cooked it.
These bowls aren’t just good for meal prep. They’re the kind of lunch that makes your coworkers jealous. The kind you actually get excited to eat at noon. The kind that keeps you from ordering fast food because you know you’ve got something better waiting in the fridge.
What Ingredients You Will Need
This recipe uses simple, wholesome ingredients that work together to create that signature sweet and savory teriyaki flavor. No obscure Asian market finds here, just good pantry staples.
For the Teriyaki Sauce
- Soy Sauce (½ cup): Use low-sodium if you can. Regular soy sauce works fine, but the final dish might be saltier. I prefer Kikkoman for its balanced flavor.
- Honey (¼ cup): This is what gives the sauce its sticky sweetness and helps it caramelize beautifully. You can substitute maple syrup, but the flavor will be slightly different.
- Rice Vinegar (2 tablespoons): Adds that subtle tang that balances the sweetness. Don’t skip it. Apple cider vinegar works in a pinch.
- Fresh Garlic (3 cloves, minced): Please use fresh garlic here. The jarred stuff won’t give you the same punch.
- Fresh Ginger (1 tablespoon, grated): Another non-negotiable for the best flavor. I keep a knob of ginger in the freezer and grate it straight from frozen.
- Cornstarch (1 tablespoon): This thickens the sauce and gives it that glossy, restaurant-quality finish. Mix it with 2 tablespoons of cold water to make a slurry before adding.
- Sesame Oil (1 teaspoon): A little goes a long way. It adds that nutty, toasty aroma that makes teriyaki taste authentic.
For the Chicken
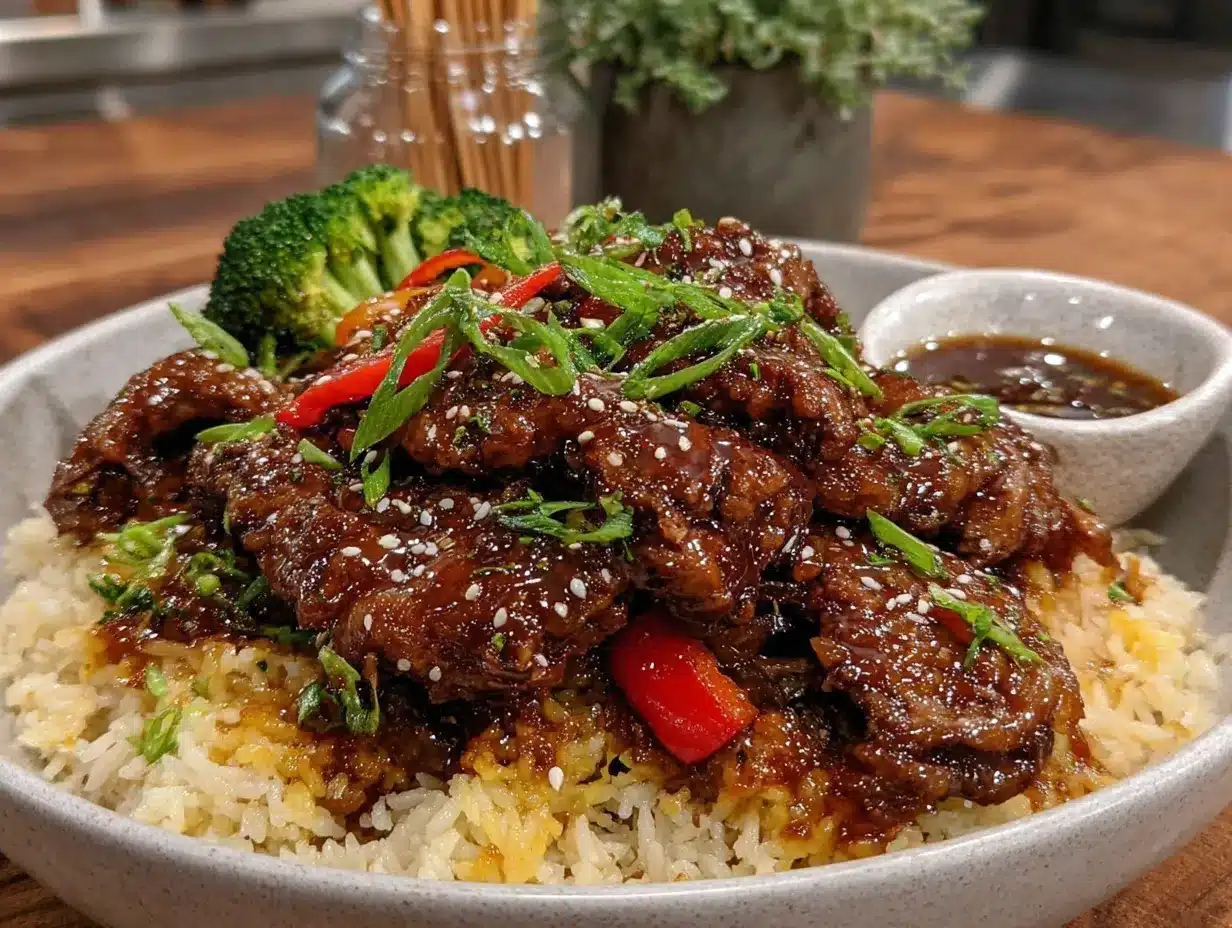
- Boneless, Skinless Chicken Thighs (1½ pounds): Trust me on this one. Thighs stay juicier than breasts, especially after a few days in the fridge. If you must use breasts, pound them to even thickness first.
- Avocado Oil (2 tablespoons): High smoke point means it won’t burn. Vegetable or canola oil work too.
- Salt and White Pepper (to taste): White pepper is traditional and blends in visually, but black pepper is fine.
For the Bowls
- Cooked White Rice (3 cups): Short-grain or medium-grain rice works best. It’s stickier and holds up better in the fridge. I use a rice cooker for perfect results every time.
- Steamed Broccoli (2 cups, florets): Adds color, crunch, and nutrition. Snap peas, green beans, or bell peppers work great too.
- Shredded Carrots (1 cup): For a pop of color and sweetness.
- Sesame Seeds (1 tablespoon, toasted): For garnish. Totally optional but makes everything look fancy.
- Thinly Sliced Green Onions (¼ cup): Freshness and crunch on top.
Equipment Needed
You don’t need a fancy kitchen to make these bowls. Here’s what you’ll need:
- Large Skillet or Wok: A 12-inch skillet with high sides works perfectly. Nonstick makes cleanup easier, but stainless steel gives better browning. I use my trusty cast iron skillet for the best sear.
- Small Bowl: For mixing the cornstarch slurry.
- Sharp Knife and Cutting Board: For dicing the chicken and prepping veggies. A good chef’s knife makes this step painless.
- Measuring Cups and Spoons: Accuracy matters with the sauce ingredients.
- Rice Cooker or Small Pot: For cooking the rice. A rice cooker is hands-off and perfect for meal prep. If using a pot, follow the 2:1 water-to-rice ratio.
- Steamer Basket or Microwave-Safe Bowl: For the broccoli. Steaming preserves nutrients and texture better than boiling.
- Meal Prep Containers: Glass containers with tight-fitting lids are best. They don’t stain, they reheat well, and they keep everything fresh.
If you don’t have a steamer basket, just microwave the broccoli with a splash of water for 2-3 minutes. Works like a charm.
Preparation Method
Follow these steps carefully, and you will have perfect teriyaki chicken bowls every single time. I’ve numbered everything for clarity.
- Start the rice first. Rinse 1½ cups of short-grain rice under cold water until the water runs clear. Add to your rice cooker with 2 cups of water and start it. If using a pot, bring 3 cups of water to a boil, add the rice, reduce to low, cover, and simmer for 18 minutes. Remove from heat and let it sit, covered, for 5 minutes before fluffing.
- Make the teriyaki sauce. In a small bowl, whisk together ½ cup soy sauce, ¼ cup honey, 2 tablespoons rice vinegar, minced garlic, and grated ginger. In a separate tiny bowl, mix 1 tablespoon cornstarch with 2 tablespoons cold water until smooth. Set both aside.
- Prep the chicken. Pat the chicken thighs dry with paper towels. This is crucial for getting a good sear. Cut them into bite-sized pieces, about 1-inch cubes. Season lightly with salt and white pepper.
- Sear the chicken. Heat your skillet over medium-high heat for a full 2 minutes. Add the avocado oil and swirl to coat. The oil should shimmer but not smoke. Add the chicken pieces in a single layer — do not crowd the pan. Work in batches if needed. Let the chicken cook undisturbed for 3-4 minutes until the bottom is golden brown and crispy. Flip and cook another 2-3 minutes. The chicken should be cooked through and have nice brown spots.
- Add the sauce. Reduce the heat to medium-low. Pour the soy sauce mixture into the skillet with the chicken. It will bubble up immediately. Stir everything together and let it simmer for 2 minutes.
- Thicken the sauce. Give the cornstarch slurry a quick stir (it settles fast) and pour it into the skillet. Stir constantly for 1-2 minutes. You’ll see the sauce transform from watery to glossy and thick. It should coat the back of a spoon. If it seems too thick, add a tablespoon of water. Too thin, let it simmer another minute.
- Remove from heat. Drizzle the sesame oil over the chicken and stir to combine. The sauce will continue to thicken as it cools.
- Steam the broccoli. While the chicken cooks, steam the broccoli florets. I use a steamer basket over boiling water for 3-4 minutes. You want them bright green and tender-crisp, not mushy. Shock them in cold water to stop the cooking and preserve that vibrant color.
- Assemble the bowls. Divide the cooked rice evenly among your meal prep containers. Top with the teriyaki chicken and sauce. Add a portion of steamed broccoli and shredded carrots on the side. Sprinkle with toasted sesame seeds and sliced green onions.
- Cool completely before sealing. This is the most important step for food safety. Let the containers sit open on the counter for 30-45 minutes until they reach room temperature. Then seal the lids and refrigerate.
Pro tip: Reserve about ¼ cup of the sauce separately. Drizzle it over the bowls right before eating to revive that fresh-from-the-pan flavor.
Cooking Tips & Techniques
I’ve made every mistake in the book with this recipe, so you don’t have to. Here’s what I’ve learned the hard way.
Don’t overcook the chicken. Chicken thighs are forgiving, but they can still dry out if you cook them too long. The moment they hit 165°F internally, they’re done. I use an instant-read thermometer to be sure. Cooking them in batches also helps prevent overcrowding, which steams the meat instead of searing it.
The sauce will seem too thin at first. Don’t panic. Cornstarch needs heat and time to activate. Keep stirring, and it will thicken right before your eyes. If you add the slurry and nothing happens after 2 minutes, turn the heat up slightly. If it gets too thick too fast, whisk in a splash of water.
Toast your sesame seeds. This takes 2 minutes in a dry pan over medium heat and makes a huge difference in flavor. Watch them carefully — they burn fast. Shake the pan constantly until they’re golden and fragrant.
Multitask like a pro. While the rice cooks and the chicken sears, chop your green onions and shred your carrots. This saves at least 10 minutes. I also clean as I go, which makes the whole process feel less overwhelming.
Season in layers. A little salt on the chicken before cooking, a little soy sauce in the sauce, and a final sprinkle of sesame seeds and green onions. Each layer adds depth. Don’t dump all the salt in at once.
The biggest mistake I made? Adding the sauce too early. I used to dump everything in at the same time — raw chicken, sauce, everything — and wonder why the chicken was tough and the sauce was watery. Cooking the chicken first gives you that beautiful golden crust. Then the sauce coats it like a glaze instead of poaching it.
Variations & Adaptations
One of the best things about this recipe is how flexible it is. Here are some variations I’ve tried and loved.
Spicy Teriyaki Bowls: Add 1 tablespoon of sriracha or gochujang to the sauce for a spicy kick. I do this when I want something with more heat. A pinch of red pepper flakes works too.
Low-Carb Version: Swap the rice for cauliflower rice or zucchini noodles. The teriyaki chicken is naturally low-carb, so this is an easy switch. I’ve made it with cauliflower rice several times, and it’s surprisingly satisfying.
Vegetarian Option: Use extra-firm tofu or tempeh instead of chicken. Press the tofu for 30 minutes to remove excess moisture, then cube and pan-fry until golden. The sauce works beautifully with tofu. I also like adding edamame for extra protein.
Different Veggies: Broccoli is classic, but this recipe works with snap peas, bell peppers, bok choy, or asparagus. Use whatever is in season. In summer, I add fresh corn kernels. In fall, roasted butternut squash cubes.
Baked Version: If you want a hands-off method, bake the chicken at 400°F for 20 minutes, then toss with the sauce and bake another 5 minutes. It won’t have the same caramelized edges, but it’s still delicious.
Gluten-Free Adaptation: Use tamari or coconut aminos instead of soy sauce. Everything else is naturally gluten-free. Just double-check your rice vinegar and sesame oil labels.
I once made a version with pineapple chunks added to the sauce, and it was incredible. The natural sweetness of the pineapple complemented the teriyaki perfectly. Just add the pineapple at the end so it doesn’t break down too much.
Serving & Storage Suggestions
These bowls are designed for meal prep, but they’re also fantastic served fresh. Here’s how to get the most out of them.
Serving Fresh: Serve the teriyaki chicken over a bed of hot rice with the steamed broccoli and shredded carrots on the side. Garnish with sesame seeds and green onions. A side of pickled ginger or a simple cucumber salad would be lovely too. For drinks, iced green tea or a cold lager pairs beautifully.
Storing in the Fridge: Store the assembled bowls in airtight containers for up to 4 days. Keep the sauce separate if you can, but it’s not essential. The flavors actually meld together overnight and taste even better the next day.
Freezing Instructions: You can freeze the teriyaki chicken and rice separately for up to 3 months. Thaw overnight in the fridge. The broccoli doesn’t freeze well — it gets mushy. I recommend making fresh veggies when you reheat.
Reheating Methods:
- Microwave: Remove the lid and microwave on high for 2-3 minutes, stirring halfway through. Add a splash of water if the rice seems dry.
- Skillet: Reheat in a nonstick skillet over medium heat with a tablespoon of water. Cover and cook for 3-4 minutes, stirring occasionally. This restores the best texture.
- Oven: Place in an oven-safe dish at 350°F for 10-15 minutes, covered with foil.
Flavor Development: The sauce thickens as it sits in the fridge, which is actually a good thing. The flavors become more concentrated and the chicken absorbs more of that sweet-savory goodness. By day three, these bowls are at their peak. Don’t be afraid to eat them cold too — they make an excellent cold lunch on hot days.
Nutritional Information & Benefits
Here’s the estimated nutritional breakdown per serving (one bowl with rice, chicken, and veggies).
| Nutrient | Amount Per Serving |
|---|---|
| Calories | 485 |
| Protein | 38g |
| Carbohydrates | 52g |
| Fat | 14g |
| Saturated Fat | 3g |
| Fiber | 4g |
| Sugar | 18g |
| Sodium | 980mg |
These bowls are packed with protein from the chicken, which keeps you full and satisfied. The broccoli and carrots provide fiber, vitamins A and C, and antioxidants. Ginger is known for its anti-inflammatory properties, and garlic supports immune health. Using low-sodium soy sauce helps keep the sodium in check without sacrificing flavor.
If you’re watching your sugar intake, you can reduce the honey to 3 tablespoons. The sauce will still be delicious, just slightly less sticky. For a lower-calorie option, swap the rice for cauliflower rice, which saves about 150 calories per serving.
This recipe is naturally dairy-free and can easily be made gluten-free with a simple swap. It’s also nut-free, so it’s safe for most allergy-friendly kitchens.
Personally, I love that these bowls give me sustained energy throughout the afternoon without the crash that comes from processed takeout. The balance of protein, carbs, and veggies is just right.
Conclusion
These Easy Teriyaki Chicken Meal Prep Bowls with Rice have genuinely changed how I approach lunch. No more sad desk salads, no more overpriced delivery, no more staring into the fridge hoping something magical appears. Just delicious, homemade teriyaki chicken that tastes like it came from your favorite takeout spot, ready whenever you are.
The best part? You can customize these bowls to your heart’s content. Swap the veggies, adjust the spice level, go low-carb, or double the batch for a crowd. This recipe is a starting point, not a strict rulebook. Make it your own.
I’d love to hear how these turn out for you. Did you add pineapple? Use tofu instead of chicken? Discover a new favorite vegetable combination? Drop a comment below and let me know. Your adaptations might inspire someone else’s next great lunch.
Here’s to less stress, better lunches, and more time doing things you actually enjoy. Happy cooking, friends. You’ve got this.
Frequently Asked Questions
Can I use chicken breast instead of thighs?
Yes, absolutely. Just be careful not to overcook them, as breasts dry out faster. Pound them to even thickness first for consistent cooking. You might also want to slice them slightly larger since breast meat shrinks more during cooking.
How long do these meal prep bowls last in the fridge?
They stay fresh for up to 4 days when stored in airtight containers. The flavors actually get better after a day or two as the sauce soaks into the rice and chicken. I wouldn’t push it past day 4, though.
Can I freeze the teriyaki chicken?
Yes! The chicken freezes beautifully for up to 3 months. Store it in a freezer-safe container with the sauce. Thaw overnight in the fridge and reheat in a skillet for the best texture. The rice can also be frozen separately.
My sauce turned out too thin. What went wrong?
Most likely, the cornstarch slurry wasn’t mixed properly before adding, or the sauce didn’t simmer long enough. Make sure you stir the slurry right before adding it, and let the sauce bubble for at least 2 minutes after. If it’s still thin, mix another teaspoon of cornstarch with cold water and add it in.
Is this recipe gluten-free?
Not as written, but it’s easily adaptable. Simply swap the soy sauce for tamari or coconut aminos, and check that your rice vinegar and sesame oil are certified gluten-free. Everything else in the recipe is naturally gluten-free.
Pin This Recipe!
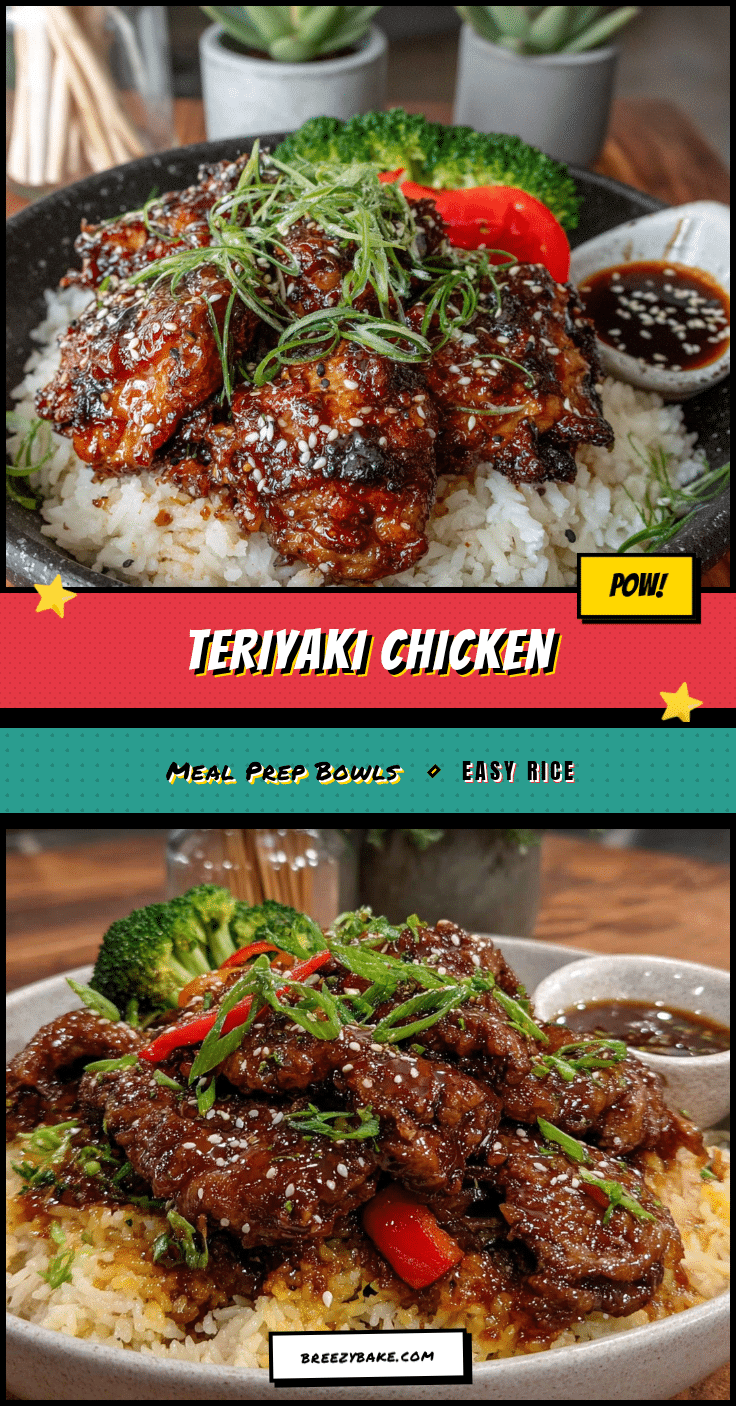
Easy Teriyaki Chicken Meal Prep Bowls: Best 20-Minute Lunch
These Easy Teriyaki Chicken Meal Prep Bowls with Rice are forgiving enough for a busy Tuesday but impressive enough that you’ll actually look forward to eating them cold from the fridge the next day. The chicken stays juicy, the sauce thickens into that perfect, clingy glaze, and the whole thing comes together in about 20 minutes.
- Prep Time: 10 minutes
- Cook Time: 10 minutes
- Total Time: 20 minutes
- Yield: 4 servings 1x
- Category: Main Course
- Cuisine: Japanese
Ingredients
- ½ cup soy sauce (low-sodium preferred)
- ¼ cup honey
- 2 tablespoons rice vinegar
- 3 cloves garlic, minced
- 1 tablespoon fresh ginger, grated
- 1 tablespoon cornstarch
- 2 tablespoons cold water
- 1 teaspoon sesame oil
- 1½ pounds boneless, skinless chicken thighs
- 2 tablespoons avocado oil
- Salt and white pepper to taste
- 3 cups cooked white rice (short-grain or medium-grain)
- 2 cups steamed broccoli florets
- 1 cup shredded carrots
- 1 tablespoon toasted sesame seeds
- ¼ cup thinly sliced green onions
Instructions
- Start the rice first. Rinse 1½ cups of short-grain rice under cold water until the water runs clear. Add to your rice cooker with 2 cups of water and start it. If using a pot, bring 3 cups of water to a boil, add the rice, reduce to low, cover, and simmer for 18 minutes. Remove from heat and let it sit, covered, for 5 minutes before fluffing.
- Make the teriyaki sauce. In a small bowl, whisk together ½ cup soy sauce, ¼ cup honey, 2 tablespoons rice vinegar, minced garlic, and grated ginger. In a separate tiny bowl, mix 1 tablespoon cornstarch with 2 tablespoons cold water until smooth. Set both aside.
- Prep the chicken. Pat the chicken thighs dry with paper towels. Cut them into bite-sized pieces, about 1-inch cubes. Season lightly with salt and white pepper.
- Sear the chicken. Heat your skillet over medium-high heat for a full 2 minutes. Add the avocado oil and swirl to coat. Add the chicken pieces in a single layer — do not crowd the pan. Work in batches if needed. Let the chicken cook undisturbed for 3-4 minutes until the bottom is golden brown and crispy. Flip and cook another 2-3 minutes. The chicken should be cooked through and have nice brown spots.
- Add the sauce. Reduce the heat to medium-low. Pour the soy sauce mixture into the skillet with the chicken. It will bubble up immediately. Stir everything together and let it simmer for 2 minutes.
- Thicken the sauce. Give the cornstarch slurry a quick stir and pour it into the skillet. Stir constantly for 1-2 minutes. You’ll see the sauce transform from watery to glossy and thick. It should coat the back of a spoon. If it seems too thick, add a tablespoon of water. Too thin, let it simmer another minute.
- Remove from heat. Drizzle the sesame oil over the chicken and stir to combine. The sauce will continue to thicken as it cools.
- Steam the broccoli. While the chicken cooks, steam the broccoli florets in a steamer basket over boiling water for 3-4 minutes. You want them bright green and tender-crisp. Shock them in cold water to stop the cooking.
- Assemble the bowls. Divide the cooked rice evenly among your meal prep containers. Top with the teriyaki chicken and sauce. Add a portion of steamed broccoli and shredded carrots on the side. Sprinkle with toasted sesame seeds and sliced green onions.
- Cool completely before sealing. Let the containers sit open on the counter for 30-45 minutes until they reach room temperature. Then seal the lids and refrigerate.
Notes
Reserve about ¼ cup of the sauce separately to drizzle over the bowls right before eating for fresh-from-the-pan flavor. Don’t overcook the chicken; use an instant-read thermometer to ensure it reaches 165°F. The sauce will seem thin at first but will thicken as it cooks. Toast sesame seeds in a dry pan over medium heat for 2 minutes until golden. For best results, cook chicken in batches to avoid overcrowding the pan.
Nutrition
- Serving Size: 1 bowl
- Calories: 485
- Sugar: 18
- Sodium: 980
- Fat: 14
- Saturated Fat: 3
- Carbohydrates: 52
- Fiber: 4
- Protein: 38
Keywords: teriyaki chicken, meal prep, lunch bowls, 20-minute meal, chicken thighs, homemade teriyaki sauce, easy lunch, healthy meal prep


