Wednesday morning, 7:23 AM, and I’m staring into the open fridge like it holds the secrets to the universe. Half a pack of turkey slices, a sad-looking cucumber, and a jar of ranch dressing that’s seen better days. The lunchbox on the counter is empty, the bus comes in thirty minutes, and my kid just announced that “anything with bread is disgusting” today. I grab the tortillas from the back of the drawer, the cream cheese from the door, and I start slathering. No plan. No recipe. Just the desperate hope that if I roll it up tight enough and cut it into little circles, it’ll look like something fun instead of a fridge-clearing scramble. Turns out, that desperate hope turned into the most requested lunchbox item in this house. These Easy Turkey Ranch Pinwheel Lunchbox Wraps are the accidental hero of our school-year survival story.
They’re not fancy. They’re not complicated. But they are the kind of thing that makes you feel like you actually have your life together, even when you absolutely don’t. The cream cheese gets all tangy and smooth, the ranch seasoning kicks in with that familiar herby goodness, and the turkey and cheese roll up into these perfect little spirals that somehow taste better than the sum of their parts. I’ve made them for school lunches, for road trips, for afternoon snacks when the hangry hits hard. And every single time, they disappear before I can grab one for myself.
Honestly, I think that’s the real magic here. It’s not about being a gourmet chef or spending hours in the kitchen. It’s about having one reliable, no-fail recipe in your back pocket that works when nothing else does. And these pinwheels? They work.
Why You’ll Love This Recipe
Look, I’ve tested a lot of lunchbox recipes over the years. Some are too soggy by noon. Some fall apart the second you look at them. Some require seventeen ingredients you’ll use once and then forget about until they expire. These turkey ranch pinwheels are none of those things. They’re the Goldilocks of packed lunches — just right in every way that counts.
- Quick & Easy : From fridge to lunchbox in under 15 minutes. No cooking, no fuss, no dirtying a million dishes. You can literally make these while your coffee brews.
- Simple Ingredients : Everything is a standard grocery run staple. Tortillas, cream cheese, ranch seasoning, turkey, cheese, and whatever veggies you have hanging around. No special trips needed.
- Perfect for Meal Prep : These hold up beautifully in the fridge for 3-4 days. Make a batch on Sunday, and lunch is sorted for the better part of the week.
- Crowd-Pleaser : Kids love the fun spiral shape. Adults love the flavor. I’ve served these at playdates, picnics, and even as a light party appetizer, and they always get devoured.
- Endlessly Customizable : Don’t like turkey? Use ham or chicken. Not a ranch fan? Swap in any seasoning blend you love. This recipe is a template, not a rulebook.
What really sets these apart from other wrap recipes is the cream cheese base. Most pinwheels use mayo or plain cream cheese, but mixing the ranch seasoning right into the softened cream cheese creates this ultra-creamy, flavor-packed layer that holds everything together like glue. No soggy wraps. No sliding fillings. Just perfect little spirals every single time.
And here’s the thing — this isn’t just another lunch idea. It’s the kind of recipe that gives you five extra minutes in the morning. The kind that makes your kid actually excited to open their lunchbox. The kind that you’ll find yourself making even when nobody asks for it, just because it’s that good. Trust me on this one.
What Ingredients You Will Need
This recipe uses simple, wholesome ingredients that you probably already have in your kitchen. The beauty is in how they come together — each component plays a specific role in creating that perfect pinwheel texture and flavor.
- Large Flour Tortillas (10-inch) — You want the burrito-sized ones here, not the small taco size. The bigger surface area means more filling and tighter rolls. I prefer Mission or Ole brand for their flexibility, but any brand works as long as they’re soft and pliable. If your tortillas seem stiff, warm them in the microwave for 10 seconds to prevent cracking.
- Cream Cheese (8 oz), softened — Full-fat is best for flavor and structure. Let it sit on the counter for 20-30 minutes before mixing, or give it a quick 15-second zap in the microwave. You want it spreadable, not melted. Philadelphia is my go-to, but store brands work fine too.
- Ranch Seasoning Mix (1 packet or 3 tablespoons) — This is where the magic happens. I use Hidden Valley, but feel free to use your favorite brand. You can also make your own with dried buttermilk, parsley, dill, garlic powder, onion powder, and a pinch of salt and pepper.
- Sliced Turkey (8-10 slices) — Deli-style oven-roasted or smoked turkey works best. Look for slices that are thin but not paper-thin — you want them to hold together when rolled. I usually grab Boar’s Head or Hillshire Farm from the deli counter, but pre-packaged works in a pinch.
- Sliced Cheese (8-10 slices) — Provolone, cheddar, Swiss, or pepper jack are all excellent choices. The cheese adds creaminess and helps bind the roll. I’m partial to provolone for its mild flavor and excellent melting properties, even when cold.
- Fresh Vegetables (optional but recommended) — Thinly sliced cucumber, bell pepper strips, shredded lettuce, or fresh spinach all add crunch and freshness. Just make sure whatever you use is sliced thin and patted dry to avoid sogginess.
- Salt and Black Pepper (to taste) — A light sprinkle on the veggies brings out their flavor. Don’t overdo it — the ranch seasoning and cheese already bring plenty of salt.
A quick note on ingredient selection: if you’re using pre-shredded cheese, know that it often contains anti-caking agents that prevent it from melting as smoothly. For these pinwheels, sliced cheese is actually better because it creates an even layer that rolls without gaps. And for the veggies, less is more. You want a thin, even distribution — not a pile in the middle that makes rolling impossible.
For a lighter version, you can use reduced-fat cream cheese and low-fat turkey. The texture will be slightly less creamy, but the flavor is still fantastic. And if you’re dairy-free, there are excellent plant-based cream cheese options now — Kite Hill and Tofutti both work well in this recipe.
Equipment Needed
You don’t need much for this recipe, which is honestly half the appeal. Here’s what you’ll need:
- Cutting Board — A large, flat surface for assembling and rolling. Wood or plastic, doesn’t matter.
- Sharp Knife — A serrated knife works best for clean cuts through the tortilla without squishing the roll. A chef’s knife works too, just use a gentle sawing motion.
- Small Mixing Bowl — For combining the cream cheese and ranch seasoning.
- Spatula or Butter Knife — For spreading the cream cheese mixture evenly across the tortilla.
- Plastic Wrap or Parchment Paper — For wrapping the rolls tightly before chilling. This step is crucial for clean slices.
- Toothpicks (optional) — For securing the rolls if you’re transporting them. Not strictly necessary, but helpful for lunchboxes.
If you don’t have plastic wrap, you can use reusable beeswax wraps or simply place the rolls seam-side down on a plate. I’ve also used a damp paper towel in a pinch — it works, but plastic wrap gives you the tightest, most uniform rolls. And honestly, a good serrated knife makes all the difference. I learned the hard way that using a dull knife just squishes everything into a sad, flattened mess.
Preparation Method
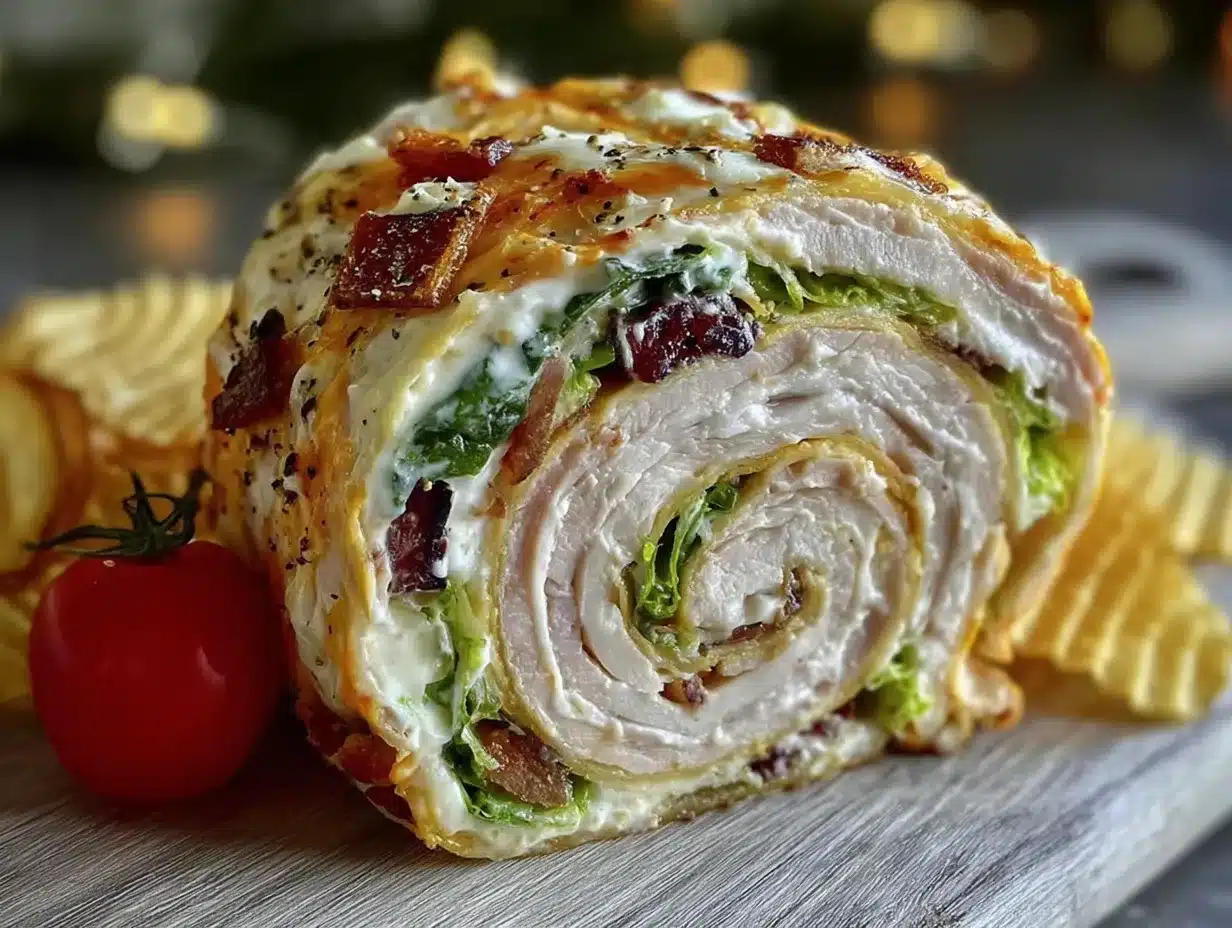
Alright, let’s get rolling — literally. This comes together fast once you get the hang of it, so read through the steps first and then dive in.
- Soften the cream cheese. Take your 8 oz of cream cheese out of the fridge about 20 minutes before you start. If you’re in a hurry (and let’s face it, when aren’t we?), remove the foil wrapper and microwave it on a plate for 15-20 seconds. You want it soft enough to stir easily but not warm or runny.
- Mix the ranch spread. In your small bowl, combine the softened cream cheese with the entire packet of ranch seasoning mix. Stir until completely smooth and uniform. Give it a taste — it should be tangy, herby, and just a little bit addictive. If you like things extra ranch-y, add another tablespoon of seasoning.
- Prepare your work surface. Lay one large flour tortilla flat on your cutting board. If your tortillas are cold or stiff, warm them in the microwave for 10 seconds — this makes them way more pliable and prevents cracking when you roll.
- Spread the cream cheese mixture. Using your spatula or butter knife, spread about 2-3 tablespoons of the ranch cream cheese evenly across the entire surface of the tortilla. Go all the way to the edges — this acts as the glue that holds everything together. Don’t be shy with it.
- Layer the turkey. Place 2-3 slices of turkey flat on top of the cream cheese, overlapping slightly. You want full coverage but not a thick, bumpy layer. Think single layer, slightly overlapping.
- Add the cheese. Lay 2-3 slices of your chosen cheese on top of the turkey. Again, overlapping slightly, covering the surface evenly.
- Add your veggies. If you’re using vegetables, now’s the time. Lay a thin, even layer of cucumber slices, bell pepper strips, or shredded lettuce across the cheese. Remember: thin and even. You don’t want a bulge in the middle.
- Season lightly. A tiny pinch of salt and a few grinds of black pepper over the veggies. That’s it — the ranch seasoning does most of the heavy lifting here.
- Roll it up tight. Starting from the edge closest to you, begin rolling the tortilla away from you into a tight log. Use your fingers to tuck and pull as you go, keeping even pressure. Think of it like rolling a sushi roll — firm but not so tight that the filling squishes out the ends. Roll all the way to the end and place it seam-side down.
- Wrap and chill. Tightly wrap the rolled tortilla in plastic wrap or parchment paper. Twist the ends like a candy wrapper to keep it snug. Place it in the fridge for at least 30 minutes — this is non-negotiable. The chilling time allows the cream cheese to firm up, which is what gives you those clean, perfect slices instead of a squished mess.
- Slice and serve. When you’re ready to eat, unwrap the roll and place it on your cutting board. Using a sharp serrated knife, slice the roll into 1-inch pinwheels. Use a gentle sawing motion — don’t press straight down. You should get about 8-10 pinwheels per tortilla.
- Pack it up. Arrange the pinwheels in your lunchbox or container. If you’re packing for later, place a slightly damp paper towel on top to keep them from drying out. They’ll stay perfect for hours.
A few things I’ve learned the hard way: if your cream cheese isn’t soft enough, you’ll tear the tortilla trying to spread it. If you skip the chilling step, your pinwheels will look like a toddler assembled them. And if you use too many veggies, the roll won’t close properly. Trust the process — it works.
Cooking Tips & Techniques
After making these probably fifty times (conservative estimate), I’ve picked up a few tricks that make a real difference. Here’s what I wish someone had told me from the start.
Don’t overfill. I know it’s tempting to pile on the turkey and cheese, but less really is more here. A thin, even layer rolls better, slices cleaner, and stays together longer. Overstuffed pinwheels are sad, leaky pinwheels.
Temperature matters. Cold tortillas crack. Warm cream cheese slides. Room temperature ingredients work together beautifully. Let everything sit out for 10-15 minutes before assembly, and you’ll thank me later.
The chilling step is sacred. I once skipped it because I was in a rush, and the result was a plate of squished, oozing spirals that looked like a crime scene. Thirty minutes in the fridge transforms a messy roll into a work of art. Don’t skip it.
Use a serrated knife. This was a game-changer for me. A serrated knife cuts through the tortilla without compressing the roll, giving you those beautiful spiral cross-sections. A chef’s knife works, but you have to be gentle and use a sawing motion.
Pat your veggies dry. Wet veggies = soggy pinwheels. After washing your cucumber or lettuce, lay it on a paper towel and pat it thoroughly dry. Excess moisture is the enemy of a good wrap.
Make it ahead. These actually taste better after a few hours in the fridge. The flavors meld together, and the cream cheese sets up perfectly. I often make them the night before and slice them in the morning — saves time and tastes better.
One mistake I made early on was using low-fat cream cheese to save calories. Big mistake. Low-fat cream cheese has a higher water content, which makes the pinwheels soggy and the slices messy. Full-fat is worth it here — you’re using a small amount per wrap anyway.
Variations & Adaptations
This recipe is basically a blank canvas, and I’ve tried more variations than I can count. Here are some of my favorites:
Buffalo Chicken Pinwheels: Swap the turkey for shredded cooked chicken mixed with buffalo sauce. Use blue cheese or ranch dressing in the cream cheese mixture instead of the seasoning packet. These are incredible for game day — and they pair perfectly with our Crispy Super Bowl Bacon Ranch Chicken Flatbread Minis for a full spread.
Veggie Ranch Pinwheels: Skip the meat entirely and load up on thinly sliced cucumber, bell pepper, shredded carrot, and fresh spinach. Add a layer of hummus under the cream cheese for extra protein. My vegetarian friends beg me for these.
Ham and Swiss Variation: Replace the turkey with deli ham and use Swiss cheese instead of provolone. Add a smear of Dijon mustard to the cream cheese for a tangy kick. This is my husband’s favorite version.
Spicy Jalapeño Ranch: Mix 2 tablespoons of chopped pickled jalapeños into the cream cheese. Use pepper jack cheese and add a few fresh jalapeño slices. Warning: these are addictive and disappear fast.
Low-Carb / Keto Option: Use large low-carb tortillas or collard green leaves instead of flour tortillas. Everything else stays the same. They roll up beautifully and taste just as good.
Gluten-Free Adaptation: Most flour tortillas contain gluten, but there are excellent gluten-free options available now. Look for gluten-free wraps made from cassava flour or almond flour. They’re slightly more delicate, so handle them gently.
If you’re looking for more healthy lunch inspiration, our Healthy Chicken Veggie Skillet Wraps are another fantastic option that comes together in just 5 steps.
Serving & Storage Suggestions
These pinwheels are incredibly versatile when it comes to serving. Here’s how I handle them:
Serving Temperature: Cold is classic, but room temperature is also fantastic. If you’re packing them for lunch, they’ll naturally come to room temp by the time lunch rolls around, and that’s perfectly fine. The flavors actually open up a bit as they warm.
Presentation: Arrange the pinwheels cut-side up in a circle on a plate, with a small bowl of extra ranch dressing for dipping in the center. For lunchboxes, I stack them in a small container with a piece of parchment paper between layers to prevent sticking.
What to Serve With: These pair beautifully with fresh fruit, veggie sticks, a small side salad, or some crunchy chips. For a heartier meal, serve alongside our Healthy Ranch Chicken Grain Bowls for a complete ranch-themed lunch.
Storage: Keep assembled (unsliced) rolls wrapped tightly in plastic wrap in the refrigerator for up to 4 days. Once sliced, they’re best eaten within 24 hours — the cut edges start to dry out after that. I don’t recommend freezing these, as the cream cheese texture changes upon thawing.
Reheating: Honestly, these are meant to be eaten cold. But if you prefer them warm, you can microwave a few pinwheels for 15-20 seconds. The cheese will get melty and the tortilla will soften. Just don’t overdo it, or they’ll turn into a mess.
Flavor Development: Here’s a little secret — these taste even better the next day. The ranch seasoning has time to fully infuse the cream cheese, and all the flavors meld together beautifully. I often make them a day ahead on purpose.
Nutritional Information & Benefits
Per serving (about 4 pinwheels, using full-fat ingredients and turkey):
- Calories: Approximately 320-360
- Protein: 18-22g
- Fat: 18-22g
- Carbohydrates: 22-26g
- Fiber: 1-2g
- Sugar: 3-4g
- Sodium: 800-1000mg
These numbers will vary based on your specific ingredients and portion sizes. If you’re watching sodium, look for low-sodium turkey and reduced-sodium ranch seasoning.
Health Benefits: Turkey is an excellent source of lean protein, which keeps you full and satisfied. Cream cheese provides calcium and a small amount of vitamin A. Adding vegetables boosts the fiber and micronutrient content significantly. And the ranch seasoning contains herbs like dill and parsley, which have antioxidant properties.
Dietary Considerations: This recipe can easily be made gluten-free (use GF tortillas), low-carb (use low-carb tortillas or collard greens), or vegetarian (skip the turkey and double up on veggies). It’s not dairy-free in its standard form, but plant-based cream cheese works well as a substitute.
Potential Allergens: Contains dairy (cream cheese, cheese) and gluten (tortillas). Check your ranch seasoning packet for any added allergens — most are gluten-free, but always read the label.
I love that these pinwheels feel indulgent but are actually a balanced meal. The protein from the turkey and cheese keeps the kids full until after-school snacks, and the veggies add a fresh crunch that makes it feel like real food, not just processed stuff.
Conclusion
These Easy Turkey Ranch Pinwheel Lunchbox Wraps are the kind of recipe that makes you feel like you’ve hacked the system. They’re fast, they’re forgiving, and they’re absolutely delicious. Whether you’re packing school lunches, prepping for a road trip, or just need a quick snack that doesn’t require turning on the stove, these pinwheels deliver every single time.
What I love most about them is how they adapt to whatever you have on hand. No turkey? Use ham. No ranch? Try Italian seasoning. No cream cheese? Okay, that one’s kind of essential, but you get the idea. This is a template, not a rigid formula, and I hope you make it your own.
I’d love to hear how yours turn out! Drop a comment below and let me know what fillings you used, if you tried any fun variations, or if your kids loved them as much as mine do. And if you’re looking for more easy lunchbox ideas, check out our Healthy Air Fryer BBQ Chicken Lettuce Wraps for another no-fuss option. Happy rolling, friends!
Frequently Asked Questions
Can I make these pinwheels the night before?
Absolutely! In fact, I recommend it. Make the rolls, wrap them tightly in plastic wrap, and refrigerate overnight. Slice them in the morning before packing. They’ll hold up beautifully and the flavors will be even better.
How do I keep the pinwheels from getting soggy in a lunchbox?
The key is patting your vegetables completely dry before adding them. Also, don’t overdo the veggies — a thin, even layer is all you need. If you’re really worried, pack the veggies separately and let everyone assemble their own pinwheels at lunchtime.
Can I use a different type of meat?
Absolutely! Ham, roast beef, shredded chicken, or even salami all work great. Just make sure the meat is sliced thin and evenly layered. For a vegetarian option, skip the meat entirely and double up on veggies or add some hummus.
How long do these pinwheels last in the fridge?
Uncooked rolls (not sliced) will keep for 3-4 days in the refrigerator when wrapped tightly. Once sliced, they’re best within 24 hours. I don’t recommend freezing them, as the cream cheese texture changes when thawed.
Can I use a homemade ranch seasoning instead of a packet?
Definitely! Mix 1 tablespoon dried buttermilk powder, 1 teaspoon dried parsley, 1/2 teaspoon dried dill, 1/2 teaspoon garlic powder, 1/2 teaspoon onion powder, and a pinch of salt and pepper. This makes about 3 tablespoons, which is equal to one packet. You can adjust the herbs to your taste.
Pin This Recipe!
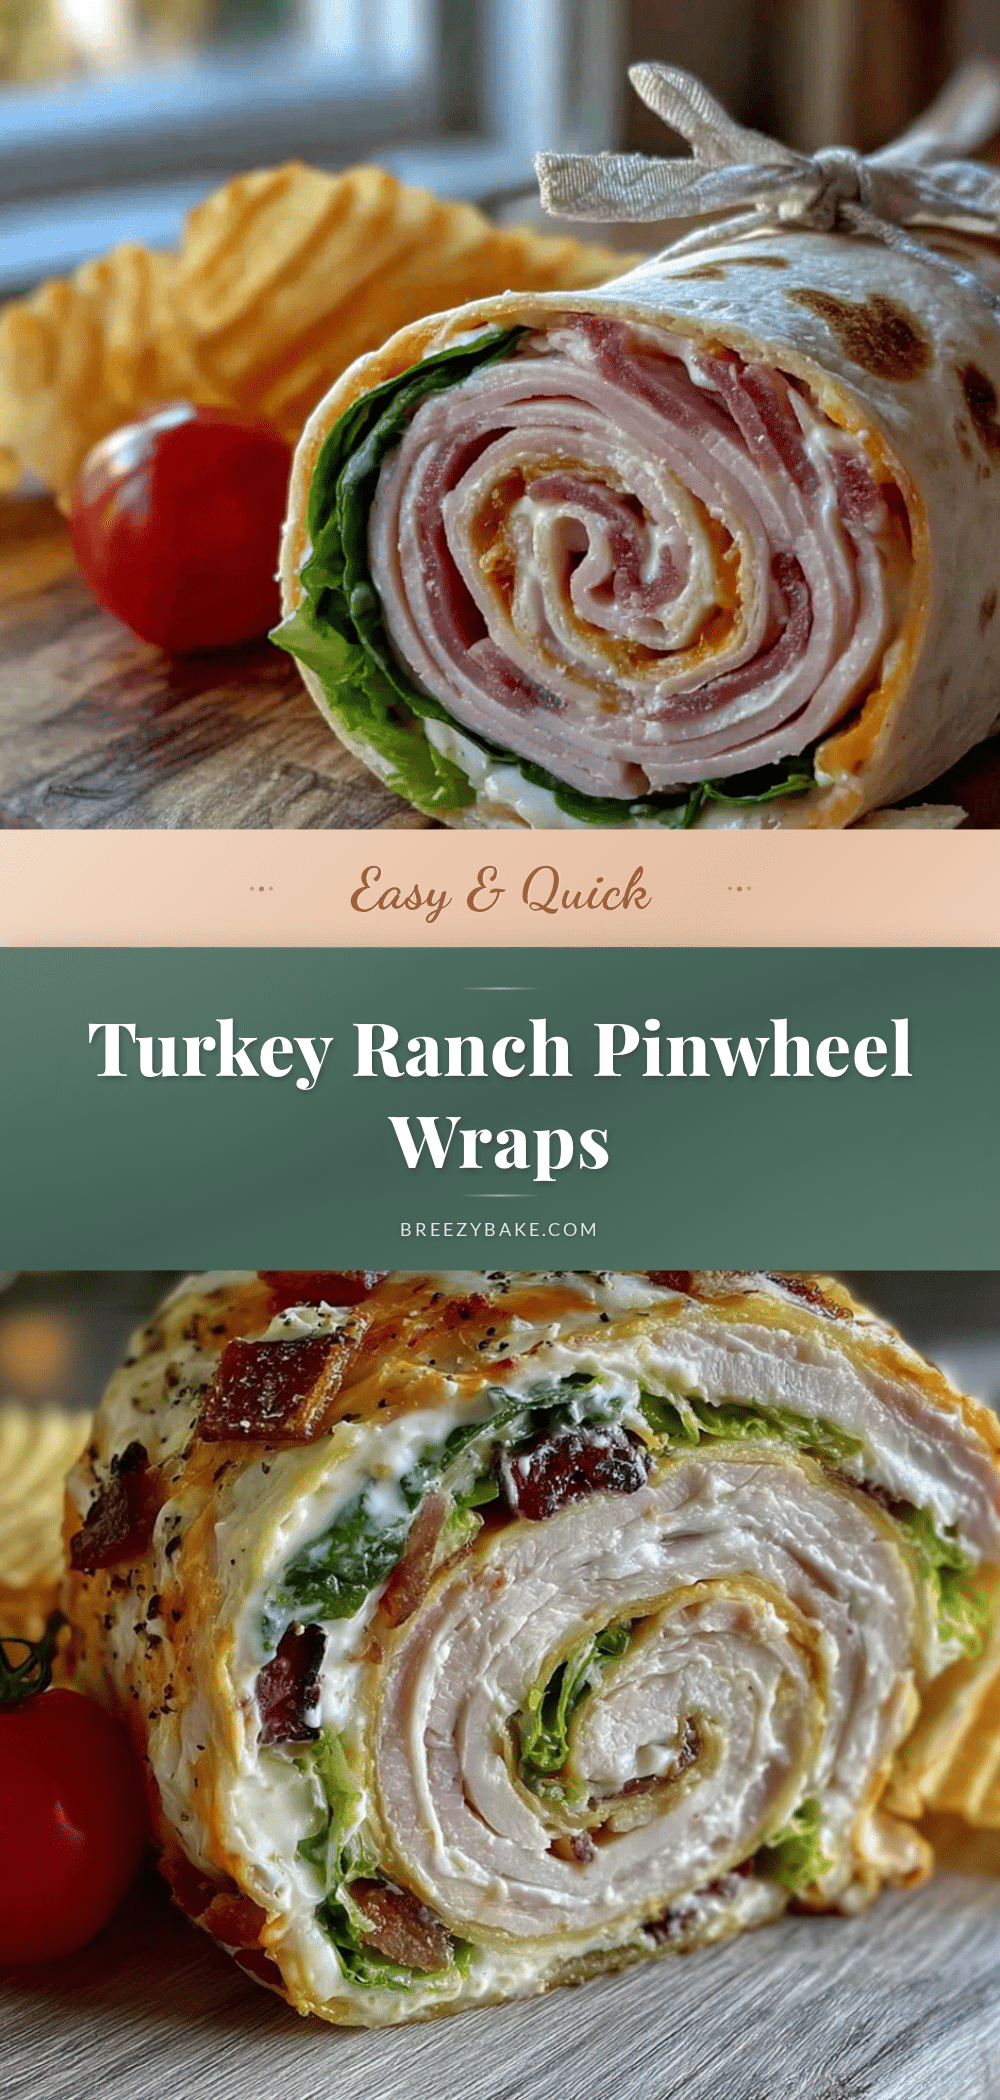
Easy Turkey Ranch Pinwheel Wraps: Best Lunchbox Recipe
These Easy Turkey Ranch Pinwheel Lunchbox Wraps are the accidental hero of our school-year survival story. They’re fast, forgiving, and absolutely delicious—perfect for school lunches, road trips, or quick snacks.
- Prep Time: 15 minutes
- Cook Time: 0 minutes
- Total Time: 45 minutes (includes 30 minutes chilling)
- Yield: 4 servings 1x
- Category: Lunch
- Cuisine: American
Ingredients
- 4 large flour tortillas (10-inch)
- 8 oz cream cheese, softened
- 1 packet (3 tablespoons) ranch seasoning mix
- 8–10 slices deli turkey
- 8–10 slices cheese (provolone, cheddar, Swiss, or pepper jack)
- Fresh vegetables (optional): thinly sliced cucumber, bell pepper strips, shredded lettuce, or fresh spinach
- Salt and black pepper to taste
Instructions
- Soften the cream cheese: Take the 8 oz of cream cheese out of the fridge about 20 minutes before starting. If in a hurry, microwave on a plate for 15-20 seconds until soft but not runny.
- Mix the ranch spread: In a small bowl, combine the softened cream cheese with the entire packet of ranch seasoning mix. Stir until completely smooth and uniform.
- Prepare your work surface: Lay one large flour tortilla flat on a cutting board. If cold or stiff, warm in the microwave for 10 seconds to prevent cracking.
- Spread the cream cheese mixture: Using a spatula or butter knife, spread about 2-3 tablespoons of the ranch cream cheese evenly across the entire surface of the tortilla, all the way to the edges.
- Layer the turkey: Place 2-3 slices of turkey flat on top of the cream cheese, overlapping slightly for full coverage.
- Add the cheese: Lay 2-3 slices of your chosen cheese on top of the turkey, overlapping slightly.
- Add your veggies (optional): Lay a thin, even layer of cucumber slices, bell pepper strips, or shredded lettuce across the cheese.
- Season lightly: Add a tiny pinch of salt and a few grinds of black pepper over the veggies.
- Roll it up tight: Starting from the edge closest to you, roll the tortilla away from you into a tight log, using your fingers to tuck and pull as you go. Roll all the way to the end and place seam-side down.
- Wrap and chill: Tightly wrap the rolled tortilla in plastic wrap or parchment paper, twisting the ends like a candy wrapper. Refrigerate for at least 30 minutes.
- Slice and serve: Unwrap the roll and place on a cutting board. Using a sharp serrated knife, slice into 1-inch pinwheels using a gentle sawing motion. You should get about 8-10 pinwheels per tortilla.
- Pack it up: Arrange pinwheels in a lunchbox or container. If packing for later, place a slightly damp paper towel on top to prevent drying out.
Notes
Don’t overfill the tortillas. Use room temperature ingredients for best results. The chilling step is essential for clean slices. Pat vegetables dry to avoid sogginess. Full-fat cream cheese is recommended for best texture. These taste even better the next day.
Nutrition
- Serving Size: 4 pinwheels
- Calories: 320360
- Sugar: 34
- Sodium: 8001000
- Fat: 1822
- Saturated Fat: 810
- Carbohydrates: 2226
- Fiber: 12
- Protein: 1822
Keywords: turkey ranch pinwheels, lunchbox wraps, easy lunch recipe, meal prep, kid-friendly lunch, no-cook recipe


