My neighbor, Mrs. Kowalski, watched me struggle with a wobbly, cracked cheesecake one October afternoon. She didn’t say anything at first. Then she just slid a foil-wrapped pan across the fence an hour later, muttering something about “American desserts needing a proper base.” The bars inside were dense, spiced, and had this incredible crumbly layer that tasted like autumn itself. I didn’t know it then, but she had introduced me to the magic of Biscoff cookies.
I spent the next few weeks trying to recreate that moment. My first attempt? A disaster. The crust was too soggy, the filling too dense, and I had used the wrong kind of cream cheese. Honestly, I almost gave up. But then I remembered the way she had laughed, a dry, knowing chuckle, and said, “You think too much. Just feel it.” So I stopped overthinking and started playing.
These Fall’s Best Biscoff Cheesecake Bars are the result of that permission to just feel it. They have a buttery, spiced Biscoff cookie crust, a creamy and tangy cheesecake filling that is not too sweet, and a gorgeous swirl of melted Biscoff spread on top. It is the kind of dessert that makes you close your eyes after the first bite. It tastes like a crisp afternoon, a warm sweater, and a really good conversation with a neighbor who doesn’t use a recipe. If you have been looking for that one fall dessert that feels both special and totally unfussy, this is it.
Why You’ll Love This Recipe
I have tested this recipe a dozen times to get the texture just right. It is the kind of dessert that looks like you spent hours on it, but the whole thing comes together in about 30 minutes of active work. Seriously, the hardest part is waiting for it to chill.
- Quick & Easy: The prep time is only 30 minutes, and then the oven does the rest. Perfect for a busy Tuesday or a last-minute Thanksgiving contribution.
- Simple Ingredients: You only need a handful of basic baking staples. No trips to a specialty store for hard-to-find items.
- Perfect for Fall Gatherings: This is a guaranteed hit for Friendsgiving, Halloween parties, or a cozy night in. It travels beautifully, too.
- Crowd-Pleaser: I have watched people who “don’t like cheesecake” go back for a second square. The Biscoff flavor is familiar but feels special.
- Unbelievably Delicious: The contrast between the crunchy, spiced crust and the silky, cool filling is pure comfort food magic. It is next-level without being complicated.
What makes this recipe different from the rest is the technique. Instead of a water bath, which is annoying and risky, we use a low oven temperature and a simple trick of letting the cheesecake cool slowly in the turned-off oven. This guarantees a crack-free top every single time. I have also perfected the ratio of Biscoff spread to cream cheese, so the flavor is distinct but not overwhelming. It is not just another cheesecake bar; it is my best version, tested for texture, taste, and total reliability.
This recipe is the one you will turn to when you want to impress without the stress. It is the dessert that makes people ask for the recipe, and the one you will find yourself making just because it is Tuesday and it is October.
What Ingredients You Will Need
This recipe uses simple, wholesome ingredients to deliver that bold, spiced flavor and satisfying creamy texture. Most of these are pantry staples, and I have included notes on substitutions so you can make it work with what you have.
- For the Biscoff Crust:
- 2 cups (about 20-22 cookies) Biscoff cookie crumbs — You can crush them in a food processor or put them in a zip-top bag and smash them with a rolling pin. It is a great stress reliever.
- 5 tablespoons (70g) unsalted butter, melted — I use salted butter in a pinch, just reduce the added salt if you are using salted.
- 2 tablespoons (25g) granulated sugar — This helps the crust hold together and adds a tiny bit of sweetness.
- A pinch of kosher salt — It balances the sweetness and makes the spice flavor pop.
- For the Cheesecake Filling:
- 16 ounces (two 8-ounce blocks) full-fat cream cheese, softened to room temperature — This is non-negotiable. Cold cream cheese will give you a lumpy filling. Let it sit on the counter for at least an hour.
- 1/2 cup (100g) granulated sugar — Just enough to sweeten without making it cloying.
- 2 large eggs, at room temperature — Cold eggs can seize the batter. I place mine in a bowl of warm water for 5 minutes if I am in a hurry.
- 1 teaspoon vanilla extract — Pure vanilla extract makes a difference here. I use Nielsen-Massey.
- 1/4 cup (60g) sour cream, at room temperature — This is my secret for an ultra-creamy, never-dry cheesecake. It also adds a slight tang that plays beautifully with the Biscoff.
- For the Swirl & Topping:
- 1/2 cup (150g) Biscoff cookie spread (smooth or crunchy) — You can find this near the peanut butter or in the international aisle. I prefer the smooth version for the swirl.
- Optional: A few extra Biscoff cookies for garnish — Just for that pretty, bakery-style look.
Ingredient Selection Tip: Look for a Biscoff spread that has a smooth, pourable consistency at room temperature. If it is too thick, you can microwave it for 10-15 seconds before swirling. For the cream cheese, I always recommend Philadelphia brand for the most reliable texture. It is creamier and less watery than store brands.
Substitution Guidance: If you are dairy-free, you can use a dairy-free cream cheese alternative like Kite Hill or Violife, and swap the butter for a plant-based butter. The texture will be slightly softer, but it still works beautifully. For a gluten-free option, this recipe is naturally gluten-free as long as you use certified gluten-free Biscoff cookies (they are typically gluten-free, but always check the label).
Equipment Needed
You do not need a fancy kitchen to make these bars. Here is what you will need:
- 8×8-inch square baking pan — This is the perfect size for thick, generous bars. A 9×9-inch pan will work, but the bars will be thinner and bake a bit faster.
- Parchment paper — I cannot stress this enough. Line your pan with two overlapping strips of parchment, leaving a 2-inch overhang on each side. This creates “handles” that make lifting the bars out so easy. No scraping, no sticking.
- Food processor or zip-top bag & rolling pin — For crushing the cookies. A food processor is faster and gives you a more even crumb, but the bag-and-rolling-pin method works great and is oddly satisfying.
- Large mixing bowls — One for the crust and one for the filling.
- Hand mixer or stand mixer — A hand mixer is perfect for this. A stand mixer works too, but be careful not to overmix the filling.
- Spatula — A rubber spatula is your best friend for scraping down the bowl and smoothing the filling.
- Small microwave-safe bowl — For melting the Biscoff spread for the swirl.
- Toothpick or skewer — For creating the swirl pattern.
If you do not have a food processor, do not worry. I have used a rolling pin and a bag many times. It takes an extra minute, but it works perfectly. Also, if your baking pan is dark, keep an eye on the crust—it can brown faster. I prefer a light-colored metal pan for the most even baking.
Preparation Method
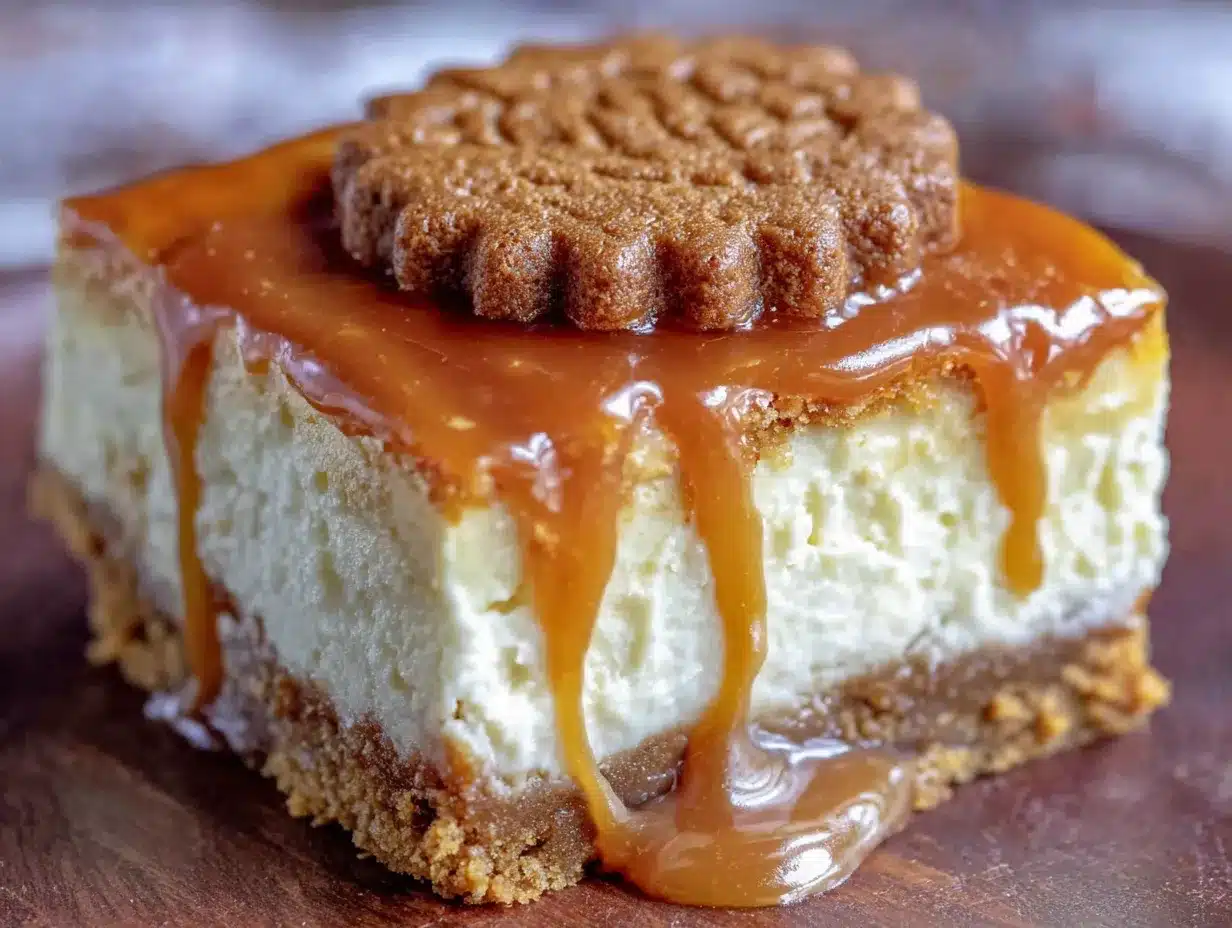
Let us get to the good part. Follow these steps, and you will have the most perfect, creamy, spiced bars. Take your time, and do not rush the cooling process—that is where the magic happens.
- Preheat and Prep: Preheat your oven to 325°F (160°C). Line your 8×8-inch pan with parchment paper, leaving a 2-inch overhang on two opposite sides. This will be your lifting handles later.
- Make the Crust: In a food processor, pulse the Biscoff cookies until they are fine crumbs. You should have about 2 cups. If you are using the bag method, place the cookies in a zip-top bag, seal it, and smash them with a rolling pin until you have fine crumbs. Pour the crumbs into a medium bowl. Add the melted butter, 2 tablespoons of sugar, and a pinch of salt. Stir with a fork until the mixture looks like wet sand and holds together when you squeeze it.
- Press and Bake the Crust: Transfer the crumb mixture to your prepared pan. Use the bottom of a measuring cup or a flat-bottomed glass to press it down firmly and evenly. This step is crucial for a crust that does not crumble when you cut the bars. Bake the crust for 10 minutes at 325°F. It should be fragrant and just slightly darker around the edges. Set it aside to cool while you make the filling. Do not turn off the oven.
- Make the Cheesecake Filling: In a large bowl, beat the softened cream cheese with a hand mixer on medium speed until it is smooth and creamy—about 2 minutes. Scrape down the sides of the bowl with your spatula. Add the 1/2 cup of sugar and beat for another minute until it is light and fluffy. Add the eggs, one at a time, beating on low speed after each addition just until combined. Overmixing at this stage will incorporate too much air, which can cause cracks. Finally, add the vanilla extract and the sour cream. Beat on low just until everything is smooth and combined. Give the bowl a final scrape with your spatula to make sure there are no lumps at the bottom.
- Assemble the Bars: Pour the cheesecake filling over the pre-baked crust. Use your spatula to spread it into an even layer. Tap the pan gently on the counter two or three times to release any air bubbles.
- Make the Swirl: Place the 1/2 cup of Biscoff spread in a small microwave-safe bowl. Microwave it in 15-second intervals, stirring in between, until it is smooth and pourable—about 30 seconds total. Drop spoonfuls of the melted spread over the cheesecake filling. Use a toothpick or a skewer to swirl the spread into the filling. Do not over-swirl; you want distinct ribbons of Biscoff, not a muddy brown color. Just a few figure-eight motions will do the trick.
- Bake the Cheesecake: Place the pan in the preheated 325°F oven. Bake for 35-40 minutes, or until the edges are set and the center is still slightly jiggly (like Jell-O, not liquid). The center should wobble just a little when you gently shake the pan. This is the sign of a perfectly baked, creamy cheesecake.
- The Cool-Down Trick: This is the most important step. Turn the oven off and crack the oven door open about 4-6 inches. Let the cheesecake sit in the cooling oven for 1 hour. This slow cooling process prevents the dreaded crack. After 1 hour, remove the pan from the oven and let it cool completely on a wire rack—about another hour.
- Chill and Serve: Once the cheesecake is at room temperature, cover the pan with plastic wrap and refrigerate for at least 4 hours, but overnight is best. This is the hardest part, I know. Chilling allows the cheesecake to set fully, making it sliceable and giving it that perfect, dense, creamy texture. When you are ready to serve, use the parchment handles to lift the entire block of cheesecake out of the pan. Place it on a cutting board and use a sharp, clean knife to cut it into 9 even squares. Wipe the knife clean between cuts for the neatest slices.
Cooking Tips & Techniques
I have made this recipe more times than I can count, and I have learned a few things the hard way. Here are my best tips for guaranteed success.
The Room Temperature Rule: I cannot say this enough. Your cream cheese, eggs, and sour cream must be at room temperature. If they are cold, your batter will be lumpy, and the cheesecake will bake unevenly. I have learned this lesson in a very messy, lumpy way. Set everything out on the counter an hour before you start.
Don’t Overmix the Batter: When you add the eggs, beat on low speed and only until they are incorporated. Overmixing beats too much air into the batter, which expands in the oven and then collapses, causing cracks. I once got distracted and overmixed, and my cheesecake looked like the surface of the moon. Keep it gentle.
The Jiggle Test: Do not rely on a toothpick to test doneness. Cheesecake is done when the edges are set and the center has a slight jiggle—like a wobble, not a wave. If the center is completely firm, it is overbaked and will be dry. Trust the jiggle.
Timing and Multitasking: While the crust is baking, you can prepare the cheesecake filling. This saves time. While the cheesecake is cooling in the oven, you can clean up the kitchen. It is a very efficient recipe.
Consistency Tip: For the neatest slices, use a sharp knife and wipe it clean with a damp paper towel between each cut. This prevents the Biscoff swirl from smearing into the cheesecake. I also sometimes run the knife under hot water and dry it off before cutting—it glides through the cold cheesecake like butter.
Variations & Adaptations
This recipe is a fantastic base for experimentation. Here are a few ways I have played with it over the years.
- Pumpkin Biscoff Cheesecake Bars: This is my absolute favorite fall variation. Reduce the cream cheese to 12 ounces (1.5 blocks) and add 1/2 cup of pumpkin puree (not pumpkin pie filling) to the filling. Add 1 teaspoon of pumpkin pie spice and 1 tablespoon of brown sugar along with the granulated sugar. The pumpkin adds a lovely moisture and earthy sweetness that pairs perfectly with the Biscoff.
- Chocolate Swirl Version: For a richer dessert, swap the Biscoff spread for 1/2 cup of melted dark chocolate in the swirl. Use a high-quality chocolate like Ghirardelli or Lindt. You can also add a tablespoon of cocoa powder to the crust for a double-chocolate experience.
- Gluten-Free & Vegan Adaptation: To make this vegan, use a plant-based cream cheese (I have had good luck with Violife), a flax egg (1 tablespoon ground flaxseed + 3 tablespoons water per egg), and vegan butter. The texture will be slightly softer, but it is still delicious. The Biscoff cookies are naturally vegan and gluten-free, so that part is already handled.
- Spiced Apple Cider Version: Reduce the sour cream to 2 tablespoons and add 1/4 cup of reduced apple cider. To reduce the cider, simmer 1 cup of apple cider on the stove until it is syrupy and reduced to 1/4 cup. This adds a concentrated, tangy apple flavor that is incredible with the spices.
I have tried the pumpkin version for a Friendsgiving potluck, and it disappeared in minutes. The apple cider version is my new favorite for a cozy Sunday afternoon. Do not be afraid to experiment—this recipe is very forgiving.
Serving & Storage Suggestions
These bars are best served cold, straight from the refrigerator. The texture is at its peak when it is fully chilled. I like to let them sit at room temperature for about 10 minutes before serving—this takes the chill off and makes the Biscoff flavor more pronounced.
Presentation: For a beautiful presentation, garnish each bar with a whole Biscoff cookie and a light dusting of cinnamon or a drizzle of melted Biscoff spread. A dollop of whipped cream on the side is never a bad idea. I serve them on a simple white platter to let the beautiful golden color of the bars stand out.
Complementary Dishes: These bars are wonderful on their own, but they pair beautifully with a hot cup of coffee, a chai latte, or a glass of cold milk. For a dessert spread, serve them alongside a warm apple crisp or a slice of pumpkin bread. The flavors are very complementary.
Storage Instructions: Store any leftover bars in an airtight container in the refrigerator for up to 5 days. I place a piece of parchment paper between layers if I am stacking them. They actually taste even better on the second day as the flavors meld together.
Freezing Instructions: These bars freeze like a dream. Place the fully chilled and cut bars on a baking sheet and freeze them for 1 hour, or until they are firm. Then, wrap each bar individually in plastic wrap and place them in a freezer-safe bag or container. They will keep for up to 3 months. To thaw, place a bar in the refrigerator overnight or let it sit at room temperature for about 30 minutes. I always keep a stash in my freezer for unexpected guests.
Reheating: You do not need to reheat these bars. They are meant to be served cold. However, if you like a slightly warm center, you can microwave a single bar for about 10-15 seconds. It will soften the filling and make the Biscoff swirl a bit gooey.
Nutritional Information & Benefits
Please note that these values are estimates and will vary based on specific ingredients and portion sizes. One bar (based on 9 servings) contains approximately:
- Calories: 420
- Fat: 28g
- Carbohydrates: 38g
- Protein: 7g
- Sugar: 26g
Health Benefits: While this is a treat, it does have some redeeming qualities. The cream cheese provides a good amount of calcium and protein, which helps keep you full. The Biscoff cookies contain a small amount of fiber from the wheat flour, and the spices (cinnamon, nutmeg, cloves) are known for their anti-inflammatory properties. The sour cream adds probiotics, which are great for gut health.
Dietary Considerations: This recipe is naturally vegetarian and can easily be made gluten-free and vegan with the substitutions mentioned above. It contains dairy, eggs, and wheat (from the cookies), so it is not suitable for those with allergies to those ingredients. If you are watching your sugar intake, you can reduce the sugar in the filling to 1/3 cup without affecting the texture too much.
I believe in balance. This is a dessert to be enjoyed, not feared. It is okay to have a slice (or two) and savor every bite. It is a celebration of fall, after all.
Conclusion
These Fall’s Best Biscoff Cheesecake Bars are more than just a recipe—they are a moment. They are the taste of a crisp afternoon, the comfort of a warm kitchen, and the joy of sharing something delicious with the people you love. They are simple enough for a weeknight and impressive enough for a holiday table.
I hope you give them a try. Do not be afraid to make them your own. Add a little extra cinnamon, swap in pumpkin, or just enjoy them exactly as written. The best recipes are the ones that become part of your own story. I would love to hear how they turn out for you. Leave a comment below and tell me about your own kitchen adventures. Did you try a variation? Did you forget to set out the cream cheese? (I have been there.) Let me know.
Happy baking, and here is to a season filled with spice, sweetness, and a little bit of neighborly wisdom.
Frequently Asked Questions
Can I use a different cookie for the crust?
Absolutely. While Biscoff is the star here, you can use graham crackers, shortbread cookies, or even ginger snaps for a different flavor profile. If you use ginger snaps, reduce the sugar in the crust to 1 tablespoon as they are already sweet and spicy.
Why did my cheesecake crack?
Cracks usually happen from overbaking, overmixing, or a drastic temperature change. Make sure you do the “jiggle test” and cool the cheesecake slowly in the turned-off oven with the door cracked. If it still cracks, do not worry—the Biscoff swirl and a little whipped cream will cover it up perfectly.
Can I make these bars in a 9×13-inch pan?
Yes, you can. For a 9×13-inch pan, double the entire recipe. The baking time will be similar, but start checking at 30 minutes. The bars will be thinner, so they will bake a little faster. You will get about 24 smaller bars.
Do I have to use a water bath?
No. This recipe is designed to be baked without a water bath. The sour cream in the batter and the low oven temperature, combined with the slow cooling method, are enough to prevent cracks. A water bath is messy and unnecessary here.
How do I know when the Biscoff spread is ready to swirl?
The spread should be smooth and pourable, like warm honey. If it is too thick, it will sink into the cheesecake instead of swirling on top. If it is too thin, it will just disappear. Microwave it in short bursts and stir until it reaches that perfect, drizzly consistency.
Pin This Recipe!
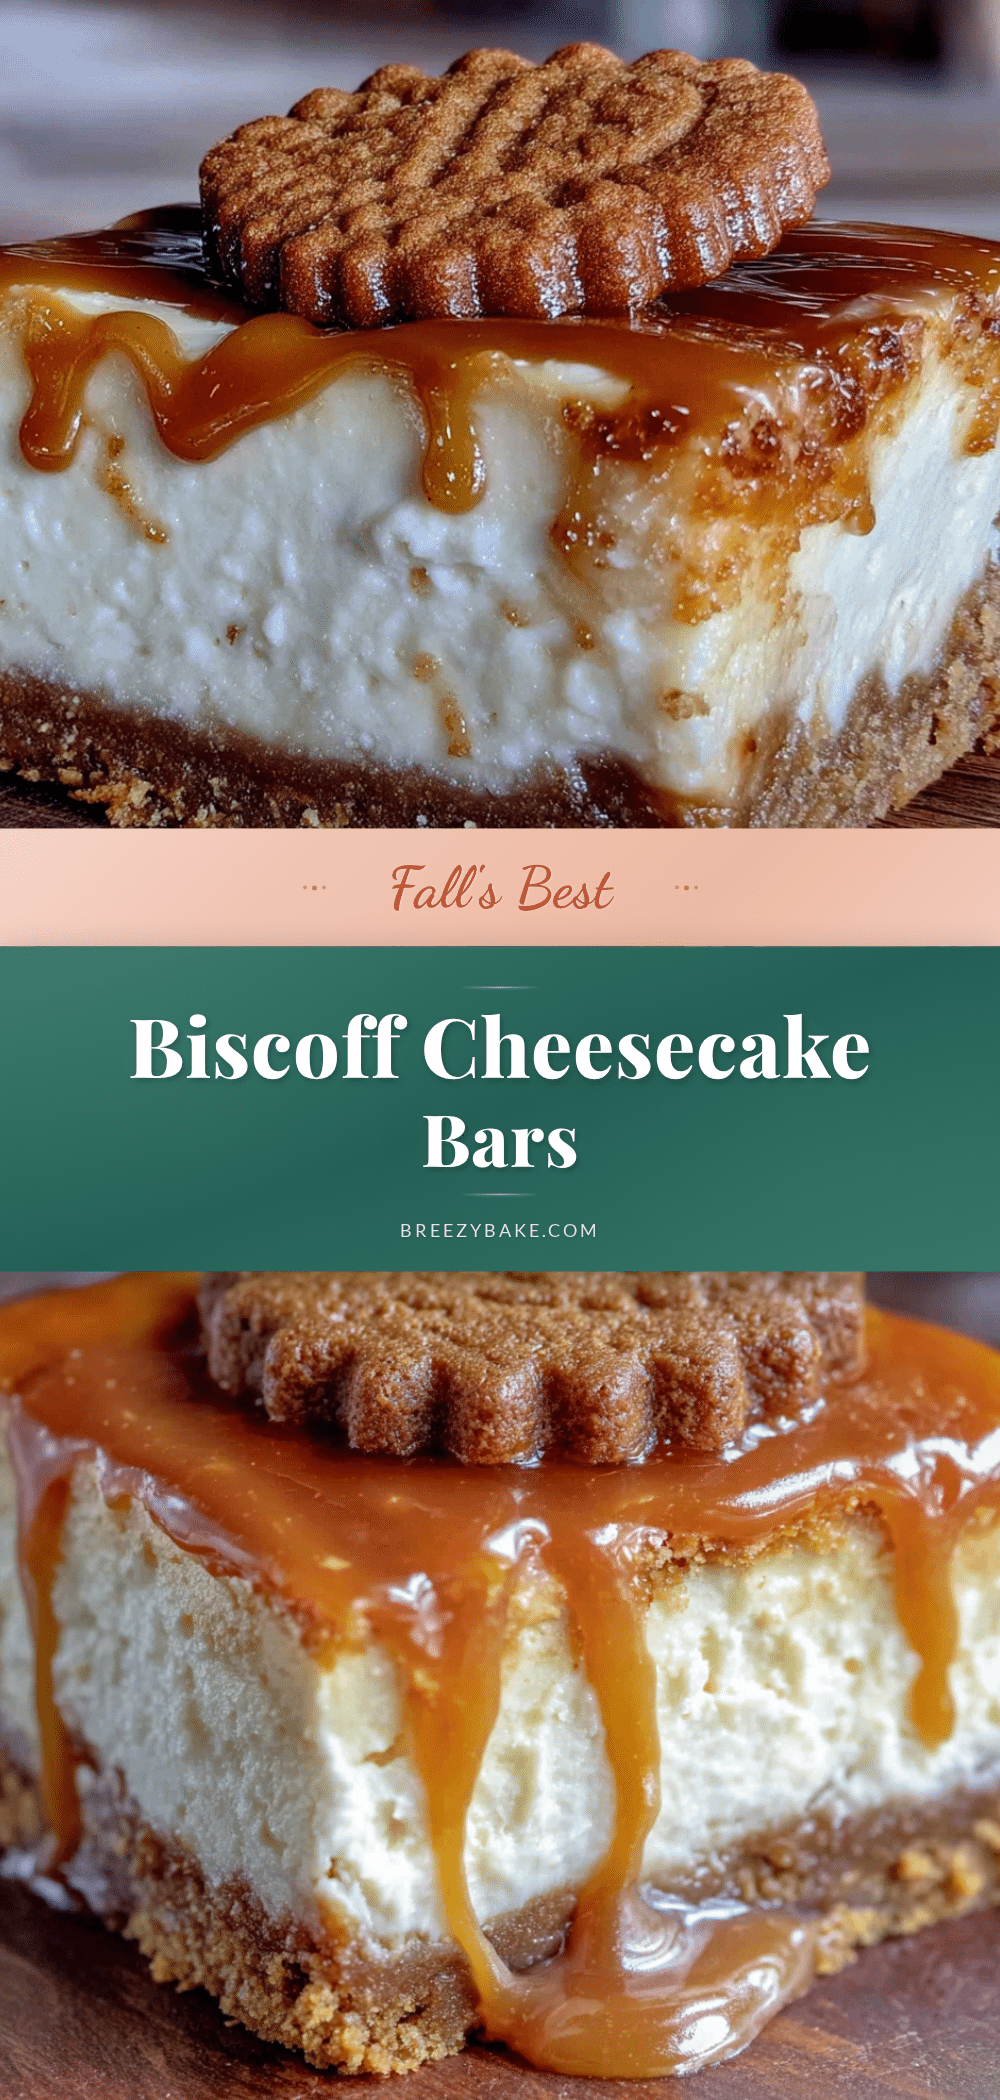
Fall’s Best Biscoff Cheesecake Bars: Easy Dessert
These Fall’s Best Biscoff Cheesecake Bars have a buttery, spiced Biscoff cookie crust, a creamy and tangy cheesecake filling that is not too sweet, and a gorgeous swirl of melted Biscoff spread on top. It is the kind of dessert that makes you close your eyes after the first bite.
- Prep Time: 30 minutes
- Cook Time: 35-40 minutes
- Total Time: 1 hour 5 minutes (plus 4 hours chilling)
- Yield: 9 servings 1x
- Category: Dessert
- Cuisine: American
Ingredients
- 2 cups (about 20–22 cookies) Biscoff cookie crumbs
- 5 tablespoons (70g) unsalted butter, melted
- 2 tablespoons (25g) granulated sugar
- A pinch of kosher salt
- 16 ounces (two 8-ounce blocks) full-fat cream cheese, softened to room temperature
- 1/2 cup (100g) granulated sugar
- 2 large eggs, at room temperature
- 1 teaspoon vanilla extract
- 1/4 cup (60g) sour cream, at room temperature
- 1/2 cup (150g) Biscoff cookie spread (smooth or crunchy)
- Optional: A few extra Biscoff cookies for garnish
Instructions
- Preheat your oven to 325°F (160°C). Line your 8×8-inch pan with parchment paper, leaving a 2-inch overhang on two opposite sides.
- In a food processor, pulse the Biscoff cookies until they are fine crumbs (about 2 cups). Alternatively, place cookies in a zip-top bag and crush with a rolling pin. Pour crumbs into a medium bowl. Add melted butter, 2 tablespoons sugar, and a pinch of salt. Stir with a fork until mixture looks like wet sand and holds together when squeezed.
- Transfer crumb mixture to prepared pan. Press down firmly and evenly using the bottom of a measuring cup or flat-bottomed glass. Bake crust for 10 minutes at 325°F. Set aside to cool while making filling. Do not turn off the oven.
- In a large bowl, beat softened cream cheese with a hand mixer on medium speed until smooth and creamy (about 2 minutes). Scrape down sides. Add 1/2 cup sugar and beat for another minute until light and fluffy. Add eggs one at a time, beating on low speed after each addition just until combined. Add vanilla extract and sour cream. Beat on low just until smooth and combined. Scrape bowl with spatula.
- Pour cheesecake filling over pre-baked crust. Spread into an even layer. Tap pan gently on counter two or three times to release air bubbles.
- Place 1/2 cup Biscoff spread in a small microwave-safe bowl. Microwave in 15-second intervals, stirring in between, until smooth and pourable (about 30 seconds total). Drop spoonfuls of melted spread over cheesecake filling. Use a toothpick or skewer to swirl spread into filling with a few figure-eight motions.
- Place pan in preheated 325°F oven. Bake for 35-40 minutes, until edges are set and center is still slightly jiggly (like Jell-O, not liquid).
- Turn oven off and crack oven door open about 4-6 inches. Let cheesecake sit in cooling oven for 1 hour. Then remove pan from oven and let cool completely on a wire rack (about another hour).
- Once at room temperature, cover pan with plastic wrap and refrigerate for at least 4 hours, but overnight is best. When ready to serve, use parchment handles to lift entire block out of pan. Place on cutting board and cut into 9 even squares with a sharp, clean knife. Wipe knife clean between cuts.
Notes
Ensure cream cheese, eggs, and sour cream are at room temperature for a smooth batter. Do not overmix the batter to avoid cracks. Use the jiggle test for doneness. Cool cheesecake slowly in the turned-off oven to prevent cracking. For neat slices, use a sharp knife and wipe clean between cuts.
Nutrition
- Serving Size: 1 bar
- Calories: 420
- Sugar: 26
- Fat: 28
- Carbohydrates: 38
- Protein: 7
Keywords: Biscoff cheesecake bars, fall dessert, easy cheesecake, Biscoff dessert, cheesecake bars


