I used to think charcuterie boards were a total cop-out. Honestly, for years I avoided making them for gatherings. It felt like cheating—just buying a bunch of stuff and arranging it on a plank. “Anyone can do that,” I’d mutter while slaving over a hot stove for hours. Then last November, my friend Jenna texted me a photo from her own Friendsgiving. There it was: a massive wooden board absolutely drowning in deep reds, burnt oranges, and soft golds. It looked like autumn had exploded onto a cutting board. I almost dropped my phone.
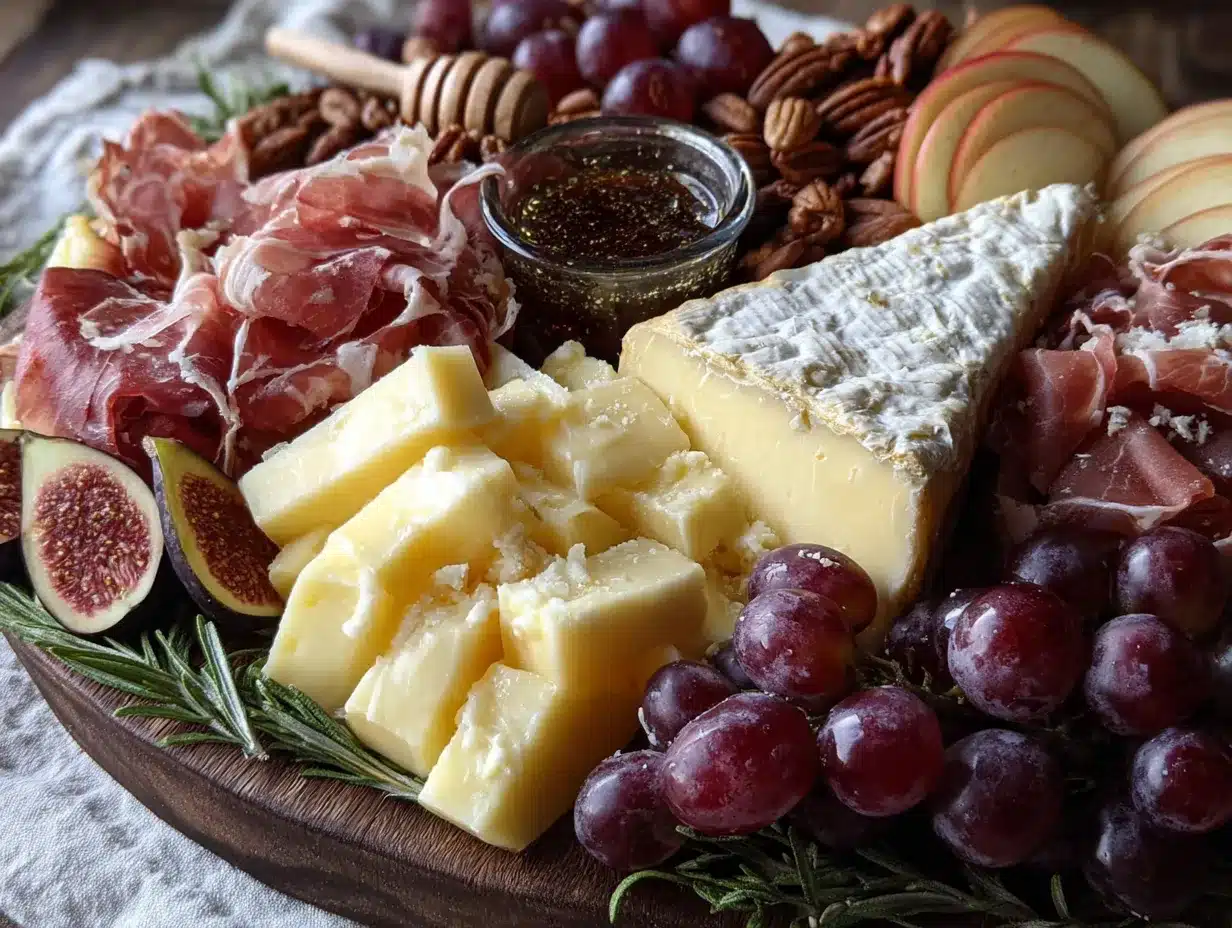
The thing is, I was supposed to be the one hosting that year. I had this whole elaborate menu planned—braised short ribs, roasted root vegetables, the works. But as I stared at her board, something clicked. It wasn’t just a pile of food. It was a story. Each little cluster of grapes, each wedge of brie, each candied pecan told a part of the season’s tale. And honestly? It looked way more fun than my complicated menu. So I did something I never do. I changed my entire plan two days before the party. I mean, I kept the short ribs, but I made this Fresh Friendsgiving Charcuterie Board with Fall Fruits the star of the show. And let me tell you, people stood around that board for the entire evening. They weren’t just eating; they were grazing, chatting, and discovering new flavor combos together. Maybe you’ve been there—the moment you realize simple is actually smarter.
Why You’ll Love This Fresh Friendsgiving Charcuterie Board
Look, I’ve tested a lot of appetizer spreads in my time. Some were gorgeous but took three hours to assemble. Others were easy but looked sad. This board? It hits the sweet spot. It’s the kind of thing that makes you look like a culinary genius with half the effort you’d expect. Here’s why it works so well:
- Quick & Easy: You can have this whole board assembled in under 30 minutes. No joke. It’s perfect for those days when you’re juggling a turkey, a pie, and a dozen other things.
- Simple Ingredients: No weird specialty items here. You’ll find everything at your regular grocery store. Apples, pears, cheese, nuts—the usual suspects.
- Perfect for Friendsgiving: This board is made for sharing. It gets people talking, reaching, and trying things they might not normally grab. It’s the ultimate icebreaker.
- Crowd-Pleaser: I’ve served this to everyone from picky kids to fancy foodie friends. It always disappears. Always.
- Unbelievably Delicious: The combo of sharp cheddar with a slice of honeycrisp apple? Next-level. The creamy brie with a dried fig? Pure magic.
What makes this board different from the thousand others you see online? It’s the balance. Most boards lean too heavy on meat or cheese. This one puts the fall fruits front and center. The fresh apples and pears add a crispness that cuts through the richness of the cheese and cured meats. Plus, I’ve found that arranging things by color—not just category—makes the board feel intentional and abundant. It’s comfort food reimagined: fresh, seasonal, and totally satisfying without being heavy.
What Ingredients You Will Need
This recipe uses simple, seasonal ingredients to create a board that’s as beautiful as it is delicious. Most of these are fall pantry staples, so you probably already have half of them. Let’s break it down by category so you can shop smart.
The Cheeses (The Foundation)
- 8 ounces aged sharp cheddar (I love Cabot’s Seriously Sharp—it holds up to the sweet fruit)
- 8 ounces creamy brie (go for a double or triple cream for maximum decadence)
- 4 ounces blue cheese (Point Reyes or a creamy gorgonzola works beautifully)
- 4 ounces goat cheese log (a plain one, not flavored—you want it versatile)
The Fall Fruits (The Stars)
- 2 medium Honeycrisp apples (they stay crisp and don’t brown too fast)
- 2 medium Bosc pears (their firm texture holds up well on a board)
- 1 cup seedless red grapes (small clusters look gorgeous and are easy to grab)
- 1 cup dried figs (buy the soft, sticky kind—they’re like candy)
- 1/2 cup dried cranberries (adds that pop of tartness and deep red color)
The Meats (The Savory Balance)
- 4 ounces prosciutto (ask for it sliced thin at the deli counter)
- 4 ounces soppressata (a dry Italian salami with nice peppery notes)
The Crunch (Texture is Everything)
- 1 cup candied pecans (store-bought is fine, but homemade is better—I’ll share my trick later)
- 1 cup Marcona almonds (they’re saltier and more buttery than regular almonds)
- 1 small baguette (sliced thin and lightly toasted)
- 1 box good-quality crackers (I like Raincoast Crisps or a simple water cracker)
The Extras (For Depth and Beauty)
- 3 tablespoons honey (a local honey adds a lovely floral note)
- Fresh rosemary sprigs (for garnish—they smell amazing)
- Fresh thyme sprigs (tuck these around for a pop of green)
- Fig jam or honeycomb (optional, but a small bowl adds a sweet dip option)
Ingredient Notes: If you can’t find Bosc pears, Anjou or Bartlett work fine—just make sure they’re firm, not mushy. For a dairy-free option, swap the brie and cheddar for your favorite plant-based cheeses. I’ve used Miyoko’s brand and it melts beautifully. Also, look for prosciutto that’s deep pink with a bit of white fat—that’s the good stuff.
Equipment Needed
You don’t need fancy tools for this board, but a few things make life easier:
- A large wooden board or slate slab (at least 12×18 inches—the bigger, the better)
- Small ramekins or bowls (for the honey, jam, and nuts—keeps things tidy)
- A sharp chef’s knife (for slicing apples, pears, and cheese cleanly)
- A cheese knife set (or at least one soft cheese knife and one hard cheese knife)
- Tongs or small spoons (for serving the nuts and dried fruit)
- A cutting board for prep (you won’t want to chop on your nice serving board)
Budget-friendly tip: Don’t have a fancy board? A clean baking sheet lined with parchment paper works perfectly. I’ve done it more times than I can count. Just fold up the edges of the parchment for a rustic look. Also, those cheap wooden cutting boards from IKEA? They’re amazing for charcuterie. I have three of them.
Preparation Method
Alright, let’s build this board. The key is to work in layers and trust your eye. Here’s exactly how I do it:
- Start with the bowls. Place your small ramekins or bowls on the board first. I put one for honey near the top right, one for fig jam near the bottom left, and one for candied pecans in the center. This creates anchor points that guide the eye. (Pro tip: don’t put all bowls on one side—spread them out for balance.)
- Add the cheeses next. Unwrap your cheeses and let them sit at room temperature for about 15 minutes—they’ll be creamier and more flavorful. Place the brie whole near the top left. Cut the cheddar into thin triangles and fan them out near the bottom center. Slice the blue cheese into wedges and arrange them opposite the brie. Place the goat cheese log in a small empty space and let it be a soft, white focal point. (Sensory cue: the brie should feel slightly squishy at the center when pressed gently.)
- Layer in the meats. Take your prosciutto slices and fold each one in half, then in half again, creating a little ribbon. Place these in a cluster near the brie. For the soppressata, fold each slice into a quarter and stack them in a small pile near the cheddar. The meat should look intentionally messy—like you just tossed it there. (Personal tip: I always put the meats near the cheeses they pair best with. Prosciutto loves brie; soppressata loves sharp cheddar.)
- Add the fresh fruit. Slice your apples and pears just before assembling so they don’t brown. Cut them into thin wedges—about 8 slices per fruit. Fan the apple slices out in a curve near the top right. Fan the pear slices near the bottom right. Place small clusters of red grapes in any empty gaps. (Warning: if you slice the apples more than 20 minutes ahead, squeeze a little lemon juice on them to prevent browning.)
- Fill in with dried fruit and nuts. Sprinkle the dried figs and cranberries into the remaining empty spaces. Don’t pile them—scatter them so they look like little treasures. Pour the Marcona almonds into a small pile near the goat cheese. (Sensory cue: the dried figs should feel sticky and soft when you touch them—that means they’re perfectly hydrated.)
- Add the crunch. Arrange your baguette slices in a neat row along one edge of the board. Fan the crackers out in a semi-circle near the opposite edge. This creates a clear path for people to grab and go. (Personal tip: I always put crackers on the edge closest to where people will stand—makes it easier to reach.)
- Finish with garnishes. Tuck fresh rosemary and thyme sprigs around the board, especially near the cheeses and fruits. Drizzle a little honey over the brie and goat cheese. If you have honeycomb, place a small piece right on the brie—it looks stunning. (Final check: step back and look at the board. If you see any big empty spots, fill them with extra grapes or crackers.)
The whole process takes about 25 minutes once you have everything prepped. I usually set out the cheeses and meats first, then slice fruit while my guests are arriving. It makes me look calm and put-together, even when I’m not.
Cooking Tips & Techniques
I’ve made about a hundred of these boards, and I’ve learned a few things the hard way. Here’s what I wish someone had told me:
Temperature matters more than you think. Cold cheese is sad cheese. Take everything out of the fridge at least 30 minutes before serving. The brie should be soft enough that a cracker can sink into it. I learned this after serving a rock-hard brie to my mother-in-law. Not my finest moment.
Don’t overcrowd the board. I know you want to pile it high, but people need room to grab things without knocking over a bowl of honey. Leave about 20% of the board empty—it actually makes it look more abundant. Trust me on this.
Cut your cheese strategically. Hard cheeses like cheddar should be pre-sliced into thin triangles or sticks. Soft cheeses like brie should be left whole so people can cut their own portions. Blue cheese? Crumble some and leave some in wedges. Variety is the whole point.
My biggest failure: One year, I made this board two hours before guests arrived. The apples had turned brown, the crackers were stale, and the prosciutto had dried out. Now I assemble everything within 45 minutes of serving. The fruit stays crisp, the meat stays silky, and the crackers stay crunchy. Lesson learned.
Timing strategy: Prep everything—wash fruit, slice cheese, toast baguette—up to two hours ahead. Store each component separately in the fridge. Then assemble the board in the 30 minutes before guests arrive. This way you’re not scrambling, but everything tastes fresh.
Variations & Adaptations
This board is endlessly flexible. Here are some ways I’ve changed it up depending on the crowd or season:
Dietary variations: For a vegan version, swap all cheeses with plant-based alternatives. I’ve used Treeline’s cashew-based soft cheese and it’s surprisingly good. Replace honey with agave or maple syrup. Skip the meats and add marinated artichoke hearts, roasted red peppers, and olives instead. It’s still gorgeous and satisfying.
Seasonal swaps: In early fall, use fresh figs instead of dried ones—they’re heavenly with goat cheese. As winter approaches, swap the apples for Fuyu persimmons and add pomegranate seeds for a jewel-like look. In spring, sub in strawberries and fresh cherries. The formula stays the same; just change the fruit.
Flavor twists: Try a spicy honey by stirring a pinch of red pepper flakes into your honey before drizzling. Or swap the blue cheese for a smoked gouda for a deeper, richer flavor. I once added dark chocolate chunks to the board (the 70% cacao kind) and it was a huge hit—chocolate and figs are a dream team.
Personal variation: My favorite version includes a small bowl of homemade candied pecans. I toss raw pecans with a tablespoon of maple syrup, a pinch of cinnamon, and a pinch of salt, then roast them at 350°F for 10 minutes. They’re addictive and so easy. I always make a double batch because I eat half before they hit the board.
Serving & Storage Suggestions
This board is best served at room temperature, so let it sit out for about 15-20 minutes after assembling. I like to place it in the center of the table so everyone can reach. If you’re serving it as a main event (like for a casual Friendsgiving dinner), it pairs beautifully with a crisp white wine like Sauvignon Blanc or a dry rosé. For a non-alcoholic option, sparkling apple cider is festive and cuts through the richness perfectly.
Presentation tip: Arrange the board so the colors are evenly distributed. A red apple cluster here, a green herb sprig there, a wedge of white brie in between. It should look like a painting. I sometimes add a few small pumpkins or mini gourds around the board for extra fall vibes.
Storage: This board doesn’t store well once assembled—the fruit will brown and the crackers will get soft. But you can store the components separately. Wrap cheeses tightly in wax paper (not plastic wrap—cheese needs to breathe) and keep them in the fridge for up to a week. Store dried fruits and nuts in airtight containers at room temperature. Fresh fruit should be eaten within a day or two.
Reheating: If you’re using toasted baguette slices, they can go a bit stale after a few hours. Just pop them in a 350°F oven for 3-4 minutes to crisp them back up. The honey can be gently warmed in the microwave for 10 seconds if it crystallizes.
One thing I love about this board is how the flavors develop. The cheese softens, the fruit releases a little juice, and everything kind of melds together over an hour. It’s even better halfway through the party than at the start. So don’t stress about perfect timing—let it breathe.
Nutritional Information & Benefits
Look, this is a treat. It’s not a health food, but it’s made from real, whole ingredients—and that counts for something. Here’s a rough estimate per serving (about 1/8 of the board):
Calories: Approximately 380-420 calories per serving
Protein: 14-16 grams
Fat: 24-28 grams (mostly from cheese and nuts—the good kind)
Carbohydrates: 30-35 grams
Fiber: 4-5 grams
Sugar: 18-22 grams (natural sugars from fruit, plus a little honey)
Health highlights: Apples and pears are packed with fiber and vitamin C. Nuts provide healthy fats and protein that keep you full. Cheese offers calcium and protein. The dried figs are a great source of potassium and antioxidants. So while this isn’t a salad, it’s a far cry from processed party snacks.
Dietary considerations: This recipe contains dairy, gluten (from crackers and baguette), and nuts. For a gluten-free version, use gluten-free crackers and skip the baguette (or use a gluten-free baguette). For a nut-free version, skip the pecans and almonds and add extra dried fruit or seeds like pumpkin seeds instead. The blue cheese is made from cow’s milk, so if you’re avoiding dairy, stick with the vegan alternatives mentioned earlier.
My personal take? I serve this board as a shared appetizer, not a meal. It’s meant to be enjoyed in moderation, with good company and maybe a glass of wine. Balance is everything—and this board brings plenty of it.
Conclusion
Honestly, I never thought I’d be the person evangelizing about a cheese board. But this Fresh Friendsgiving Charcuterie Board with Fall Fruits changed something for me. It’s not just about the food—it’s about the way people gather around it. The way conversations spark over a shared slice of brie. The way someone discovers they actually love blue cheese when it’s paired with a sweet fig. It’s simple, but it’s meaningful.
I hope you make this board your own. Swap in your favorite cheese, use whatever fruit looks best at the market, and don’t stress about perfection. The best boards are the ones that feel a little messy and a lot like home. If you try it, I’d love to hear how it goes. Drop a comment below and tell me what combination surprised you. And if you’re feeling generous, share a photo—I’m always looking for new inspiration.
Here’s to good food, good friends, and a Friendsgiving that feels exactly right. You’ve got this.
Frequently Asked Questions
How far in advance can I assemble this charcuterie board?
I recommend assembling it no more than 45 minutes before serving. The fruit will start to brown and the crackers will lose their crunch if left out too long. You can prep all components up to two hours ahead—just keep everything separate in the fridge and assemble right before guests arrive.
What if I don’t have a wooden board?
No problem at all! A clean baking sheet, a large cutting board, or even a flat serving platter works perfectly. Line it with parchment paper for a rustic look, or use a marble slab if you have one. The ingredients are the star, not the board.
Can I make this board vegetarian or vegan?
Absolutely. For a vegetarian version, just skip the meats and add more cheese or roasted vegetables like bell peppers and artichokes. For a vegan version, use plant-based cheeses (I like Miyoko’s or Treeline), swap honey for agave, and add extra nuts, dried fruit, and fresh produce. It’s still gorgeous and satisfying.
How do I keep the apple slices from turning brown?
Slice the apples right before you assemble the board—within 20 minutes of serving. If you need to prep ahead, toss the slices in a little lemon juice or a mixture of water and lemon juice. You can also use a variety like Honeycrisp or Fuji, which brown more slowly than other types.
What’s the best way to arrange the board so it looks professional?
Start with the bowls and cheeses as your anchor points, then fill in with meats, fruit, and nuts. Work in layers and leave about 20% of the board empty for visual breathing room. Use fresh herbs like rosemary and thyme as garnishes to add color and fragrance. Step back and look at it from above—if it feels balanced, you’re good to go.
Pin This Recipe!
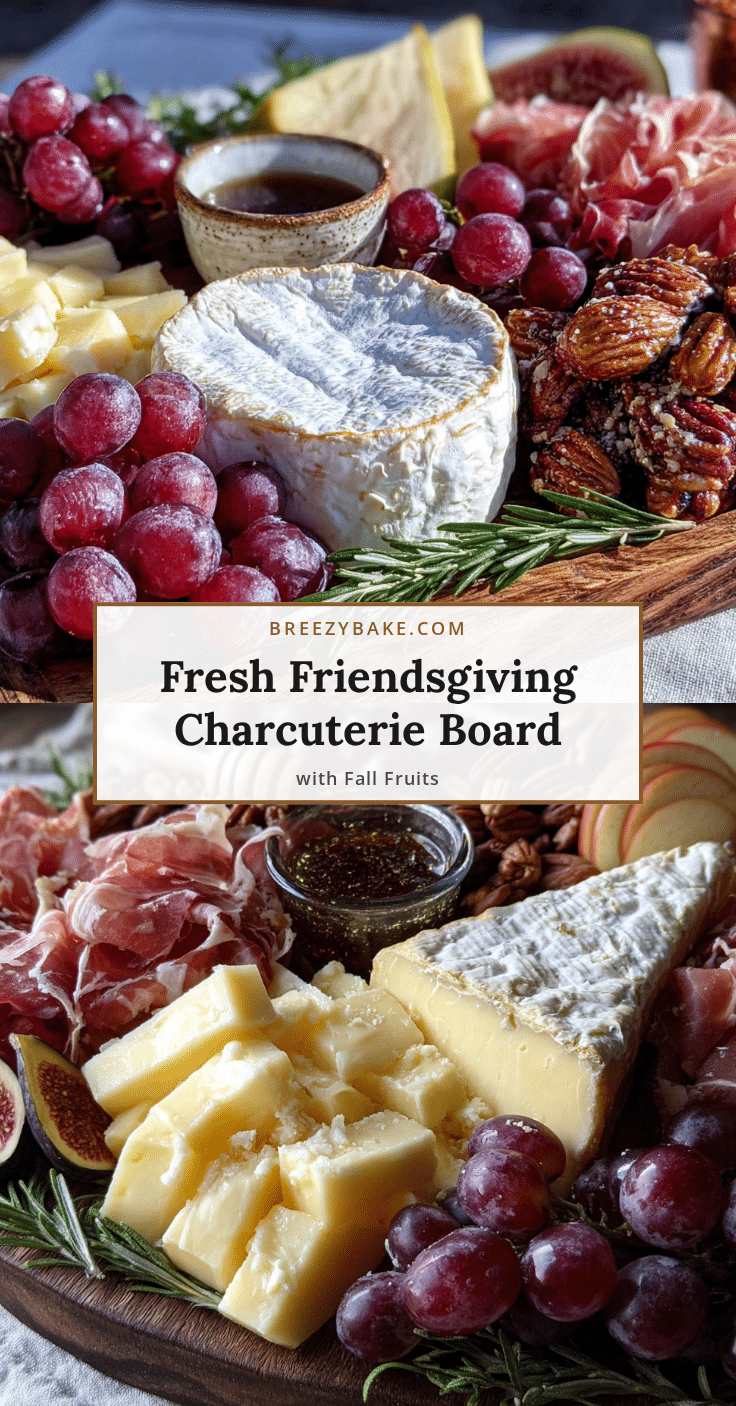
Fresh Friendsgiving Charcuterie Board with Fall Fruits
A stunning and easy-to-assemble charcuterie board featuring seasonal fall fruits, artisan cheeses, cured meats, and crunchy nuts. Perfect for Friendsgiving gatherings, this board is designed to be a beautiful centerpiece that encourages grazing and conversation.
- Prep Time: 25 minutes
- Cook Time: 0 minutes
- Total Time: 25 minutes
- Yield: 8 servings 1x
- Category: Appetizer
- Cuisine: American
Ingredients
- 8 ounces aged sharp cheddar cheese
- 8 ounces creamy brie cheese (double or triple cream)
- 4 ounces blue cheese (such as Point Reyes or gorgonzola)
- 4 ounces goat cheese log (plain)
- 2 medium Honeycrisp apples
- 2 medium Bosc pears
- 1 cup seedless red grapes
- 1 cup dried figs (soft, sticky kind)
- 1/2 cup dried cranberries
- 4 ounces prosciutto (thinly sliced)
- 4 ounces soppressata (dry Italian salami)
- 1 cup candied pecans
- 1 cup Marcona almonds
- 1 small baguette (sliced thin and lightly toasted)
- 1 box good-quality crackers (such as Raincoast Crisps or water crackers)
- 3 tablespoons honey
- Fresh rosemary sprigs (for garnish)
- Fresh thyme sprigs (for garnish)
- Fig jam or honeycomb (optional, for serving)
Instructions
- Start with the bowls. Place small ramekins or bowls on the board first: one for honey near the top right, one for fig jam near the bottom left, and one for candied pecans in the center. Spread them out for balance.
- Add the cheeses next. Let cheeses sit at room temperature for about 15 minutes. Place the brie whole near the top left. Cut the cheddar into thin triangles and fan them out near the bottom center. Slice the blue cheese into wedges and arrange them opposite the brie. Place the goat cheese log in a small empty space as a soft, white focal point.
- Layer in the meats. Fold each prosciutto slice in half, then in half again to create ribbons. Place these in a cluster near the brie. Fold each soppressata slice into a quarter and stack them in a small pile near the cheddar. Place meats near the cheeses they pair best with.
- Add the fresh fruit. Slice apples and pears just before assembling into thin wedges (about 8 slices per fruit). Fan apple slices in a curve near the top right. Fan pear slices near the bottom right. Place small clusters of red grapes in any empty gaps. If slicing more than 20 minutes ahead, toss apple slices with a little lemon juice to prevent browning.
- Fill in with dried fruit and nuts. Sprinkle dried figs and cranberries into remaining empty spaces, scattering them like little treasures. Pour Marcona almonds into a small pile near the goat cheese.
- Add the crunch. Arrange baguette slices in a neat row along one edge of the board. Fan crackers out in a semi-circle near the opposite edge, placing them on the edge closest to where people will stand.
- Finish with garnishes. Tuck fresh rosemary and thyme sprigs around the board, especially near cheeses and fruits. Drizzle a little honey over the brie and goat cheese. If using honeycomb, place a small piece on the brie. Step back and check for any big empty spots, filling them with extra grapes or crackers.
Notes
Temperature matters: take cheeses out of fridge at least 30 minutes before serving. Don’t overcrowd the board—leave about 20% empty for visual breathing room. Cut hard cheeses like cheddar into thin triangles or sticks; leave soft cheeses like brie whole. Assemble within 45 minutes of serving for best freshness. Prep components up to 2 hours ahead and store separately in the fridge, then assemble just before guests arrive.
Nutrition
- Serving Size: 1/8 of the board
- Calories: 380420
- Sugar: 1822
- Sodium: 600700
- Fat: 2428
- Saturated Fat: 1012
- Carbohydrates: 3035
- Fiber: 45
- Protein: 1416
Keywords: charcuterie board, Friendsgiving, fall fruits, cheese board, appetizer, holiday entertaining, easy appetizer, seasonal


