It was 11:47 PM on a drizzly Wednesday, and I had a very specific, almost desperate craving for something that tasted like fall but didn’t require me to put on real pants and drive to a bakery. I didn’t have the energy for a full batch of muffins, honestly, and the thought of dirtying a dozen muffin tins felt like a personal attack after a long day. But I had a can of pumpkin puree staring at me from the pantry, a half-empty bag of chocolate chips from a forgotten baking project, and the idea that maybe, just maybe, I could make something that felt like a warm hug but was small enough to hold in one hand while I watched the rain hit the window. The result was a bit of a gamble—I was tired, I was impulsive, and I just started throwing things into a bowl. I wasn’t following a recipe; I was following a feeling. And let me tell you, that feeling was right. These cozy baked pumpkin chocolate chip oatmeal cups were born from a late-night whim, and they’ve been my go-to comfort breakfast (or snack, or dessert, no judgment) ever since.
Maybe you’ve been there—staring into your fridge, hoping for something that just *feels* good. Something that tastes like effort but requires almost none. That’s exactly what these are. They’re not fussy or fancy. They’re just perfectly spiced, warmly sweet, and studded with melty chocolate chips in every single bite. The oats give them a satisfying chew, the pumpkin keeps them incredibly moist, and the whole thing comes together in one bowl. I mean, honestly, what more could you ask for on a chilly evening?
This recipe stayed with me because it solved a problem I didn’t even know I had. It proved that you don’t need a perfect kitchen or a perfect plan to make something truly delicious. Sometimes the best recipes are the ones you make in your pajamas, when you’re a little bit tired and a lot hungry for something cozy. And that’s exactly what these oatmeal cups are—a little bit of cozy, baked into a perfectly portable, perfectly shareable little package.
Why You’ll Love This Recipe
Let me tell you why these little guys have become a staple in my kitchen. I’ve tested this recipe more times than I care to admit, tweaking the spice levels and the oat-to-pumpkin ratio until it was just right. The result is something I’m genuinely proud to share—a recipe that delivers on comfort without any of the stress.
- Quick & Easy: These come together in about 30 minutes, from bowl to plate. Perfect for a lazy Sunday morning or a quick weekday breakfast when you need something satisfying.
- Simple Ingredients: You probably have almost everything in your pantry right now. Oats, pumpkin puree, eggs, chocolate chips—no fancy grocery trips required.
- Perfect for Meal Prep: Make a batch on Sunday, and you have breakfast (or a snack) ready to grab all week. They store beautifully and taste even better the next day.
- Crowd-Pleaser: I’ve brought these to brunches and potlucks, and they disappear fast. Kids love the chocolate chips, and adults love the warm, spiced flavor.
- Unbelievably Delicious: The texture is what gets me every time. The oats provide a hearty chew, the pumpkin keeps everything tender and moist, and the chocolate chips melt into little pockets of sweetness. It’s comfort food in its purest form.
What makes this recipe different from all the other oatmeal cup recipes out there? It’s the balance. I spent a lot of time figuring out the perfect amount of pumpkin so the cups are moist but not soggy, and the perfect amount of spice so they taste like fall without being overwhelming. I also use a mix of old-fashioned oats and a touch of almond flour for structure, which gives them a texture that’s sturdy enough to hold in your hand but soft enough to feel like a treat. This isn’t just another version—it’s the version I keep coming back to, and I think you will too.
This recipe is the kind that makes you close your eyes after the first bite. It’s comfort food reimagined—healthier, faster, but with the same soul-soothing satisfaction. Perfect for turning a simple morning into something memorable.
What Ingredients You Will Need
This recipe uses simple, wholesome ingredients that work together to create something truly comforting. Most of these are pantry staples, which makes it incredibly easy to whip up a batch whenever the craving strikes.
- Old-Fashioned Rolled Oats (2 cups / 180g): These are the backbone of the recipe. They provide a hearty, chewy texture that holds the cups together. I recommend using old-fashioned oats over quick oats for the best texture. Quick oats will work in a pinch, but the cups will be softer and less structured.
- Almond Flour (1/2 cup / 50g): This is my secret ingredient for structure. It helps bind the oats and gives the cups a tender, almost cake-like crumb. It also adds a subtle nutty flavor that pairs beautifully with the pumpkin.
- Pumpkin Puree (1 cup / 245g): Make sure you’re using 100% pure pumpkin puree, not pumpkin pie filling. The puree adds moisture, flavor, and a beautiful orange color. I prefer Libby’s brand for its consistent texture.
- Eggs (2 large): These act as a binder and help the cups rise slightly. Make sure they’re at room temperature so they mix in evenly.
- Maple Syrup (1/3 cup / 80ml): This adds natural sweetness and a lovely depth of flavor. You can substitute with honey or agave nectar if needed, but maple syrup really complements the pumpkin and spices.
- Coconut Oil (2 tablespoons / 30ml), melted: This adds moisture and a subtle richness. You can substitute with melted butter or any neutral oil like avocado oil.
- Milk (1/4 cup / 60ml): Any milk works here—dairy or non-dairy. I often use unsweetened almond milk or oat milk. This helps thin the batter slightly so everything mixes well.
- Pumpkin Pie Spice (1 1/2 teaspoons): This is the flavor powerhouse. If you don’t have pumpkin pie spice, you can make your own by mixing 1 teaspoon cinnamon, 1/2 teaspoon nutmeg, 1/4 teaspoon ginger, and a pinch of cloves.
- Cinnamon (1 teaspoon): Because you can never have too much cinnamon. It adds warmth and depth.
- Baking Powder (1 teaspoon): This helps the cups rise and become light and tender.
- Baking Soda (1/2 teaspoon): Works with the baking powder to give the cups a good lift.
- Salt (1/4 teaspoon): A pinch of salt balances the sweetness and enhances all the flavors.
- Chocolate Chips (1/2 cup / 90g): Use semi-sweet or dark chocolate chips for the best balance. The sweetness of the chocolate pairs perfectly with the warm, spiced pumpkin. I recommend Ghirardelli or Enjoy Life (dairy-free) for consistent melting.
- Optional Topping: A sprinkle of coarse sugar or a few extra chocolate chips on top before baking for a pretty finish.
Equipment Needed
You don’t need a lot of fancy equipment for this recipe, which is part of its charm. Here’s what you’ll need:
- Muffin Tin (12-cup standard size): This is essential for shaping the oatmeal cups. I prefer a non-stick tin for easy release, but a regular tin works fine with liners.
- Muffin Liners (silicone or paper): Silicone liners are my favorite because they’re reusable and the cups never stick. Paper liners work great too—just give them a quick spritz of cooking spray.
- Large Mixing Bowl: For combining all the ingredients. Any large bowl will do.
- Whisk: For mixing the wet ingredients together smoothly.
- Rubber Spatula: For folding in the oats and chocolate chips without overmixing.
- Measuring Cups and Spoons: Accuracy matters here, especially with the oats and pumpkin.
- Ice Cream Scoop or Cookie Scoop: This makes filling the muffin cups so much easier and ensures they’re all the same size. If you don’t have one, a 1/4 cup measuring cup works perfectly.
- Cooling Rack: For cooling the cups completely after baking. This prevents them from getting soggy on the bottom.
I’ve made these cups with both a cheap muffin tin and my nicer one, and honestly, the results were the same. The key is to use liners—trust me on this. I tried making them without liners once, and it was a sticky disaster. Learn from my mistakes!
Preparation Method
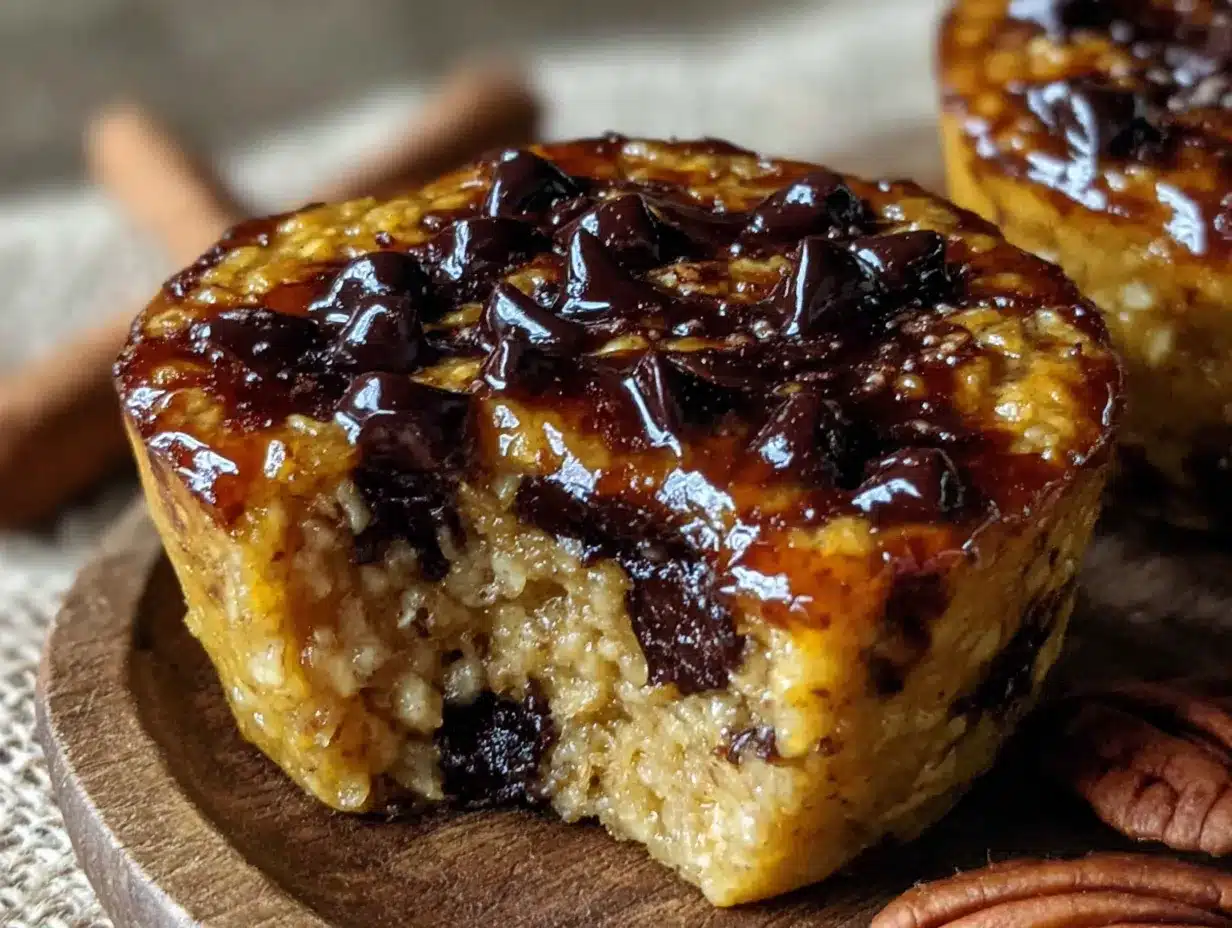
Alright, let’s get to the fun part. This recipe is incredibly forgiving, so don’t stress about being perfect. Just follow these steps, and you’ll have a batch of cozy oatmeal cups in no time.
- Preheat and Prep: Preheat your oven to 350°F (175°C). Line a 12-cup muffin tin with silicone or paper liners. If using paper liners, give them a light spray with non-stick cooking spray to ensure the cups release easily.
- Mix the Dry Ingredients: In a large mixing bowl, whisk together the 2 cups of old-fashioned rolled oats, 1/2 cup of almond flour, 1 1/2 teaspoons of pumpkin pie spice, 1 teaspoon of cinnamon, 1 teaspoon of baking powder, 1/2 teaspoon of baking soda, and 1/4 teaspoon of salt. Make sure everything is evenly distributed. This step takes about 30 seconds.
- Mix the Wet Ingredients: In a separate medium bowl, whisk together 1 cup of pumpkin puree, 2 large eggs, 1/3 cup of maple syrup, 2 tablespoons of melted coconut oil, and 1/4 cup of milk. Whisk until the mixture is smooth and completely combined. The color should be a beautiful, uniform orange.
- Combine Wet and Dry: Pour the wet ingredients into the bowl with the dry ingredients. Use a rubber spatula to fold everything together gently. Mix just until there are no more dry streaks of flour or oats. Be careful not to overmix—a few lumps are totally fine. Overmixing can make the cups tough.
- Add the Chocolate Chips: Fold in 1/2 cup of chocolate chips until they’re evenly distributed throughout the batter. The batter will be thick and scoopable, not runny. This is exactly what you want.
- Fill the Muffin Cups: Using an ice cream scoop or a 1/4 cup measuring cup, divide the batter evenly among the 12 muffin cups. The batter will be mounded slightly above the rim—that’s perfect. If you want, sprinkle a few extra chocolate chips on top of each cup for a pretty finish.
- Bake: Place the muffin tin in the preheated oven and bake for 20-25 minutes. The cups are done when the edges are golden brown and a toothpick inserted into the center of a cup comes out mostly clean (a few moist crumbs are fine; you just don’t want wet batter). The tops should feel firm to the touch.
- Cool: Remove the muffin tin from the oven and let it cool on a wire rack for 5 minutes. This rest time is crucial—it allows the cups to set so they don’t fall apart when you remove them. After 5 minutes, carefully transfer the cups from the tin to the cooling rack to cool completely.
One thing I learned the hard way: don’t rush the cooling process. I was impatient once and tried to eat one straight out of the oven. It was delicious, but it completely fell apart in my hands. Letting them cool for at least 10-15 minutes on the rack makes all the difference in texture and structure.
Cooking Tips & Techniques
After making these oatmeal cups more times than I can count, I’ve picked up a few tricks that make the process even easier and the results even better.
Don’t Overmix the Batter: This is the number one mistake I see people make. When you combine the wet and dry ingredients, mix just until everything is incorporated. Overmixing activates the gluten in the oats (yes, oats have gluten-like properties) and can make the cups dense and tough. A few lumps are your friend here.
Room Temperature Ingredients Matter: I know it’s tempting to use cold eggs straight from the fridge, but taking the time to let them come to room temperature makes a big difference. Room temperature ingredients blend together more smoothly, creating a more uniform batter and a better texture. Same goes for the pumpkin puree—if it’s cold from the fridge, let it sit on the counter for 15 minutes before you start.
Check Your Oven Temperature: Ovens can be liars. I’ve had ovens that run hot and ovens that run cold, and both can ruin a batch of oatmeal cups. I highly recommend using an oven thermometer to make sure your oven is actually at 350°F (175°C). It’s a small investment that pays off in consistent baking.
Use a Cookie Scoop for Even Portions: This is one of those small kitchen tools that makes a huge difference. Using a cookie scoop ensures that all your oatmeal cups are the same size, which means they’ll bake evenly. No more undercooked centers or burnt edges.
Let Them Cool Completely: I know I’ve said this before, but it’s worth repeating. These cups need time to set. If you try to remove them from the tin too soon, they’ll be too fragile and might fall apart. Patience is a virtue, especially when it comes to baked oatmeal.
My Biggest Failure: I once tried to double the recipe and bake it in a 9×13 inch pan, thinking I could just cut it into bars. It was a disaster. The edges were overcooked, the center was undercooked, and the whole thing was a mess. Stick to the muffin tin—it’s the perfect size for even baking and portion control.
Variations & Adaptations
One of the best things about this recipe is how adaptable it is. I’ve tried several variations, and they’ve all been delicious in their own way. Here are a few ideas to get you started.
Gluten-Free Version: This recipe is already gluten-free if you use certified gluten-free oats and almond flour. Just make sure your oats are labeled gluten-free, as cross-contamination is common with regular oats. Everything else in the recipe is naturally gluten-free.
Dairy-Free Version: This is easy to do. Use dairy-free chocolate chips (like Enjoy Life or Pascha), a plant-based milk (almond, oat, or coconut milk work great), and coconut oil instead of butter. The recipe is already dairy-free as written, so you’re good to go.
Nut-Free Version: If you need to avoid nuts, replace the almond flour with an equal amount of oat flour. You can make oat flour by simply pulsing old-fashioned oats in a food processor or blender until they form a fine powder. It works perfectly and keeps the recipe nut-free.
Add Some Crunch: I love adding 1/4 cup of chopped pecans or walnuts to the batter along with the chocolate chips. The crunch adds a wonderful texture contrast to the soft, tender oatmeal cups. Toasted nuts are even better—just toast them in a dry pan for a few minutes before adding them to the batter.
Spice It Up: If you like things a little more intense, add a pinch of ground ginger or cardamom to the spice mix. I once added a teaspoon of fresh grated ginger to the wet ingredients, and it gave the cups a lovely, warm zing that paired beautifully with the pumpkin.
Personal Variation: My favorite variation is to swap out half the chocolate chips for dried cranberries. The tartness of the cranberries balances the sweetness of the maple syrup and chocolate, creating a flavor profile that’s both cozy and bright. I call them my “fall harvest” oatmeal cups, and they’re perfect for Thanksgiving morning.
Serving & Storage Suggestions
These oatmeal cups are incredibly versatile, which is one of the reasons I love them so much. Here’s how I like to serve and store them.
Serving: These cups are delicious at room temperature, but I highly recommend warming them up for about 15 seconds in the microwave before serving. It softens the oats, melts the chocolate chips, and makes the whole thing taste like it just came out of the oven. I like to serve them with a dollop of Greek yogurt or a drizzle of extra maple syrup for a little extra indulgence.
Pairings: These cups are perfect on their own, but they also pair beautifully with a hot cup of coffee, a chai latte, or a glass of cold milk. For a more substantial breakfast, serve them alongside scrambled eggs or a fresh fruit salad.
Storage: Store any leftover oatmeal cups in an airtight container at room temperature for up to 3 days. If your kitchen is warm or humid, I recommend storing them in the refrigerator to keep them fresh longer. They’ll last for up to a week in the fridge.
Freezing: These cups freeze beautifully. Once they’re completely cool, place them in a single layer on a baking sheet and freeze for 1-2 hours until solid. Then transfer them to a freezer-safe bag or container. They’ll keep for up to 3 months. To reheat, simply microwave one for 20-30 seconds, or let it thaw at room temperature for about an hour.
Flavor Development: Here’s a little secret: these oatmeal cups actually taste better the next day. The flavors have time to meld together, and the texture becomes even more tender. So don’t be afraid to make them a day ahead—they’ll be even more delicious.
Nutritional Information & Benefits
These oatmeal cups are not only delicious but also packed with wholesome ingredients that offer several health benefits. Here’s a breakdown of what you’re getting in each cup.
Estimated Nutritional Values (per cup):
| Nutrient | Amount |
|---|---|
| Calories | 180 |
| Total Fat | 8g |
| Saturated Fat | 4g |
| Cholesterol | 31mg |
| Sodium | 120mg |
| Total Carbohydrates | 24g |
| Dietary Fiber | 3g |
| Sugars | 11g |
| Protein | 5g |
Health Benefits: Oats are a fantastic source of soluble fiber, which helps lower cholesterol and keeps you feeling full longer. Pumpkin is rich in vitamin A, which is great for eye health and immune function. The almond flour adds healthy fats and vitamin E, while the eggs provide high-quality protein. And let’s not forget the antioxidants in dark chocolate—they’re good for your heart and your mood.
Dietary Considerations: This recipe is naturally vegetarian and can easily be made gluten-free, dairy-free, and nut-free with the substitutions mentioned above. It’s also relatively low in added sugar compared to traditional baked goods, making it a great option for anyone watching their sugar intake.
Potential Allergens: This recipe contains eggs, tree nuts (almonds), and may contain gluten depending on the oats used. Please adjust substitutions based on your dietary needs.
I love that these oatmeal cups feel like a treat but are actually packed with good-for-you ingredients. It’s the kind of recipe that makes you feel good about eating something delicious.
Conclusion
So there you have it—my cozy baked pumpkin chocolate chip oatmeal cups, born from a late-night craving and perfected through many, many batches. These little cups are more than just a recipe to me. They’re a reminder that sometimes the best things in life come from improvisation and a willingness to try something new, even when you’re tired and in your pajamas.
I encourage you to make these your own. Add your favorite mix-ins, adjust the spices to your liking, or double the batch so you have plenty to share. The beauty of this recipe is its flexibility—it’s forgiving, it’s forgiving, and it always delivers on comfort.
I’d love to hear how these turn out for you! Leave a comment below and let me know if you tried any fun variations. Did you add dried fruit? Swap the chocolate for white chocolate chips? I want to hear all about it. And don’t forget to share this recipe with someone who needs a little cozy in their life. Happy baking, friends!
Frequently Asked Questions
Can I use quick oats instead of old-fashioned oats?
Yes, you can use quick oats, but the texture will be softer and less chewy. The cups may also be slightly more delicate. If you only have quick oats on hand, reduce the milk by 1 tablespoon to compensate for their finer texture.
Can I make these ahead of time?
Absolutely! These oatmeal cups are perfect for meal prep. They taste even better the next day as the flavors meld together. Store them in an airtight container at room temperature for up to 3 days, or in the refrigerator for up to a week.
Can I freeze these oatmeal cups?
Yes, they freeze beautifully. Cool them completely, then freeze them in a single layer on a baking sheet. Once frozen, transfer them to a freezer-safe bag or container. They’ll keep for up to 3 months. Reheat in the microwave for 20-30 seconds straight from frozen.
Can I use pumpkin pie filling instead of pumpkin puree?
I don’t recommend it. Pumpkin pie filling is pre-sweetened and contains spices that will throw off the balance of this recipe. Stick with 100% pure pumpkin puree for the best results. If you only have pumpkin pie filling, reduce the maple syrup and spices significantly, but the texture may still be off.
Why are my oatmeal cups falling apart?
This usually happens for one of two reasons: they weren’t baked long enough, or they were removed from the muffin tin too soon. Make sure to bake them until a toothpick inserted in the center comes out mostly clean, and let them cool in the tin for at least 5 minutes before transferring to a cooling rack. Patience is key!
Pin This Recipe!
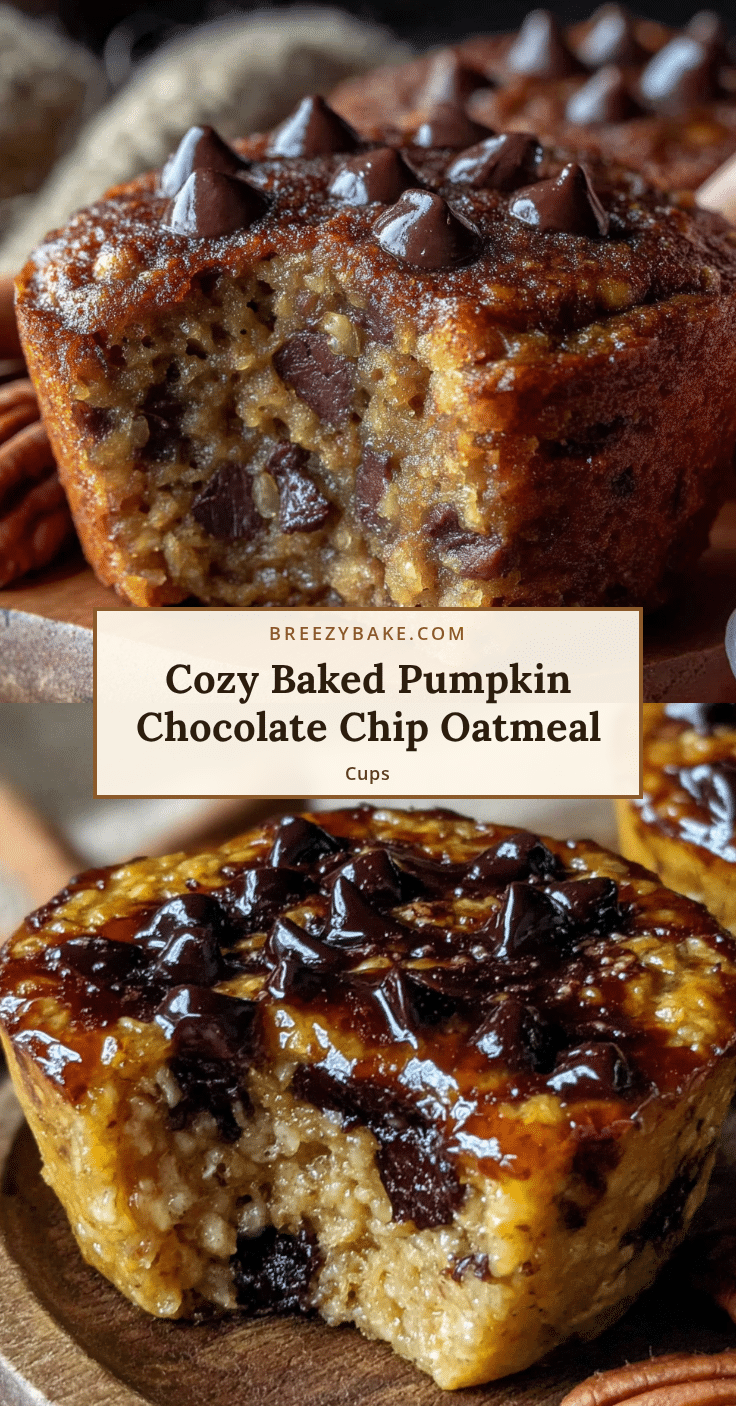
Healthy Baked Pumpkin Chocolate Chip Oatmeal Cups
These cozy baked pumpkin chocolate chip oatmeal cups are perfectly spiced, warmly sweet, and studded with melty chocolate chips. They come together in one bowl and are perfect for a quick breakfast, snack, or dessert.
- Prep Time: 10 minutes
- Cook Time: 25 minutes
- Total Time: 35 minutes
- Yield: 12 servings 1x
- Category: Breakfast
- Cuisine: American
Ingredients
- 2 cups (180g) old-fashioned rolled oats
- 1/2 cup (50g) almond flour
- 1 cup (245g) pumpkin puree
- 2 large eggs, room temperature
- 1/3 cup (80ml) maple syrup
- 2 tablespoons (30ml) coconut oil, melted
- 1/4 cup (60ml) milk (dairy or non-dairy)
- 1 1/2 teaspoons pumpkin pie spice
- 1 teaspoon cinnamon
- 1 teaspoon baking powder
- 1/2 teaspoon baking soda
- 1/4 teaspoon salt
- 1/2 cup (90g) semi-sweet or dark chocolate chips
- Optional: coarse sugar or extra chocolate chips for topping
Instructions
- Preheat oven to 350°F (175°C). Line a 12-cup muffin tin with silicone or paper liners. If using paper liners, spray lightly with non-stick cooking spray.
- In a large mixing bowl, whisk together oats, almond flour, pumpkin pie spice, cinnamon, baking powder, baking soda, and salt.
- In a separate medium bowl, whisk together pumpkin puree, eggs, maple syrup, melted coconut oil, and milk until smooth.
- Pour wet ingredients into dry ingredients and fold with a rubber spatula until just combined. Do not overmix.
- Fold in chocolate chips until evenly distributed.
- Divide batter evenly among the 12 muffin cups using an ice cream scoop or 1/4 cup measure. Batter will be mounded slightly above the rim. Optionally, sprinkle extra chocolate chips on top.
- Bake for 20-25 minutes, until edges are golden brown and a toothpick inserted in the center comes out mostly clean.
- Let cool in the tin on a wire rack for 5 minutes, then transfer cups to the rack to cool completely.
Notes
Don’t overmix the batter to avoid tough cups. Let ingredients come to room temperature for best results. Use an oven thermometer to ensure accurate temperature. Let cups cool completely before removing from tin to prevent breakage. These cups taste even better the next day.
Nutrition
- Serving Size: 1 oatmeal cup
- Calories: 180
- Sugar: 11
- Sodium: 120
- Fat: 8
- Saturated Fat: 4
- Carbohydrates: 24
- Fiber: 3
- Protein: 5
Keywords: pumpkin oatmeal cups, baked oatmeal cups, healthy breakfast, pumpkin chocolate chip, fall recipe, meal prep breakfast


