My neighbor Carol wasn’t trying to impress anyone. I’d stopped by to borrow a lug wrench—my car had made a funny noise pulling into the driveway—and the smell hit me before I even got to her garage. It wasn’t fancy. It wasn’t complicated. It was green beans, sure, but there was something else in the air. Something warm and savory and a little bit toasty. Carol was standing at her stove in sweatpants, stirring a pan with one hand and holding her phone with the other. She barely looked up. “Oh, that? Just the green bean thing my kids actually eat.” She said it like it was nothing. Like she hadn’t just created a side dish that made me forget why I’d walked over in the first place. I stood there, honestly, a little stunned. The green beans weren’t mushy. The topping wasn’t sad and soggy. It was crispy. It was golden. It had this crunch that I could hear from three feet away. Carol shrugged and went back to her phone call. And I stood there, mentally taking notes, because that kind of casual cooking magic? That’s the stuff you remember. Maybe you’ve been there—you taste something at a friend’s house that’s so simple and so good you can’t stop thinking about it. That’s this recipe. It’s the green bean casserole that actually gets eaten, not pushed around the plate.
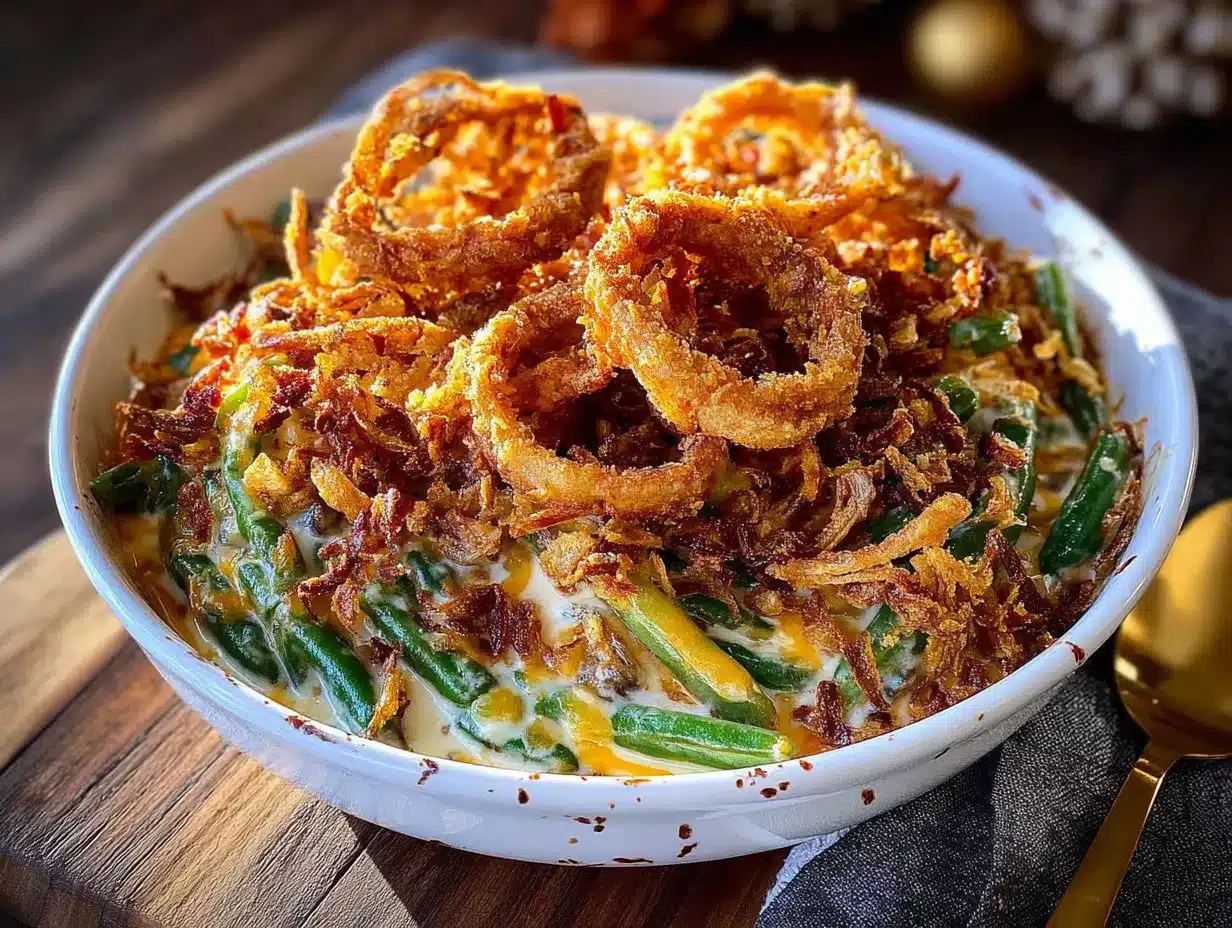
This Kid-Approved Crispy Green Bean Casserole is the one I’ve been making ever since. It comes together in 25 minutes flat. The green beans stay bright and tender-crisp. The creamy sauce is rich without being heavy. And that crispy topping? It stays crunchy even the next day, which honestly feels like a small miracle. Whether you’re feeding picky eaters or just want a side dish that doesn’t feel like an afterthought, this one delivers. Let me show you how it’s done.
Why You’ll Love This Recipe
I’ve tested this green bean casserole more times than I care to count. The first few attempts? Let’s just say there were some sad, soggy green beans in my trash can. But this version? This is the one that finally worked. Here’s why it’s become a staple in my kitchen:
- Quick & Easy: From fridge to table in 25 minutes. No blanching. No complicated steps. Just straightforward cooking that fits into a busy weeknight.
- Simple Ingredients: You probably have most of this in your pantry right now. No special trips to the fancy grocery store. No obscure ingredients that cost a fortune.
- Perfect for Family Meals: This is the side dish that bridges the gap between what adults want and what kids will actually eat. It’s creamy enough for little ones but flavorful enough for grown-ups.
- Crowd-Pleaser: I’ve brought this to potlucks and family dinners. The dish comes back empty every single time. Kids ask for seconds. Adults ask for the recipe.
- Unbelievably Delicious: The texture is the star here. Crispy on top, creamy in the middle, and green beans that still have a little bite. It’s comfort food that feels fresh, not heavy.
What makes this different from every other green bean casserole out there? Two things. First, I skip the canned soup entirely. The homemade cream sauce is faster than you think and tastes so much better. Second, I use a trick for the crispy topping that keeps it crunchy even after it’s been sitting out. No more sad, soggy topping. Just crunch in every bite.
This recipe isn’t just good—it’s the kind that makes you close your eyes after the first bite. It’s comfort food reimagined. Faster, crunchier, and with the same soul-soothing satisfaction that makes green bean casserole a classic. Perfect for impressing guests without stress, or turning a simple Tuesday dinner into something memorable.
What Ingredients You Will Need
This recipe uses simple, wholesome ingredients to deliver bold flavor and satisfying texture without the fuss. Most of these are pantry staples, which is exactly what you want when you’re feeding a family on a budget.
For the Green Bean Base
- 1 pound fresh green beans, trimmed and halved (frozen works too, just thaw and pat dry first—fresh gives a better crunch though)
- 2 tablespoons unsalted butter (I use Kerrygold for the rich flavor, but any good butter works)
- 1 medium yellow onion, diced (about 1 cup—this adds sweetness without being overpowering)
- 3 cloves garlic, minced (fresh is best, but jarred minced garlic works in a pinch)
For the Creamy Sauce
- 2 tablespoons all-purpose flour (adds thickness without making it gluey)
- 1 cup whole milk (2% works too, but whole milk gives the creamiest texture)
- 1/2 cup heavy cream (this is the secret to the luxurious sauce—don’t skip it)
- 1/2 teaspoon salt (adjust to taste)
- 1/4 teaspoon black pepper (freshly ground is best)
- 1/4 teaspoon garlic powder (adds depth without extra chopping)
- 1/4 teaspoon onion powder (rounds out the savory flavor)
For the Crispy Topping
- 1 cup crispy fried onions (French’s is the classic, but store brands work just as well)
- 1/2 cup panko breadcrumbs (this is the secret to the extra crunch—regular breadcrumbs get soggy)
- 2 tablespoons melted butter (helps the topping brown evenly)
- 1/4 cup grated Parmesan cheese (optional, but adds a salty, nutty kick that kids somehow love)
A few notes from my kitchen to yours: When you’re picking green beans at the store, look for ones that snap when you bend them. That’s the sign of freshness. If you’re using frozen green beans, make sure to thaw them completely and pat them dry with a paper towel. Extra moisture is the enemy of crispiness. For the panko breadcrumbs, I’ve tried making my own from stale bread, and honestly? The store-bought ones work better here. They’re lighter and crispier. And if you want to save a few bucks, skip the Parmesan. The casserole is still amazing without it.
Equipment Needed
You don’t need a fancy kitchen to make this recipe. Here’s what you’ll need:
- Large skillet or sauté pan (12-inch is ideal—gives the green beans room to cook evenly)
- Medium mixing bowl (for tossing the topping ingredients together)
- 8×8-inch baking dish (or any 2-quart casserole dish—I’ve used a pie plate in a pinch)
- Sharp knife and cutting board (for trimming the green beans and dicing the onion)
- Wooden spoon or spatula (for stirring the sauce without scratching your pan)
- Measuring cups and spoons (precision matters with the flour and cream)
If you don’t have an 8×8 dish, a 9-inch pie plate works beautifully. I’ve even made this in a cast-iron skillet from start to finish—just skip the transfer and bake it right in the pan. It saves a dish and looks rustic on the table. For the panko topping, I’ve used a food processor to crush regular breadcrumbs into a finer texture when I was out of panko. It’s not quite the same, but it gets the job done.
Preparation Method
Let me walk you through this step by step. Trust me, if you follow these steps, you’ll end up with a casserole that disappears fast.
- Preheat your oven to 400°F (200°C). Get this going first so it’s ready when you need it. While the oven heats, trim the ends off your green beans and cut them in half. You want bite-sized pieces—about 2 inches long. I usually do this while the pan is heating up to save time.
- Blanch the green beans. Bring a large pot of salted water to a boil. Drop in the green beans and cook for exactly 2 minutes. You’re not trying to cook them through—just take the raw edge off. Drain them immediately and plunge them into a bowl of ice water. This stops the cooking and locks in that bright green color. Let them sit in the ice water for a couple minutes, then drain well. Pat them dry with a clean kitchen towel. (I forgot to dry them once, and the extra water made the sauce thin. Learn from my mistake.)
- Start the sauce. In your large skillet, melt 2 tablespoons of butter over medium heat. Add the diced onion and cook for 3-4 minutes until it’s soft and translucent. You want it to smell sweet, not burnt. Add the minced garlic and cook for another 30 seconds until fragrant. Don’t let the garlic brown—it turns bitter fast.
- Make the roux. Sprinkle the flour over the onions and garlic. Stir constantly for 1-2 minutes. This cooks the raw flour taste out. The mixture will look thick and pasty—that’s exactly what you want. Keep stirring until it smells kind of nutty and toasty.
- Add the milk and cream. Slowly pour in the milk while whisking constantly. Then add the heavy cream. Keep whisking until the sauce thickens, about 2-3 minutes. You’ll feel it get heavier on the spoon. It should coat the back of a spoon without dripping off too fast. If it’s too thick, add a splash more milk. Too thin? Let it simmer another minute.
- Season the sauce. Stir in the salt, pepper, garlic powder, and onion powder. Taste it. Adjust the seasoning if needed. This is your chance to fix it before the green beans go in. I always add a tiny pinch more salt than I think I need—it balances out once the green beans are in.
- Combine everything. Add the blanched green beans to the sauce. Stir gently until every bean is coated. Pour the whole thing into your greased 8×8 baking dish. Spread it out evenly with a spatula.
- Make the topping. In a small bowl, mix the crispy fried onions, panko breadcrumbs, melted butter, and Parmesan cheese (if using). Use your fingers to toss everything together. You want every crumb coated in butter. Sprinkle this mixture evenly over the green beans.
- Bake until golden. Pop the dish into your preheated oven. Bake for 12-15 minutes, until the topping is golden brown and the sauce is bubbly around the edges. Every oven runs a little different—mine takes exactly 13 minutes. Watch for that golden color, not the clock.
- Rest before serving. Let the casserole sit for 5 minutes after it comes out of the oven. This lets the sauce set up so it doesn’t turn into soup on the plate. I know it’s hard to wait, but trust me on this one.
Cooking Tips & Techniques
After making this casserole about a dozen times (and failing a few times along the way), I’ve picked up some tricks that make a real difference.
Don’t skip the blanching step. I tried making this with raw green beans once, thinking it would save time. The beans came out unevenly cooked—some were still crunchy, others were mushy. The 2-minute blanch is non-negotiable. It gives you that perfect tender-crisp texture every time.
Watch your heat with the sauce. Medium heat is your friend. High heat will scorch the milk and give you a grainy, separated sauce. Low heat takes forever. Medium heat, constant stirring, and patience. That’s the formula. I burned my first batch because I walked away to answer the phone. Don’t be like me—stay at the stove.
The topping is the star. The panko breadcrumbs are what make this different from every other green bean casserole. They stay crunchy because they’re larger and lighter than regular breadcrumbs. If you can’t find panko, crush up some cornflakes instead. It’s not the same, but it’s close enough. I’ve done it in a pinch and nobody complained.
Make ahead tip: You can assemble the casserole (without the topping) a day ahead. Keep it covered in the fridge. When you’re ready to bake, add the topping and add 5 extra minutes to the baking time since you’re starting from cold. This is a lifesaver on busy days.
Double it for a crowd. This recipe fits perfectly in an 8×8 dish. If you’re feeding a crowd, double everything and use a 9×13 pan. Add 5-7 minutes to the baking time. I’ve done this for Thanksgiving, and it worked like a charm.
Variations & Adaptations
One of the best things about this recipe is how flexible it is. Here are some ways to make it your own:
Dairy-Free Version: Swap the butter for vegan butter or olive oil. Use oat milk or unsweetened almond milk instead of whole milk. Replace the heavy cream with full-fat coconut cream (the kind from a can, not the refrigerated kind). Omit the Parmesan or use a dairy-free alternative. The texture is slightly less creamy, but it’s still really good. I made this for a friend with lactose intolerance, and she asked for the recipe.
Gluten-Free Adaptation: Use gluten-free all-purpose flour for the roux. Replace panko with gluten-free panko or crushed gluten-free crackers. Check your crispy fried onions—some brands use wheat flour. French’s makes a gluten-free version that works perfectly. I tested this for a reader who emailed me, and it held up beautifully.
Add Some Protein: Turn this into a main dish by adding 1 cup of cooked, shredded chicken or 1/2 pound of cooked ground turkey. Stir it in with the green beans before baking. It stretches the meal further and makes it a one-dish dinner. My kids love this version on nights when I don’t feel like making a separate protein.
Spice It Up: Add 1/4 teaspoon of red pepper flakes to the sauce for a subtle kick. Or stir in 1 tablespoon of hot sauce (I like Cholula) with the milk. The heat is mild enough that kids don’t notice it, but adults will appreciate the depth.
Mushroom Lover’s Version: Sauté 8 ounces of sliced mushrooms with the onions. They add an earthy flavor that pairs beautifully with the creamy sauce. I do this when I’m making the casserole for adults only. It’s a completely different dish—richer, deeper, more savory.
Seasonal Twist: In the summer, swap green beans for fresh asparagus. Blanch it for 1 minute instead of 2. In the fall, use a mix of green beans and roasted butternut squash cubes. The sweetness of the squash balances the savory sauce. I stumbled on this combination by accident when I had leftover squash, and now it’s a fall favorite.
Serving & Storage Suggestions
This casserole is best served hot, straight from the oven. Let it rest for 5 minutes after baking so the sauce sets up. Spoon it onto plates with a wide spatula to keep the crispy topping intact. I like to serve it alongside roasted chicken, meatloaf, or even a simple weeknight pork chop. It also works beautifully as a Thanksgiving side—it frees up oven space because it bakes so quickly.
For presentation, sprinkle a few extra crispy fried onions on top right before serving. It makes the dish look intentional and pretty. A sprinkle of fresh parsley adds a pop of green if you’re feeling fancy.
Storage: Leftovers keep in an airtight container in the fridge for up to 4 days. The topping will soften a bit, but the flavor is still fantastic. To reheat, pop individual portions in the microwave for 1-2 minutes. For larger portions, reheat in a 350°F oven for 10-15 minutes until warmed through. The oven method helps the topping crisp up again.
Freezer Instructions: This casserole freezes surprisingly well. Assemble it completely (topping included) but don’t bake it. Wrap the dish tightly in plastic wrap, then foil. Freeze for up to 3 months. When you’re ready to bake, thaw overnight in the fridge, then bake as directed, adding 10 extra minutes. I’ve done this for busy weeks, and it’s like having a homemade frozen dinner that tastes fresh.
Flavor Development: Honestly, this casserole tastes even better the next day. The flavors meld together overnight, and the sauce gets even creamier. If you can resist eating it all the first night, the leftovers are a treat. I’ve been known to make a double batch just for the leftovers.
Nutritional Information & Benefits
Here’s the nutritional breakdown for one serving (about 1 cup, based on 6 servings):
- Calories: 245
- Total Fat: 16g
- Saturated Fat: 9g
- Cholesterol: 45mg
- Sodium: 420mg
- Total Carbohydrates: 20g
- Dietary Fiber: 3g
- Sugars: 6g
- Protein: 6g
Green beans are a solid source of vitamin K, vitamin C, and fiber. They’re low in calories but high in nutrients, which makes them a great vegetable to build a side dish around. The calcium from the milk and cheese supports bone health, and the protein from the dairy helps keep you full.
If you’re watching your sodium, you can use low-sodium crispy fried onions and reduce the added salt. The Parmesan cheese adds saltiness too, so you might not miss the extra salt. For a lower-fat version, use 2% milk and skip the heavy cream—the sauce will be thinner but still tasty.
This recipe contains dairy and gluten. For dairy-free or gluten-free options, check the variations section above. It’s not suitable for vegan diets as written, but with the substitutions mentioned, you can make it work.
Conclusion
This Kid-Approved Crispy Green Bean Casserole is the side dish that keeps showing up in my kitchen because it actually works. It’s fast enough for a Tuesday, fancy enough for a holiday, and simple enough that you don’t need to be a chef to pull it off. The green beans stay bright. The sauce is creamy without being heavy. And that crispy topping? It’s the reason my kids ask for seconds.
I love this recipe because it reminds me of Carol standing in her kitchen in sweatpants, making something extraordinary without even realizing it. That’s the kind of cooking I want to share with you. No stress. No complicated techniques. Just good food that makes everyone at the table happy.
Try it this week. Customize it with whatever you have on hand. Make it your own. And when you do, come back and let me know how it turned out. Did your kids ask for seconds? Did you add mushrooms or chicken? I’d love to hear about your version in the comments below. Happy cooking, friends!
Frequently Asked Questions
Can I use frozen green beans instead of fresh?
Yes, absolutely. Thaw them first and pat them dry with a paper towel to remove excess moisture. Skip the blanching step since frozen beans are already partially cooked. Just add them directly to the sauce and proceed with the recipe. They won’t be quite as crisp as fresh, but the flavor is still great.
Why did my sauce turn out lumpy?
Lumpy sauce usually happens when you add the milk too quickly or don’t whisk constantly. Next time, pour the milk in a slow, steady stream while whisking vigorously. If your sauce is already lumpy, you can save it by whisking in a splash of cold milk or running it through a fine-mesh strainer. I’ve done both, and they work.
Can I make this casserole ahead of time?
Yes, you can assemble the casserole (without the topping) up to 24 hours in advance. Keep it covered in the fridge. When you’re ready to bake, add the topping and bake as directed, adding 5 extra minutes since the dish starts cold. This is a great option for busy holiday meals.
How do I keep the topping from getting soggy?
The panko breadcrumbs are the secret weapon here. They’re larger and lighter than regular breadcrumbs, so they stay crunchy longer. Also, make sure you’re not overbaking the casserole—once the topping is golden brown, it’s done. Letting it sit in the oven too long will steam the topping and make it soft.
Can I double this recipe for a crowd?
Absolutely. Double all the ingredients and use a 9×13-inch baking dish. The baking time will increase by about 5-7 minutes. Keep an eye on the topping and pull it out when it’s golden and bubbly. I’ve made this for Thanksgiving dinners with great success.
Pin This Recipe!
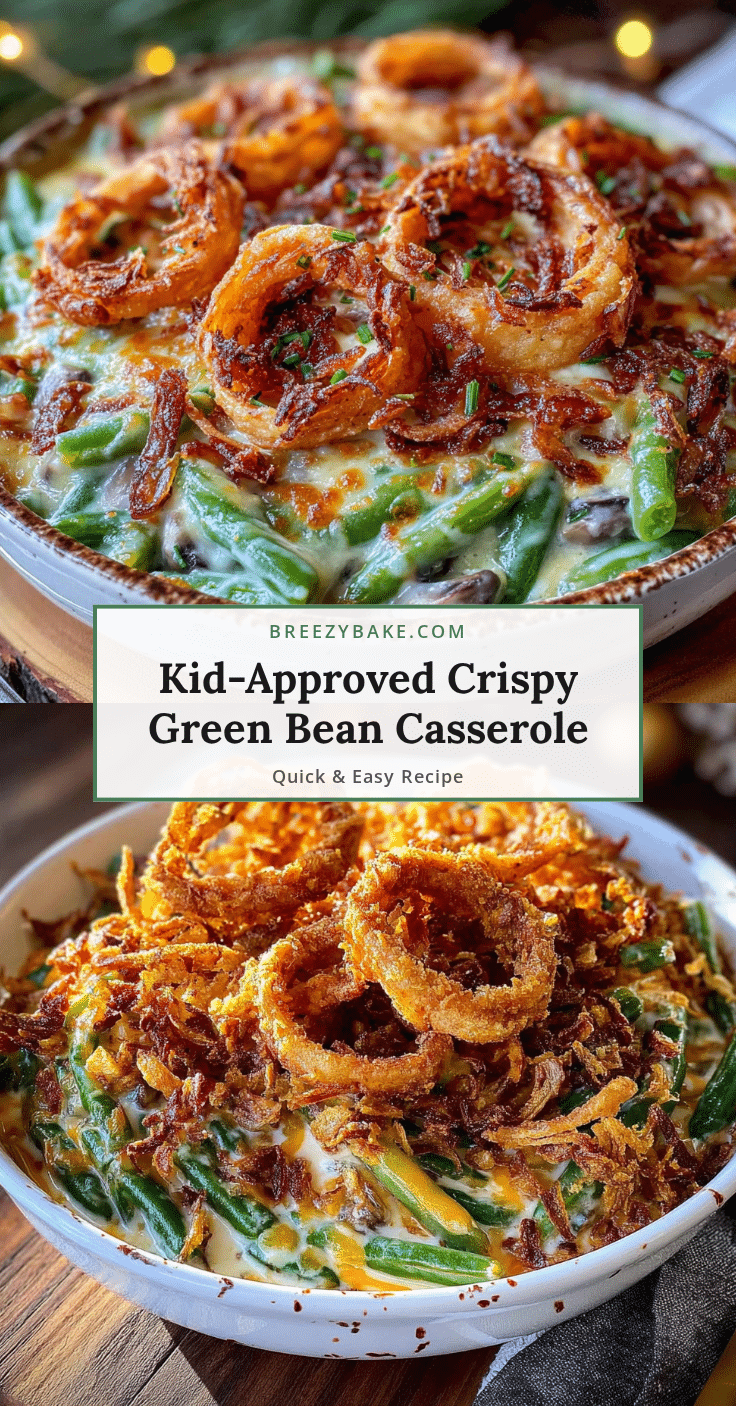
Kid-Approved Crispy Green Bean Casserole | Easy 25-Minute Side

This Kid-Approved Crispy Green Bean Casserole comes together in 25 minutes flat. The green beans stay bright and tender-crisp, the creamy sauce is rich without being heavy, and the crispy topping stays crunchy even the next day.
- Prep Time: 10 minutes
- Cook Time: 15 minutes
- Total Time: 25 minutes
- Yield: 6 servings 1x
- Category: Side Dish
- Cuisine: American
Ingredients
- 1 pound fresh green beans, trimmed and halved
- 2 tablespoons unsalted butter
- 1 medium yellow onion, diced (about 1 cup)
- 3 cloves garlic, minced
- 2 tablespoons all-purpose flour
- 1 cup whole milk
- 1/2 cup heavy cream
- 1/2 teaspoon salt
- 1/4 teaspoon black pepper
- 1/4 teaspoon garlic powder
- 1/4 teaspoon onion powder
- 1 cup crispy fried onions
- 1/2 cup panko breadcrumbs
- 2 tablespoons melted butter
- 1/4 cup grated Parmesan cheese (optional)
Instructions
- Preheat your oven to 400°F (200°C). Trim the ends off your green beans and cut them in half into bite-sized pieces (about 2 inches long).
- Blanch the green beans: Bring a large pot of salted water to a boil. Drop in the green beans and cook for exactly 2 minutes. Drain immediately and plunge into a bowl of ice water. Let sit for a couple minutes, then drain well and pat dry with a clean kitchen towel.
- Start the sauce: In a large skillet, melt 2 tablespoons of butter over medium heat. Add the diced onion and cook for 3-4 minutes until soft and translucent. Add the minced garlic and cook for another 30 seconds until fragrant.
- Make the roux: Sprinkle the flour over the onions and garlic. Stir constantly for 1-2 minutes until the mixture is thick and pasty and smells nutty and toasty.
- Add the milk and cream: Slowly pour in the milk while whisking constantly. Then add the heavy cream. Keep whisking until the sauce thickens, about 2-3 minutes. It should coat the back of a spoon.
- Season the sauce: Stir in the salt, pepper, garlic powder, and onion powder. Taste and adjust seasoning if needed.
- Combine everything: Add the blanched green beans to the sauce. Stir gently until every bean is coated. Pour the mixture into a greased 8×8-inch baking dish and spread evenly.
- Make the topping: In a small bowl, mix the crispy fried onions, panko breadcrumbs, melted butter, and Parmesan cheese (if using). Toss until every crumb is coated in butter. Sprinkle evenly over the green beans.
- Bake until golden: Bake for 12-15 minutes, until the topping is golden brown and the sauce is bubbly around the edges.
- Rest before serving: Let the casserole sit for 5 minutes after coming out of the oven to allow the sauce to set.
Notes
Don’t skip the blanching step for perfect tender-crisp green beans. Watch your heat with the sauce—medium heat and constant stirring prevent scorching. The panko breadcrumbs are key to a crunchy topping that stays crispy. You can assemble the casserole (without topping) a day ahead; add topping and bake with 5 extra minutes. Double the recipe for a crowd using a 9×13 pan and add 5-7 minutes to baking time.
Nutrition
- Serving Size: 1 cup
- Calories: 245
- Sugar: 6
- Sodium: 420
- Fat: 16
- Saturated Fat: 9
- Carbohydrates: 20
- Fiber: 3
- Protein: 6
Keywords: green bean casserole, crispy green bean casserole, kid-friendly side dish, easy side dish, 25-minute recipe, Thanksgiving side, comfort food


