My sister asked why I couldn’t just use pumpkin purée straight from the can instead of roasting fresh pumpkin for scones. I started to explain why that wouldn’t work—something about moisture content and texture integrity. Then I stopped. Honestly, I had no good reason except that I’d always done it the “proper” way, and proper felt important. I grabbed the can, shrugged, and said, “Let’s find out.”
That Tuesday afternoon turned into a beautiful kitchen mess. There was flour on the dog, a smear of pumpkin on the microwave handle, and my sister looking at me with that “I told you so” grin I still haven’t lived down. But the scones? They were perfect. Light, tender, with that cozy pumpkin-cinnamon warmth that makes you want to curl up on the couch. The canned purée worked just as well as the fancy roasted stuff—maybe better, because it kept the scones from drying out.
I’ve made these Lighter Cinnamon Pumpkin Scones with Maple Glaze at least a dozen times since then. They’ve become my go-to for fall mornings when I want something that feels indulgent but doesn’t leave me sluggish. You know that feeling—when you want a bakery treat but also want to feel good about eating it? That’s exactly what these are. They’re lighter than traditional scones, thanks to a few smart swaps, but they still have that buttery, flaky texture and the sweet maple drizzle that makes them irresistible. My sister still brings up that afternoon every single time I make them. I let her.
Why You’ll Love This Recipe
These aren’t your typical heavy, dry scones that crumble into a thousand pieces. They’re soft, tender, and actually satisfying—without the sugar crash an hour later. I’ve tested this recipe more times than I care to count, tweaking the fat content and sweetener ratios until everything clicked. Here’s what makes them special:
- Quick & Easy: From mixing bowl to cooling rack in under 35 minutes. Perfect for weekday mornings when you want something special but don’t have time to fuss.
- Simple Ingredients: No weird flours or hard-to-find extracts. You probably have most of these in your pantry right now, minus the pumpkin.
- Perfect for Fall Gatherings: Great for brunch, Thanksgiving morning, or cozy coffee dates with friends. They travel well, too.
- Crowd-Pleaser: I brought these to a neighborhood potluck and three people asked for the recipe before the plate was empty.
- Unbelievably Delicious: The texture is what gets everyone. They’re light but not crumbly, sweet but not cloying, with that maple glaze that seeps into every crevice.
What sets this recipe apart is the balance. I swapped some butter for Greek yogurt to keep them tender without the extra saturated fat, and used just enough maple syrup in the glaze to satisfy that sweet tooth. It’s comfort food reimagined—healthier, faster, but with the same soul-soothing satisfaction that makes you close your eyes after the first bite. Perfect for impressing guests without stress, or turning a simple Tuesday into something memorable.
What Ingredients You Will Need
This recipe uses simple, wholesome ingredients to deliver bold flavor and satisfying texture without the fuss. Most are pantry staples, and the substitutions are easy if you need them.
- All-purpose flour, 2 cups (250g) – gives the scones structure without making them dense. I prefer King Arthur for consistent results, but any brand works.
- Pumpkin purée, ½ cup (120g) – canned is fine! Look for 100% pumpkin, not pumpkin pie filling. Libby’s is my go-to for consistent moisture content.
- Greek yogurt, ¼ cup (60g) – plain, full-fat or 2% works best. This replaces some of the butter and keeps the scones tender. (Use dairy-free coconut yogurt if needed.)
- Unsalted butter, 3 tablespoons (42g), cold and cubed – just enough for flakiness without going overboard.
- Maple syrup, 2 tablespoons (30ml) – adds sweetness and that cozy fall flavor. Use real maple syrup, not pancake syrup.
- Large egg, 1, room temperature – helps bind everything together.
- Brown sugar, 2 tablespoons (25g), packed – for depth of sweetness. Coconut sugar works too if you’re avoiding refined sugar.
- Baking powder, 2 teaspoons – make sure it’s fresh for proper rise.
- Baking soda, ½ teaspoon – balances the acidity from the yogurt and pumpkin.
- Salt, ¼ teaspoon – enhances all the flavors.
- Ground cinnamon, 1½ teaspoons – the star spice here. I use Saigon cinnamon for its warmth.
- Ground ginger, ½ teaspoon – adds a little zing.
- Ground nutmeg, ¼ teaspoon – freshly grated if you have it.
- Ground cloves, ⅛ teaspoon – just a pinch for depth.
- For the Maple Glaze:
- Powdered sugar, ¾ cup (90g)
- Maple syrup, 2 tablespoons (30ml)
- Milk, 1-2 teaspoons (5-10ml), as needed for consistency
For the best texture, make sure your butter is really cold. I pop mine in the freezer for 10 minutes before cutting it into the flour. And if you’re using fresh pumpkin purée, drain it slightly on paper towels—the canned stuff is more consistent, which is why I prefer it here.
Equipment Needed
You don’t need fancy gadgets for these scones, which is part of why I make them so often. Here’s what you’ll need:
- Large mixing bowl – for combining dry ingredients
- Pastry cutter or two forks – for cutting butter into flour. I’ve used both; the pastry cutter is faster, but forks work in a pinch.
- Whisk – for mixing wet ingredients and the glaze
- Baking sheet – lined with parchment paper for easy cleanup
- Bench scraper or sharp knife – for cutting the dough into wedges. A bench scraper gives cleaner edges.
- Cooling rack – so the glaze sets properly without getting soggy
- Measuring cups and spoons – accuracy matters here, especially with the baking powder
If you don’t have a pastry cutter, you can use a food processor—just pulse the butter into the flour until it looks like coarse meal. Be careful not to over-process, or the scones will be tough. I learned that the hard way my first time.
Preparation Method
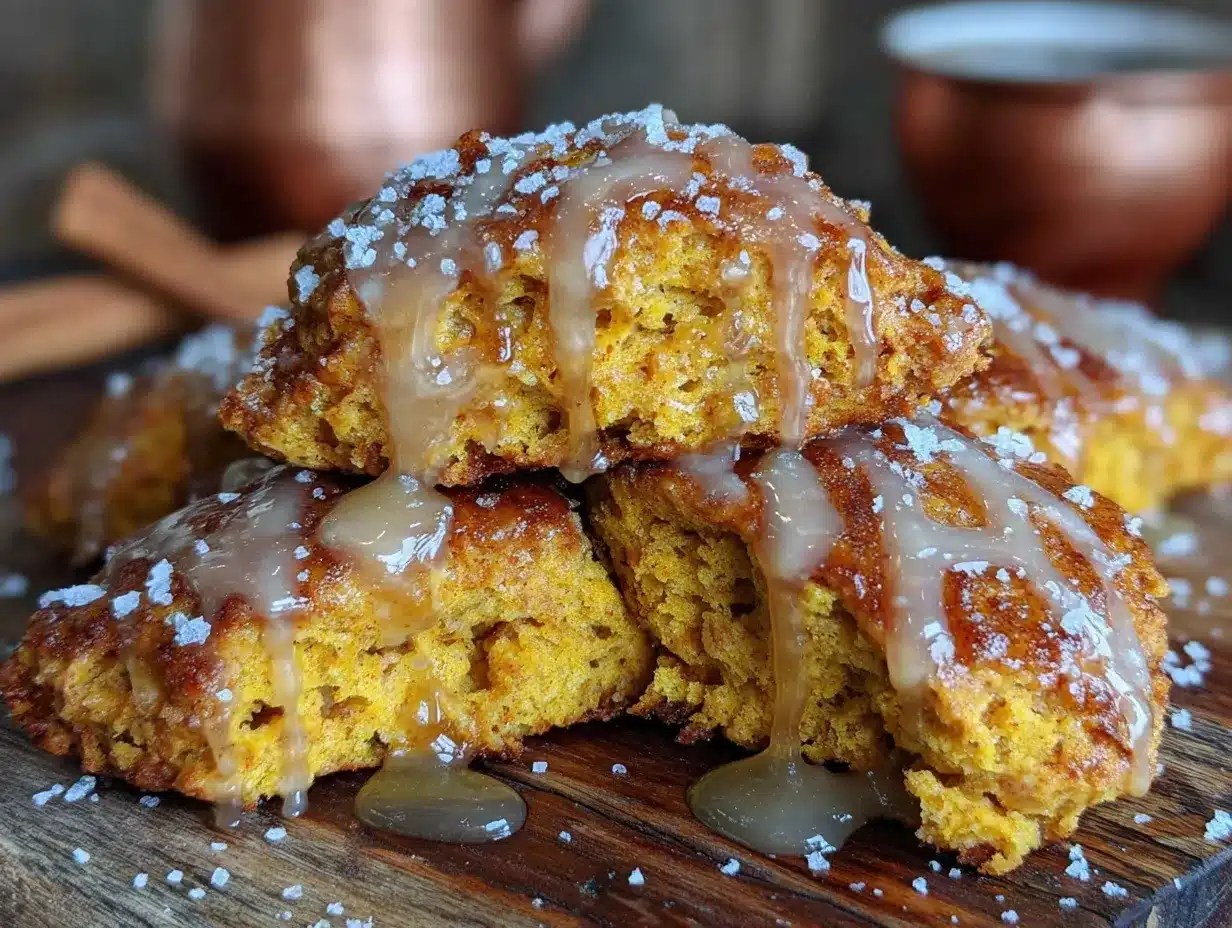
Preheat your oven to 400°F (200°C) and line a baking sheet with parchment paper. This recipe comes together quickly, so have everything measured and ready before you start.
- Mix the dry ingredients: In a large bowl, whisk together the flour, brown sugar, baking powder, baking soda, salt, cinnamon, ginger, nutmeg, and cloves. Make sure the spices are evenly distributed—nobody wants a clump of cinnamon in one bite.
- Cut in the butter: Add the cold, cubed butter to the flour mixture. Use a pastry cutter or two forks to cut the butter into the flour until it resembles coarse crumbs with some pea-sized butter pieces. It should look like wet sand with a few small lumps. (Those lumps create flaky layers, so don’t overdo it.)
- Combine the wet ingredients: In a separate small bowl, whisk together the pumpkin purée, Greek yogurt, maple syrup, and egg until smooth. The mixture should be thick but pourable.
- Bring it together: Pour the wet ingredients into the dry ingredients. Stir with a spatula just until the dough comes together. It will be sticky—that’s normal. Don’t overmix, or the scones will be tough. Stop when you no longer see streaks of flour.
- Shape the dough: Turn the dough out onto a lightly floured surface. Gently pat it into a circle about ¾-inch thick (2cm). Use a bench scraper or sharp knife to cut the circle into 8 wedges, like a pizza. (For cleaner edges, dip the knife in flour between cuts.)
- Bake: Place the wedges on the prepared baking sheet, spacing them about 2 inches apart. Bake for 14-16 minutes, until the edges are lightly golden and the tops spring back when touched. The kitchen should smell like fall by now.
- Cool: Transfer the scones to a cooling rack and let them cool for at least 10 minutes before glazing. They need to be mostly cool, or the glaze will slide right off.
- Make the glaze: While the scones cool, whisk together the powdered sugar and maple syrup in a small bowl. Add milk 1 teaspoon at a time until the glaze is thick but pourable—it should coat the back of a spoon. Drizzle over the cooled scones and let set for 5 minutes before serving.
The scones should feel slightly firm on the outside but tender inside. If they feel doughy, they might need an extra minute or two next time—ovens vary, so trust your senses.
Cooking Tips & Techniques
I’ve made plenty of mistakes with scones over the years, and I’m happy to share them so you don’t have to repeat them. Here’s what I’ve learned:
Keep everything cold: This is the number one rule for flaky scones. If your butter warms up, the scones will spread and turn out flat and greasy. I chill my mixing bowl and pastry cutter for 10 minutes before starting if my kitchen is warm.
Don’t overwork the dough: Scones are not bread. You’re not developing gluten here—you’re trying to avoid it. Mix until just combined, and handle the dough as little as possible. The first time I made these, I kneaded the dough like pizza dough, and the scones came out tough enough to use as hockey pucks.
Use a light hand with the flour: When shaping the dough, use just enough flour to keep it from sticking. Too much extra flour will dry out the scones. I keep a small bowl of flour nearby and dip my hands in it instead of dusting the whole surface.
Check your baking powder: If your baking powder is old, your scones won’t rise properly. Test it by dropping a teaspoon into hot water—if it fizzes vigorously, it’s good. If not, buy a new can.
Let them cool completely: I know it’s tempting to glaze warm scones, but trust me—the glaze will turn into a runny mess. I once glazed them after 5 minutes and ended up with a puddle of sugary syrup on the plate. Patience pays off here.
Multitask smartly: While the scones are baking, clean up your workspace and make the glaze. That way, you’re not scrambling when they come out of the oven.
Variations & Adaptations
These scones are forgiving, so feel free to play around. Here are some variations I’ve tried and loved:
- Gluten-Free Version: Substitute the all-purpose flour with a 1:1 gluten-free baking blend that contains xanthan gum. I’ve used Bob’s Red Mill with good results. The texture will be slightly more crumbly, but still delicious.
- Vegan Adaptation: Replace the Greek yogurt with dairy-free yogurt (coconut or soy work well) and use a flax egg (1 tablespoon ground flaxseed + 3 tablespoons water, let sit for 5 minutes). The scones will be a bit denser but still tasty.
- Add Mix-Ins: Fold in ½ cup of chopped pecans, walnuts, or dried cranberries after combining the wet and dry ingredients. I did this with toasted pecans last Thanksgiving, and they were a hit.
- Spice It Up: Swap the pumpkin pie spice blend for the individual spices if you have it on hand. Use 2 teaspoons of pumpkin pie spice instead of the cinnamon, ginger, nutmeg, and cloves.
- Chocolate Lover’s Twist: Add ⅓ cup of dark chocolate chips to the dough. The bitterness of the chocolate pairs beautifully with the pumpkin and maple. I tried this on a whim and now it’s my secret indulgence.
- Savory Option: Skip the spices and maple syrup, and add ½ cup of shredded cheddar cheese and 2 tablespoons of chopped fresh sage. Bake as directed, then brush with melted butter. Perfect for breakfast sandwiches.
For a lower-sugar version, reduce the brown sugar to 1 tablespoon and use a sugar-free maple syrup in the glaze. The scones won’t be as sweet, but the pumpkin flavor shines through more.
Serving & Storage Suggestions
These scones are best served slightly warm, with the glaze still soft and sticky. I like to pair them with a hot cup of coffee or chai latte for the ultimate fall experience. For a more indulgent breakfast, serve them alongside scrambled eggs and fresh fruit.
They also make a great afternoon snack—just reheat one in the microwave for 10 seconds to bring back that fresh-from-the-oven feel. If you’re serving them at a brunch, arrange them on a pretty plate with a small pitcher of extra maple glaze for drizzling.
Storage: Store leftover scones in an airtight container at room temperature for up to 2 days. The glaze will soften slightly, but they’ll still be delicious. For longer storage, place them in the refrigerator for up to 5 days. Let them come to room temperature before serving, or warm them in the oven at 300°F for 5 minutes.
Freezing: These freeze beautifully. Freeze unglazed scones in a single layer on a baking sheet, then transfer to a freezer-safe bag for up to 3 months. When you’re ready to enjoy them, thaw at room temperature and glaze fresh. The flavor actually improves after freezing—the spices meld together more.
Reheating: For best results, reheat scones in a 350°F oven for 5-7 minutes. The microwave works in a pinch, but the scones will be softer and less crisp. If you’re reheating glazed scones, do it gently to avoid melting the glaze into a puddle.
Nutritional Information & Benefits
Here’s the estimated nutritional breakdown per scone (based on 8 servings, with glaze):
| Nutrient | Amount |
|---|---|
| Calories | 215 |
| Total Fat | 6g |
| Saturated Fat | 3.5g |
| Cholesterol | 35mg |
| Sodium | 220mg |
| Total Carbohydrates | 37g |
| Dietary Fiber | 2g |
| Sugars | 18g |
| Protein | 5g |
These scones are lighter than traditional versions, thanks to the Greek yogurt replacing some butter and the reduced sugar content. Pumpkin is packed with vitamin A and fiber, which supports eye health and digestion. The cinnamon and ginger add anti-inflammatory benefits, and the maple syrup provides a natural sweetness with a lower glycemic impact than refined sugar.
If you’re watching your sugar intake, skip the glaze or use a sugar-free alternative. The scones themselves are sweet enough to enjoy plain. For a higher protein version, add an extra tablespoon of Greek yogurt and reduce the flour by the same amount.
Conclusion
These Lighter Cinnamon Pumpkin Scones with Maple Glaze have become my fall staple for a reason. They’re everything I want in a seasonal treat—warm, comforting, and just sweet enough to feel special, but light enough that I don’t regret reaching for a second one. They remind me that eating well doesn’t mean sacrificing joy, and that sometimes the best recipes come from letting go of perfection.
I’d love to hear how yours turn out. Did you add pecans? Skip the glaze? Make them for a crowd? Drop a comment below and let me know—I read every single one and answer questions as fast as I can. And if you share a photo on social media, tag me so I can see your beautiful creations. Happy baking, friends!
Frequently Asked Questions
Can I use fresh pumpkin instead of canned?
Yes, but you’ll need to drain it well. Fresh pumpkin purée has more water than canned, which can make the dough too sticky. Spread the purée on paper towels and let it sit for 10 minutes before using.
Why did my scones spread out flat?
This usually happens when the butter is too warm or the dough is overmixed. Make sure your butter is cold straight from the fridge, and handle the dough as little as possible. Chilling the shaped scones for 15 minutes before baking can also help.
Can I make these scones ahead of time?
Absolutely. Shape the dough, cut the scones, and freeze them on a baking sheet. Once frozen, transfer to a bag and bake straight from frozen, adding 2-3 minutes to the baking time. Glaze after baking.
How do I make the glaze thicker or thinner?
For a thicker glaze, add more powdered sugar. For a thinner drizzle, add a few more drops of milk. The perfect consistency is thick enough to coat the back of a spoon but thin enough to drip slowly off the scone.
Can I use a different sweetener in the scones?
Yes, you can substitute the brown sugar with coconut sugar, maple sugar, or even a granulated monk fruit blend. Keep in mind that liquid sweeteners like honey or agave will change the moisture content, so you may need to reduce the pumpkin slightly.
Pin This Recipe!
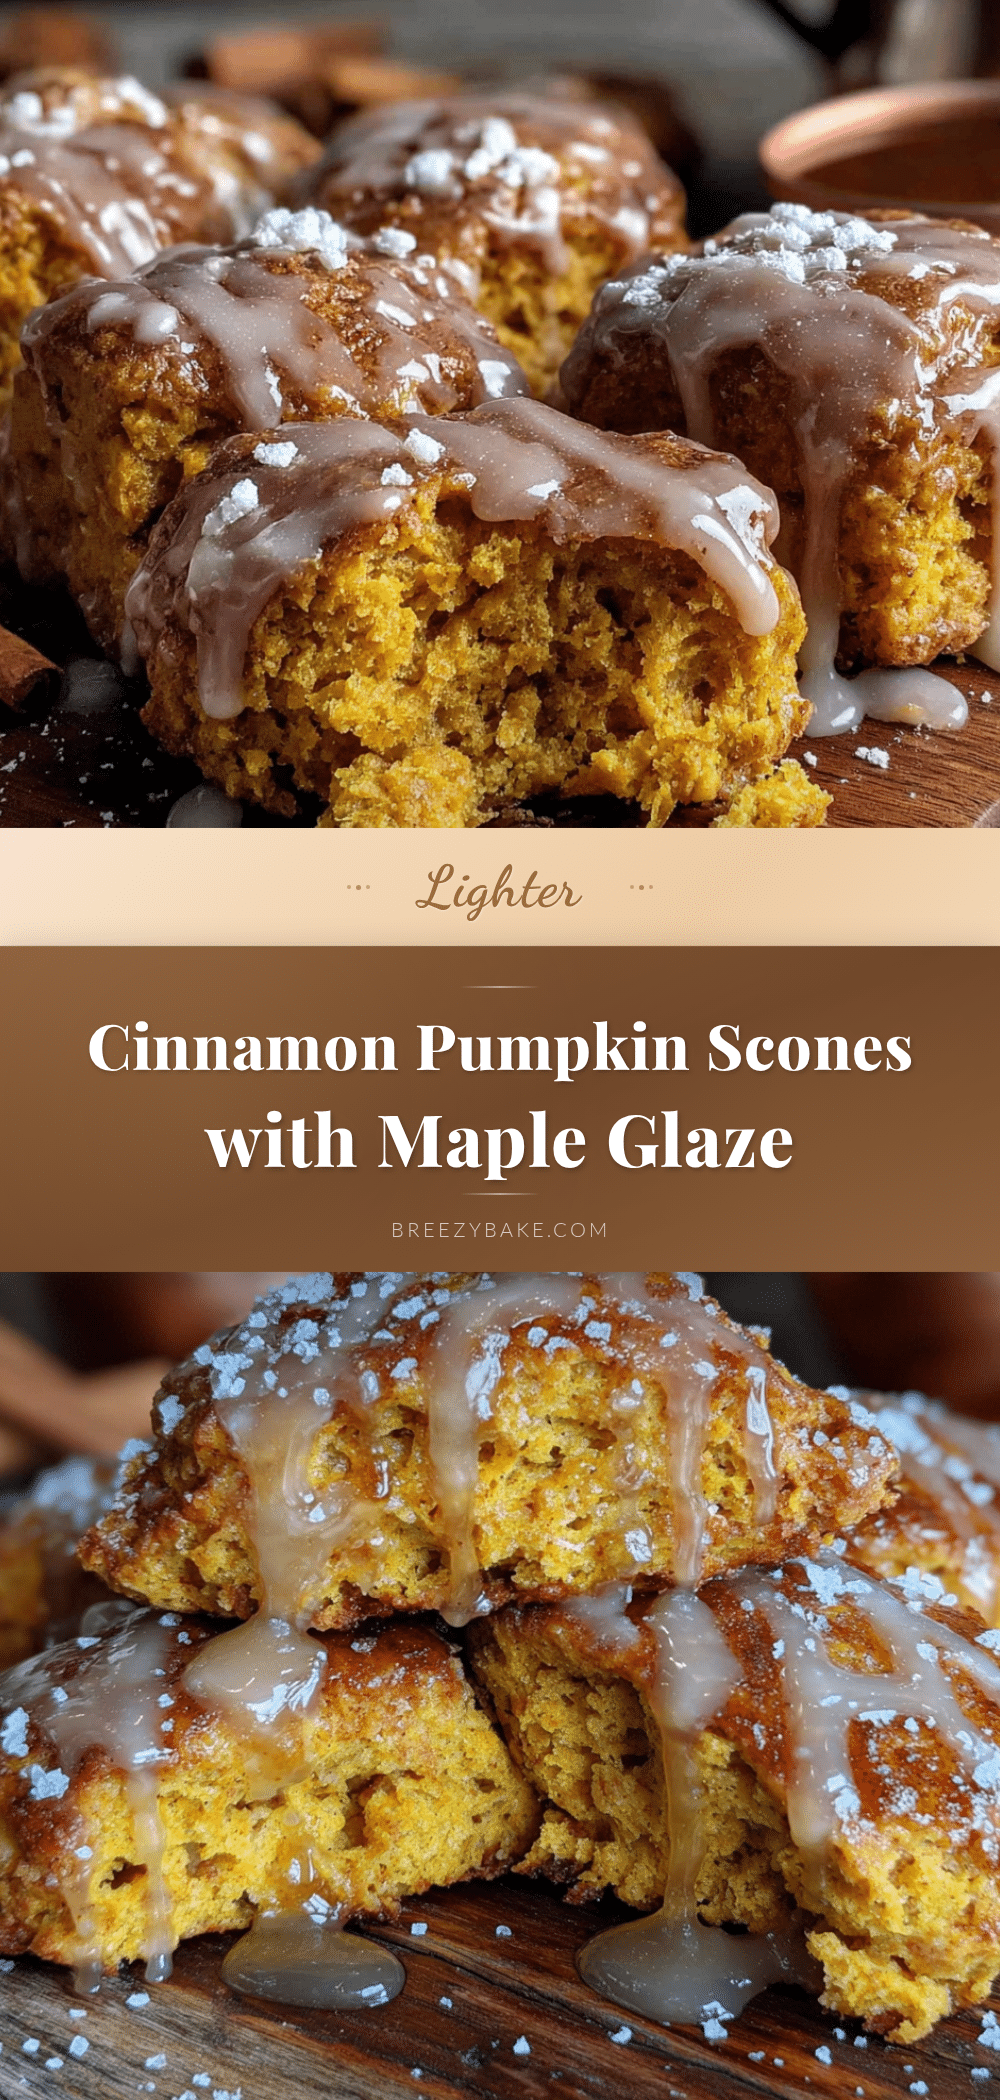
Lighter Cinnamon Pumpkin Scones with Easy Maple Glaze

These lighter pumpkin scones are tender, flaky, and perfectly spiced, with a sweet maple glaze that makes them irresistible. Made with Greek yogurt and real pumpkin purée, they’re a healthier fall treat that comes together in under 35 minutes.
- Prep Time: 15 minutes
- Cook Time: 16 minutes
- Total Time: 31 minutes
- Yield: 8 servings 1x
- Category: Breakfast, Brunch, Dessert
- Cuisine: American
Ingredients
- 2 cups (250g) all-purpose flour
- ½ cup (120g) pumpkin purée (canned, 100% pumpkin)
- ¼ cup (60g) plain Greek yogurt (full-fat or 2%)
- 3 tablespoons (42g) unsalted butter, cold and cubed
- 2 tablespoons (30ml) maple syrup (real maple syrup)
- 1 large egg, room temperature
- 2 tablespoons (25g) packed brown sugar
- 2 teaspoons baking powder
- ½ teaspoon baking soda
- ¼ teaspoon salt
- 1½ teaspoons ground cinnamon
- ½ teaspoon ground ginger
- ¼ teaspoon ground nutmeg
- ⅛ teaspoon ground cloves
- For the Maple Glaze:
- ¾ cup (90g) powdered sugar
- 2 tablespoons (30ml) maple syrup
- 1–2 teaspoons (5-10ml) milk (as needed for consistency)
Instructions
- Preheat oven to 400°F (200°C) and line a baking sheet with parchment paper.
- In a large bowl, whisk together flour, brown sugar, baking powder, baking soda, salt, cinnamon, ginger, nutmeg, and cloves until evenly distributed.
- Add cold, cubed butter to the flour mixture. Use a pastry cutter or two forks to cut the butter into the flour until it resembles coarse crumbs with some pea-sized butter pieces.
- In a separate small bowl, whisk together pumpkin purée, Greek yogurt, maple syrup, and egg until smooth.
- Pour the wet ingredients into the dry ingredients. Stir with a spatula just until the dough comes together (it will be sticky; do not overmix).
- Turn the dough out onto a lightly floured surface. Gently pat it into a circle about ¾-inch thick (2cm). Use a bench scraper or sharp knife to cut the circle into 8 wedges.
- Place the wedges on the prepared baking sheet, spacing them about 2 inches apart. Bake for 14-16 minutes, until edges are lightly golden and tops spring back when touched.
- Transfer scones to a cooling rack and let cool for at least 10 minutes before glazing.
- While scones cool, make the glaze: whisk together powdered sugar and maple syrup in a small bowl. Add milk 1 teaspoon at a time until the glaze is thick but pourable.
- Drizzle glaze over cooled scones and let set for 5 minutes before serving.
Notes
Keep butter very cold for flaky scones. Do not overwork the dough. For best results, use canned pumpkin purée (not pumpkin pie filling). Scones can be frozen unglazed for up to 3 months. Glaze after thawing and reheating.
Nutrition
- Serving Size: 1 scone
- Calories: 215
- Sugar: 18
- Sodium: 220
- Fat: 6
- Saturated Fat: 3.5
- Carbohydrates: 37
- Fiber: 2
- Protein: 5
Keywords: pumpkin scones, cinnamon scones, maple glaze, lighter scones, fall baking, healthy scones, pumpkin recipes, breakfast treats


