This was supposed to be a full-sized pumpkin bundt cake for a fall potluck. I had the recipe memorized, the butter softening on the counter, and my grandmother’s heavy bundt pan already greased. Then my neighbor called—could I watch her toddler for an hour? “Sure,” I said, because that’s what you do. Forty-five minutes later, I was back in the kitchen, the butter now a sad, soft puddle, and I realized I was out of all-purpose flour. I had a bag of whole wheat pastry flour in the pantry and some Greek yogurt I’d bought for breakfast. I stood there, honestly feeling a little defeated. The cake was supposed to be a showstopper, and now it was turning into a science experiment I hadn’t signed up for.
I almost scrapped the whole thing. But the pumpkin puree was already open, and the potluck was in three hours. So I made a choice—I swapped the butter for a mix of yogurt and a little oil, cut the sugar by a third, and used that whole wheat pastry flour. I poured the batter into my mini bundt pans instead, because at least those would bake faster. I figured I’d end up with something edible, maybe a little dense, and I’d bring a store-bought pie as backup. You know that feeling when you’re already planning your apology before the food is even served?
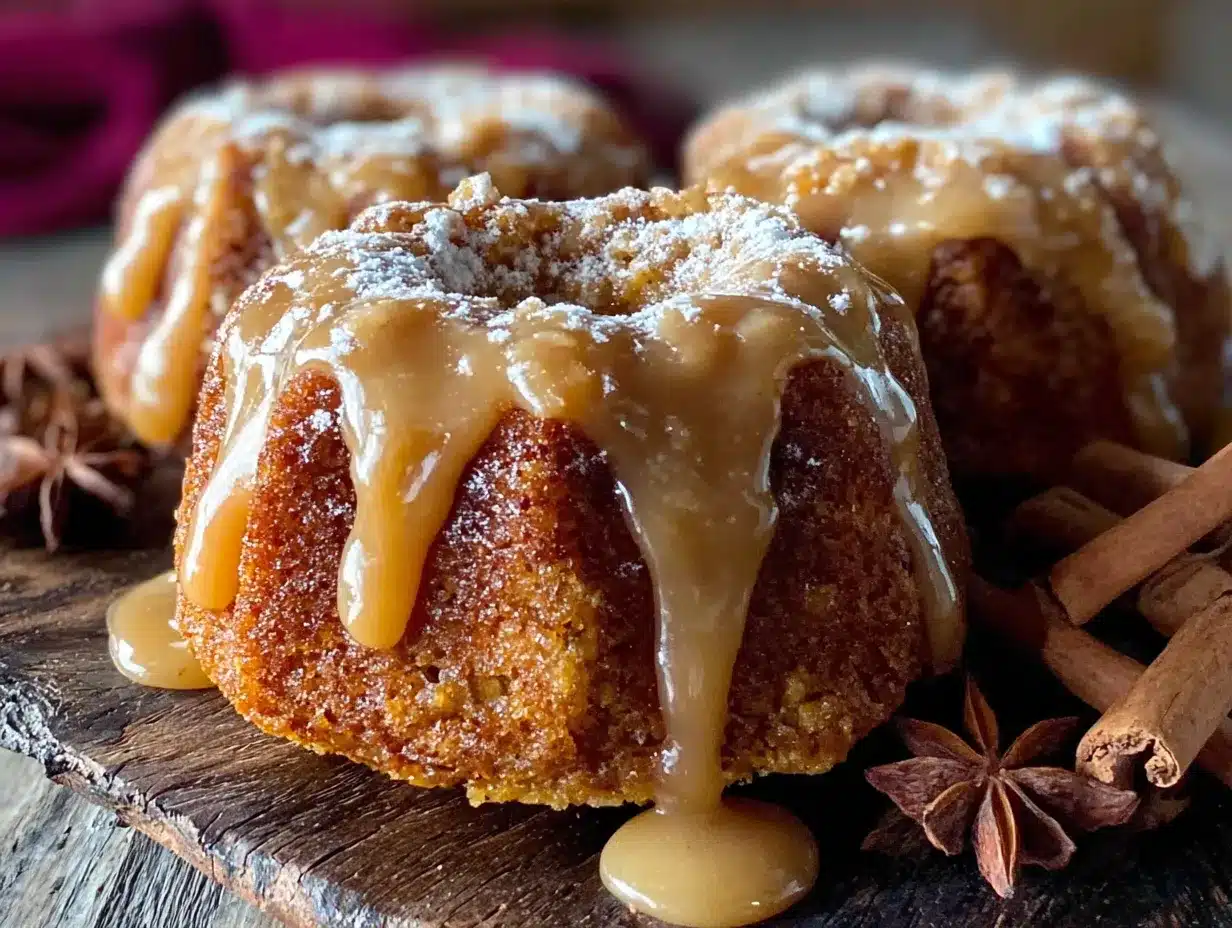
What came out of the oven was nothing like I expected. The mini cakes domed up perfectly, the edges were a deep golden brown, and the whole kitchen smelled like fall had exploded inside it. They were lighter than any pumpkin cake I’d ever made—tender, almost fluffy, with that warm spice flavor you crave when the weather turns. I whipped up a quick maple glaze because I had nothing to lose, and let me tell you, I ate two before they even cooled. I brought them to the potluck, still a little nervous, and they disappeared in ten minutes. Someone asked for the recipe, and I had to admit I didn’t really have one—I just grabbed things and hoped. That moment, standing there with an empty plate, I knew this happy accident was something I’d be making for years. And honestly, I think these lighter mini pumpkin bundt cakes with maple glaze are better than the original ever would have been.
Why You’ll Love This Recipe
I have tested this recipe more times than I care to count, tweaking the flour ratio, playing with the spice blend, and even trying it with different sweeteners. After all that trial and error, I can tell you with confidence—this version is the one. It brings together everything you want in a fall dessert without the heavy feeling that usually follows.
- Quick & Easy: These mini bundt cakes come together in about 35 minutes from start to finish. No stand mixer required, no complicated techniques—just a bowl, a whisk, and a little patience while they bake.
- Simple Ingredients: You probably have most of these in your kitchen right now. Whole wheat pastry flour, pumpkin puree, Greek yogurt, maple syrup—nothing fancy, nothing hard to find.
- Perfect for Fall Gatherings: Whether it’s a Thanksgiving dessert table, a cozy brunch, or a weekday treat that feels special, these little cakes fit right in. They’re also portion-controlled, which makes them great for parties.
- Crowd-Pleaser: I’ve served these to kids, adults, and even my picky aunt who “doesn’t do healthy desserts.” Every single person has asked for seconds. They don’t taste “light”—they just taste good.
- Unbelievably Delicious: The texture is what gets people. It’s tender and moist without being dense or gummy. The maple glaze adds that sweet, buttery finish that makes you close your eyes after the first bite.
What makes this recipe different from all the other pumpkin cakes out there is the technique. Using Greek yogurt instead of all the butter, and whole wheat pastry flour instead of all-purpose, creates a crumb that’s surprisingly light. It’s not a compromise—it’s an upgrade. This is comfort food reimagined: healthier, faster, and honestly, more satisfying than the original.
What Ingredients You Will Need
This recipe uses simple, wholesome ingredients to deliver that cozy pumpkin flavor and tender texture without any fuss. Most of these are pantry staples, and I’ve included some notes on substitutions so you can adapt based on what you have.
For the Mini Pumpkin Bundt Cakes
- 1 ½ cups whole wheat pastry flour – This is my secret weapon for lighter baked goods. It has the fiber of whole wheat but a finer texture that keeps cakes tender. Regular all-purpose flour works too, but the texture won’t be quite as delicate.
- 1 teaspoon baking soda – Helps the cakes rise and gives them that soft, airy crumb.
- ½ teaspoon baking powder – Adds extra lift, especially important with the whole wheat flour.
- 2 teaspoons pumpkin pie spice – I use store-bought for convenience, but you can make your own with cinnamon, nutmeg, ginger, and cloves. I recommend the McCormick brand for consistent flavor.
- ½ teaspoon salt – Balances the sweetness and brings out the warm spices.
- 1 cup pumpkin puree – Not pumpkin pie filling—make sure you grab the 100% pure pumpkin. Libby’s is my go-to because it’s consistently thick and not watery.
- ½ cup plain Greek yogurt – This replaces most of the butter and adds moisture without the fat. Full-fat or 2% works best; avoid non-fat as it can make the cakes a bit dry.
- ¼ cup coconut oil, melted – A little oil keeps the cakes tender. You can substitute with melted butter or any neutral oil like avocado or grapeseed.
- ½ cup maple syrup – Adds natural sweetness and pairs beautifully with the pumpkin. Use pure maple syrup, not pancake syrup—the flavor is much richer.
- ¼ cup brown sugar, packed – Just enough for that deep, caramel-like sweetness. Coconut sugar works well here too.
- 2 large eggs, room temperature – Room temperature eggs blend more evenly into the batter. If you’re in a rush, place them in a bowl of warm water for 5 minutes.
- 1 teaspoon vanilla extract – Enhances all the warm flavors. I always use pure vanilla extract, not imitation.
For the Maple Glaze
- ½ cup powdered sugar – Sifted to avoid lumps. You can make your own by blending regular sugar in a high-speed blender.
- 2 tablespoons pure maple syrup – The star of the glaze. Use a darker grade for a more robust maple flavor.
- 1-2 tablespoons milk – Any milk works—dairy, almond, or oat. Add slowly until you reach your desired consistency.
- Pinch of salt – Just a tiny bit to cut the sweetness and make the maple flavor pop.
Substitution Notes
If you need a dairy-free version, use coconut yogurt instead of Greek yogurt and your favorite plant-based milk in the glaze. For a gluten-free option, swap the whole wheat pastry flour with a good 1:1 gluten-free baking blend—I like King Arthur Measure for Measure. The texture will be slightly different, but still delicious. And if you don’t have pumpkin pie spice, mix 1 teaspoon cinnamon, ½ teaspoon nutmeg, ¼ teaspoon ginger, and ¼ teaspoon cloves.
Equipment Needed
You don’t need a lot of fancy tools for this recipe, which is part of why I love it. Here’s what you’ll need:
- Mini bundt pan – A 6-cavity mini bundt pan is ideal. I use a Nordic Ware one that I’ve had for years, and it releases cakes beautifully if greased well. If you don’t have one, a standard muffin tin works—just adjust the baking time to 15-18 minutes.
- Large mixing bowl – For whisking the dry ingredients. Any bowl works, but a wide one makes mixing easier.
- Medium mixing bowl – For combining the wet ingredients.
- Whisk – A good whisk helps incorporate air into the batter. I prefer a balloon whisk for this.
- Rubber spatula – For folding the batter and scraping every last bit into the pan. A silicone one is best so it doesn’t scratch your pan.
- Measuring cups and spoons – Accurate measurements matter in baking. I use metal measuring cups for dry ingredients and glass ones for liquids.
- Cooling rack – Essential for letting the cakes cool evenly. If you don’t have one, a wire rack from your oven works too.
- Small saucepan or microwave-safe bowl – For making the glaze. I usually do it in a small bowl in the microwave, 15 seconds at a time.
One tip I learned the hard way—always grease your mini bundt pan generously, even if it’s non-stick. I use a pastry brush to coat every nook and cranny with melted butter or baking spray that contains flour. Trust me, there’s nothing sadder than a perfectly baked cake that refuses to leave the pan.
Preparation Method
Making these lighter mini pumpkin bundt cakes with maple glaze is straightforward, but I’ve included some sensory cues and tips so you know exactly what to look for at each stage.
- Preheat your oven to 350°F (175°C). Position the rack in the center of the oven. While it’s heating, generously grease your mini bundt pan with melted butter or baking spray. I use a pastry brush to get into all the ridges—this step is non-negotiable if you want clean releases.
- Whisk the dry ingredients together. In a large bowl, combine the whole wheat pastry flour, baking soda, baking powder, pumpkin pie spice, and salt. Whisk them for about 20 seconds to aerate the flour and distribute the leavening agents evenly. You’ll see the spices swirl through the flour—that’s a good sign.
- Mix the wet ingredients in a separate bowl. In a medium bowl, whisk together the pumpkin puree, Greek yogurt, melted coconut oil, maple syrup, brown sugar, eggs, and vanilla extract. Whisk until the mixture is smooth and uniform. It will be thick and smell incredible already—like fall in a bowl. Make sure the coconut oil isn’t too hot when you add it, or it might cook the eggs. Let it cool for a minute if needed.
- Combine wet and dry ingredients. Pour the wet mixture into the bowl of dry ingredients. Use a rubber spatula to fold everything together gently. Stir just until you no longer see streaks of flour—about 12 to 15 strokes. Overmixing will make the cakes tough, so stop as soon as it comes together. The batter will be thick and slightly fluffy, not runny.
- Fill the mini bundt pan. Spoon the batter into the prepared pan, filling each cavity about ¾ full. I use a cookie scoop for even portions—it’s less messy than a spoon. The batter should mound slightly but not overflow. Don’t be tempted to fill them to the top; they need room to rise.
- Bake for 18-22 minutes. Place the pan in the preheated oven and bake until the tops are golden brown and a toothpick inserted into the center of a cake comes out clean or with just a few moist crumbs. At 18 minutes, check them—every oven runs a little differently. You’ll smell that warm pumpkin spice aroma filling your kitchen, which is your cue that they’re almost done.
- Cool in the pan for 10 minutes. This is crucial. Set the pan on a wire rack and let the cakes cool for exactly 10 minutes. If you try to remove them too soon, they’ll fall apart. If you wait too long, they might stick. After 10 minutes, run a thin knife around the edges to loosen any stubborn spots.
- Invert onto the cooling rack. Place the wire rack on top of the pan, then flip it over in one confident motion. Lift the pan off gently. If any cake sticks, tap the bottom of the pan lightly. Let the cakes cool completely on the rack—about 20 minutes—before glazing.
- Make the maple glaze. While the cakes cool, whisk together the powdered sugar, maple syrup, and a pinch of salt in a small bowl. Add milk one tablespoon at a time until the glaze is thick but pourable—it should coat the back of a spoon. If it’s too thin, add a little more powdered sugar. If it’s too thick, add a drop more milk.
- Glaze the cakes. Once the cakes are completely cool, drizzle the glaze over the tops using a spoon or a small measuring cup. Let it run down the sides naturally. For a cleaner look, place the cakes on a wire rack over a baking sheet to catch the drips. Let the glaze set for about 10 minutes before serving.
Cooking Tips & Techniques
After making these mini bundt cakes more times than I can count, I’ve picked up a few tricks that make a real difference. Here are the ones I wish someone had told me from the start.
Don’t skip the room temperature eggs. I know it seems fussy, but cold eggs can seize the coconut oil and make the batter lumpy. I learned this the hard way when my first batch came out with weird, dense spots. Now I always set my eggs out 30 minutes before baking, or I place them in a bowl of warm water for 5 minutes if I’m in a hurry.
Measure your flour correctly. Whole wheat pastry flour is lighter than all-purpose, but it can still pack down in the bag. Spoon it into your measuring cup and level it off with a knife—don’t scoop directly from the bag. Scooping can add up to 25% more flour, which will make your cakes dry. I did this once and ended up with cakes that crumbled like sand. Not my finest moment.
Let the batter rest for 5 minutes before baking. This is a tip I picked up from a pastry chef friend. Letting the batter sit allows the whole wheat flour to absorb the liquid, which results in a more tender crumb. It also gives the baking soda and powder a head start on creating those air bubbles. You’ll see tiny bubbles forming on the surface—that’s exactly what you want.
Use a toothpick to check for doneness, not just the color. The tops can look golden and set while the centers are still underdone. Insert a toothpick into the thickest part of a cake—if it comes out clean or with a few moist crumbs, they’re done. If there’s wet batter on it, give them another 2-3 minutes. I’ve pulled cakes too early before, and nothing is more disappointing than a sunken center.
Glaze when completely cool. I know it’s tempting to drizzle that maple glaze on while the cakes are still warm—I’ve done it, and the glaze just melts into a puddle. Wait until they’re at room temperature. The glaze will set into a beautiful, slightly firm layer that stays put. Patience pays off here.
Variations & Adaptations
One of the best things about this recipe is how flexible it is. I’ve tried several variations, and each one brought something new to the table. Here are a few you can try.
Vegan Version: Replace the Greek yogurt with an equal amount of coconut yogurt or applesauce. Use flax eggs instead of regular eggs—mix 2 tablespoons ground flaxseed with 6 tablespoons water and let it sit for 5 minutes until it thickens. For the glaze, use plant-based milk. The texture will be slightly denser, but the flavor is still spot-on.
Gluten-Free Option: Swap the whole wheat pastry flour with a 1:1 gluten-free baking blend that contains xanthan gum. I’ve tested this with King Arthur Measure for Measure, and it worked beautifully. Add an extra tablespoon of milk to the batter since gluten-free flours tend to absorb more liquid. The cakes won’t rise quite as high, but they’ll still be tender and delicious.
Spice it Up: If you want a more complex flavor, add ¼ teaspoon of cardamom or a pinch of black pepper to the spice mix. I tried this once on a whim, and the cardamom added this warm, almost floral note that paired perfectly with the maple glaze. It’s become my go-to for holiday gatherings.
Chocolate Pumpkin Version: For a richer twist, fold ¼ cup of mini chocolate chips into the batter before baking. Use dark chocolate chips for a less sweet option. The chocolate melts into little pockets throughout the cake, and it’s honestly incredible with the pumpkin spice. I made these for a Halloween party, and they were gone in minutes.
Add a Crunchy Topping: Before baking, sprinkle a mixture of chopped pecans and a little brown sugar on top of each cake. They’ll bake into a crunchy, caramelized crust that contrasts beautifully with the soft cake. Just be sure to grease the pan extra well if you add toppings, as they can stick.
Serving & Storage Suggestions
These lighter mini pumpkin bundt cakes with maple glaze are best served at room temperature, which lets the glaze set and the flavors meld together. I like to arrange them on a pretty cake stand for brunch or dessert, letting the golden glaze catch the light. They look almost too pretty to eat—almost.
For a more indulgent presentation, serve them with a dollop of whipped cream or a scoop of vanilla ice cream. The cold creaminess against the spiced cake is a match made in heaven. If you’re serving them for breakfast (no judgment here), a side of fresh fruit and a hot cup of coffee is all you need.
Storage: Store any leftover cakes in an airtight container at room temperature for up to 3 days. If you stack them, place a piece of parchment paper between layers to prevent the glaze from sticking. The cakes actually taste even better on day two—the spices have time to mellow and blend together.
Freezing: These freeze beautifully. Place the unglazed cakes on a baking sheet and freeze for 1 hour until firm, then transfer them to a freezer-safe bag or container. They’ll keep for up to 3 months. When you’re ready to enjoy them, thaw at room temperature for about 30 minutes, then make the glaze fresh and drizzle it on. I often double the batch and stash some in the freezer for unexpected guests or lazy Sunday mornings.
Reheating: If you prefer them warm, pop a cake in the microwave for 10-15 seconds. The glaze will soften slightly, but it’ll still hold its shape. You can also warm them in a 300°F oven for 5 minutes—just keep an eye on the glaze so it doesn’t melt off completely.
Nutritional Information & Benefits
One of the reasons I keep coming back to this recipe is that it feels good to eat. Here’s the estimated nutritional breakdown per mini bundt cake (with glaze):
- Calories: Approximately 185
- Total Fat: 7g
- Saturated Fat: 5g
- Carbohydrates: 29g
- Fiber: 3g
- Sugar: 16g
- Protein: 5g
These numbers are estimates and can vary based on your specific ingredients. The key benefits here come from the whole wheat pastry flour, which provides more fiber than all-purpose flour, and the Greek yogurt, which adds protein and calcium without the saturated fat of butter. Pumpkin puree is packed with vitamin A and antioxidants, making this a dessert that actually offers some nutritional value.
If you’re watching your sugar intake, you can reduce the maple syrup to ⅓ cup and skip the glaze. The cakes will still be sweet enough from the pumpkin and brown sugar. For a lower-fat option, replace the coconut oil with unsweetened applesauce—the texture will be a bit more muffin-like, but still delicious.
As always, this recipe contains gluten, dairy, and eggs. For allergen-friendly alternatives, check the variations section above.
Conclusion
These lighter mini pumpkin bundt cakes with maple glaze have become my go-to fall recipe for a reason. They came from a moment of chaos and improvisation, and somehow, that made them better than anything I could have planned. They’re proof that you don’t need a pantry full of fancy ingredients or hours of free time to make something that feels special.
I hope you give them a try, and more than that, I hope you make them your own. Add a pinch of cardamom if that’s your thing. Swap the glaze for a dusting of powdered sugar. Double the batch and share them with people you love. That’s what cooking is really about—not following rules, but finding what works for you.
If you do make these, I’d love to hear about it. Drop a comment below and let me know how they turned out, or tag me in your photos if you share them online. And if you have your own happy accident story from the kitchen, I’m all ears. Those are always the best recipes.
Frequently Asked Questions
Can I use all-purpose flour instead of whole wheat pastry flour?
Yes, you can substitute all-purpose flour in a 1:1 ratio. The cakes will be slightly less tender and won’t have the same nutty flavor, but they’ll still turn out well. If you do use all-purpose, you might want to add an extra tablespoon of yogurt to keep them moist.
How do I know when the mini bundt cakes are done baking?
Insert a toothpick into the center of a cake—if it comes out clean or with just a few moist crumbs, they’re done. The tops should also be golden brown and spring back when lightly touched. Start checking at 18 minutes to avoid overbaking.
Can I make these ahead of time?
Absolutely. You can bake the cakes a day in advance and store them in an airtight container at room temperature. Make the glaze fresh on the day you plan to serve them for the best texture and appearance. They also freeze well for up to 3 months.
Why did my cakes stick to the pan?
This usually happens when the pan isn’t greased thoroughly enough. Make sure you get into every ridge and crevice with melted butter or baking spray that contains flour. Letting the cakes cool for exactly 10 minutes before inverting also helps—too soon and they’ll break, too late and they’ll stick.
Can I make this recipe into a full-sized bundt cake instead of mini ones?
Yes, you can pour the batter into a standard 10-cup bundt pan. Bake at 350°F for 35-40 minutes, or until a toothpick inserted near the center comes out clean. You may need to increase the glaze recipe by half to cover the larger cake. The baking time will vary depending on your pan, so keep an eye on it.
Pin This Recipe!
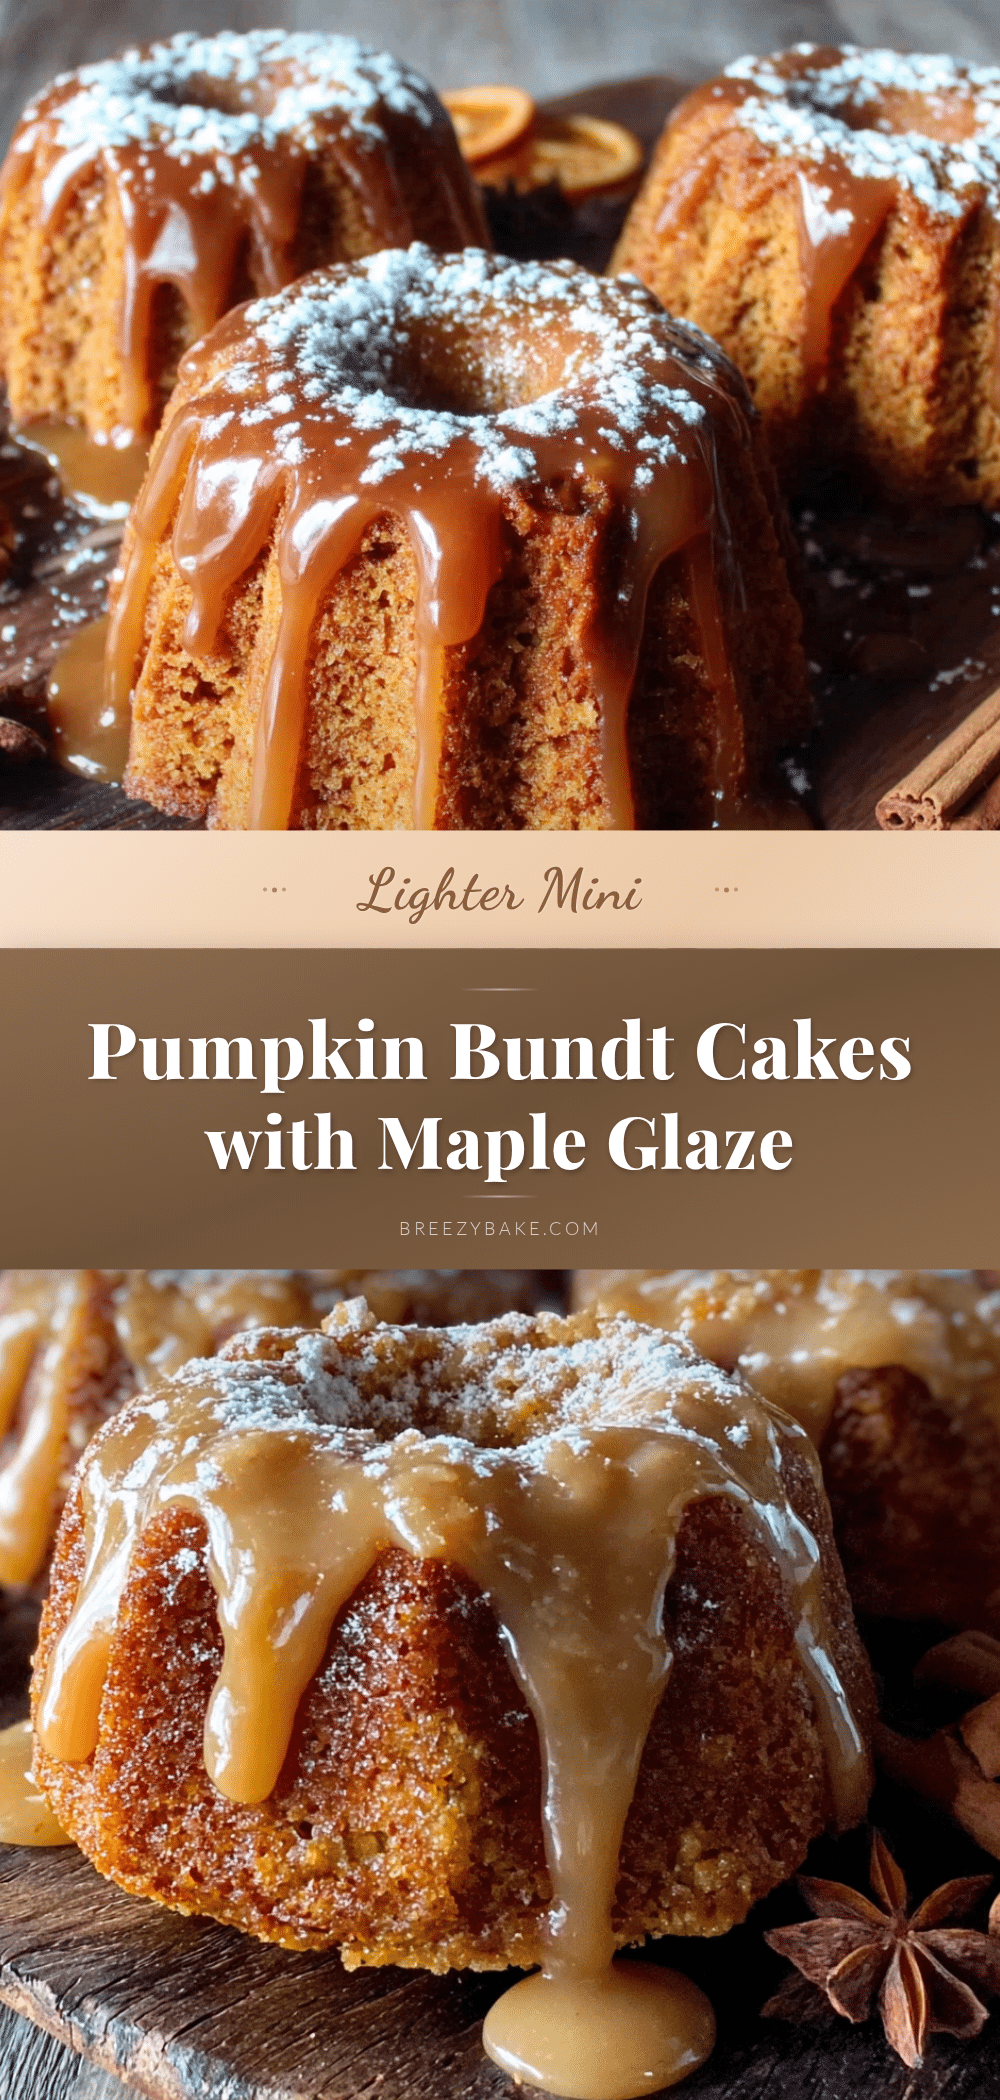
Lighter Mini Pumpkin Bundt Cakes with Maple Glaze
These tender, spiced mini bundt cakes are made with whole wheat pastry flour and Greek yogurt for a lighter take on a fall favorite, finished with a sweet maple glaze.
- Prep Time: 15 minutes
- Cook Time: 20 minutes
- Total Time: 35 minutes
- Yield: 6 servings 1x
- Category: Dessert
- Cuisine: American
Ingredients
- 1 ½ cups whole wheat pastry flour
- 1 teaspoon baking soda
- ½ teaspoon baking powder
- 2 teaspoons pumpkin pie spice
- ½ teaspoon salt
- 1 cup pumpkin puree (100% pure pumpkin)
- ½ cup plain Greek yogurt (full-fat or 2%)
- ¼ cup coconut oil, melted
- ½ cup pure maple syrup
- ¼ cup brown sugar, packed
- 2 large eggs, room temperature
- 1 teaspoon vanilla extract
- ½ cup powdered sugar, sifted
- 2 tablespoons pure maple syrup
- 1–2 tablespoons milk (any kind)
- Pinch of salt
Instructions
- Preheat your oven to 350°F (175°C). Generously grease a 6-cavity mini bundt pan with melted butter or baking spray.
- In a large bowl, whisk together the whole wheat pastry flour, baking soda, baking powder, pumpkin pie spice, and salt for about 20 seconds.
- In a medium bowl, whisk together the pumpkin puree, Greek yogurt, melted coconut oil, maple syrup, brown sugar, eggs, and vanilla extract until smooth.
- Pour the wet mixture into the dry ingredients. Fold gently with a rubber spatula until just combined (12-15 strokes). Do not overmix.
- Spoon the batter into the prepared mini bundt pan, filling each cavity about ¾ full.
- Bake for 18-22 minutes, until the tops are golden brown and a toothpick inserted into the center comes out clean or with a few moist crumbs.
- Cool the pan on a wire rack for exactly 10 minutes. Run a thin knife around the edges, then invert onto the rack to release the cakes. Let cool completely (about 20 minutes).
- While the cakes cool, make the glaze: In a small bowl, whisk together the powdered sugar, 2 tablespoons maple syrup, and a pinch of salt. Add milk 1 tablespoon at a time until the glaze is thick but pourable.
- Once the cakes are completely cool, drizzle the glaze over the tops. Let set for about 10 minutes before serving.
Notes
For best results, use room temperature eggs and measure flour by spooning into the cup and leveling off. Let the batter rest for 5 minutes before baking for a more tender crumb. Glaze only when cakes are completely cool to prevent melting.
Nutrition
- Serving Size: 1 mini bundt cake
- Calories: 185
- Sugar: 16
- Fat: 7
- Saturated Fat: 5
- Carbohydrates: 29
- Fiber: 3
- Protein: 5
Keywords: mini bundt cakes, pumpkin, maple glaze, whole wheat, Greek yogurt, fall dessert, healthy dessert


