I was supposed to be making banana bread. That was the plan. I had three spotted bananas on the counter, a half-used bag of all-purpose flour, and this very specific vision of a moist, cinnamon-flecked loaf cooling on the rack. But somewhere between measuring the flour and reaching for the sugar, my hand landed on a different bag. I grabbed the oat flour by mistake—the stuff I’d bought months ago for a “healthy kick” that never quite happened. And instead of the usual cup of granulated sugar, I accidentally used a blend of coconut sugar and a little stevia I had stashed in the back of the pantry. The bananas? I mashed them, took a phone call, and completely forgot to add the oil. I mean, honestly, who does that?
I stared at the bowl. This weird, dry, lumpy dough that looked nothing like the smooth batter I needed for bread. It was crumbly. It was sad. I was already running late for a work call, and the kitchen was a mess. I almost scraped the whole thing into the trash. But then—out of pure stubbornness—I grabbed a spoon, scooped up a tiny ball of the mixture, and pressed it flat. I figured I’d bake one, just to see. Maybe it would be a funny story to tell later. The cookie came out of the oven looking pale and unassuming. Not golden. Not puffy. I let it cool for exactly thirty seconds before taking a bite.
And then I stood there, staring at the oven light, chewing. It was chewy. It was buttery (even without the oil). It had this deep, almost caramel-like sweetness from the coconut sugar. And it was good. Not just “good for a mistake” good—actually, genuinely good. I quickly shaped the rest of the dough, baked them off, and ate two more before my call started. The banana bread never happened. But these lighter small-batch chocolate chip cookies? They’ve been happening ever since. Maybe you’ve been there—the moment a kitchen disaster turns into something you secretly hope happens again.
Why You’ll Love This Recipe
Let’s be real—finding a cookie recipe that actually delivers on flavor without a ton of calories or a complicated ingredient list feels like a unicorn hunt. But these lighter small-batch chocolate chip cookies are the real deal. I’ve tested this recipe more times than I care to admit (my coworkers have been very willing taste-testers), and it hits every single note you want from a classic cookie.
- Quick & Easy: From start to finish, you’re looking at about 20 minutes. Mix the dough, scoop, and bake. No chilling required, which honestly is my favorite kind of recipe.
- Simple Ingredients: You likely have everything in your pantry right now. Oat flour, coconut sugar, a little butter, and chocolate chips. No weird protein powders or obscure superfoods.
- Perfect for a Small Craving: This makes exactly six cookies. No more, no less. It’s the perfect amount for when you want a treat without a giant batch staring at you from the counter.
- Crowd-Pleaser: I’ve served these to friends who had no idea they were “lighter.” They just asked for the recipe. That’s the kind of win we’re going for.
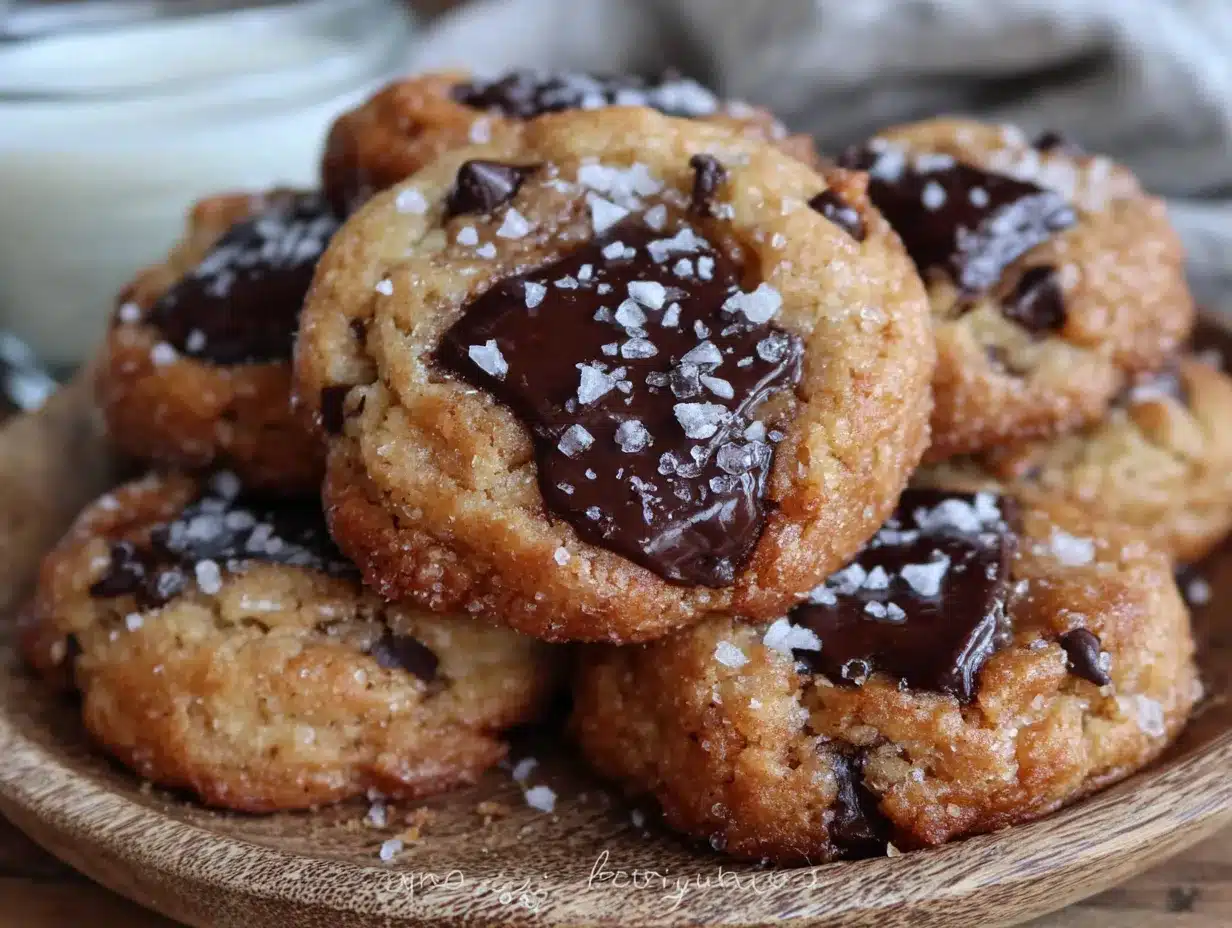
- Unbelievably Delicious: The texture is where these shine. They’re chewy on the inside with slightly crisp edges. The oat flour gives them a subtle nuttiness that pairs perfectly with the chocolate.
What makes these different from every other “light” cookie recipe out there? It’s the technique. Using oat flour instead of all-purpose adds fiber and a tender crumb without making the cookies taste like cardboard. The combination of coconut sugar and a touch of stevia gives you that deep sweetness without the sugar crash. And skipping the oil? It was an accident, but it works. The small amount of butter does all the heavy lifting for flavor and texture. This isn’t just another version of a healthy cookie—it’s the one I actually look forward to making.
What Ingredients You Will Need
This recipe keeps things refreshingly simple. You don’t need a specialty grocery run or a cabinet full of obscure flours. Each ingredient plays a specific role in creating that chewy, satisfying texture without the extra calories. Here’s what you’ll need and why it matters.
- Oat Flour (¼ cup, 30g): This is the backbone of the cookie. Oat flour gives a tender, slightly nutty flavor and a soft crumb. You can buy it pre-made or just blitz rolled oats in a blender for 30 seconds. I prefer Bob’s Red Mill oat flour for consistent results, but homemade works great too. Make sure it’s certified gluten-free if that’s a concern.
- Coconut Sugar (2 tablespoons, 24g): This adds a deep, almost caramel-like sweetness that plain white sugar just can’t match. It’s less processed than regular sugar and has a lower glycemic index, which helps keep the calorie count down. If you don’t have it, you can substitute brown sugar, but the cookies will be slightly sweeter and less complex.
- Stevia or Monk Fruit Sweetener (1 tablespoon, 12g): This is the secret to keeping the cookies light without sacrificing sweetness. I use a granular stevia blend that measures like sugar. If you’re using a liquid stevia, start with just a few drops and taste the dough. Too much can make things bitter, so go easy.
- Unsalted Butter (1 tablespoon, 14g, softened): Just one tablespoon! It sounds tiny, but it’s enough to give the cookies that rich, buttery flavor and a tender texture. Make sure it’s softened to room temperature so it creams properly with the sugars. If you’re dairy-free, you can use a plant-based butter stick, but avoid margarine spreads as they have too much water.
- Large Egg White (1, from one egg): Using just the white instead of the whole egg cuts down on fat and calories while still providing structure. The egg white helps the cookies hold their shape and gives them that slight chewiness. Save the yolk for an omelet or scramble the next morning.
- Vanilla Extract (½ teaspoon): Pure vanilla extract is non-negotiable here. It enhances all the other flavors and makes the cookies taste more indulgent. Imitation vanilla works in a pinch, but pure is noticeably better.
- Baking Soda (¼ teaspoon): This helps the cookies spread just a little and gives them a soft, airy texture. Make sure it’s fresh—old baking soda won’t give you the same lift.
- Salt (⅛ teaspoon): A small pinch of salt balances the sweetness and brings out the chocolate flavor. I use fine sea salt. If you only have kosher salt, use a slightly larger pinch.
- Semi-Sweet Chocolate Chips (2 tablespoons, 28g): This is the star of the show. Use good-quality chips—I like Ghirardelli or Enjoy Life for a dairy-free option. You can also chop up a dark chocolate bar for bigger, melty pockets. If you want to keep the calories lower, use mini chips; you get more pieces for the same amount.
Equipment Needed
You don’t need a fancy bakery setup for these cookies. Just a few basic tools you probably already have. Here’s what I use:
- Mixing Bowls: One medium bowl for the dry ingredients and one small bowl for the wet. I love my set of nesting glass bowls—they’re easy to clean and don’t hold onto odors.
- Whisk or Fork: For mixing the dry ingredients together. A fork works totally fine if you don’t have a small whisk.
- Spatula or Wooden Spoon: For combining the wet and dry ingredients. A silicone spatula is my go-to because it scrapes the bowl clean.
- Baking Sheet: A standard half-sheet pan works perfectly. No need to grease it—the cookies have enough butter to prevent sticking.
- Parchment Paper or Silicone Baking Mat: This makes cleanup a breeze and helps the cookies bake evenly. I prefer parchment for the crispier edges.
- Cookie Scoop or Tablespoon: For portioning the dough evenly. A 1-tablespoon scoop is the perfect size. If you don’t have one, just use a regular spoon and try to make each ball about the same size.
- Cooling Rack: Optional but helpful. Letting the cookies cool on a rack prevents the bottoms from getting soggy.
If you don’t have a cooling rack, just let them cool on the baking sheet for a few minutes, then transfer to a plate. No big deal.
Preparation Method
- Preheat your oven to 350°F (175°C). Line a baking sheet with parchment paper or a silicone mat. This ensures the cookies won’t stick and makes cleanup effortless.
- Mix the dry ingredients. In a medium bowl, whisk together the oat flour, baking soda, and salt. Make sure there are no lumps. The oat flour can sometimes clump, so break those up with your fingers or the back of a spoon.
- Cream the butter and sugars. In a separate small bowl, combine the softened butter, coconut sugar, and stevia. Use a fork or spatula to mash them together until it looks like a thick, grainy paste. It won’t be fluffy like traditional creamed butter, and that’s okay. Just make sure the butter is evenly distributed.
- Add the wet ingredients. Stir in the egg white and vanilla extract. Mix until everything is well combined. The mixture will look a bit loose and maybe even slightly separated—don’t panic, that’s normal.
- Combine wet and dry. Pour the wet mixture into the bowl with the dry ingredients. Use your spatula to fold everything together until just combined. Do not overmix! Overmixing will make the cookies tough. You want a soft, slightly sticky dough that holds together when pressed.
- Fold in the chocolate chips. Gently stir in the chocolate chips until they’re evenly distributed. If the dough feels too sticky to handle, pop it in the fridge for 5 minutes. If it feels too dry, add a teaspoon of water or milk (dairy or plant-based) and mix again.
- Portion the dough. Using a cookie scoop or a tablespoon, scoop out 6 equal portions of dough. Roll each one into a ball and place them on the prepared baking sheet, spacing them about 2 inches apart. They won’t spread much, so don’t worry about crowding.
- Bake. Bake for 8-10 minutes, or until the edges are set and lightly golden. The centers will look slightly underdone and puffy—that’s exactly what you want. They will continue to set as they cool. For softer, chewier cookies, bake for 8 minutes. For slightly crispier edges, go for 10.
- Cool. Let the cookies cool on the baking sheet for 5 minutes. This allows them to firm up without becoming hard. Then transfer them to a cooling rack or a plate. Try not to eat them all immediately—I know it’s hard.
Cooking Tips & Techniques
I’ve made these cookies at least a dozen times now, and I’ve learned a few things along the way. Here are my best tips for getting them perfect every time.
Don’t overmix the dough. This is the number one mistake I see. When you overmix, you develop the gluten in the oat flour (yes, even oat flour has some gluten-like proteins), and the cookies turn out dense and tough. Mix until you don’t see any more dry flour, then stop. It’s okay if there are a few tiny lumps.
Use room temperature ingredients. Cold butter won’t cream properly, and cold egg white won’t incorporate smoothly. Let your butter sit out for about 15-20 minutes before starting. If you’re in a hurry, you can microwave the butter for 5-10 seconds, but be careful not to melt it.
Weigh your flour if you can. Oat flour is lighter than all-purpose, and measuring by volume can be inconsistent. If you don’t have a kitchen scale, spoon the flour into your measuring cup and level it off with a knife. Don’t scoop directly from the bag—you’ll pack in too much flour and end up with dry cookies.
Let them cool completely. I know the smell is irresistible, but these cookies are fragile when they’re hot. Letting them cool on the baking sheet for a full 5 minutes is crucial. If you try to move them too soon, they’ll fall apart. Trust me, I’ve learned this the hard way.
Adjust for your oven. Every oven runs a little differently. If your cookies are browning too fast on the bottom, try baking on the middle rack. If they’re not spreading at all, your oven might be running cool. Invest in an oven thermometer—they’re cheap and take the guesswork out of baking.
Variations & Adaptations
One of the best things about this recipe is how flexible it is. Here are some ways to make it your own.
Gluten-Free: This recipe is naturally gluten-free if you use certified gluten-free oat flour. Just double-check your chocolate chips—some brands have gluten cross-contamination.
Vegan: Swap the butter for a plant-based butter stick (like Earth Balance) and use a flax egg instead of the egg white. To make a flax egg, mix 1 tablespoon of ground flaxseed with 2.5 tablespoons of water and let it sit for 5 minutes until it forms a gel.
Nut-Free: Oat flour is naturally nut-free, but make sure your chocolate chips are also processed in a nut-free facility if you have allergies.
Flavor Twists: Add ¼ teaspoon of cinnamon or a pinch of nutmeg to the dry ingredients for a warm, spiced flavor. Or swap the vanilla extract for almond extract for a completely different vibe. I once added a tablespoon of peanut powder (like PB2) and it was incredible—peanut butter chocolate chip cookies with almost no extra calories.
Different Chips: Use dark chocolate chips, white chocolate chips, or even butterscotch chips. You can also chop up a dark chocolate bar for bigger, melty chunks. If you want to keep the calories lower, use mini chips—you get more pieces for the same amount.
Add-Ins: Fold in 1 tablespoon of chopped walnuts, pecans, or shredded coconut. Just keep in mind that this will add a few calories per cookie.
Serving & Storage Suggestions
These cookies are best enjoyed warm, when the chocolate is still slightly melty and the edges are just a little crisp. I like to serve them with a cold glass of almond milk or a hot cup of coffee for the perfect afternoon treat. They’re also great crumbled over a bowl of vanilla ice cream or yogurt for a quick dessert.
If you have leftovers (unlikely, but possible), store them in an airtight container at room temperature for up to 3 days. To keep them soft, add a slice of bread to the container—the cookies will absorb the moisture and stay chewy. For longer storage, you can freeze the baked cookies for up to 2 months. Just let them cool completely, then pop them in a freezer-safe bag. Thaw at room temperature for about 15 minutes, or reheat in a 300°F oven for 5 minutes.
You can also freeze the unbaked dough. Scoop the dough into balls, place them on a baking sheet, and freeze until solid. Then transfer the frozen dough balls to a freezer bag. When you’re ready to bake, just add 2-3 minutes to the baking time—no need to thaw. This is my favorite trick for having fresh cookies on demand without the temptation of a full batch.
Nutritional Information & Benefits
Here’s the breakdown for one cookie (based on the recipe as written):
- Calories: 45
- Fat: 2.5g
- Carbohydrates: 6g
- Fiber: 1g
- Sugar: 3g
- Protein: 1.5g
These cookies are a great option for anyone watching their calorie intake but still wanting a real treat. The oat flour provides soluble fiber, which helps with digestion and keeps you feeling full longer. Coconut sugar contains small amounts of minerals like zinc and iron, though it’s still sugar, so enjoy in moderation. The egg white adds a little protein without the fat of the yolk. And dark chocolate? It’s rich in antioxidants. So yes, you can feel pretty good about having one (or two) of these cookies.
If you’re following a specific diet, this recipe is naturally low in added sugar and can easily be made vegan or gluten-free. Just be aware of the substitutions mentioned above.
Conclusion
These lighter small-batch chocolate chip cookies are proof that you don’t need a complicated recipe or a ton of ingredients to make something truly satisfying. They came from a happy accident, but they’ve become a staple in my kitchen. Whether you’re craving a sweet treat after dinner, need a quick dessert for a small gathering, or just want to enjoy a cookie without the guilt, this recipe delivers every time.
I’d love to hear how yours turn out. Did you try any variations? Did you manage to save any for later? Drop a comment below and let me know—I read every single one. And if you loved this recipe, share it with a friend who could use a little cookie magic in their life. Happy baking!
Frequently Asked Questions
Can I use all-purpose flour instead of oat flour?
Yes, but the texture will be different. All-purpose flour will make the cookies slightly denser and less tender. If you swap, use the same amount (¼ cup) and expect a slightly different result.
Why are my cookies spreading too much?
This usually happens if the butter was too soft or melted. Make sure your butter is just softened, not liquid. Also, check that your oat flour is measured correctly—too little flour can cause spreading.
Can I make these cookies without a sweetener?
You can reduce the sweetener, but the cookies won’t be as sweet. If you omit the stevia, the cookies will still work, but they’ll be more like a mildly sweet shortbread. The coconut sugar adds flavor, so I wouldn’t skip it entirely.
How do I make these cookies softer?
Bake them for the shorter time (8 minutes) and let them cool completely on the baking sheet. You can also add an extra teaspoon of water to the dough for more moisture.
Can I double this recipe?
Absolutely! Just double all the ingredients and bake in batches. The cookies will still come out perfectly. I often make a double batch and freeze half the dough for later.
Pin This Recipe!
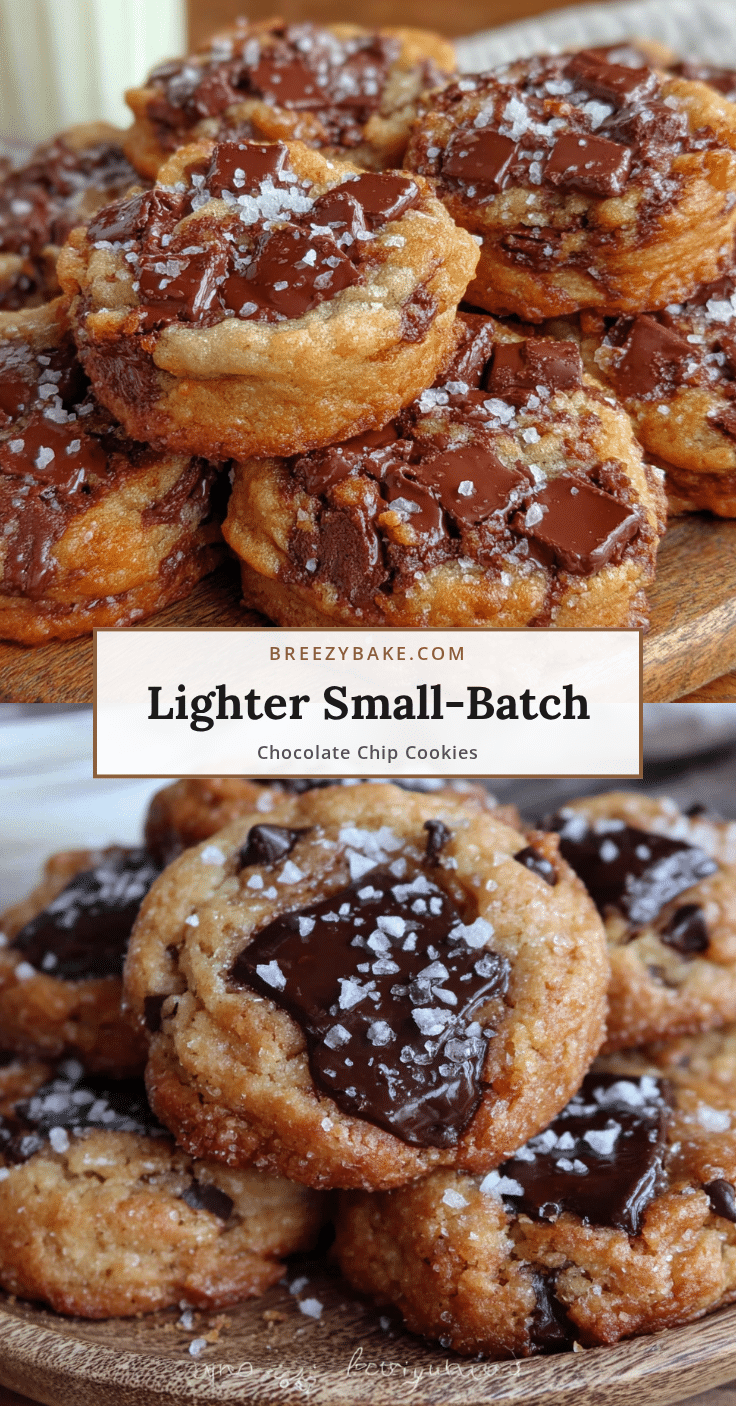
Lighter Small-Batch Chocolate Chip Cookies (Easy, 45 Cal)

These lighter small-batch chocolate chip cookies are chewy, buttery, and made with simple ingredients like oat flour and coconut sugar. Perfect for a small craving, they deliver big flavor with only 45 calories each.
- Prep Time: 10 minutes
- Cook Time: 10 minutes
- Total Time: 20 minutes
- Yield: 6 cookies 1x
- Category: Dessert
- Cuisine: American
Ingredients
- ¼ cup (30g) oat flour
- 2 tablespoons (24g) coconut sugar
- 1 tablespoon (12g) stevia or monk fruit sweetener
- 1 tablespoon (14g) unsalted butter, softened
- 1 large egg white
- ½ teaspoon vanilla extract
- ¼ teaspoon baking soda
- ⅛ teaspoon salt
- 2 tablespoons (28g) semi-sweet chocolate chips
Instructions
- Preheat your oven to 350°F (175°C). Line a baking sheet with parchment paper or a silicone mat.
- In a medium bowl, whisk together the oat flour, baking soda, and salt. Break up any clumps.
- In a separate small bowl, combine the softened butter, coconut sugar, and stevia. Mash together with a fork or spatula until it forms a thick, grainy paste.
- Stir in the egg white and vanilla extract until well combined. The mixture may look loose or slightly separated.
- Pour the wet mixture into the dry ingredients. Fold together with a spatula until just combined. Do not overmix.
- Gently fold in the chocolate chips until evenly distributed. If the dough is too sticky, refrigerate for 5 minutes. If too dry, add a teaspoon of water or milk.
- Using a cookie scoop or tablespoon, portion the dough into 6 equal balls. Place them on the prepared baking sheet, spacing about 2 inches apart.
- Bake for 8-10 minutes, until edges are set and lightly golden. Centers will look slightly underdone and puffy.
- Let the cookies cool on the baking sheet for 5 minutes, then transfer to a cooling rack or plate.
Notes
Do not overmix the dough to avoid tough cookies. Use room temperature ingredients for best results. Weigh the oat flour for accuracy. Let cookies cool completely on the baking sheet before moving. Adjust baking time based on your oven.
Nutrition
- Serving Size: 1 cookie
- Calories: 45
- Sugar: 3
- Sodium: 85
- Fat: 2.5
- Saturated Fat: 1.5
- Carbohydrates: 6
- Fiber: 1
- Protein: 1.5
Keywords: small-batch chocolate chip cookies, light cookies, low calorie cookies, oat flour cookies, healthy cookies, easy cookie recipe


