I was standing in the frozen foods aisle last November, trying to remember if we were out of peas, when a woman walked past me holding a box of those pre-cut butternut squash chunks. The smell of the freezer section—that cold, slightly cardboard-y air—didn’t smell like anything special. But something about the way she held that box, kind of cradling it like it was a secret weapon, hit me hard. Suddenly I was seven years old, standing in my Aunt Rosie’s cramped kitchen in Queens, watching her halve a funny-looking squash I’d never seen before. She called it a “honeynut,” and I thought she was making up the name. The whole thing felt like a small, warm conspiracy.
Aunt Rosie didn’t have kids of her own, but she had this knack for making vegetables feel like a treat. She’d roast that honeynut squash with a pat of butter and a drizzle of maple syrup, and the smell—honestly, it was the kind of sweet, nutty perfume that made you forget you were eating a vegetable at all. I remember standing on a step stool beside her, watching the butter brown in the pan, and she said, “You see that? That’s the good stuff. That’s where the flavor lives.” I didn’t really get it then. I just knew the squash came out tasting like candy, but better—caramelized and rich, with edges that were almost crispy. She passed away a few years ago, and I haven’t thought about that kitchen in forever. But standing there in the freezer aisle, I could feel the warmth of that little stove, the weight of her hand on my shoulder.
So I grabbed a couple of honeynut squashes—they’re smaller and sweeter than butternut, with a thinner skin you don’t even have to peel—and I went home to try and recreate that moment. I burned the butter the first time. Let me tell you, I was so focused on getting that memory right that I forgot butter can go from brown to burnt in about twenty seconds. The second batch? That was the one. The maple brown butter coated every slice, and the squash came out tender with these gorgeous caramelized edges. My kids, who normally treat squash like it’s a punishment, actually asked for seconds. Seconds! Maybe you’ve been there—trying to get a vegetable past a picky eater and feeling like you need a strategy meeting about it. This recipe is that strategy. It’s not fancy. It’s not complicated. But it tastes like someone put real thought into it, which is exactly what I remember from Aunt Rosie’s kitchen.
Why You’ll Love This Recipe
Look, I’ve tested a lot of squash recipes over the years. Some are too sweet, some are too bland, and some require a level of patience I just don’t have on a Tuesday night. This maple brown butter honeynut squash recipe hits a sweet spot—pun intended—that makes it a regular in our dinner rotation. Here’s why it works for real families:
- Quick & Easy: From start to table in about 35 minutes. You slice, you toss, you roast. That’s it. No blanching, no peeling, no complicated steps that leave you with a sink full of dishes.
- Simple Ingredients: You need honeynut squash, butter, maple syrup, salt, and maybe some cinnamon if you’re feeling fancy. That’s probably already in your kitchen, minus the squash—and those are easy to find at most grocery stores now.
- Perfect for Picky Eaters: This is the kind of vegetable dish that makes kids forget they’re eating vegetables. The maple brown butter gives it a sweet, nutty flavor that even my most skeptical five-year-old couldn’t resist. She called it “candy squash” and I didn’t correct her.
- Crowd-Pleaser: I brought this to a Thanksgiving potluck last year, and it was the first dish to disappear. Not the mac and cheese. Not the pie. The squash. Adults and kids alike went back for more.
- Unbelievably Delicious: The brown butter is the secret weapon here. It adds a toasty, nutty depth that plain melted butter just can’t touch. Combined with the maple syrup, it creates this glaze that caramelizes in the oven and makes every bite taste like something special.
What makes this recipe different from all the other roasted squash recipes out there? It’s the technique. Most recipes just toss the squash in oil and roast it, hoping for the best. But browning the butter first—letting it cook until the milk solids turn golden and smell like toasted hazelnuts—transforms the entire dish. It’s not just butter anymore. It’s a flavor bomb. And the honeynut squash itself is a game-changer. It’s naturally sweeter and creamier than butternut, with a thinner skin that means no peeling required. You just slice it, scoop out the seeds, and roast. The skin gets tender enough to eat, which saves you time and reduces food waste.
This recipe is the kind that makes you close your eyes after the first bite. It’s comfort food reimagined—healthier than you’d expect, faster than you’d think, but with the same soul-soothing satisfaction as something that took hours. And honestly? It’s perfect for impressing guests without any stress, or turning a simple weeknight dinner into something your family will remember.
What Ingredients You Will Need
This recipe uses simple, wholesome ingredients to deliver bold flavor and satisfying texture without the fuss. Most of these are pantry staples, and the few that aren’t are easy to find at any grocery store.
- Honeynut squash (2 medium-sized): These are smaller and sweeter than butternut squash, with a deep orange flesh that’s almost creamy when roasted. Look for squash that feel heavy for their size and have a firm, unblemished skin. You’ll find them in the fall and winter, but they’re becoming more common year-round. (No peeling needed—the skin gets tender in the oven.)
- Unsalted butter (4 tablespoons, or 1/2 stick): I use unsalted so I can control the salt level. The butter gets browned, which means it cooks until the milk solids turn golden and smell nutty. This is where the magic happens. I prefer Kerrygold for its rich flavor, but any good-quality unsalted butter works.
- Pure maple syrup (2 tablespoons): Please don’t use pancake syrup here. Real maple syrup has a complex, woodsy sweetness that pairs perfectly with the brown butter. Grade A dark amber is my go-to for cooking—it has a stronger flavor that stands up to roasting. (Adds sweetness and helps with caramelization.)
- Kosher salt (1/2 teaspoon, plus more for finishing): Salt balances the sweetness and brings out the nutty notes in the brown butter. I use Diamond Crystal kosher salt—it’s less salty by volume than Morton’s, so adjust if you’re using a different brand.
- Ground cinnamon (1/4 teaspoon, optional): This is optional, but I love the warmth it adds. It’s not enough to taste “cinnamony”—it just rounds out the flavors. (Adds warmth and depth without overpowering.)
- Fresh thyme (4-5 sprigs, optional): A few sprigs of fresh thyme scattered over the squash before roasting add a subtle herbal note that cuts through the sweetness. My kids don’t even notice it, but it makes the dish feel more grown-up. (Use dried thyme if that’s what you have—about 1/2 teaspoon.)
- Black pepper (freshly ground, to taste): Just a pinch at the end adds a tiny bit of heat that balances the sweetness. Don’t skip it—it makes a difference.
Substitution notes: If you can’t find honeynut squash, you can use butternut squash instead. Just peel it first, since butternut skin is too tough to eat. Cut it into 1-inch cubes and adjust the roasting time to about 30-35 minutes. For a dairy-free version, use coconut oil or a high-quality vegan butter. The flavor won’t be exactly the same, but it’ll still be delicious. And if you’re out of maple syrup, honey or agave nectar work in a pinch—though the flavor profile will shift slightly.
Equipment Needed
You don’t need a lot of fancy equipment for this recipe, which is one of the reasons I love it. Here’s what you’ll need:
- Large baking sheet (rimmed): A rimmed baking sheet prevents any buttery maple goodness from dripping onto your oven floor. I use a half-sheet pan (18×13 inches) for even roasting. If you don’t have one, a 9×13 baking dish works too, though the squash won’t get as crispy.
- Chef’s knife: A sharp chef’s knife makes cutting through the squash much easier. Honeynut squash is smaller and softer than butternut, but it’s still firm. A good 8-inch chef’s knife does the job. (Pro tip: If your knife is dull, it’ll slip—sharpen it first.)
- Cutting board: Any sturdy cutting board works. I prefer wood because it’s gentler on knife edges.
- Small saucepan: For browning the butter. A light-colored pan is helpful because you can see the butter change color more easily. I use a small stainless steel saucepan.
- Mixing bowl: For tossing the squash with the brown butter mixture. A medium-sized bowl is perfect.
- Spoon or silicone spatula: For stirring the butter as it browns and for tossing the squash. A spatula is great for scraping every last bit of that brown butter goodness.
- Parchment paper (optional but recommended): Lining your baking sheet makes cleanup a breeze. The caramelized maple butter can stick to the pan, and parchment paper prevents that.
Budget-friendly tip: Don’t have a small saucepan? Use any small pot or even a skillet. The key is to watch the butter closely—it can go from brown to burnt in seconds. And if you don’t have parchment paper, you can grease the baking sheet lightly with butter or oil. It’ll still work, just expect a bit more scrubbing.
Preparation Method
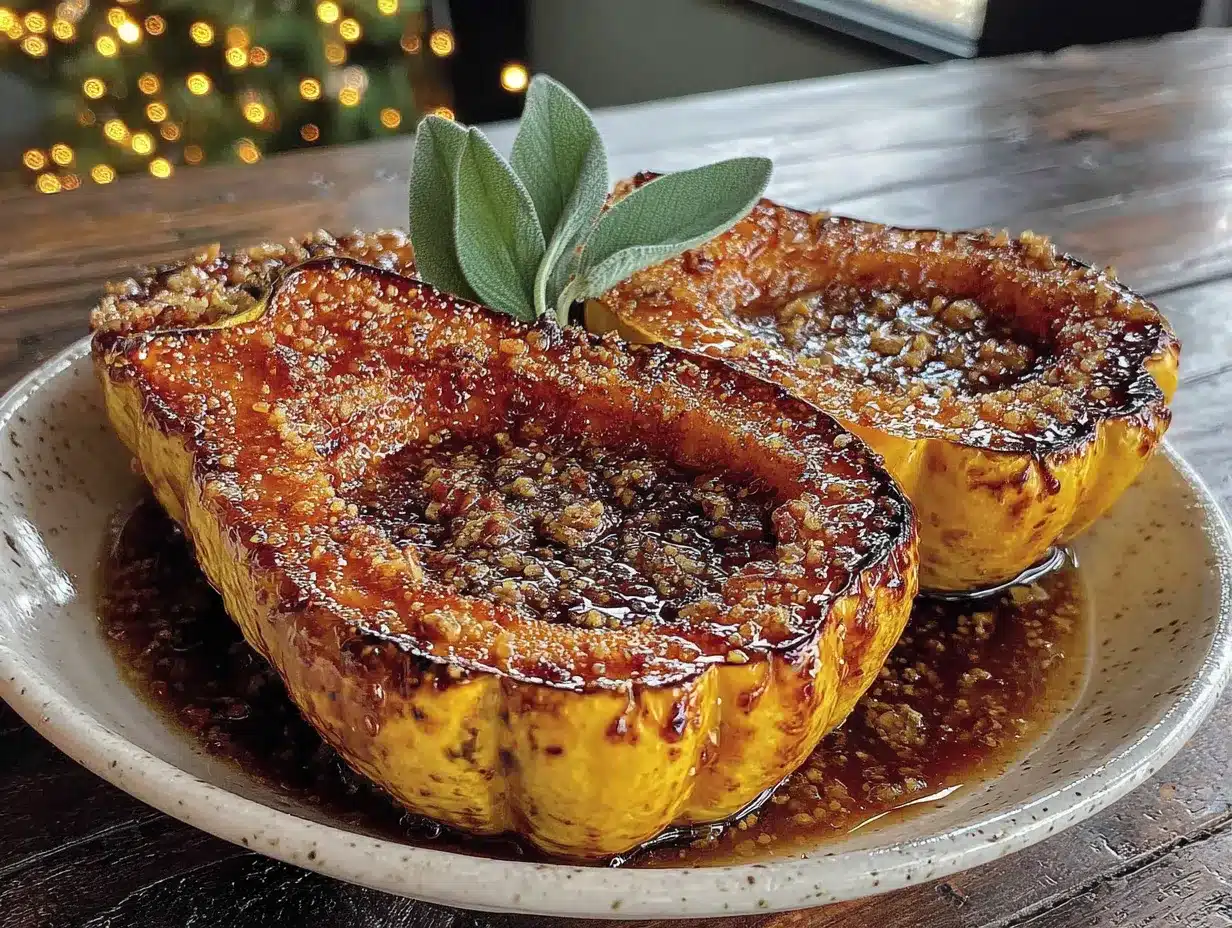
Let’s get cooking. This recipe comes together fast, so I like to have everything prepped before I start. It’s a habit that saves me from burning butter while I’m scrambling to find a spoon.
- Preheat your oven to 400°F (200°C). Give it a good 10-15 minutes to fully heat up. A hot oven is key for getting those caramelized edges.
- Prepare the squash. Wash the honeynut squash well—remember, we’re eating the skin. Cut each squash in half lengthwise using a sharp chef’s knife. Be careful; they can be a bit tough. Scoop out the seeds and stringy pulp with a spoon. (You can save the seeds and roast them separately if you like—they’re delicious with a little salt.) Slice each half into 1/2-inch thick half-moons. Try to keep the pieces uniform in size so they cook evenly. If some are thicker, they’ll need a few extra minutes.
- Start browning the butter. Place the 4 tablespoons of unsalted butter in a small saucepan over medium heat. Let it melt completely, then continue cooking. Stir occasionally with a spoon or spatula. The butter will foam and crackle—that’s normal. After about 3-4 minutes, the foam will subside, and you’ll see golden brown specks forming at the bottom. The butter will smell nutty and toasty. This is the moment you’re waiting for. As soon as it turns a light amber color and smells like toasted hazelnuts, remove it from the heat immediately. Don’t walk away from the butter. I learned this the hard way—it goes from perfect to burnt in about 15 seconds.
- Make the glaze. Stir in the 2 tablespoons of maple syrup, 1/2 teaspoon of kosher salt, and 1/4 teaspoon of cinnamon (if using) into the hot brown butter. The mixture will bubble up a bit—that’s fine. Stir until everything is combined. If you’re using fresh thyme, add a few leaves now. (The aroma at this point is incredible—sweet, nutty, and slightly herbal.)
- Toss the squash. Place the sliced squash in a mixing bowl. Pour the brown butter mixture over the top. Use your hands or a spatula to toss everything together until every piece is coated. (I use my hands—it’s messier but ensures even coverage. Just be careful, the mixture is warm.)
- Arrange on the baking sheet. Line your baking sheet with parchment paper if you have it. Spread the squash slices in a single layer. Don’t overcrowd the pan—if they’re piled on top of each other, they’ll steam instead of roast. If you have too much, use two baking sheets. (Leave a little space between each slice for air to circulate.)
- Roast. Place the baking sheet in the preheated oven. Roast for 20-25 minutes, flipping the slices halfway through. You’ll know they’re done when the squash is tender when pierced with a fork and the edges are caramelized and slightly crispy. The glaze should be bubbling and dark golden. (The smell in your kitchen right now is going to make everyone wander in asking what’s for dinner.)
- Finish and serve. Remove from the oven. If you have extra fresh thyme, scatter a few leaves over the top for garnish. Add a tiny pinch of flaky sea salt and some freshly ground black pepper. Let them rest for 2-3 minutes—the glaze will set slightly and become even more delicious. Serve warm.
Troubleshooting tip: If your squash isn’t browning after 20 minutes, your oven might run cool. Turn it up to 425°F for the last 5 minutes. And if the glaze is burning on the pan but the squash isn’t tender, your slices are probably too thick. Next time, cut them a bit thinner.
Cooking Tips & Techniques
I’ve made this maple brown butter honeynut squash more times than I can count, and I’ve learned a few things along the way. Here are my best tips for getting it right every time:
Don’t rush the brown butter. This is the most important step. Brown butter can be intimidating, but it’s really just butter that’s been cooked until the milk solids toast. The key is patience. Keep the heat at medium—not high—and stir constantly. Watch for the moment when the foam subsides and the butter turns a warm amber color. The smell is your best clue: it should smell nutty and rich, not burnt. (I once got distracted by a phone call and ended up with black butter. It smelled like a campfire—not in a good way.)
Cut the squash evenly. This is one of those details that makes a big difference. If some pieces are thicker than others, they’ll cook at different rates. The thin ones will burn while the thick ones stay hard. Take an extra 30 seconds to make sure your slices are uniform. Your future self will thank you.
Use a rimmed baking sheet. The glaze gets bubbly and can spill over the edges of a flat baking sheet. A rimmed sheet catches all that goodness and keeps your oven clean. Plus, it’s easier to flip the squash without losing pieces.
Flip halfway through. This ensures even caramelization on both sides. I use a thin spatula to flip each piece gently. If the glaze sticks a little, don’t force it—let it cook a few more minutes and try again. (Pro tip: If you forget to flip, it’s not the end of the world. The top will just be more caramelized than the bottom, which some people actually prefer.)
Let them rest before serving. I know it’s hard to wait, but letting the squash sit for 2-3 minutes after roasting allows the glaze to set. The flavor concentrates, and the texture becomes even more tender. Plus, you won’t burn your mouth.
Multitasking strategy: While the squash is roasting, you can prep the rest of your meal. This dish pairs well with roasted chicken, pork chops, or even a simple salad. The 20-minute roast time is perfect for finishing up other dishes.
Variations & Adaptations
One of the things I love about this recipe is how easy it is to adapt. Here are some variations I’ve tried and loved:
Spicy Maple Brown Butter Squash: Add a pinch of cayenne pepper or red pepper flakes to the brown butter mixture. The heat balances the sweetness beautifully. My husband loves this version, though the kids find it a bit too spicy. (Start with 1/8 teaspoon of cayenne—you can always add more.)
Herb-Infused Version: Along with the thyme, add a sprig of fresh rosemary or sage to the brown butter as it cooks. Remove the herb sprig before tossing with the squash. The earthy, aromatic notes add a sophisticated twist that’s perfect for holiday dinners. I made this for Thanksgiving last year, and my sister-in-law asked for the recipe three times.
Maple Balsamic Glaze: Replace 1 tablespoon of maple syrup with 1 tablespoon of balsamic vinegar. The acidity cuts through the richness and adds a tangy depth. This version is amazing with roasted pork or chicken. (Use a good-quality balsamic—the cheap stuff is too sharp.)
Vegan-Friendly Adaptation: Use coconut oil or a high-quality vegan butter instead of dairy butter. The flavor will be slightly different, but the coconut oil adds its own subtle sweetness that pairs well with maple. I’ve tested this with my vegan friend, and she said it was “dangerously good.”
Air Fryer Method: If you’re short on time, you can make this in an air fryer. Toss the squash with the brown butter mixture, then cook at 375°F for 12-15 minutes, shaking the basket halfway through. The texture is even crispier than oven-roasted. (Don’t overcrowd the basket—work in batches if needed.)
Sweet and Savory with Bacon: Crumble 2-3 slices of cooked bacon over the squash before serving. The salty, smoky crunch is incredible against the sweet, nutty glaze. My kids go absolutely wild for this version. (I use turkey bacon sometimes to keep it lighter—still delicious.)
Serving & Storage Suggestions
This maple brown butter honeynut squash is versatile enough to serve with almost anything. Here’s how I like to enjoy it:
Serving temperature: Serve warm, straight from the oven. The glaze is at its best when it’s still slightly bubbly and the edges are crisp. If you’re serving it as part of a larger meal, keep it warm in a low oven (200°F) for up to 30 minutes.
Presentation: Arrange the squash slices on a platter in a single layer or slightly overlapping. Drizzle any remaining glaze from the pan over the top. Garnish with fresh thyme leaves, a sprinkle of flaky sea salt, and a crack of black pepper. It looks beautiful on a Thanksgiving table or a simple weeknight dinner plate.
Complementary dishes: This squash pairs beautifully with roasted chicken, pork chops, turkey, or even a hearty grain bowl. I love serving it alongside a simple green salad with a tangy vinaigrette—the acidity cuts through the richness. For a complete meal, try it with crispy garlic chicken and steamed green beans. It also works as a side dish for one-pan herb roasted pork tenderloin.
Storage instructions: Leftover squash keeps well in an airtight container in the refrigerator for up to 4 days. The flavor actually deepens as it sits—the maple and brown butter meld together even more. To reheat, spread the squash on a baking sheet and warm in a 350°F oven for 5-7 minutes, or until heated through. You can also microwave it, but the texture won’t be as crisp. (I don’t recommend freezing this dish—the texture becomes watery when thawed.)
How flavors develop: Like many roasted vegetable dishes, this one tastes even better the next day. The maple brown butter glaze seeps into the squash, making it even more tender and flavorful. I’ve been known to make a double batch just for leftovers. My kids love it cold, straight from the fridge—they call it “squash candy.”
Nutritional Information & Benefits
This recipe is proof that healthy food can taste indulgent. Here’s a breakdown of what you’re getting in each serving (based on 4 servings, using 2 tablespoons of butter and 2 tablespoons of maple syrup):
| Nutrient | Amount per Serving |
|---|---|
| Calories | 185 |
| Total Fat | 12g |
| Saturated Fat | 7g |
| Carbohydrates | 20g |
| Fiber | 3g |
| Sugar | 12g |
| Protein | 2g |
| Vitamin A | 120% DV |
| Vitamin C | 25% DV |
| Potassium | 10% DV |
Health benefits of key ingredients: Honeynut squash is packed with vitamin A (in the form of beta-carotene), which supports eye health and immune function. It’s also a good source of vitamin C and fiber, which aids digestion and keeps you feeling full. The brown butter adds healthy fats that help your body absorb the fat-soluble vitamins in the squash. Maple syrup provides antioxidants and has a lower glycemic index than refined sugar. (Of course, it’s still sugar—so enjoy in moderation.)
Dietary considerations: This recipe is naturally gluten-free and can be made vegan by substituting the butter with coconut oil or vegan butter. It’s also low-carb friendly if you reduce the maple syrup to 1 tablespoon. (Potential allergens: dairy from the butter.)
I love that this dish feels like a treat but is actually good for you. It’s the kind of recipe that makes you feel virtuous and satisfied at the same time—which, let’s be honest, is the dream.
Conclusion
This maple brown butter honeynut squash is more than just a side dish—it’s the kind of recipe that makes vegetables feel like a celebration. It’s simple enough for a Tuesday night, special enough for Thanksgiving, and delicious enough that even the pickiest eaters in your house will ask for seconds. The brown butter adds a nutty richness that you just can’t get from plain melted butter, and the maple syrup brings a natural sweetness that makes the squash taste almost like candy.
I love this recipe because it reminds me that good food doesn’t have to be complicated. It’s about paying attention to the little things—browning the butter just right, cutting the squash evenly, giving it time to caramelize in the oven. Those small efforts add up to something truly special. And honestly? Watching my kids gobble up a vegetable without any fuss is a win I’ll take every single time.
I’d love to hear how this recipe turns out for you. Did your kids love it? Did you try a variation? Drop a comment below and let me know—I read every single one. And if you’re looking for more family-friendly vegetable recipes, check out our easy roasted broccoli with garlic or honey glazed carrots. Happy cooking, friends—here’s to making vegetables the star of the dinner table!
Frequently Asked Questions
Can I use butternut squash instead of honeynut?
Absolutely. Butternut squash works well, though you’ll need to peel it first since the skin is too tough to eat. Cut it into 1-inch cubes and roast for about 30-35 minutes at 400°F. The flavor will be slightly less sweet than honeynut, so you might want to add an extra tablespoon of maple syrup.
How do I know when the brown butter is ready?
Watch for the butter to turn a light amber color and smell nutty and toasty. The milk solids will form golden brown specks at the bottom of the pan. As soon as you see that color and smell that aroma, remove it from the heat immediately. It goes from perfect to burnt in about 15 seconds, so don’t walk away.
Can I make this ahead of time?
Yes! You can prep the squash (slice and seed it) up to 2 days ahead and store it in the fridge. You can also make the brown butter mixture ahead and store it in the fridge for up to a week. When you’re ready to cook, toss the squash with the glaze and roast as directed. Leftovers keep well for up to 4 days in the fridge.
Is this recipe suitable for a gluten-free diet?
Yes, this recipe is naturally gluten-free. Just make sure your maple syrup is pure (not pancake syrup, which can contain gluten-based additives). All the other ingredients are gluten-free as well.
Can I double this recipe for a crowd?
Definitely. Just make sure you use two baking sheets so the squash is in a single layer. If you overcrowd the pan, the squash will steam instead of roast, and you won’t get those caramelized edges. You may need to roast for an extra 5-10 minutes if you’re doing a double batch.
Pin This Recipe!
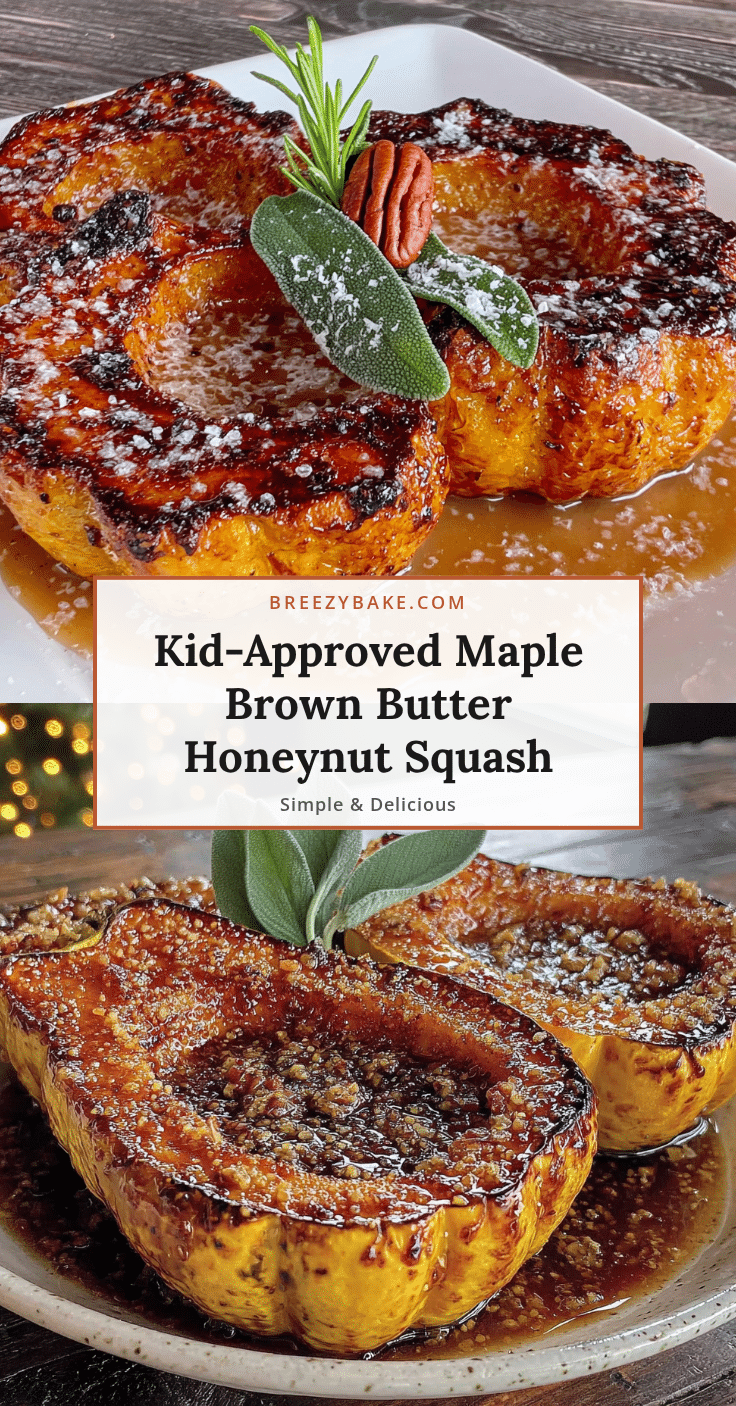
Maple Brown Butter Honeynut Squash Recipe (Kid-Approved & Easy)
This maple brown butter honeynut squash is a quick and easy side dish that turns a simple vegetable into a sweet, nutty treat. With just a few ingredients and 35 minutes, it’s perfect for picky eaters and holiday gatherings alike.
- Prep Time: 10 minutes
- Cook Time: 25 minutes
- Total Time: 35 minutes
- Yield: 4 servings 1x
- Category: Side Dish
- Cuisine: American
Ingredients
- 2 medium-sized honeynut squash
- 4 tablespoons unsalted butter (1/2 stick)
- 2 tablespoons pure maple syrup
- 1/2 teaspoon kosher salt, plus more for finishing
- 1/4 teaspoon ground cinnamon (optional)
- 4–5 sprigs fresh thyme (optional)
- Freshly ground black pepper, to taste
Instructions
- Preheat your oven to 400°F (200°C).
- Prepare the squash: Wash the honeynut squash, cut each in half lengthwise, and scoop out the seeds and stringy pulp. Slice each half into 1/2-inch thick half-moons.
- Start browning the butter: Place the 4 tablespoons of unsalted butter in a small saucepan over medium heat. Melt completely, then continue cooking, stirring occasionally, until the butter turns a light amber color and smells nutty (about 3-4 minutes). Remove from heat immediately.
- Make the glaze: Stir in the maple syrup, kosher salt, and cinnamon (if using) into the hot brown butter. If using fresh thyme, add a few leaves now.
- Toss the squash: Place the sliced squash in a mixing bowl. Pour the brown butter mixture over the top and toss until every piece is coated.
- Arrange on the baking sheet: Line a rimmed baking sheet with parchment paper. Spread the squash slices in a single layer, leaving space between each slice.
- Roast: Place the baking sheet in the preheated oven. Roast for 20-25 minutes, flipping the slices halfway through, until the squash is tender and the edges are caramelized.
- Finish and serve: Remove from the oven. Garnish with extra fresh thyme leaves, a pinch of flaky sea salt, and freshly ground black pepper. Let rest for 2-3 minutes before serving warm.
Notes
Don’t walk away from the brown butter—it can go from perfect to burnt in about 15 seconds. For even cooking, cut the squash slices uniformly. If your oven runs cool, increase temperature to 425°F for the last 5 minutes. Leftovers keep in the fridge for up to 4 days; reheat in a 350°F oven for 5-7 minutes.
Nutrition
- Serving Size: 1 serving (about 1/4
- Calories: 185
- Sugar: 12
- Sodium: 300
- Fat: 12
- Saturated Fat: 7
- Carbohydrates: 20
- Fiber: 3
- Protein: 2
Keywords: honeynut squash, maple brown butter, roasted squash, easy side dish, kid-friendly, gluten-free, fall recipe, Thanksgiving side


