Jen wasn’t trying to impress anyone. I’d stopped by her place after work to grab a cookbook she’d promised to lend me, and the smell hit me before I even got through the front door. Rich chocolate. Sweet cream. Something that made my stomach actually growl out loud—embarrassing, honestly. She was standing in her kitchen in sweatpants, holding a bowl of what looked like crushed graham crackers, completely nonchalant.
“Oh, those?” she said when I asked. “Just some little cheesecake cups. They’re no-bake. Throw them together in ten minutes.”
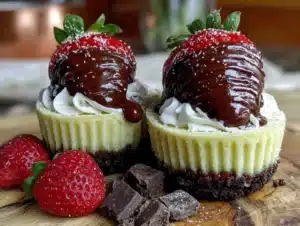
Ten minutes. She said it like it was nothing. Like she hadn’t just created what I would later describe as the perfect bite of dessert—creamy, crunchy, fruity, and chocolatey all at once. I stood there watching her crush cookies with her bare hands (she didn’t even bother with a food processor) and mix cream cheese with powdered sugar like it was the most boring thing in the world. Meanwhile, I was practically drooling on her counter.
That’s the thing about the best recipes, isn’t it? They come from people who don’t realize they’re doing anything special. Jen wasn’t a food blogger. She wasn’t trying to photograph anything for Instagram. She was just making dessert for a casual get-together with friends, and she’d thrown these together between answering emails and folding laundry. The casualness is the whole point—she made these no-bake chocolate covered strawberry cheesecake cups like it was nothing.
I asked for the recipe before I left. She scribbled it on a sticky note. Three ingredients for the filling. Two for the crust. A bag of strawberries and some melting chocolate. That’s it. I’ve made them at least a dozen times since that day, and every single time, someone asks for the recipe. Maybe you’ve been there—that moment when you bring a dessert to a party and people hover around the table, asking who made it. These cheesecake cups do that every time. And honestly? You don’t even have to turn on your oven.
Why You’ll Love This Recipe
Let me tell you why these no-bake chocolate covered strawberry cheesecake cups have become my go-to dessert for every gathering, potluck, and dinner party I’ve ever hosted. I’ve tested this recipe more times than I can count, tweaking the ratios, trying different crusts, and experimenting with toppings until I got it just right. Here’s what makes them special:
- No Oven Required: It’s summer. It’s hot. The last thing you want to do is turn on your oven and heat up your whole kitchen. These come together in minutes and chill in the fridge while you do literally anything else.
- Simple Ingredients: Cream cheese, heavy cream, powdered sugar, vanilla, graham crackers, butter, strawberries, and chocolate. That’s it. No weird specialty items, no trips to three different stores.
- Perfect for Hosting: You can make these a full day ahead of time. Actually, they taste better the next day. So when your guests arrive, you’re not scrambling in the kitchen—you’re mingling, holding a glass of wine, and looking like you didn’t even try.
- Crowd-Pleaser: I’ve served these at birthday parties, holiday dinners, casual barbecues, and fancy dinner parties. Every single time, someone says “these are incredible” within the first bite. Kids love them. Adults love them. People who claim they don’t like cheesecake love them.
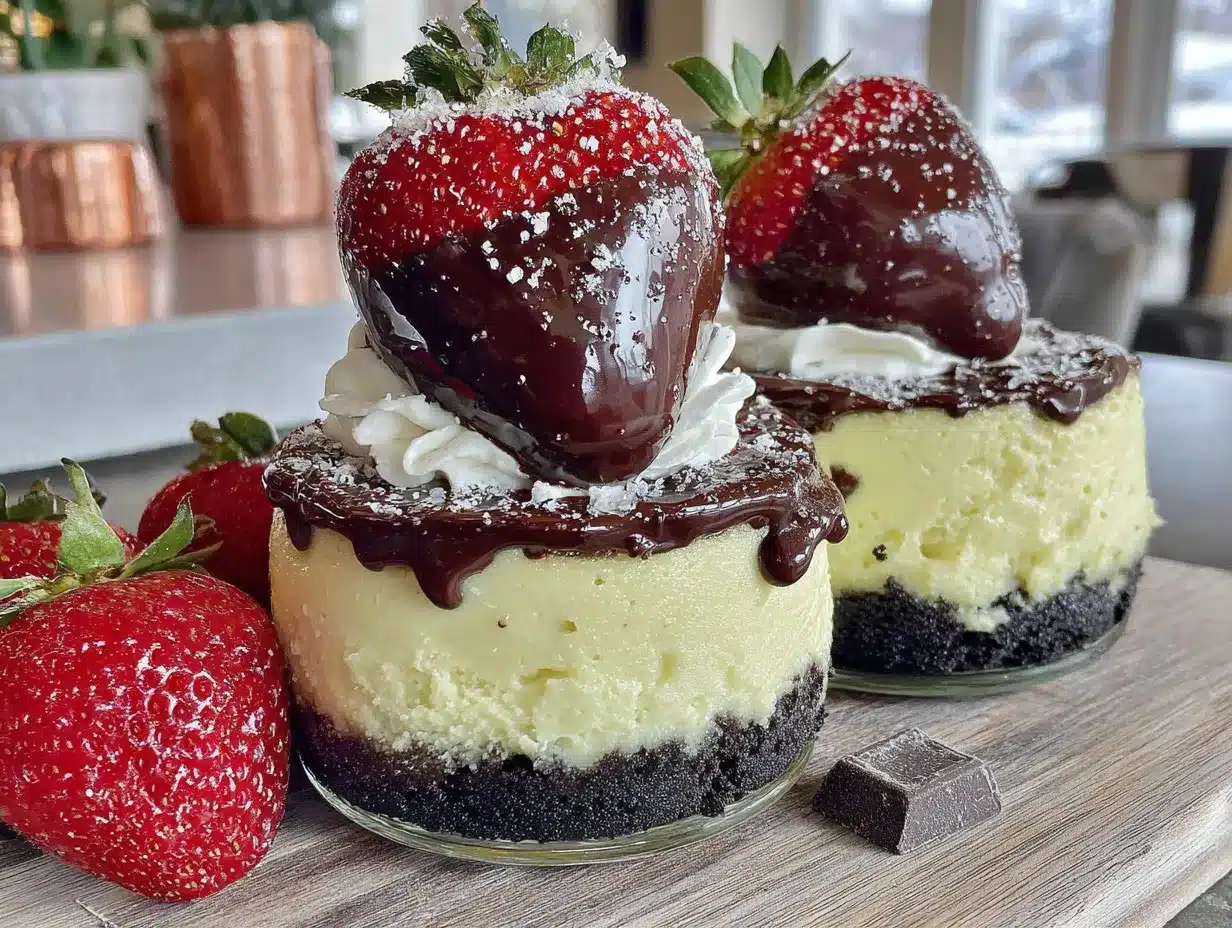
- Unbelievably Delicious: The texture is what gets everyone. That creamy, silky cheesecake filling against the buttery graham cracker crust, topped with a fresh strawberry and a shell of rich chocolate. It’s comfort food turned into something elegant without being fussy.
This isn’t just another no-bake cheesecake recipe. The trick here is using cold heavy cream whipped to stiff peaks before folding it into the cream cheese mixture. That extra step makes the filling light and mousse-like instead of dense and heavy. It’s the kind of dessert that makes people close their eyes after the first bite. And when you’re hosting, that reaction is exactly what you want.
What Ingredients You Will Need
This recipe uses simple, wholesome ingredients that come together to create something that tastes way more complicated than it actually is. Most of these are probably in your kitchen right now, which is exactly how I like my desserts to work.
For the Crust
- Graham cracker crumbs – 1 ½ cups (about 12 full sheets). You can crush them yourself in a zip-top bag with a rolling pin, or buy pre-crushed crumbs. I actually prefer doing it myself because the texture is more rustic. If you’re gluten-free, use gluten-free graham crackers or crushed shortbread cookies.
- Unsalted butter – 6 tablespoons, melted. Salted butter works too if that’s what you have—just skip adding any extra salt. I use Land O’Lakes because it’s consistent and widely available.
- Granulated sugar – 2 tablespoons. This adds just a touch of sweetness to balance the buttery crumbs.
- Pinch of salt – Because every crust needs salt to keep it from tasting flat.
For the Cheesecake Filling
- Cream cheese – 16 ounces (two blocks), softened to room temperature. This is non-negotiable. Cold cream cheese will give you lumpy filling. Let it sit on the counter for at least 30 minutes before you start. I recommend Philadelphia cream cheese for the smoothest texture.
- Powdered sugar – ½ cup, sifted if you’re feeling fancy. It dissolves more easily than granulated sugar and keeps the filling silky.
- Vanilla extract – 1 teaspoon. Pure vanilla extract makes a difference here. Save the imitation stuff for baking, but in a no-bake recipe where the vanilla isn’t cooked, you taste it more.
- Heavy cream – 1 cup, cold. This is the secret ingredient that makes the filling light and airy. Don’t substitute with half-and-half or milk—it won’t whip properly.
- Lemon zest – ½ teaspoon (optional but recommended). Just a tiny bit brightens the whole filling and cuts through the richness. You won’t taste lemon, I promise.
For the Topping
- Fresh strawberries – 12-16 medium-sized berries, washed and dried completely. The drying part matters—wet strawberries will make the chocolate seize. Look for berries that are firm and bright red, not mushy.
- Semi-sweet chocolate chips – 1 cup. I prefer Ghirardelli or Guittard for melting. They’re smooth and consistent. You can also use milk chocolate or dark chocolate depending on your preference.
- Coconut oil – 1 tablespoon. This is optional but helps the chocolate set with a nice shine and makes it easier to bite through when cold.
Substitution Notes
If you’re dairy-free, use dairy-free cream cheese (Kite Hill works well) and coconut cream instead of heavy cream. The texture will be slightly different but still delicious. For a lower-sugar version, use a sugar substitute like monk fruit sweetener in the filling and skip the sugar in the crust. And if strawberries aren’t your thing, try raspberries, sliced bananas, or even pitted cherries—they all work beautifully with the chocolate and cheesecake filling.
Equipment Needed
You don’t need much for this recipe, which is part of the beauty of it. Here’s what you’ll need:
- Muffin tin – A standard 12-cup muffin tin. I use a non-stick one from Wilton that I’ve had for years. If you don’t have one, you can use small ramekins or even disposable plastic cups for a more casual presentation.
- Muffin liners – Paper or foil liners make removal so much easier. I prefer foil liners because they hold their shape better and look prettier when serving.
- Mixing bowls – At least two medium bowls. One for the crust, one for the filling.
- Electric hand mixer or stand mixer – You can whip the cream by hand with a whisk, but your arm will get tired. A hand mixer makes it easy. I use my KitchenAid hand mixer for everything.
- Spatula – A rubber spatula for folding the whipped cream into the cream cheese mixture.
- Small saucepan or microwave-safe bowl – For melting the chocolate. I actually prefer the microwave because it’s faster and I’m impatient.
- Measuring cups and spoons – Standard set. Nothing fancy.
- Rolling pin or food processor – For crushing graham crackers. A rolling pin and a zip-top bag works great and is way easier to clean.
That’s it. No springform pan, no water bath, no complicated equipment. If you have a muffin tin and a mixer, you’re good to go.
Preparation Method
Alright, let’s make these no-bake chocolate covered strawberry cheesecake cups. I’ve broken this down step by step so you can follow along without any confusion. Trust me, if Jen can throw these together in sweatpants, you can too.
- Make the crust. In a medium bowl, combine 1 ½ cups graham cracker crumbs, 2 tablespoons granulated sugar, and a pinch of salt. Pour in 6 tablespoons melted butter and stir with a fork until every crumb is moistened. It should look like wet sand. If it’s too dry, add another tablespoon of melted butter. If it’s too wet, add a few more crumbs.
- Press the crust into the muffin liners. Line your muffin tin with 12 paper or foil liners. Divide the crust mixture evenly among them—about 2 tablespoons per cup. Press it down firmly with the bottom of a small glass or a shot glass. You want it compact so it holds together when you bite into it. Pop the tin in the fridge while you make the filling.
- Whip the heavy cream. In a medium bowl, pour 1 cup cold heavy cream. Using an electric hand mixer on medium-high speed, whip the cream until stiff peaks form. This takes about 2-3 minutes. You’ll know it’s ready when you lift the beaters and the cream stands up in peaks that don’t droop. Be careful not to over-whip or you’ll end up with butter. Set the whipped cream aside.
- Make the cheesecake filling. In a separate large bowl, beat 16 ounces softened cream cheese with ½ cup powdered sugar, 1 teaspoon vanilla extract, and ½ teaspoon lemon zest (if using). Beat on medium speed until smooth and creamy, about 2 minutes. Scrape down the sides of the bowl with a spatula halfway through. There should be no lumps.
- Fold in the whipped cream. Add the whipped cream to the cream cheese mixture. Using a rubber spatula, gently fold everything together. Start from the bottom and bring the mixture up and over, turning the bowl as you go. Don’t stir—folding keeps the air in the whipped cream, which is what makes the filling light and mousse-like. Fold until no white streaks remain.
- Fill the cups. Remove the muffin tin from the fridge. Spoon or pipe the cheesecake filling into each cup, dividing it evenly. You want the filling to come almost to the top of the liner. Smooth the tops with the back of a spoon. Tap the tin gently on the counter to settle the filling and remove any air bubbles.
- Chill the cups. Place the muffin tin in the refrigerator for at least 4 hours, but overnight is better. The filling needs time to set up so it holds its shape when you remove the liners. I know it’s hard to wait, but trust me on this.
- Prepare the strawberries. While the cups are chilling, wash and dry your strawberries. Make sure they’re completely dry—any moisture will cause the chocolate to seize. Cut the stems off so you have a flat bottom, but leave the green tops on if you want them to look pretty.
- Melt the chocolate. In a small microwave-safe bowl, combine 1 cup semi-sweet chocolate chips and 1 tablespoon coconut oil. Microwave in 30-second intervals, stirring after each, until fully melted and smooth. This usually takes about 1 ½ minutes total. Don’t overheat or the chocolate will burn.
- Dip the strawberries. Hold each strawberry by the stem and dip it into the melted chocolate, coating about three-quarters of the berry. Let the excess drip off. Place the dipped strawberry on top of each chilled cheesecake cup, chocolate side down, stem pointing up. Press gently so it sticks.
- Drizzle with extra chocolate. If you have leftover melted chocolate, drizzle it over the tops of the cups for extra visual appeal. You can use a spoon or a small piping bag. I just use a spoon and let it drip naturally—imperfect is more charming.
- Return to the fridge. Place the cups back in the fridge for another 30 minutes to let the chocolate set. Then they’re ready to serve. Remove the paper liners carefully before serving, or serve them right in the liners for a more casual look.
Cooking Tips & Techniques
I’ve made these no-bake chocolate covered strawberry cheesecake cups more times than I can count, and I’ve learned a few things along the way. Here are the tips that make the difference between good and unforgettable:
Soft cream cheese is everything. I cannot stress this enough. If your cream cheese is cold, you’ll end up with lumps that no amount of beating will fix. Let it sit on the counter for at least 30 minutes before you start. If you forgot to take it out, here’s a trick: unwrap the blocks, place them on a microwave-safe plate, and microwave on low power for 10-15 seconds. Not hot, just soft.
Don’t skip the lemon zest. I know it seems like a small thing, but that tiny bit of citrus brightens the whole filling. You won’t taste lemon—it just makes the cheesecake taste more like cheesecake. It’s the same principle as adding salt to chocolate chip cookies. Trust me on this one.
Dry your strawberries thoroughly. The first time I made these, I dipped wet strawberries into melted chocolate and watched in horror as the chocolate turned into a grainy, clumpy mess. That’s called seizing, and it happens when water touches melted chocolate. Pat your berries dry with a paper towel and let them sit for a few minutes before dipping.
Make them a day ahead. These actually taste better after sitting overnight in the fridge. The flavors meld together, the crust softens slightly, and everything becomes perfectly cohesive. Plus, it means you’re not stressed the day of your party. Just pull them out, add the strawberries and chocolate, and you’re done.
Use a piping bag for the filling. If you have a piping bag (or even a zip-top bag with the corner snipped off), use it to fill the cups. It’s cleaner and faster than spooning the filling in. I learned this after making a huge mess the first few times.
Chill the crust before adding the filling. That 10 minutes in the fridge while you make the filling isn’t optional. It helps the butter solidify so the crust stays together when you bite into it. Warm crust will crumble apart.
Variations & Adaptations
One of the best things about this recipe is how easy it is to adapt. Here are some variations I’ve tried and loved:
Berry Swap: Not a strawberry person? Use raspberries, blackberries, or sliced kiwi instead. Each berry brings its own personality. Raspberries are tart and beautiful, blackberries are earthy and rich, and kiwi adds a tropical twist. Just make sure whatever fruit you use is dry before dipping in chocolate.
Chocolate Choices: Semi-sweet is my go-to, but milk chocolate makes these taste like a candy bar, and dark chocolate (60-70% cacao) gives them a sophisticated edge. White chocolate is also gorgeous here—dip the strawberries in white chocolate and drizzle with dark chocolate for a stunning contrast. Just be careful with white chocolate because it burns easily.
Gluten-Free Option: Use gluten-free graham crackers or crushed gluten-free cookies for the crust. I’ve used gluten-free Oreos before and it was incredible. The chocolate cookies against the creamy cheesecake filling? Absolutely decadent.
Vegan Version: Use dairy-free cream cheese (Kite Hill is my favorite), coconut cream instead of heavy cream, and vegan butter. The texture will be slightly different—a bit softer—but still delicious. Use dairy-free chocolate chips for the topping.
Mini Version: Make these in a mini muffin tin for bite-sized desserts. You’ll get about 24 mini cups. Reduce the chilling time to 2 hours and use smaller berries or halved strawberries on top. These are perfect for parties where people want to graze.
Add a Swirl: Before adding the strawberries, swirl some melted chocolate or strawberry jam into the tops of the cheesecake filling. Use a toothpick to create a marbled effect. It looks fancy and adds an extra layer of flavor.
Spiced Crust: Add ½ teaspoon of cinnamon or a pinch of nutmeg to the graham cracker crust. It gives the cups a warm, cozy flavor that’s perfect for fall and winter gatherings.
Serving & Storage Suggestions
These no-bake chocolate covered strawberry cheesecake cups are incredibly versatile when it comes to serving. Here’s how I like to do it:
Serving Temperature: Serve them cold, straight from the fridge. The filling should be firm but not frozen. If they’ve been in the fridge for more than 24 hours, let them sit at room temperature for 5-10 minutes before serving so the texture softens slightly.
Presentation: Remove the paper liners carefully before serving for a cleaner look. Arrange the cups on a beautiful platter or cake stand. I like to garnish the platter with fresh mint leaves and a few extra whole strawberries for color. If you’re serving these at a dinner party, dust the tops with a tiny bit of powdered sugar right before bringing them out—it makes them look professional.
What to Serve Alongside: These are rich, so they pair beautifully with something light. A fresh fruit salad, a crisp white wine like Sauvignon Blanc, or a cup of strong coffee or espresso. If you’re serving a full dessert spread, add some simple cookies or a fruit tart to balance out the richness.
Storage: Store any leftovers in an airtight container in the refrigerator for up to 4 days. The crust will soften slightly over time, but the flavor actually gets better. Do not freeze these—the texture of the cheesecake filling changes when thawed and becomes grainy.
Reheating: You don’t need to reheat these. They’re meant to be served cold. If you want the chocolate to be slightly softer, let them sit at room temperature for 10 minutes before serving.
Make-Ahead Tip: You can prepare the cheesecake cups (without the strawberry and chocolate topping) up to 2 days in advance. Cover the muffin tin tightly with plastic wrap and refrigerate. Add the strawberries and chocolate the day you plan to serve them for the freshest presentation.
Nutritional Information & Benefits
Let’s be real—these are a dessert, not a health food. But that doesn’t mean they can’t have some redeeming qualities. Here’s the estimated nutritional breakdown per cup (based on 12 servings):
| Nutrient | Amount Per Serving |
|---|---|
| Calories | |
| Total Fat | 22g |
| Saturated Fat | 13g |
| Cholesterol | 65mg |
| Sodium | 210mg |
| Total Carbohydrates | 28g |
| Dietary Fiber | 2g |
| Sugars | 18g |
| Protein | 5g |
Now, the good stuff. Strawberries are packed with vitamin C and antioxidants. The cream cheese and heavy cream provide calcium and protein, which helps keep you full. And dark chocolate (if you use it) contains flavonoids that are good for heart health. So while these aren’t exactly a health food, they’re not empty calories either.
If you’re watching your sugar intake, you can reduce the powdered sugar in the filling to ⅓ cup and skip the sugar in the crust. The sweetness from the chocolate and strawberries will still give you plenty of satisfaction. For a lower-fat option, use reduced-fat cream cheese and skip the coconut oil in the chocolate—the texture will be slightly less creamy but still delicious.
As always, if you have specific dietary concerns or allergies, please check all ingredient labels. This recipe contains dairy and gluten (unless modified).
Conclusion
These no-bake chocolate covered strawberry cheesecake cups have become my signature dessert for a reason. They’re simple enough to throw together on a Tuesday night but elegant enough to serve at a dinner party. They taste like you spent hours in the kitchen, but the truth is, you barely broke a sweat.
Every time I make them, I think about Jen in her sweatpants, crushing graham crackers with her bare hands, completely unaware that she was creating something special. That’s the magic of this recipe—it doesn’t need fancy techniques or complicated ingredients. It just needs good components, a little patience while they chill, and people you love to share them with.
I’d love to hear how yours turn out. Did you try a different fruit? Swap the chocolate? Add a swirl? Drop a comment below and tell me about it. And if you’re making these for a gathering, tag me on social media—I want to see your beautiful creations. Trust me, your guests are going to ask for the recipe. Be ready to scribble it on a sticky note, just like Jen did for me.
Frequently Asked Questions
Can I use frozen strawberries instead of fresh?
I don’t recommend it. Frozen strawberries release too much moisture as they thaw, which will make the chocolate seize and the cheesecake filling watery. Stick with fresh, firm berries for the best results.
How far in advance can I make these?
You can make the cheesecake cups (without the strawberry and chocolate topping) up to 2 days ahead. Add the strawberries and chocolate the day you plan to serve them for the freshest look and taste.
Can I use a different type of cookie for the crust?
Absolutely! Oreos, shortbread cookies, vanilla wafers, or even Biscoff cookies all work beautifully. Just crush them the same way you would graham crackers and adjust the butter if needed—darker cookies may need a little less butter.
Why did my chocolate seize when I dipped the strawberries?
This happens when water touches melted chocolate. Make sure your strawberries are completely dry before dipping. Pat them with a paper towel and let them air dry for a few minutes. Also, make sure your bowl and utensils are completely dry.
Can I make these without a muffin tin?
Yes! Use small ramekins, disposable plastic cups, or even small mason jars. Just adjust the portion sizes and chilling time accordingly. Individual serving dishes actually make for a beautiful presentation at parties.
Pin This Recipe!
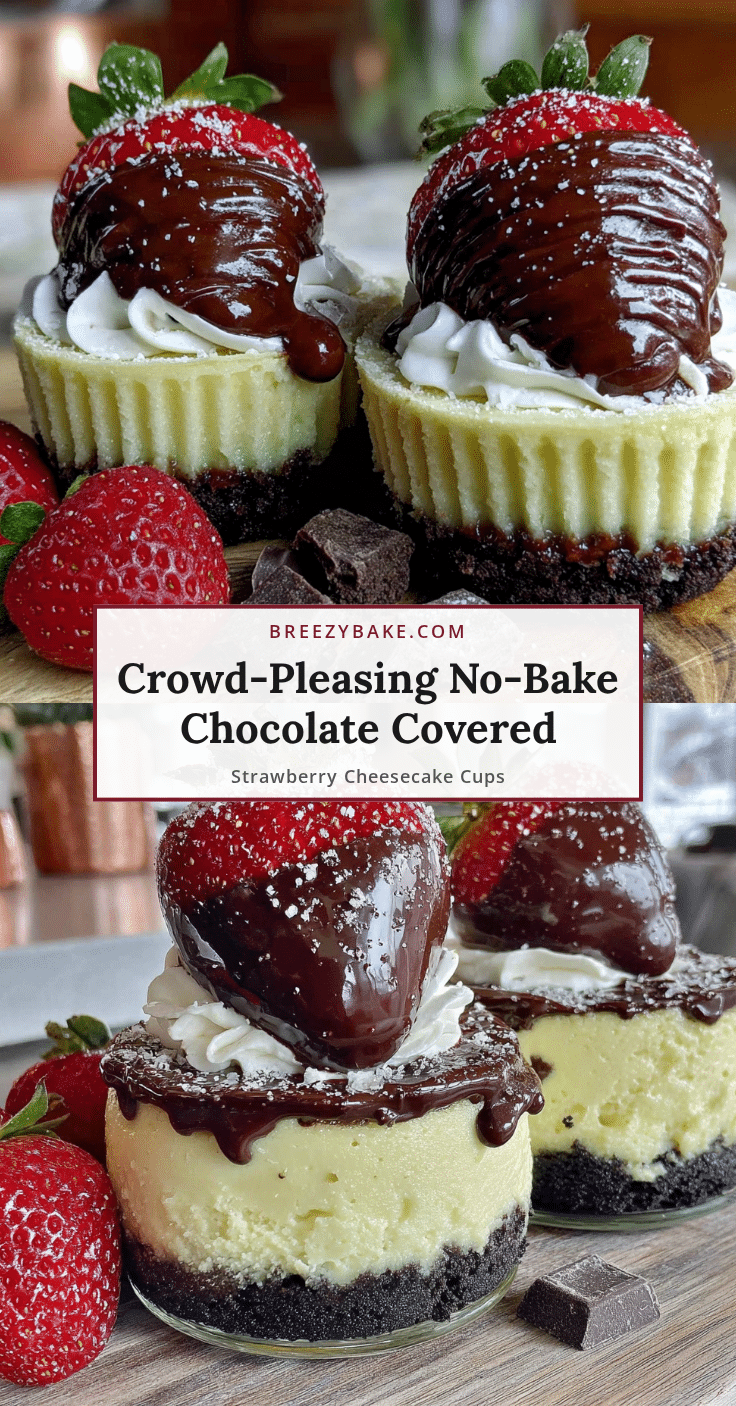
No-Bake Chocolate Covered Strawberry Cheesecake Cups: Easy Dessert
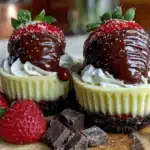
These no-bake chocolate covered strawberry cheesecake cups are a simple, elegant dessert that comes together in minutes. With a buttery graham cracker crust, creamy cheesecake filling, and fresh strawberries dipped in chocolate, they’re perfect for any gathering.
- Prep Time: 15 minutes
- Cook Time: 0 minutes
- Total Time: 4 hours 45 minutes (includes chilling)
- Yield: 12 servings 1x
- Category: Dessert
- Cuisine: American
Ingredients
- 1 ½ cups graham cracker crumbs (about 12 full sheets)
- 6 tablespoons unsalted butter, melted
- 2 tablespoons granulated sugar
- Pinch of salt
- 16 ounces cream cheese, softened to room temperature
- ½ cup powdered sugar, sifted
- 1 teaspoon vanilla extract
- 1 cup heavy cream, cold
- ½ teaspoon lemon zest (optional)
- 12–16 medium fresh strawberries, washed and dried
- 1 cup semi-sweet chocolate chips
- 1 tablespoon coconut oil (optional)
Instructions
- Make the crust: In a medium bowl, combine graham cracker crumbs, granulated sugar, and a pinch of salt. Pour in melted butter and stir with a fork until every crumb is moistened (like wet sand).
- Press the crust into the muffin liners: Line a 12-cup muffin tin with paper or foil liners. Divide the crust mixture evenly among them (about 2 tablespoons per cup). Press down firmly with the bottom of a small glass. Refrigerate while making the filling.
- Whip the heavy cream: In a medium bowl, pour cold heavy cream. Using an electric hand mixer on medium-high speed, whip until stiff peaks form (about 2-3 minutes). Set aside.
- Make the cheesecake filling: In a separate large bowl, beat softened cream cheese, powdered sugar, vanilla extract, and lemon zest (if using) on medium speed until smooth and creamy (about 2 minutes). Scrape down the sides.
- Fold in the whipped cream: Add the whipped cream to the cream cheese mixture. Using a rubber spatula, gently fold together until no white streaks remain.
- Fill the cups: Remove the muffin tin from the fridge. Spoon or pipe the cheesecake filling into each cup, dividing evenly. Smooth the tops and tap the tin gently to settle the filling.
- Chill the cups: Refrigerate for at least 4 hours, preferably overnight.
- Prepare the strawberries: Wash and dry strawberries thoroughly. Cut stems off to create a flat bottom, leaving green tops if desired.
- Melt the chocolate: In a small microwave-safe bowl, combine chocolate chips and coconut oil. Microwave in 30-second intervals, stirring after each, until fully melted and smooth (about 1 ½ minutes total).
- Dip the strawberries: Hold each strawberry by the stem and dip into melted chocolate, coating about three-quarters. Let excess drip off. Place on top of each chilled cheesecake cup, chocolate side down, stem pointing up. Press gently.
- Drizzle with extra chocolate: If desired, drizzle remaining melted chocolate over the tops.
- Return to the fridge: Refrigerate for another 30 minutes to let the chocolate set. Serve cold, removing paper liners carefully if desired.
Notes
Soft cream cheese is essential for a smooth filling. Let it sit at room temperature for at least 30 minutes. Dry strawberries thoroughly before dipping in chocolate to prevent seizing. These taste even better the next day. For a gluten-free version, use gluten-free graham crackers.
Nutrition
- Serving Size: 1 cheesecake cup
- Calories: 320
- Sugar: 18
- Sodium: 210
- Fat: 22
- Saturated Fat: 13
- Carbohydrates: 28
- Fiber: 2
- Protein: 5
Keywords: no-bake cheesecake, strawberry cheesecake cups, chocolate covered strawberries, easy dessert, no-bake dessert, cheesecake cups