I was standing in the middle of the baking aisle at my local grocery store last Tuesday when the smell hit me—that distinct, almost dusty-sweet scent of peanut butter powder mixing with the air from the ventilation system. And suddenly I was eight years old again, sitting cross-legged on the linoleum floor of my aunt Carol’s tiny apartment kitchen. She was rolling these little balls between her palms, and I remember thinking her hands looked like they were making tiny snowballs, except these were brown and smelled like the best thing I’d ever encountered. She passed me one, still warm from the mixing bowl, and I swear I’ve been chasing that exact feeling ever since.
Aunt Carol wasn’t really my aunt—she was my mom’s college roommate who became family in that way that only happens when you share too many late nights and bad decisions with someone. She passed away three years ago, and honestly, I haven’t been able to make these without getting a little misty-eyed. But here’s the thing: these no-bake peanut butter protein balls aren’t just about memory. They’re about that moment when you need something good, something fast, and something that doesn’t require turning on the oven or washing a dozen dishes. Maybe you’ve been there—standing in your kitchen at 3 PM, energy crashing, staring into the pantry like it might offer you a solution?
Well, this is it. These no-bake peanut butter protein balls come together in five minutes flat. I mean it. Five minutes from “I’m hungry” to “I’m satisfied.” They’ve gotten me through afternoon slumps, pre-workout hunger pangs, and those moments when the kids are asking for snacks and you haven’t had a second to breathe. And every single time I roll one, I think of Aunt Carol’s hands and that tiny kitchen. This recipe stayed with me because it’s not just food—it’s a little pocket of calm in a chaotic day.
Why You’ll Love This Recipe
Let me tell you why these no-bake peanut butter protein balls have become my absolute go-to recipe. I’ve tested this version at least a dozen times, tweaking ratios and swapping ingredients until I got it exactly right. And honestly? I think I’ve finally nailed it.
- Quick & Easy: We’re talking five minutes, friends. Five. That’s less time than it takes to decide what to order for delivery. No oven, no stove, no complicated techniques.
- Simple Ingredients: You probably have most of these in your pantry right now. No fancy health food store runs required—just honest, everyday ingredients that work together beautifully.
- Perfect for Busy Days: Whether you need a pre-workout boost, an afternoon pick-me-up, or something to toss in a lunchbox, these balls deliver. They’re the ultimate grab-and-go snack.
- Crowd-Pleaser: I’ve served these at playdates, office meetings, and family gatherings. Kids love them. Adults love them. Even my picky-eating nephew asked for seconds—which never happens.
- Unbelievably Delicious: The texture is this perfect balance of chewy and soft, with just the right amount of sweetness. The peanut butter shines through, and the oats give it that satisfying heartiness.
What makes this recipe different from all the other protein ball recipes out there? It’s the ratio. I spent weeks tweaking the balance of wet to dry ingredients until I found the sweet spot where everything holds together perfectly without being sticky or crumbly. Plus, I use a little trick—a splash of vanilla extract and a pinch of salt—that makes the flavors pop in a way that feels almost decadent.
This isn’t just another healthy snack recipe. It’s the kind that makes you close your eyes after the first bite, even if you’re standing over the kitchen sink eating it in a hurry. It’s comfort food reimagined—healthier, faster, but with the same soul-soothing satisfaction. Perfect for impressing yourself on a Tuesday afternoon, or turning a chaotic moment into something a little bit special.
What Ingredients You Will Need
This recipe uses simple, wholesome ingredients to deliver bold flavor and satisfying texture without the fuss. Most of these are pantry staples, which is exactly what you want in a quick recipe.
For the Protein Balls
- 1 cup creamy peanut butter (I prefer natural peanut butter for cleaner flavor, but regular works too—just avoid the “no-stir” kind if you can, as it can be too runny)
- 1/3 cup honey (or maple syrup for a vegan option—both work beautifully, though honey gives a slightly thicker texture)
- 1 1/2 cups old-fashioned rolled oats (not quick oats—the texture is better with rolled oats, trust me on this one)
- 1/2 cup protein powder (vanilla or unflavored both work; I recommend a plant-based or whey protein that you enjoy the taste of)
- 1/4 cup ground flaxseed (adds fiber and helps bind everything together—plus it’s great for digestion)
- 1/4 cup mini chocolate chips (optional but highly recommended—they add little pockets of sweetness that make these feel like a treat)
- 1 teaspoon vanilla extract (pure vanilla extract makes a difference here; avoid imitation if you can)
- 1/4 teaspoon salt (if your peanut butter is unsalted—if it’s already salted, skip this or reduce to a pinch)
Ingredient Tips and Substitutions
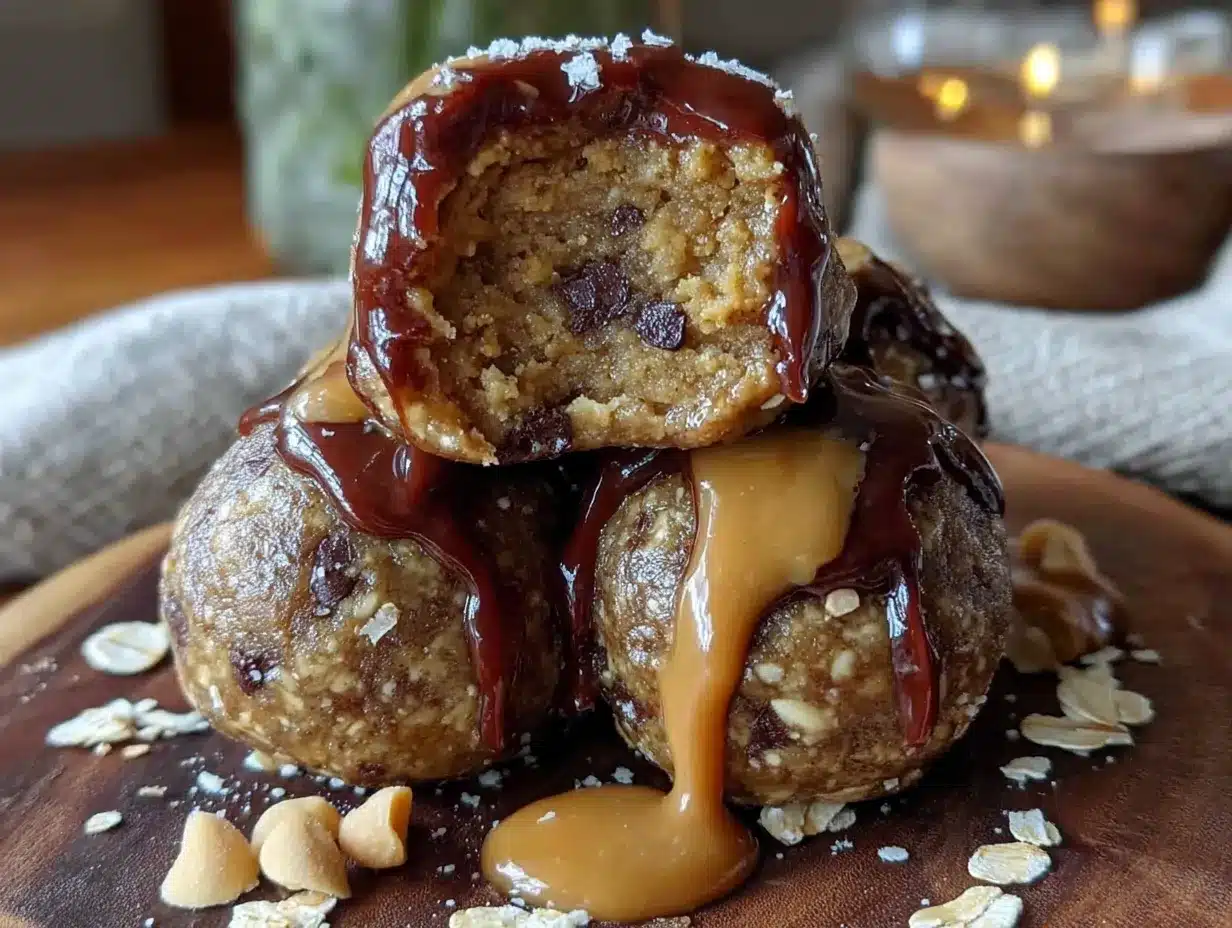
I’ve tested this recipe with different protein powders, and here’s what I’ve learned: plant-based protein powders tend to make the mixture a bit drier, so you might need to add an extra tablespoon of peanut butter or honey. Whey protein gives a softer, more traditional texture. My personal favorite is a vanilla plant-based protein from Orgain—it blends seamlessly without any chalky aftertaste.
For the oats, I’ve tried both old-fashioned and quick oats. Quick oats work in a pinch, but they make the balls a bit mushier. Old-fashioned oats give that satisfying chewiness that makes these feel more substantial. If you’re gluten-sensitive, make sure to grab certified gluten-free oats.
You can also swap the peanut butter for almond butter or sunflower seed butter if you have allergies. Just note that sunflower seed butter can react with baking soda if you ever bake with it, but since this is a no-bake recipe, you’re totally fine. Almond butter will give a slightly different flavor but works beautifully.
And those chocolate chips? I’ve made these without them, and they’re still delicious. But honestly, the mini chocolate chips add such a nice little surprise in every bite that I rarely skip them. Look for mini ones—they distribute more evenly through the mixture.
Equipment Needed
The beauty of this recipe is that you barely need any equipment. Here’s what you’ll need:
- Large mixing bowl (any medium-to-large bowl works—I use my favorite ceramic one that I’ve had for years)
- Measuring cups and spoons (standard set—nothing fancy)
- Rubber spatula or wooden spoon (for mixing—a spatula makes scraping the sides easier)
- Baking sheet or plate (to hold the balls while they set—lined with parchment paper for easy cleanup)
- Cookie scoop or tablespoon (for portioning—a 1-tablespoon scoop gives perfect-sized balls every time)
- Parchment paper (optional but helpful for preventing sticking)
If you don’t have a cookie scoop, don’t worry. Just use a regular tablespoon and your hands. I actually started making these with just a spoon and my palms before I invested in a scoop. The key is to press the mixture firmly so everything holds together.
One tip: if your hands get sticky while rolling, lightly wet them with water or rub a tiny bit of oil on your palms. It makes the process much smoother and less frustrating. Learned that one after my first batch turned into a sticky mess!
Preparation Method
Alright, let’s get rolling—literally. Here’s exactly how to make these no-bake peanut butter protein balls.
-
Combine the wet ingredients first. In your large mixing bowl, add 1 cup of creamy peanut butter and 1/3 cup of honey. Add 1 teaspoon of vanilla extract. Stir these together until they’re well combined and smooth. This should take about 30 seconds. You want the mixture to look glossy and uniform.
-
Add the dry ingredients. To the same bowl, add 1 1/2 cups of rolled oats, 1/2 cup of protein powder, 1/4 cup of ground flaxseed, and 1/4 teaspoon of salt (if using). If you’re adding chocolate chips, set those aside for now—we’ll add them in a moment.
-
Mix everything together. Use your rubber spatula or wooden spoon to fold the dry ingredients into the wet mixture. Start slowly to avoid sending oat flakes flying everywhere (speaking from experience here). Keep mixing until the mixture comes together into a thick, cohesive dough. It should look slightly crumbly at first, but keep going—it will come together. This takes about 1-2 minutes of steady mixing.
-
Add the chocolate chips. Once the dough is well combined, fold in 1/4 cup of mini chocolate chips. Make sure they’re evenly distributed throughout the mixture. If the dough feels too dry at this point, add a tablespoon of peanut butter or a teaspoon of honey to bring it together.
-
Check the texture. Press a small amount of the mixture between your fingers. It should hold together firmly without crumbling. If it falls apart, add a bit more peanut butter or honey. If it’s too sticky, add a tablespoon more oats or protein powder. This is where experience comes in—trust your hands.
-
Portion the mixture. Using your cookie scoop or a tablespoon, scoop out portions of the mixture. Each portion should be about 1 to 1.5 tablespoons. Place them on your parchment-lined baking sheet or plate as you go.
-
Roll into balls. Take each portion and roll it between your palms using gentle, firm pressure. Roll until you have a smooth, round ball. If the mixture starts sticking to your hands, lightly wet your palms or rub a tiny bit of oil on them. Repeat with all portions.
-
Let them set. Place the baking sheet or plate with the rolled balls into the refrigerator. Let them chill for at least 30 minutes. This helps them firm up and hold their shape. If you’re in a hurry, 15 minutes in the freezer works too.
-
Enjoy! Once they’re firm, they’re ready to eat. Store any leftovers in the refrigerator.
One thing I learned the hard way: don’t skip the chilling step. I was impatient once and ate one right after rolling, and it was delicious but fell apart in my hands. The chill time really makes a difference in texture and structure.
Also, if you’re making these with kids, expect a bit of a mess—but that’s half the fun. My niece loves helping roll the balls, even though half of them end up a little lopsided. They still taste the same!
Cooking Tips & Techniques
After making these no-bake peanut butter protein balls more times than I can count, I’ve picked up a few tricks that make the process smoother and the results better.
Temperature matters. If your peanut butter has been sitting in the fridge, let it come to room temperature before mixing. Cold peanut butter is harder to stir and doesn’t blend as evenly with the other ingredients. Same goes for honey—if it’s crystallized or thick, warm it slightly in the microwave (10 seconds should do it) to make it easier to work with.
Don’t overmix. Once the ingredients come together, stop mixing. Overworking the mixture can make the balls dense and tough. You want them tender and slightly chewy, not compacted.
My biggest failure? The first time I made these, I used a protein powder that was flavored with artificial sweetener. I thought I was being smart, saving calories. The result? Balls that tasted like chemicals and disappointment. Learn from my mistake: use a protein powder you actually enjoy eating. The flavor really comes through.
Timing strategy. I like to make a double batch on Sunday afternoons. That way, I have protein balls ready for the whole week. They’re perfect for throwing in a lunchbox or grabbing on the way out the door. I’ve even taken them on road trips—they travel surprisingly well.
Consistency check. If your mixture seems too dry, add a little more peanut butter or honey, one tablespoon at a time. If it’s too wet, add more oats or protein powder. The texture should be similar to play-dough—firm but pliable, holding together without being sticky.
One more thing: taste the mixture before you roll it. I know, I know, raw eggs aren’t an issue here, so go ahead. This is your chance to adjust sweetness or saltiness before committing to the full batch. I always taste and tweak—it’s saved me from a few bland batches.
Variations & Adaptations
This recipe is incredibly versatile. Here are some of my favorite variations:
Chocolate Peanut Butter Version
Swap 2 tablespoons of the oats for unsweetened cocoa powder. The chocolate-peanut butter combination is classic for a reason. I make this version when I’m craving something more dessert-like.
Vegan Option
Use maple syrup instead of honey, and make sure your chocolate chips are dairy-free. The texture stays the same, and the maple flavor adds a lovely warmth that complements the peanut butter beautifully.
Nut-Free Alternative
Substitute sunflower seed butter for the peanut butter. The flavor is different—more earthy—but it works wonderfully. Just be aware that the mixture might be slightly darker in color.
Add-In Ideas
Get creative with mix-ins! Try dried cranberries, chopped nuts (if not avoiding nuts), shredded coconut, chia seeds, or even a pinch of cinnamon. I once added a tablespoon of instant espresso powder for a mocha version that was absolutely killer.
Lower Sugar Version
Reduce the honey to 1/4 cup and add an extra tablespoon of peanut butter. The protein balls will be less sweet, but still satisfying. You can also use a sugar-free protein powder to cut down on sugar further.
My personal favorite variation? I add a tablespoon of chia seeds and a tablespoon of hemp hearts for extra nutrition. It makes them feel even more like a power snack, and the little seeds add a nice texture contrast.
Serving & Storage Suggestions
These no-bake peanut butter protein balls are best served cold or at room temperature. I personally love them straight from the fridge—they’re firm and refreshing, almost like a little frozen treat.
How to serve them: They’re perfect as a grab-and-go snack, but you can also dress them up. Arrange a few on a small plate with fresh berries for a pretty presentation. Or crumble one over yogurt or oatmeal for extra texture and protein. I’ve even packed them in lunchboxes with a little note for my family members—it’s a small gesture that always gets smiles.
Storage instructions: Keep them in an airtight container in the refrigerator. They’ll stay fresh for up to two weeks, though honestly, they never last that long in my house. You can also freeze them for up to three months. Just place them in a single layer on a baking sheet, freeze until solid, then transfer to a freezer bag. Thaw in the refrigerator overnight or at room temperature for about 15 minutes.
Reheating tips: These don’t need reheating, but if you prefer a softer texture, let them sit at room temperature for 10 minutes before eating. The flavors actually develop over time—they taste even better on day two or three as the ingredients meld together.
One note: if you’re packing these for a lunchbox, consider adding an ice pack if it’s warm out. They’ll hold their shape better when kept cool.
Nutritional Information & Benefits
These no-bake peanut butter protein balls are packed with good-for-you ingredients. Here’s a rough estimate per ball (based on making 15 balls):
- Calories: Approximately 180-200
- Protein: 8-10 grams
- Fiber: 3-4 grams
- Healthy Fats: 10-12 grams
- Carbohydrates: 18-22 grams
Health benefits: The peanut butter provides healthy monounsaturated fats and protein that keep you full and satisfied. Oats are rich in fiber, which supports digestion and steady energy levels. Ground flaxseed adds omega-3 fatty acids and extra fiber. Protein powder helps with muscle recovery and satiety.
Dietary considerations: This recipe is naturally gluten-free if you use certified gluten-free oats. For a vegan version, swap honey for maple syrup. For nut-free, use sunflower seed butter. The recipe contains peanuts and may contain dairy depending on your chocolate chips and protein powder—check labels if you have allergies.
I love that these are a snack I can feel good about eating. They’re not just empty calories—they actually fuel my body. And that makes the occasional second one feel totally justified.
Conclusion
These no-bake peanut butter protein balls are more than just a quick snack. They’re a little reminder that good things don’t have to be complicated. Five minutes, a handful of ingredients, and you’ve got something that tastes like a treat but fuels your body like a smart choice.
I hope you’ll make these your own—add your favorite mix-ins, adjust the sweetness to your taste, and share them with the people you love. That’s what cooking is really about, isn’t it? Taking something simple and making it yours.
If you try these, I’d love to hear how they turned out. Drop a comment below, tag me in your photos, or share your favorite variation. And if you’re looking for another easy snack idea, you might also love my quick overnight oats recipe—another no-fuss option for busy mornings.
Now go roll some protein balls. Aunt Carol would approve.
Frequently Asked Questions
Can I use quick oats instead of rolled oats?
Yes, you can use quick oats, but the texture will be softer and less chewy. Rolled oats give a better texture and hold up better in the refrigerator.
How long do these protein balls last?
Stored in an airtight container in the refrigerator, they’ll stay fresh for up to two weeks. You can also freeze them for up to three months.
Can I make these without protein powder?
Absolutely! Just replace the protein powder with an equal amount of rolled oats or ground flaxseed. The texture will be slightly different, but they’ll still be delicious.
Why are my protein balls too dry?
If your mixture is too dry, add a tablespoon of peanut butter or honey at a time until it comes together. Different protein powders absorb moisture differently, so you may need to adjust.
Can I use crunchy peanut butter instead of creamy?
Yes, crunchy peanut butter works great! It adds extra texture and little peanut pieces throughout the balls. Just note that the mixture might be slightly harder to roll.
Pin This Recipe!
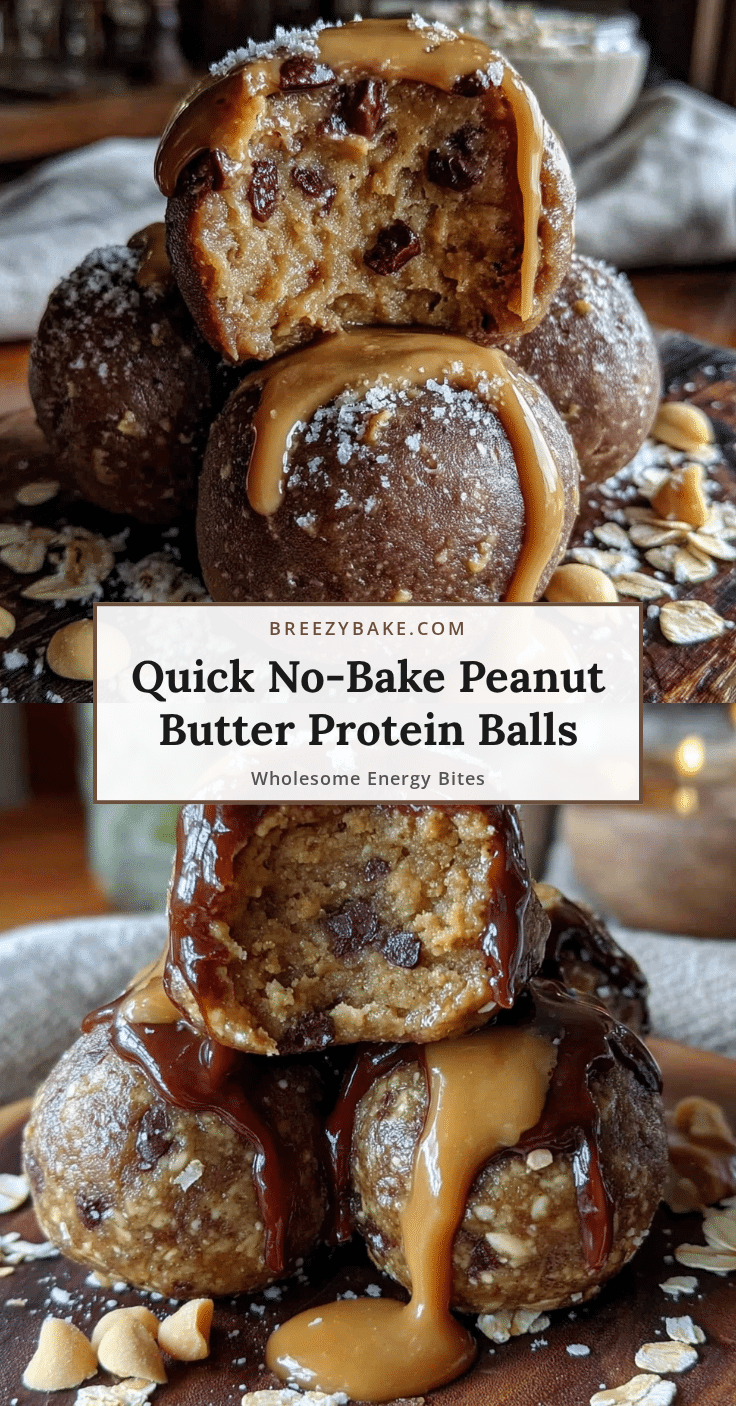
No-Bake Peanut Butter Protein Balls: Easy 5-Minute Recipe
These no-bake peanut butter protein balls come together in five minutes flat. They’re the perfect grab-and-go snack for busy days, made with simple pantry ingredients and packed with protein and fiber.
- Prep Time: 5 minutes
- Cook Time: 0 minutes
- Total Time: 35 minutes (includes 30 minutes chilling)
- Yield: 15 balls 1x
- Category: Snack
- Cuisine: American
Ingredients
- 1 cup creamy peanut butter
- 1/3 cup honey (or maple syrup for vegan)
- 1 1/2 cups old-fashioned rolled oats
- 1/2 cup protein powder (vanilla or unflavored)
- 1/4 cup ground flaxseed
- 1/4 cup mini chocolate chips (optional)
- 1 teaspoon vanilla extract
- 1/4 teaspoon salt (if peanut butter is unsalted)
Instructions
- In a large mixing bowl, combine 1 cup creamy peanut butter, 1/3 cup honey, and 1 teaspoon vanilla extract. Stir until smooth and glossy.
- Add 1 1/2 cups rolled oats, 1/2 cup protein powder, 1/4 cup ground flaxseed, and 1/4 teaspoon salt (if using). Mix until a thick, cohesive dough forms.
- Fold in 1/4 cup mini chocolate chips until evenly distributed.
- Check the texture: press a small amount between your fingers; it should hold together firmly. If too dry, add a tablespoon of peanut butter or honey. If too sticky, add more oats or protein powder.
- Using a cookie scoop or tablespoon, portion the mixture into 1 to 1.5 tablespoon-sized balls.
- Roll each portion between your palms into smooth balls. If sticky, lightly wet your hands or rub with a tiny bit of oil.
- Place the balls on a parchment-lined baking sheet or plate. Refrigerate for at least 30 minutes (or 15 minutes in the freezer) to firm up.
- Enjoy cold or at room temperature. Store leftovers in an airtight container in the refrigerator.
Notes
If using plant-based protein powder, the mixture may be drier; add an extra tablespoon of peanut butter or honey. For best texture, use old-fashioned rolled oats. Let peanut butter come to room temperature for easier mixing. Taste the mixture before rolling to adjust sweetness or saltiness. Chilling is essential for the balls to hold their shape.
Nutrition
- Serving Size: 1 ball
- Calories: 190
- Sugar: 10
- Sodium: 95
- Fat: 11
- Saturated Fat: 2.5
- Carbohydrates: 20
- Fiber: 3.5
- Protein: 9
Keywords: no-bake peanut butter protein balls, easy protein balls, 5-minute snack, healthy snack, gluten-free snack, high protein snack


