That night, the kitchen was my quiet refuge. The hum of the coffee grinder and the rich aroma of freshly brewed espresso filled the air, cutting through the late-night fog of exhaustion. Honestly, I wasn’t planning on crafting a showstopper dessert, but a sudden craving for something deeply chocolatey with a hint of coffee nudged me into action. I’d been skeptical about mixing espresso into cake batter before—thought it might overpower or taste bitter. Yet, as the layers baked and the mocha buttercream came together, something clicked. Each forkful felt like a little secret indulgence, the kind that makes you pause and savor despite the whirlwind of daily life. It’s funny how a simple cake can turn a restless night into a memorable moment. This perfect espresso chocolate layer cake with mocha buttercream isn’t just dessert; it’s that cozy confidence boost you didn’t know you needed.
Why You’ll Love This Recipe
This recipe has been through the wringer of multiple kitchen tests, tweaks, and honest taste trials. It’s a dependable classic that’s my go-to when I want rich flavor without fuss.
- Quick & Easy: Ready in just about an hour from start to finish — perfect for last-minute celebrations or a spontaneous treat.
- Simple Ingredients: You probably have most of these staples on hand—no hunting for exotic items required.
- Perfect for Special Occasions: Whether it’s a birthday, an intimate dinner, or a treat for yourself after a long day, this cake fits the bill.
- Crowd-Pleaser: Friends and family have repeatedly requested this one, and it’s always met with smiles and a few “wow” moments.
- Unbelievably Delicious: The espresso intensifies the chocolate, while the mocha buttercream adds just the right creamy sweetness and depth.
What sets this cake apart is the way the espresso isn’t just an add-on but a key player, enhancing the chocolate without stealing the show. The buttercream frosting is whipped light but still holds the mocha punch that makes every bite linger. Honestly, it’s the kind of dessert that has you closing your eyes to enjoy each forkful, just like the mint chocolate cake jar parfaits that blend layers and flavors effortlessly for maximum delight.
What Ingredients You Will Need
This recipe uses straightforward, wholesome ingredients that work together to create a moist, flavorful cake with a luscious buttercream frosting. Most are pantry staples, making this an easy whip-up without special trips to the store.
- For the Cake Batter:
- All-purpose flour – 2 ½ cups (315 g) (I prefer King Arthur for consistent results)
- Unsweetened cocoa powder – ¾ cup (65 g) (Dutch-processed for richer chocolate flavor)
- Baking powder – 1 ½ teaspoons
- Baking soda – 1 ½ teaspoons
- Salt – 1 teaspoon
- Granulated sugar – 2 cups (400 g)
- Large eggs – 3, room temperature
- Whole milk – 1 cup (240 ml), room temperature (can swap with almond milk for dairy-free)
- Strong brewed espresso – 1 cup (240 ml), freshly made and cooled (key to that espresso punch)
- Vegetable oil – ½ cup (120 ml) (adds moistness)
- Vanilla extract – 2 teaspoons
- For the Mocha Buttercream Frosting:
- Unsalted butter – 1 cup (227 g), softened (I like using Plugrá for creaminess)
- Powdered sugar – 4 cups (480 g), sifted
- Unsweetened cocoa powder – ⅓ cup (28 g)
- Strong brewed espresso – 2 tablespoons, cooled (this keeps the mocha flavor balanced)
- Vanilla extract – 1 teaspoon
- Salt – a pinch (to balance sweetness)
For a seasonal twist, I sometimes add a pinch of cinnamon or swap the espresso with a shot of flavored coffee syrup. If avoiding caffeine, decaf espresso or strong brewed chicory coffee works surprisingly well. For gluten-free options, almond or oat flour can be used but expect a slightly denser texture.
Equipment Needed
- Two 9-inch (23 cm) round cake pans (non-stick or lined with parchment paper for easy release)
- Electric mixer (stand or hand) for smooth batter and frosting
- Mixing bowls (medium and large)
- Measuring cups and spoons (accuracy matters here!)
- Fine mesh sieve for sifting cocoa and powdered sugar (helps avoid lumps)
- Rubber spatula for folding and scraping
- Cooling racks to cool cakes evenly
- Offset spatula or butter knife for frosting spreading
If you don’t have a stand mixer, a sturdy hand mixer works just fine—just don’t rush when whipping the buttercream; it needs time to reach that fluffy texture. For budget-friendly bakeware, simple aluminum pans lined with parchment paper also do the trick. Pro tip: Keep your butter at room temperature for easier creaming, which really smooths out the frosting.
Preparation Method
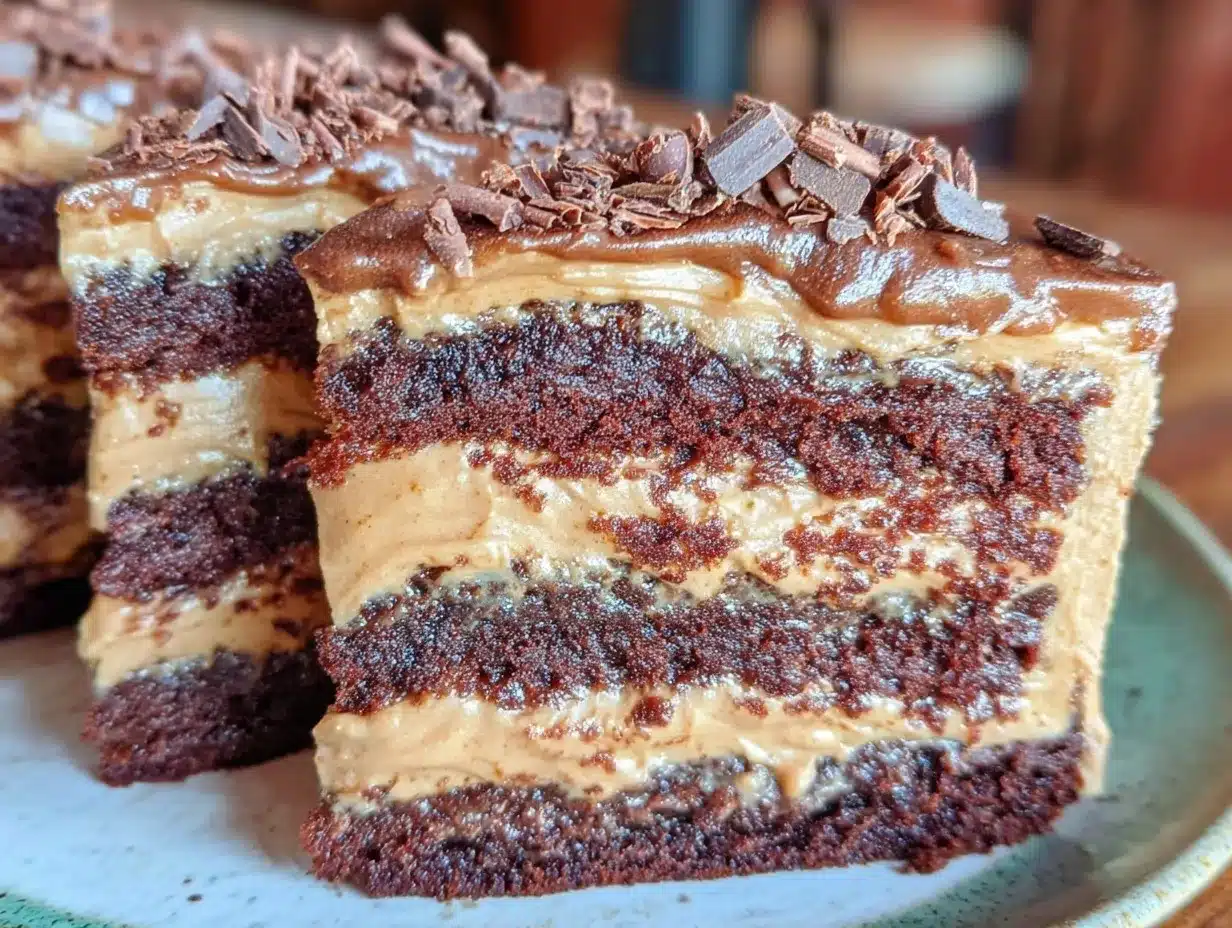
- Preheat the Oven and Prepare Pans: Set your oven to 350°F (175°C). Grease two 9-inch cake pans and line their bottoms with parchment paper for an easy release. This step prevents that frustrating cake sticking scenario.
- Sift Dry Ingredients: In a large bowl, sift together the all-purpose flour, cocoa powder, baking powder, baking soda, and salt. This ensures even distribution and a light crumb. Set aside.
- Mix Wet Ingredients: In a separate bowl, whisk together the sugar and eggs until slightly fluffy. Add the milk, vegetable oil, and vanilla extract, stirring until combined.
- Combine Wet and Dry: Gradually add the sifted dry ingredients to the wet mixture, alternating with the cooled espresso. Start and end with the dry ingredients. Stir gently with a spatula until just combined—avoid overmixing to keep the cake tender.
- Divide Batter and Bake: Pour the batter evenly into the prepared pans. Tap the pans lightly on the counter to release air bubbles. Bake for 30-35 minutes or until a toothpick inserted in the center comes out clean. The cake should spring back lightly when touched.
- Cool Completely: Let the cakes cool in the pans for 10 minutes before transferring them to wire racks. Cooling fully is key before frosting, or you risk a melty mess.
- Make the Mocha Buttercream: Beat the softened butter on medium speed until creamy, about 2 minutes. Gradually add the sifted powdered sugar and cocoa powder, alternating with the espresso and vanilla. Increase speed to high and whip until fluffy, about 3-4 minutes. Add a pinch of salt to balance sweetness.
- Assemble the Cake: Level the tops of the cakes if needed. Place the first layer on your serving plate and spread a generous layer of mocha buttercream over it. Top with the second layer, then frost the top and sides evenly. Use an offset spatula for smooth edges.
- Chill and Serve: For best slicing, chill the cake for at least 30 minutes to let the frosting set. Bring to room temperature before serving to enjoy that melt-in-your-mouth texture.
If you spot any cracks in your cake layers, a quick tip is to cover them with extra frosting or a sprinkle of chocolate shavings. And you know that moment when the batter smells so good you’re tempted to sneak a spoonful? Totally normal.
Cooking Tips & Techniques
Getting this espresso chocolate layer cake just right means a few savvy moves. First, don’t underestimate the power of room-temperature ingredients — cold eggs or milk can make the batter curdle or mix unevenly. I learned this the hard way, and the texture really suffered.
When mixing the batter, fold gently after combining the wet and dry ingredients to avoid a tough crumb. Overmixing is a sneaky culprit for dense cakes. For the espresso, use fresh, strong brewed coffee, but cooled completely. Hot espresso can kill your leavening agents and cause a flat cake.
The mocha buttercream should be whipped long enough to get that fluffy texture but not so long that it starts to separate. If it gets too soft, pop it in the fridge for 10 minutes, then re-whip briefly.
Timing-wise, I usually bake the layers while prepping the espresso, so nothing sits around too long. Multitasking like this saves time and keeps everything fresh.
A common mistake is rushing to frost when cakes are still warm — patience pays off. For a professional touch, chilling the cake layers before frosting helps maintain shape and prevents crumbs from mixing into the buttercream.
Variations & Adaptations
- Dietary Variation: Use gluten-free flour blends instead of all-purpose flour for a gluten-free version. For dairy-free, swap butter with vegan margarine and milk with almond or oat milk. I’ve tried coconut milk once—it adds a subtle tropical note that’s surprisingly nice.
- Flavor Twist: Add a teaspoon of orange zest to the batter for a citrus-chocolate combo. Or mix in a tablespoon of chili powder for a subtle spicy kick that wakes up the mocha flavor.
- Cooking Method: This cake can be baked in a 9×13-inch pan for a single-layer sheet cake with adjusted baking time (about 35-40 minutes). For cupcakes, fill liners ⅔ full and bake for 18-20 minutes.
- Frosting Swap: Try a cream cheese mocha frosting for tangy richness, or a simple espresso glaze for a lighter finish.
One personal favorite is adding crushed espresso beans on top for a crunchy contrast. I once swapped the espresso for a rich cold brew concentrate, and it made the mocha flavor even more intense. Just a heads-up—it’s not for the faint-hearted!
Serving & Storage Suggestions
This cake tastes best at room temperature, allowing the mocha buttercream to soften just enough for that creamy bite. I like to serve it with a dusting of cocoa powder or a few fresh berries on the side, which add a bright contrast.
Pairing it with a cup of black coffee or a creamy latte works wonders, especially when you want to mirror those espresso notes throughout the experience.
Store leftovers covered tightly in the fridge for up to 4 days. Before serving again, let the cake sit out for 30 minutes to soften the frosting. You can freeze the cake (wrapped in plastic and foil) for up to 2 months; thaw overnight in the fridge.
Interestingly, the flavors deepen after a day or two, so if you can wait, it’s worth the patience. This slow flavor development is much like the layered textures in the decadent chocolate-covered strawberry mousse cups, where chilling intensifies the taste beautifully.
Nutritional Information & Benefits
Per serving (based on 12 slices), this cake contains approximately:
| Calories | 410 kcal |
|---|---|
| Fat | 22 g |
| Saturated Fat | 13 g |
| Carbohydrates | 52 g |
| Sugars | 38 g |
| Protein | 5 g |
The espresso adds antioxidants and a natural bitterness that cuts the sweetness, making this dessert feel a little less heavy than most chocolate cakes. Cocoa powder is rich in flavonoids, which have heart-healthy properties, and using oil instead of butter in the batter keeps the crumb moist without too much saturated fat.
Keep in mind this cake contains caffeine from espresso and common allergens like wheat, eggs, and dairy. If you’re watching carbs, consider swapping sugar with a natural substitute, but note texture may vary.
Conclusion
This perfect espresso chocolate layer cake with mocha buttercream has become one of those recipes I reach for when I want something that tastes fancy but doesn’t demand hours in the kitchen. It strikes the right balance between bold flavor and comforting texture, with a frosting that’s just the right kind of indulgent.
Feel free to tweak the espresso strength or try the variations to suit your taste buds. I love how this cake has quietly stolen the spotlight at gatherings, much like the pink velvet cookie crumble board—simple yet impressive. It’s the kind of recipe that rewards your effort with smiles and second helpings.
If you end up making it, I’d love to hear your favorite twists or how it turned out for you. Baking is better when shared, right? So, here’s to many cozy moments with cake and coffee.
FAQs About Perfect Espresso Chocolate Layer Cake
Can I use instant espresso powder instead of brewed espresso?
Yes, dissolve 1 tablespoon of instant espresso powder in 1 cup of hot water and let it cool before adding. It works well but freshly brewed espresso provides a richer flavor.
How do I prevent the cake from drying out?
Make sure not to overbake—start checking at 30 minutes. Also, avoid overmixing the batter and store the cake tightly wrapped to maintain moisture.
Can I make this cake ahead of time?
Absolutely! The cake layers can be baked a day ahead and wrapped well. Assemble and frost on the day you plan to serve for freshest results.
Is it possible to freeze the frosted cake?
Yes, freeze the frosted cake tightly wrapped in plastic wrap and foil. Thaw overnight in the refrigerator and bring to room temperature before serving.
What’s the best way to get a smooth buttercream frosting?
Use room-temperature butter and sift your powdered sugar and cocoa powder. Beat the butter first until creamy before gradually adding dry ingredients and espresso, whipping on high for fluffiness.
Pin This Recipe!
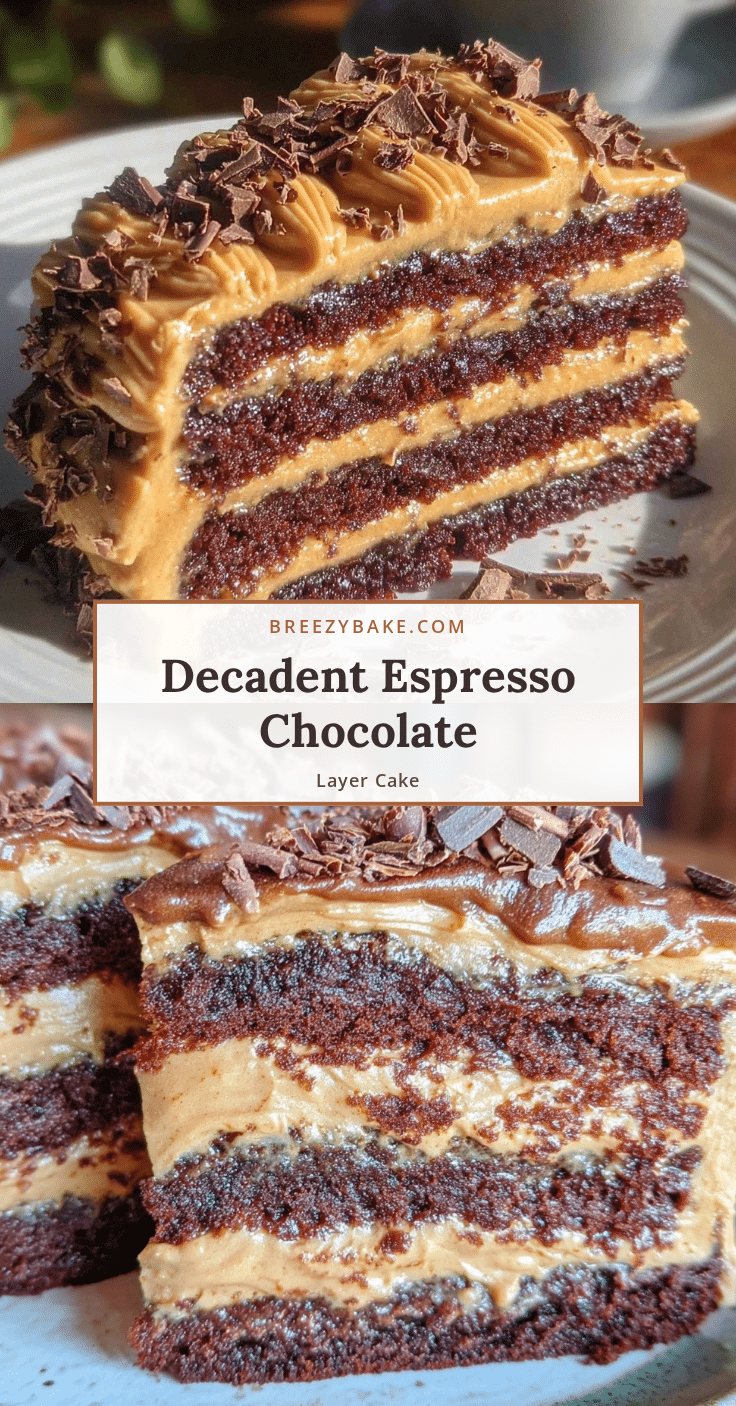
Perfect Espresso Chocolate Layer Cake Recipe with Easy Mocha Buttercream Frosting
A rich and moist chocolate layer cake enhanced with espresso and topped with a creamy mocha buttercream frosting. Perfect for special occasions or a cozy indulgence.
- Prep Time: 20 minutes
- Cook Time: 35 minutes
- Total Time: 55 minutes
- Yield: 12 servings 1x
- Category: Dessert
- Cuisine: American
Ingredients
- 2 ½ cups (315 g) all-purpose flour
- ¾ cup (65 g) unsweetened cocoa powder (Dutch-processed)
- 1 ½ teaspoons baking powder
- 1 ½ teaspoons baking soda
- 1 teaspoon salt
- 2 cups (400 g) granulated sugar
- 3 large eggs, room temperature
- 1 cup (240 ml) whole milk, room temperature (can swap with almond milk for dairy-free)
- 1 cup (240 ml) strong brewed espresso, freshly made and cooled
- ½ cup (120 ml) vegetable oil
- 2 teaspoons vanilla extract
- 1 cup (227 g) unsalted butter, softened
- 4 cups (480 g) powdered sugar, sifted
- ⅓ cup (28 g) unsweetened cocoa powder
- 2 tablespoons strong brewed espresso, cooled
- 1 teaspoon vanilla extract
- Pinch of salt
Instructions
- Preheat the oven to 350°F (175°C). Grease two 9-inch cake pans and line their bottoms with parchment paper.
- Sift together the all-purpose flour, cocoa powder, baking powder, baking soda, and salt in a large bowl.
- In a separate bowl, whisk sugar and eggs until slightly fluffy. Add milk, vegetable oil, and vanilla extract; stir until combined.
- Gradually add the sifted dry ingredients to the wet mixture, alternating with the cooled espresso, starting and ending with dry ingredients. Stir gently until just combined.
- Pour batter evenly into prepared pans. Tap pans lightly to release air bubbles. Bake for 30-35 minutes or until a toothpick inserted in the center comes out clean.
- Cool cakes in pans for 10 minutes, then transfer to wire racks to cool completely.
- For the mocha buttercream, beat softened butter on medium speed until creamy (about 2 minutes). Gradually add powdered sugar and cocoa powder, alternating with espresso and vanilla extract.
- Increase mixer speed to high and whip until fluffy (3-4 minutes). Add a pinch of salt to balance sweetness.
- Level cake tops if needed. Place first layer on serving plate and spread a generous layer of buttercream. Top with second layer and frost top and sides evenly.
- Chill cake for at least 30 minutes to set frosting. Bring to room temperature before serving.
Notes
Use room-temperature ingredients for best results. Avoid overmixing batter to keep cake tender. Chill cake layers before frosting to prevent crumbs mixing into buttercream. Freshly brewed espresso provides richer flavor than instant powder. For gluten-free, substitute flour blends; for dairy-free, use vegan margarine and plant milk.
Nutrition
- Serving Size: 1 slice (1/12 of cak
- Calories: 410
- Sugar: 38
- Fat: 22
- Saturated Fat: 13
- Carbohydrates: 52
- Protein: 5
Keywords: espresso chocolate cake, mocha buttercream, chocolate layer cake, easy chocolate cake, coffee cake, dessert recipe


