Three-time-in-a-week, I found myself elbow-deep in pastel-hued royal icing, frantically piping pumpkin faces and ghostly swirls under the dim kitchen light. The first batch was a total disaster—too runny, colors bleeding into one another like a watercolor gone wild. But honestly, I couldn’t stop tweaking the recipe, chasing that elusive balance between soft sugar cookie and the perfect royal icing texture that would dry smooth and shiny without cracking. By the fourth attempt, the cookies had that delicate bite I craved, and the icing wasn’t just pretty but held its shape like a charm. It was like the cookies themselves whispered, “Keep going, you’re almost there.”
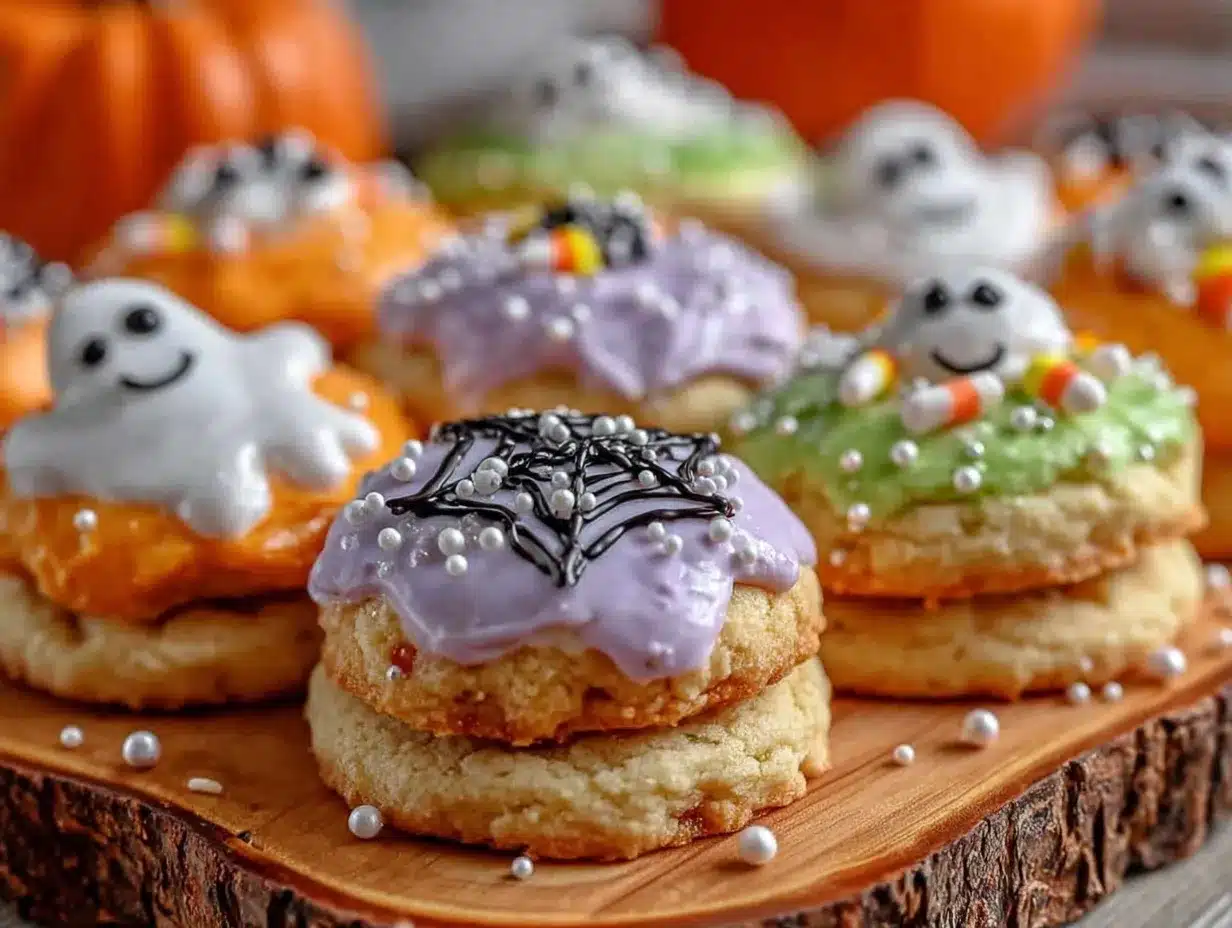
What pulled me back every Friday for a month was that weird mix of frustration and satisfaction — you know, when something almost perfect keeps pulling you back for “just one more try.” The pastel shades—soft lilacs, mint greens, pumpkin-pale oranges—felt like a gentle rebellion against the usual dark Halloween colors, a fresh twist that made these cookies feel surprisingly joyful. And the royal icing? It was the real game-changer, giving me that glossy finish that made each cookie look like a tiny edible artwork.
It’s funny — I never thought Halloween sugar cookies would become my obsession, but here we are. Each batch brought me closer to a cookie that wasn’t just about the spooky theme but about that perfect texture, that flawless icing, and a pastel palette that felt just right. These cookies stuck with me, not because they’re flashy but because they’re quietly charming — the kind that make you smile as you bite in, with a little crunch and a sweet, smooth finish. And honestly, they’re the perfect kind of treat to share quietly with friends or to savor when you want something festive but subtle.
Why You’ll Love This Recipe
After all those attempts and some serious kitchen chaos, this recipe for Perfect Pastel Halloween Sugar Cookies with Royal Icing really nails it. Here’s why you might find yourself baking these cookies more than once, too:
- Quick & Easy: You can have these cookies ready in about 1 hour from start to finish, including icing. Perfect for last-minute Halloween plans or when you realize you need a festive treat ASAP.
- Simple Ingredients: No need to hunt down strange baking items — most are pantry staples like flour, sugar, and eggs. The royal icing calls for just a few basics like powdered sugar and meringue powder.
- Perfect for Halloween Parties: These cookies are a hit for family gatherings, classroom treats, or even a cozy night in. The pastel colors bring a fresh vibe to typical Halloween spreads.
- Crowd-Pleaser: Kids and adults both love the soft texture and the sweet, smooth icing that isn’t overly sugary.
- Unbelievably Delicious: The cookies have a tender crumb with a slight crisp edge, and the royal icing dries to a nice sheen that’s just perfect for decorating intricate designs or simple shapes.
This isn’t just any sugar cookie recipe. The royal icing here is whipped to that flawless consistency where it’s pipeable but dries hard enough to stack the cookies without smudging. Plus, the pastel colors are deliberately muted — not the usual neon Halloween mess — giving these cookies a unique charm. If you’ve tried other sugar cookie recipes before and felt frustrated by cracking icing or bland flavor, this one will probably surprise you.
It’s also a bit of a creative outlet — mixing the colors, choosing the designs, watching the icing dry — that’s the kind of kitchen therapy I didn’t realize I needed. Honestly, these pastel Halloween sugar cookies have become my go-to when I need a little fun and a lot of sweet comfort.
What Ingredients You Will Need
For these pastel Halloween sugar cookies, the ingredients are straightforward but carefully chosen to deliver both flavor and that perfect texture. The royal icing is the star here, but the cookie base holds its own with a buttery, tender crumb.
For the Sugar Cookies:
- All-purpose flour – 2 ¾ cups (345 g); sifted for smooth dough
- Baking powder – 1 teaspoon; for a little lift without puffing
- Salt – ½ teaspoon; balances sweetness
- Unsalted butter, softened – 1 cup (227 g); I prefer Plugrá for its creaminess
- Granulated sugar – 1 ¼ cups (250 g); gives that classic sugar cookie snap
- Large eggs, room temperature – 2; essential for binding and tenderness
- Pure vanilla extract – 2 teaspoons; the flavor base
- Almond extract – ½ teaspoon (optional); adds a subtle nutty note that cuts the sweetness
For the Royal Icing:
- Powdered sugar – 4 cups (480 g); sifted for smooth icing
- Meringue powder – 3 tablespoons; I like Wilton brand for reliability
- Warm water – ⅔ cup (160 ml); to reach perfect piping consistency
- Pure vanilla extract – 1 teaspoon; for a touch of flavor
- Gel food coloring – pastel shades like lavender, mint, pumpkin orange, and soft pink (use sparingly to avoid runny icing)
You’ll notice all the ingredients are pretty basic, but the magic comes from how you combine them. I usually recommend using fresh eggs and quality butter — it really makes a difference in flavor and texture. For a gluten-free version, substituting the all-purpose flour with a 1:1 gluten-free baking flour blend works well, but expect a slightly different crumb.
Equipment Needed
- Stand mixer or hand mixer: Essential for creaming butter and mixing dough smoothly.
- Rolling pin: To roll out the dough evenly (I sometimes use a silicone rolling pin cover to prevent sticking).
- Cookie cutters: Halloween-themed shapes like pumpkins, ghosts, bats, or simple circles for easy decorating.
- Baking sheets: Preferably with a silicone baking mat or parchment paper for even baking and easy cleanup.
- Cooling racks: To let the cookies cool completely before icing.
- Piping bags and tips: Small round tips (size #2 or #3) for precise royal icing details.
- Spatula and mixing bowls: For mixing dough and icing.
If you don’t have a stand mixer, a sturdy hand mixer works fine—just be ready for a bit of an arm workout. I’ve found that silicone mats are worth the investment since cookies slide off easier, and cleanup is a breeze. For piping, disposable bags are convenient, but I prefer reusable ones for less waste. Also, keep a toothpick handy to fix tiny icing mistakes—trust me, it’s a lifesaver.
Preparation Method
- Mix dry ingredients: In a medium bowl, whisk together 2 ¾ cups (345 g) of sifted all-purpose flour, 1 teaspoon baking powder, and ½ teaspoon salt. Set aside. (This ensures even distribution and prevents clumps.) Time: 5 minutes.
- Cream butter and sugar: In a large bowl, beat 1 cup (227 g) softened unsalted butter with 1 ¼ cups (250 g) granulated sugar until light and fluffy — about 3-4 minutes on medium speed. You’ll notice the color lighten and texture become almost mousse-like.
- Add eggs and extracts: Beat in 2 room-temperature eggs, one at a time, mixing well after each addition. Stir in 2 teaspoons vanilla extract and ½ teaspoon almond extract if using. The dough will smell heavenly at this point.
- Combine dry and wet: Gradually add the flour mixture to the butter mixture, mixing on low speed until just combined. Don’t overmix; the dough should be soft but not sticky. If it feels too sticky, chill for 15 minutes.
- Chill the dough: Divide dough into two discs, wrap in plastic wrap, and refrigerate for 1 hour or until firm enough to roll. This step is crucial for clean cookie shapes and prevents spreading.
- Preheat oven and prepare pans: Set oven to 350°F (175°C). Line baking sheets with parchment paper or silicone mats.
- Roll and cut: On a lightly floured surface, roll out one dough disc to about ¼ inch (6 mm) thickness. Use Halloween-themed cookie cutters to cut shapes and transfer carefully to baking sheets, spacing about 1 inch (2.5 cm) apart.
- Bake: Bake cookies for 8-10 minutes, or until edges just start to turn golden. The centers will look slightly underbaked—that’s perfect. Remove and cool on pans for 5 minutes before transferring to wire racks to cool completely.
- Prepare royal icing: In a large bowl, whisk 4 cups (480 g) powdered sugar with 3 tablespoons meringue powder. Slowly add ⅔ cup (160 ml) warm water and 1 teaspoon vanilla extract, beating on medium-high speed until stiff peaks form, about 5-7 minutes. The icing should be thick enough to hold a peak but pipe smoothly.
- Color and pipe: Divide icing into small bowls and tint with gel food coloring to pastel shades. Transfer each color into piping bags fitted with small round tips. Outline cookie edges first, then flood the center with thinned icing (add a few drops of water to flood consistency). Use a toothpick to pop bubbles and gently spread icing if needed.
- Dry and decorate: Let the iced cookies dry at room temperature for at least 4 hours or overnight. Once dry, add additional details like faces or patterns with thicker icing.
Pro tip: If your icing cracks while drying, it might be too thick or the humidity is high. Try adjusting water slightly or drying in a less humid spot. Also, don’t rush the chilling step for the dough; it’s key to that perfect shape and texture.
Cooking Tips & Techniques
One of the trickiest parts of making pastel Halloween sugar cookies with royal icing is getting the icing consistency just right. From experience, the key is patience and small adjustments. Royal icing that’s too runny will spread and lose details; too thick, and it won’t spread evenly. I always recommend starting with thicker icing for outlines and thinning a small portion for flooding.
Another tip: room temperature dough is your enemy here. The dough must be cold but pliable, so chilling for at least an hour is non-negotiable. This prevents the cookies from spreading too much and losing their shape, which is especially important when you want crisp edges for decorating.
When rolling out the dough, keep your surface lightly floured or use parchment paper to avoid sticking. If the dough becomes too soft while cutting, pop it back in the fridge for 10-15 minutes before continuing. Consistency is everything.
For decorating, use gel food colors instead of liquid—they provide vibrant pastel shades without watering down the icing. I learned the hard way that liquid colors can make your icing too thin, leading to runny decorations and smudged designs.
Lastly, multitasking helps: while the first batch bakes, prepare your icing or chill the second dough portion. This way, the workflow is steady, and you’re not overwhelmed at any point. And keep a damp cloth handy to wipe your hands and tools often—it keeps the icing clean and colors pure.
Variations & Adaptations
If you want to mix it up or cater to different tastes, here are a few variations you can try:
- Flavor twists: Substitute almond extract with lemon or orange zest in the dough for a citrusy note that brightens the cookies.
- Gluten-free version: Use a 1:1 gluten-free flour blend in place of all-purpose flour. The texture will be slightly different but still delicious.
- Vegan adaptation: Swap butter with vegan margarine and replace eggs with flax eggs (1 tablespoon ground flaxseed + 3 tablespoons water per egg). Use aquafaba (chickpea water) instead of meringue powder for the royal icing.
- Alternative decorating: Instead of royal icing, try a simple glaze made from powdered sugar and milk for a quicker, less detailed option. It won’t dry as hard but still looks tasty.
Personally, I once tried adding a tiny pinch of cinnamon to the dough for a cozy fall twist — it was subtle but added a lovely warmth that paired beautifully with the pastel colors. Also, for a unique challenge, using colored sanding sugar on top of the icing before drying adds delightful texture and sparkle.
Serving & Storage Suggestions
These pastel Halloween sugar cookies are best served at room temperature, allowing the royal icing to fully set and the cookie texture to shine. Arrange them on a festive platter, and they instantly brighten the room without overwhelming with traditional spooky colors.
They pair wonderfully with a warm cup of apple cider or a creamy hot chocolate, making them perfect for cozy fall gatherings. If you want to go the extra mile, try pairing with a batch of creamy strawberry cream puff bars for a sweet-and-fruity contrast that’s as fun as it is delicious.
For storage, keep the cookies in an airtight container at room temperature for up to 5 days. Avoid refrigeration as it can cause the royal icing to sweat or soften. If you need to store longer, freezing is an option — just layer the cookies between parchment paper to prevent sticking, freeze for up to 3 months, and thaw at room temperature before serving.
Reheating isn’t recommended since these are best enjoyed fresh or fully cooled. Over time, the flavors meld gently, and the icing hardens further, making the cookies a bit crunchier but still delightful. They’re perfect for prepping ahead of Halloween parties or as thoughtful gifts tucked in pretty boxes.
Nutritional Information & Benefits
While these pastel Halloween sugar cookies are definitely a treat, here’s a rough estimate per cookie (based on 24 cookies): approximately 150 calories, 7 grams fat, 20 grams carbohydrates, and 2 grams protein.
The key ingredients like butter and eggs provide some protein and healthy fats, while the flour and sugar contribute to energy. Using real vanilla and almond extracts adds flavor without extra calories.
If you’re mindful of allergens, note these contain gluten, dairy, and eggs. For gluten-free or vegan options, follow the adaptations mentioned earlier. These cookies are definitely about indulgence but with a home-baked quality that feels wholesome compared to store-bought alternatives.
From a wellness perspective, baking at home lets you control the ingredients and avoid preservatives or artificial colors. Plus, the joy and creativity involved in decorating these cookies can be a wonderful stress-reliever — which I consider a health benefit in its own right!
Conclusion
Perfect Pastel Halloween Sugar Cookies with Royal Icing are more than just a festive treat—they’re a little project, a bit of therapy, and a sweet reward all rolled into one. I love this recipe because it balances simplicity and charm, giving you a gentle nod to Halloween with soft colors and smooth icing instead of the usual spooky overload.
Feel free to make these your own—swap flavors, tweak colors, or try different shapes. The recipe is forgiving but delivers that satisfying crunch and melt-in-your-mouth texture every time. And honestly, if you’ve ever enjoyed frosting cookies for fun or family, these are the kind you’ll want to bake again and again.
Got your own pastel Halloween twist or a decorating tip that worked wonders? I’d love to hear about it in the comments below! Sharing your kitchen wins (or fails) makes this whole baking journey a little sweeter.
FAQs About Perfect Pastel Halloween Sugar Cookies
How long does the royal icing take to dry completely?
Royal icing usually takes about 4-6 hours to dry hard at room temperature, but overnight drying is best for stacking or detailed decorations.
Can I make the cookie dough ahead of time?
Yes! The dough keeps well in the fridge for up to 3 days or can be frozen for up to 1 month. Just thaw before rolling out.
What’s the best way to prevent cookies from spreading?
Chilling the dough before baking and avoiding over-softening butter helps keep cookie shapes crisp and prevents spreading.
Can I use liquid food coloring instead of gel?
Gel food coloring is preferred because it won’t thin the icing. Liquid colors can make the icing runny and harder to work with.
How do I store decorated sugar cookies?
Store them in an airtight container at room temperature for up to 5 days. Avoid refrigeration to keep the icing from sweating.
Pin This Recipe!
Perfect Pastel Halloween Sugar Cookies with Royal Icing

These pastel Halloween sugar cookies feature a tender crumb with a slight crisp edge and a glossy royal icing that dries smooth and shiny. Perfect for festive yet subtle Halloween treats with soft pastel colors.
- Prep Time: 20 minutes
- Cook Time: 10 minutes
- Total Time: 1 hour 30 minutes
- Yield: 24 cookies 1x
- Category: Dessert
- Cuisine: American
Ingredients
- 2 ¾ cups (345 g) all-purpose flour, sifted
- 1 teaspoon baking powder
- ½ teaspoon salt
- 1 cup (227 g) unsalted butter, softened
- 1 ¼ cups (250 g) granulated sugar
- 2 large eggs, room temperature
- 2 teaspoons pure vanilla extract
- ½ teaspoon almond extract (optional)
- 4 cups (480 g) powdered sugar, sifted
- 3 tablespoons meringue powder
- ⅔ cup (160 ml) warm water
- 1 teaspoon pure vanilla extract
- Gel food coloring in pastel shades (lavender, mint, pumpkin orange, soft pink)
Instructions
- Mix dry ingredients: In a medium bowl, whisk together sifted flour, baking powder, and salt. Set aside.
- Cream butter and sugar: In a large bowl, beat softened butter with granulated sugar until light and fluffy, about 3-4 minutes on medium speed.
- Add eggs and extracts: Beat in eggs one at a time, then stir in vanilla and almond extracts if using.
- Combine dry and wet: Gradually add flour mixture to butter mixture, mixing on low speed until just combined. Chill dough if too sticky.
- Chill the dough: Divide dough into two discs, wrap in plastic wrap, and refrigerate for 1 hour until firm.
- Preheat oven to 350°F (175°C). Line baking sheets with parchment paper or silicone mats.
- Roll and cut: Roll out one dough disc to ¼ inch thickness on a lightly floured surface. Cut shapes with Halloween-themed cookie cutters and place on baking sheets spaced 1 inch apart.
- Bake: Bake for 8-10 minutes until edges start to turn golden. Cool on pans for 5 minutes, then transfer to wire racks to cool completely.
- Prepare royal icing: Whisk powdered sugar and meringue powder in a large bowl. Slowly add warm water and vanilla extract, beating until stiff peaks form, about 5-7 minutes.
- Color and pipe: Divide icing into bowls, tint with gel food coloring. Outline cookie edges with thicker icing, then flood centers with thinned icing. Use a toothpick to pop bubbles and spread icing gently.
- Dry and decorate: Let iced cookies dry at room temperature for at least 4 hours or overnight. Add additional details with thicker icing if desired.
Notes
Chill dough for at least 1 hour to prevent spreading and maintain shape. Use gel food coloring to avoid runny icing. Let royal icing dry overnight for best results. Adjust water in icing for desired consistency. Store cookies in an airtight container at room temperature for up to 5 days; avoid refrigeration to prevent icing sweating. For gluten-free or vegan versions, substitute ingredients as noted in variations.
Nutrition
- Serving Size: 1 cookie
- Calories: 150
- Fat: 7
- Carbohydrates: 20
- Protein: 2
Keywords: Halloween sugar cookies, pastel sugar cookies, royal icing cookies, easy Halloween treats, homemade sugar cookies, festive cookies, cookie decorating


