“Are you sure this is going to work?” my friend asked, peering over my kitchen counter as I swirled pastel colors into the cookie dough. Honestly, I wasn’t totally sure myself. The idea of marbling sugar cookies with delicate royal icing started as a simple experiment on a rainy afternoon when I was craving something both soothing and a little whimsical. I had no grand plan—just a handful of leftover food coloring, some powdered sugar, and a stack of trusty old cookie cutters.
The first batch looked a bit like a pastel watercolor gone rogue, but instead of tossing them, I baked the lot. The result? Crispy edges, soft centers, and this magical marbled effect that made the cookies feel like tiny edible art pieces. It was one of those happy accidents where skepticism melted away with the first bite. My kitchen smelled like vanilla and sweet nostalgia, and the mess? Well, that was part of the charm.
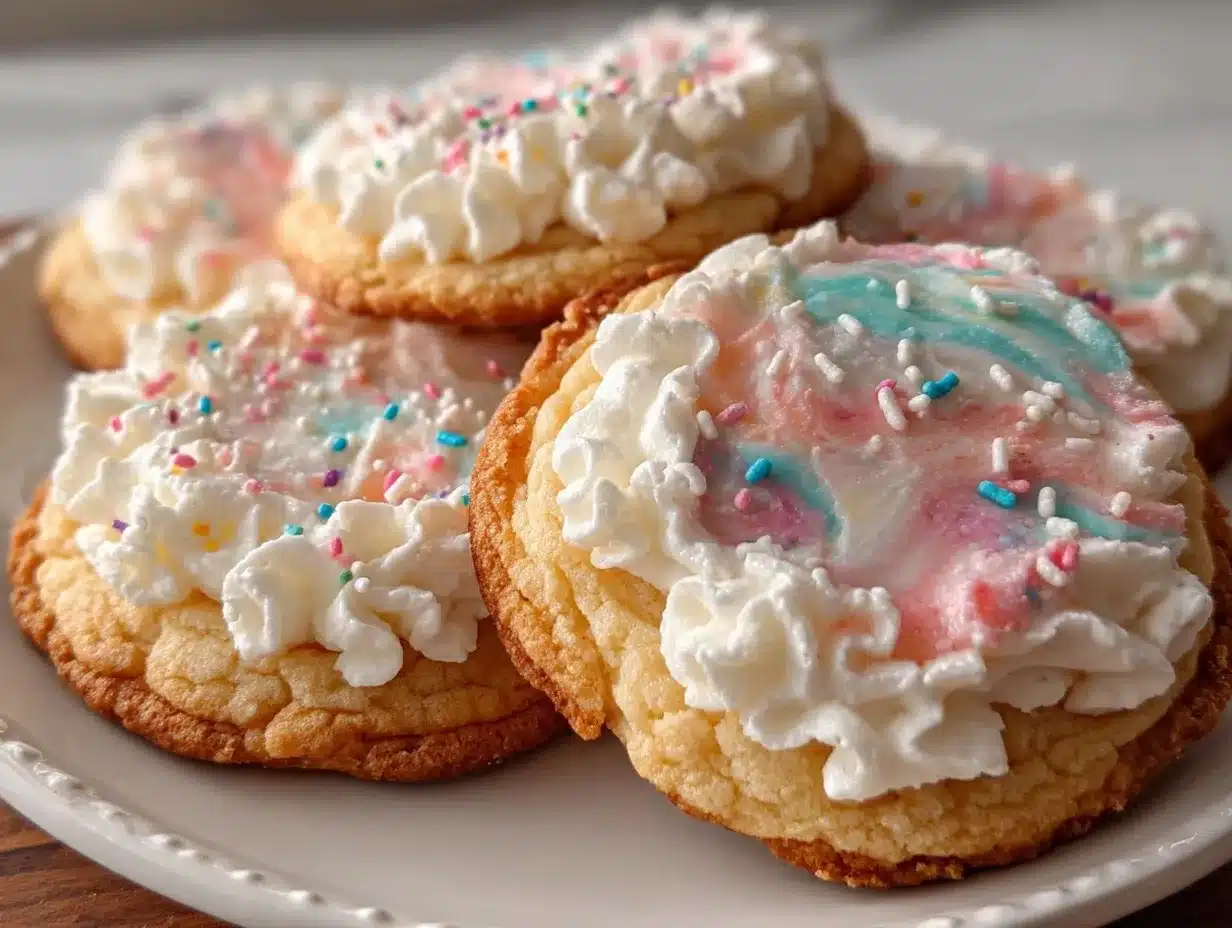
Since then, these pastel marbled sugar cookies with royal icing have become my go-to treat for nearly every occasion—whether it’s a quiet weekend baking session or an impromptu gift for a neighbor. The way the royal icing hardens into a glossy, smooth finish but still lets the marbled colors peek through? Pure delight. It’s a recipe that feels fancy but is honestly pretty forgiving, so even if you’re “not really a baker,” you’ll find yourself smiling through the process.
And you know, there’s something about these cookies that makes you pause—a little moment of calm and sweetness in the middle of a chaotic day. That’s why I keep coming back to them. They’re more than just sugar cookies; they’re a small slice of quiet joy, baked right in.
Why You’ll Love This Recipe
After countless trials and a few flour-dusted late nights, this recipe has earned the spot as my favorite pastel marbled sugar cookies with royal icing. It’s got that perfect mix of simplicity and wow factor that makes baking feel both achievable and special.
- Quick & Easy: From mixing to decorating, you can have these cookies ready in about 1.5 hours—ideal for busy afternoons or last-minute celebrations.
- Simple Ingredients: Nothing fancy here—just basic pantry staples like flour, sugar, eggs, and vanilla. The pastel shades come from a few drops of gel food coloring you might already have.
- Perfect for Any Occasion: Whether it’s a pastel-themed baby shower, a spring brunch, or just a sweet treat for yourself, these cookies fit right in.
- Crowd-Pleaser: Every time I bring these to family gatherings or friend hangouts, they vanish fast. Kids and adults alike love the gentle sweetness and pretty colors.
- Unbelievably Delicious Texture: The edges have that satisfying crisp snap, while the centers stay soft and tender—plus, the royal icing adds a subtle crunch without being too sweet.
- Unique Marbling Technique: Instead of typical solid-colored icing, the marbled effect is created by gently swirling pastel gel colors into the dough and icing, giving each cookie a one-of-a-kind look.
This isn’t your everyday sugar cookie. The royal icing tutorial included here helps you nail that smooth, glossy finish without fuss. It’s comfort food with a playful twist that makes baking feel like a little creative escape. Honestly, these cookies have become my calm in a cup of tea kind of treat—something I can make over and over, and it never gets old.
What Ingredients You Will Need
This pastel marbled sugar cookie recipe uses simple, wholesome ingredients to bring together a tender, flavorful cookie base topped with smooth royal icing that dries to perfection. Most of these you’ll find in your pantry, and substitutions are easy if you need them.
- For the Sugar Cookies:
- 2 ¾ cups (345g) all-purpose flour (for best results, sifted)
- 1 teaspoon baking powder
- ½ teaspoon salt
- 1 cup (227g) unsalted butter, softened (I usually use Land O Lakes for creaminess)
- 1 ½ cups (300g) granulated sugar
- 1 large egg, at room temperature
- 2 teaspoons pure vanilla extract
- Gel food coloring in pastel shades (soft pink, baby blue, mint green, lavender) – gel colors work best for vibrant hues without thinning the dough
- For the Royal Icing:
- 3 cups (360g) powdered sugar, sifted
- 2 large egg whites (or 4 tablespoons meringue powder mixed with 6 tablespoons water for a safer alternative)
- 1 teaspoon lemon juice or vanilla extract
- Gel food coloring in the same pastel shades as the dough
- Water (to thin icing as needed)
Feel free to swap the all-purpose flour for almond flour if you want a gluten-free option, though the texture will be a bit different. For the royal icing, I prefer meringue powder mainly for easier storage and handling, but fresh egg whites give a wonderful glossy finish if you’re comfortable using them. When picking your gel colors, brands like AmeriColor or Wilton tend to give consistent results without overpowering flavors.
Equipment Needed
To make these pastel marbled sugar cookies with royal icing, you don’t need much beyond the basics, but a few handy tools make the process smoother.
- Mixing bowls (medium and large sizes)
- Electric mixer or stand mixer (trust me, it saves your arm)
- Measuring cups and spoons (for precise baking — no eyeballing here!)
- Rolling pin (a smooth, medium-weight one works best for even dough thickness)
- Cookie cutters (classic circles, hearts, or any fun shapes you like)
- Baking sheets lined with parchment paper or silicone mats
- Cooling racks (to keep cookies crisp)
- Small bowls or cups for mixing gel colors into icing
- Fine-tipped piping bags or squeeze bottles for decorating (alternatively, zip-top bags with a small snip work fine)
If you don’t have a stand mixer, a hand mixer will do just fine. When it comes to rolling pins, I once tried a glass one, but it was slippery and cold; wooden works better for me. For piping, I keep a variety of tips on hand, but a simple round tip or even no tip at all can get the job done for these cookies. If you want to keep your royal icing tools in good shape, rinse them immediately after use to avoid hardened messes.
Preparation Method
- Prepare the Cookie Dough (15 minutes)
In a medium bowl, whisk together the flour, baking powder, and salt. In your mixer bowl, beat the softened butter and sugar on medium speed until fluffy and pale—about 3-4 minutes. Add the egg and vanilla extract, mixing until combined.
- Create the Pastel Dough Colors (10 minutes)
Divide the dough evenly into 4 bowls. Add a small amount of gel food coloring to each—start with about 2 drops and knead gently until the color spreads evenly. Don’t overdo it; pastel shades are all about subtlety.
- Marble the Dough (10 minutes)
On a clean surface, place small dollops of each colored dough next to one another. Fold and gently twist the dough a few times—enough to create swirls without fully blending colors. Then shape into a ball and roll out to about ¼-inch (6mm) thickness.
- Cut and Bake (12-15 minutes)
Use your cookie cutters to stamp shapes from the marbled dough. Place on parchment-lined baking sheets about 1 inch apart. Bake in a preheated oven at 350°F (175°C) for 12-15 minutes or until edges are just turning golden. Let cool on the baking sheet for 5 minutes before transferring to a wire rack to cool completely.
- Make the Royal Icing (10 minutes)
In a clean bowl, beat egg whites (or meringue powder mixture) and lemon juice until foamy. Gradually add sifted powdered sugar, beating until the icing holds stiff peaks but is still smooth. Thin with a teaspoon of water at a time to reach flooding consistency (flows easily but holds shape).
- Color and Marble the Icing (15 minutes)
Divide icing into 4 bowls. Tint each with a drop or two of pastel gel colors. To create the marbled effect, spoon small amounts of each colored icing side-by-side into a piping bag or squeeze bottle. As you pipe, the colors will swirl naturally.
- Decorate the Cookies (20-30 minutes)
Pipe the marbled royal icing onto cooled cookies. Use a toothpick or skewer to gently swirl the colors if you want more defined marbling. Let cookies sit at room temperature until the icing hardens, about 2-3 hours.
Pro tip: If you want sharper marbling lines, pipe the icing slowly and don’t over-swirl. If the icing thickens while decorating, add a few drops of water and stir gently to loosen it up. And if your cookies puff up too much, chilling the dough before baking helps keep their shape crisp, a trick I learned after a few floppy cookie batches!
Cooking Tips & Techniques
Getting these pastel marbled sugar cookies just right is part science, part art, and a pinch of patience. Here’s what I’ve learned through trial and error:
- Don’t Overmix the Dough: When combining flour, mix just until incorporated. Overworking leads to tough cookies, which is the last thing you want for a tender bite.
- Keep Dough Chilled: If your kitchen is warm, chill the dough for at least 30 minutes before rolling. It helps prevent spreading and makes handling easier for marbling.
- Use Gel Food Coloring: Liquid colors can thin your dough or icing, ruining the texture. Gel colors keep the consistency intact and give that vibrant pastel pop.
- Practice Your Piping: For smooth royal icing, practice steady pressure and slow, even movements. If your icing is too thick, add a tiny bit of water; too thin, add powdered sugar.
- Don’t Skip Sifting: Sift flour and powdered sugar to avoid lumps. It’s an easy step that makes a huge difference in your cookie texture and icing smoothness.
- Be Patient with Drying: Royal icing takes time to harden — rushing this step can smudge your beautiful marbled design.
I remember once trying to speed things up by tossing the iced cookies into the freezer—bad idea. The colors blurred, and the icing cracked. Letting nature take its course is the best bet.
Variations & Adaptations
Pastel marbled sugar cookies are easy to make your own with a few tweaks. Here are some ideas I’ve tried and loved:
- Flavor Variations: Add almond extract or lemon zest to the dough for a subtle twist. Lavender or rose water in the royal icing can introduce a floral note that pairs beautifully with pastel colors.
- Dietary Adaptations: For gluten-free, swap the all-purpose flour with a 1:1 gluten-free baking blend. Use aquafaba (chickpea water) as an egg white substitute in the royal icing for a vegan-friendly option.
- Seasonal Themes: Swap pastel colors for autumn hues like burnt orange, burgundy, and gold for fall parties. Or try neon colors for a fun summer vibe.
- Alternative Decorating: Skip the marbling and pipe solid pastel colors with simple dots or stripes for quick decorating. Or add edible glitter or pearl dust for extra sparkle.
- Personal Favorite: I once swapped in a hint of peppermint extract and paired the cookies with a mint chocolate cake jar parfait for a refreshing treat combo that felt both classic and new.
Serving & Storage Suggestions
These pastel marbled sugar cookies with royal icing are best served at room temperature, letting the full flavor and texture shine through. Arrange them on a pretty platter for brunch gatherings or package them in a decorative tin for thoughtful gifts.
They pair wonderfully with a cup of tea, a glass of milk, or even a light sparkling lemonade—something gentle that complements the cookie’s sweetness without overpowering it.
Store leftover cookies in an airtight container at room temperature for up to 5 days. To keep the icing intact, layer with parchment or wax paper. For longer storage, freeze the baked cookies (without icing) for up to 3 months; thaw completely before decorating.
If you need to rehydrate slightly dried cookies, a quick 10-second zap in the microwave can help soften them, but avoid overheating or the icing might melt. Over time, the flavors mellow and deepen, making them even more enjoyable the next day.
If you’re looking for a dessert board idea that complements these cookies, I once made a pink velvet cookie crumble board featuring pastel tones and textures that paired beautifully for a crowd-pleasing display.
Nutritional Information & Benefits
Each pastel marbled sugar cookie with royal icing contains approximately:
| Calories | Carbs | Fat | Protein | Sugar |
|---|---|---|---|---|
| 150 kcal | 22g | 6g | 1.5g | 14g |
While these cookies are definitely an indulgence, they’re made with real ingredients—no artificial preservatives or high-fructose corn syrup. The use of natural extracts and gel colors means fewer additives, and you can control the sweetness level by adjusting icing thickness.
For those mindful of allergens, this recipe contains gluten, eggs, and dairy but can be adapted with gluten-free flour and egg substitutes. The royal icing can be made with meringue powder to avoid raw eggs, making it safer for sharing.
From a wellness perspective, baking at home like this brings a mindful, joyful moment—plus, the simple ingredients mean you’re not just eating sugar and mystery chemicals. It’s a little treat with a lot of heart.
Conclusion
These perfect pastel marbled sugar cookies with royal icing have a way of turning baking into a quiet celebration. They’re approachable enough for a casual baker but impressive enough to gift or serve at special occasions. The marbling process makes every cookie unique, and the royal icing adds that classic smooth finish that feels like a little extra love baked right in.
Feel free to tweak colors, flavors, or shapes to suit your style—this recipe is a flexible canvas for your creativity. Personally, I keep coming back to it because it reminds me that the small moments in the kitchen can bring big smiles.
If you try this recipe, I’d love to hear how your marbled cookies turn out or what fun variations you dream up. Baking’s always better when it’s shared, right? So go ahead, make a batch, and savor the sweet little victories.
FAQs About Perfect Pastel Marbled Sugar Cookies
What’s the best way to get a smooth royal icing finish?
Use sifted powdered sugar and gradually add water to reach a smooth, flowing consistency. Pipe slowly and avoid over-swirling the colors to keep the marbled effect crisp.
Can I use liquid food coloring instead of gel?
Gel food coloring is recommended because it won’t thin your dough or icing. Liquid colors can make dough sticky and icing too runny.
How do I store these cookies to keep the icing from cracking?
Store in an airtight container at room temperature, layering cookies with parchment paper. Avoid refrigeration, which can cause condensation and crack the icing.
Is it safe to use raw egg whites in royal icing?
Raw egg whites carry a small risk of salmonella. Use pasteurized egg whites or meringue powder as a safer alternative, especially for kids or if you’re serving many people.
Can I prepare the dough and icing ahead of time?
Absolutely! Dough can be refrigerated up to 2 days or frozen for a month. Royal icing can be stored in an airtight container in the fridge for up to a week—just stir before use and thin as needed.
Pin This Recipe!
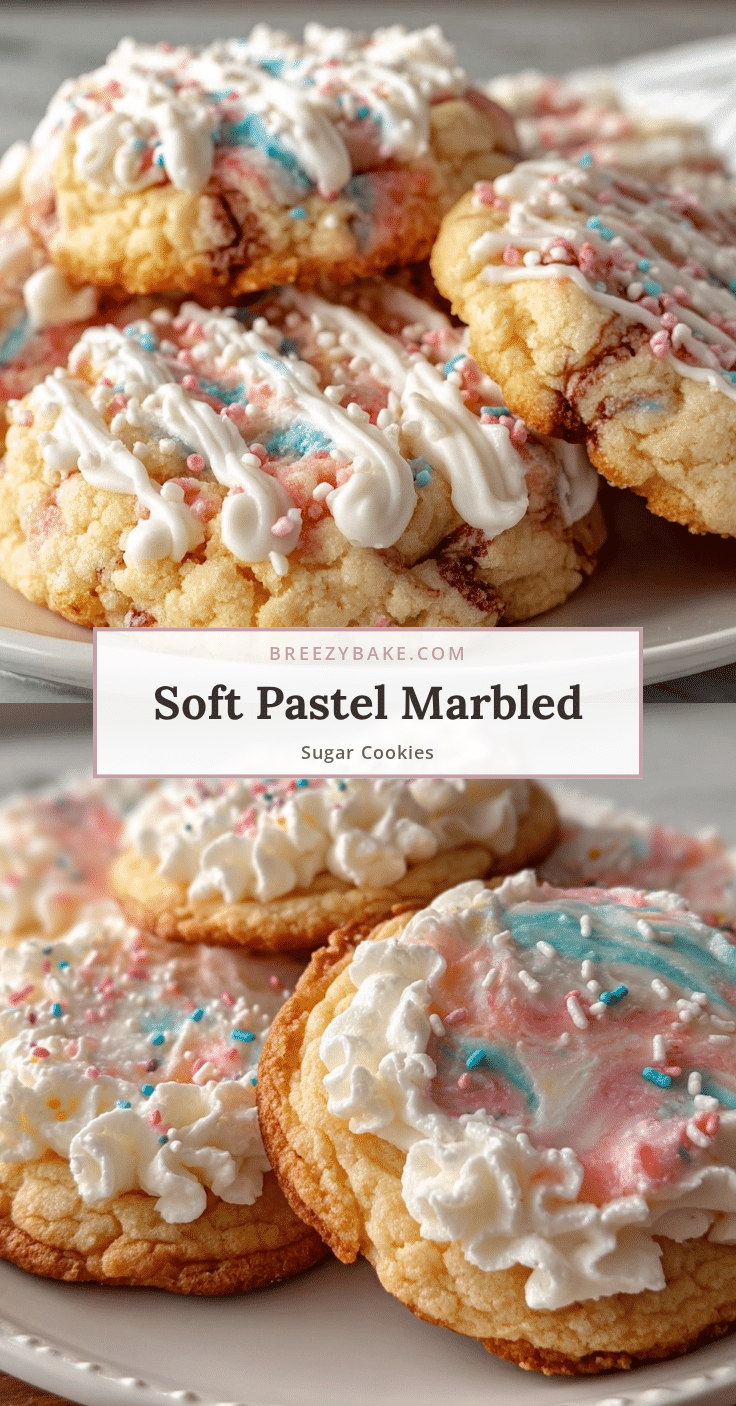
Perfect Pastel Marbled Sugar Cookies Recipe Easy Homemade Royal Icing Tutorial
These pastel marbled sugar cookies feature a tender, flavorful base with a unique marbling technique and a smooth royal icing finish, perfect for any occasion and easy enough for casual bakers.
- Prep Time: 35 minutes
- Cook Time: 15 minutes
- Total Time: 1 hour 30 minutes
- Yield: 24 cookies 1x
- Category: Dessert
- Cuisine: American
Ingredients
- 2 ¾ cups (345g) all-purpose flour (sifted)
- 1 teaspoon baking powder
- ½ teaspoon salt
- 1 cup (227g) unsalted butter, softened
- 1 ½ cups (300g) granulated sugar
- 1 large egg, at room temperature
- 2 teaspoons pure vanilla extract
- Gel food coloring in pastel shades (soft pink, baby blue, mint green, lavender)
- 3 cups (360g) powdered sugar, sifted
- 2 large egg whites (or 4 tablespoons meringue powder mixed with 6 tablespoons water)
- 1 teaspoon lemon juice or vanilla extract
- Water (to thin icing as needed)
Instructions
- Prepare the Cookie Dough: In a medium bowl, whisk together the flour, baking powder, and salt. In your mixer bowl, beat the softened butter and sugar on medium speed until fluffy and pale—about 3-4 minutes. Add the egg and vanilla extract, mixing until combined.
- Create the Pastel Dough Colors: Divide the dough evenly into 4 bowls. Add a small amount of gel food coloring to each—start with about 2 drops and knead gently until the color spreads evenly.
- Marble the Dough: On a clean surface, place small dollops of each colored dough next to one another. Fold and gently twist the dough a few times to create swirls without fully blending colors. Shape into a ball and roll out to about ¼-inch (6mm) thickness.
- Cut and Bake: Use cookie cutters to stamp shapes from the marbled dough. Place on parchment-lined baking sheets about 1 inch apart. Bake in a preheated oven at 350°F (175°C) for 12-15 minutes or until edges are just turning golden. Let cool on the baking sheet for 5 minutes before transferring to a wire rack to cool completely.
- Make the Royal Icing: In a clean bowl, beat egg whites (or meringue powder mixture) and lemon juice until foamy. Gradually add sifted powdered sugar, beating until the icing holds stiff peaks but is still smooth. Thin with a teaspoon of water at a time to reach flooding consistency.
- Color and Marble the Icing: Divide icing into 4 bowls. Tint each with a drop or two of pastel gel colors. Spoon small amounts of each colored icing side-by-side into a piping bag or squeeze bottle to create a marbled effect.
- Decorate the Cookies: Pipe the marbled royal icing onto cooled cookies. Use a toothpick or skewer to gently swirl the colors if desired. Let cookies sit at room temperature until the icing hardens, about 2-3 hours.
Notes
Do not overmix the dough to keep cookies tender. Chill dough for at least 30 minutes if kitchen is warm to prevent spreading. Use gel food coloring to avoid thinning dough or icing. Practice steady piping pressure for smooth royal icing. Sift flour and powdered sugar to avoid lumps. Let royal icing dry naturally for best results; avoid freezing iced cookies. If icing thickens during decorating, add a few drops of water to loosen.
Nutrition
- Serving Size: 1 cookie
- Calories: 150
- Sugar: 14
- Fat: 6
- Carbohydrates: 22
- Protein: 1.5
Keywords: pastel marbled sugar cookies, royal icing, sugar cookies, marbled cookies, easy sugar cookie recipe, homemade royal icing, pastel cookies, baking, cookie decorating


