Scrambling through the kitchen with red frosting smudged across my cheek and a half-empty box of cake mix on the counter, I realized the July 4th party was starting in less than an hour. No time for fancy layers or complicated decorations, but I still wanted something that screamed celebration—something fun and festive. That’s when the idea for this Perfect Red Velvet Flag Cake with Cream Cheese Stars was born. Honestly, it was all about making do with what I had: a trusty red velvet cake mix, a quick homemade cream cheese frosting, and a little creativity to get those star shapes just right.
As I fussed with the piping bag and carefully placed each creamy star, the kitchen buzzed with the sounds of kids running around, the hum of the grill outside, and a mild panic about the smoke detector that just went off (don’t ask). Somehow, amidst the chaos, this cake came together — not perfect, but charming in its homemade imperfection. The rich red crumb contrasted beautifully with the snowy cream cheese stars, and when I finally took a bite, it hit me: this wasn’t just a last-minute fix, it was a recipe that deserved a spot in my regular rotation.
That day, I realized this flag cake wasn’t about flawless baking but about bringing a slice of joy to a hectic summer afternoon. It’s a sweet reminder that sometimes the best recipes come out of a little chaos, and the ones you can rely on when time refuses to cooperate. So if you’re looking for a crowd-pleaser that’s as festive as it is forgiving, this red velvet flag cake with cream cheese stars might just be your new go-to. Let’s get into what makes it so special and how you can whip it up without breaking a sweat.
Why You’ll Love This Recipe
After testing this Perfect Red Velvet Flag Cake with Cream Cheese Stars multiple times (because, well, quality control!), I can confidently say it hits all the right notes for a special occasion dessert that doesn’t stress you out.
- Quick & Easy: The cake comes together in under an hour of active time, making it perfect when you need a festive dessert in a flash.
- Simple Ingredients: No exotic or hard-to-find items here—just pantry staples and a few fresh basics you likely already have.
- Perfect for Celebrations: Whether it’s Independence Day, Memorial Day, or any patriotic event, this cake brings the spirit with its iconic flag design.
- Crowd-Pleaser: Kids and adults alike rave about the moist red velvet crumb paired with the tangy cream cheese stars. It’s a win-win.
- Unbelievably Delicious: The cream cheese stars aren’t just decorative—they add a creamy, tangy contrast that elevates the classic red velvet flavor.
This isn’t your run-of-the-mill red velvet cake. The secret lies in the way the cream cheese stars are piped and baked just enough to hold their shape while staying soft inside. Plus, the cake batter is adjusted slightly for a tender, velvety crumb that feels homemade, not store-bought. I’ve even swapped in almond flour once to make a gluten-free version that still got rave reviews.
Honestly, this cake feels like a little celebration in every bite. It’s the kind of dessert that makes you pause and smile, closing your eyes after that first forkful. And if you love other festive treats, you might appreciate the playful vibes of my Pink Velvet Cookie Crumble Board or the creamy textures in the Creamy Valentine’s Pink Strawberry Cream Puff Bars. Both bring that same cozy, made-with-love feeling to your dessert table.
What Ingredients You Will Need
This Perfect Red Velvet Flag Cake with Cream Cheese Stars uses straightforward ingredients that come together to create a bold look and satisfying texture without fuss. Here’s what you’ll need:
- For the Red Velvet Cake:
- All-purpose flour – 2 ½ cups (315g), sifted for a tender crumb
- Granulated sugar – 1 ½ cups (300g)
- Unsweetened cocoa powder – 2 tablespoons (15g), for that subtle chocolate note
- Baking soda – 1 teaspoon
- Salt – ½ teaspoon
- Buttermilk – 1 cup (240ml), room temperature (adds moisture and tang)
- Vegetable oil – ½ cup (120ml), neutral flavor is best
- Large eggs – 2, room temperature
- Red food coloring – 2 tablespoons (liquid or gel, depending on preference)
- Vanilla extract – 1 teaspoon
- White vinegar – 1 teaspoon (reacts with baking soda for lift)
- For the Cream Cheese Stars:
- Cream cheese – 8 oz (225g), softened (I love Philadelphia for smooth texture)
- Unsalted butter – ¼ cup (57g), softened (adds richness)
- Powdered sugar – 1 cup (120g), sifted to avoid lumps
- Vanilla extract – 1 teaspoon
- Pinch of salt
You can swap buttermilk for a mix of milk and lemon juice if you’re in a pinch, or try using almond milk for a dairy-free twist (though the cream cheese stars would need to be replaced with a vegan frosting). The red food coloring is key for that vibrant flag red, but if you want a natural option, beet juice works though it might shift the flavor slightly.
Equipment Needed
- Two 9×13-inch baking pans – to layer the cake and create the flag base evenly
- Electric mixer or stand mixer – for smooth batter and frosting (a hand mixer works too!)
- Mixing bowls – at least two, for cake batter and cream cheese frosting
- Measuring cups and spoons – for precise ingredient amounts
- Sifter – highly recommended for flour and powdered sugar to avoid lumps
- Piping bag fitted with a small star tip – essential for making the cream cheese stars (a zip-top bag with a corner snipped can be a budget-friendly alternative)
- Offset spatula or butter knife – for spreading cake batter and smoothing frosting
- Cooling racks – to cool the cake layers properly
I’ve found that a quality piping tip makes the stars look so much cleaner, but honestly, you can get away with a plastic bag and a steady hand. Also, if you don’t have two pans, bake the layers one at a time and cool in between. Patience is key, but it’s doable.
Preparation Method
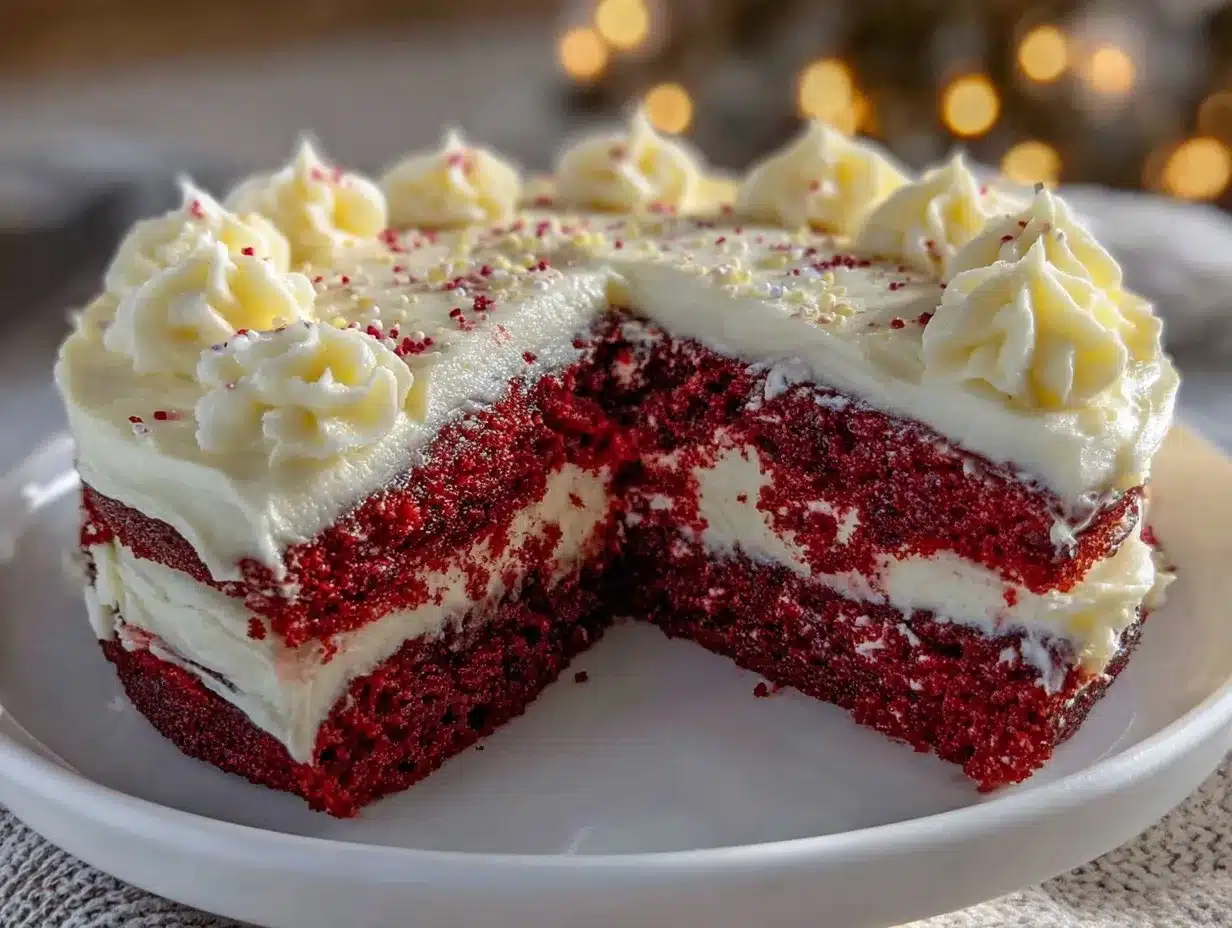
- Preheat your oven to 350°F (175°C). Grease and flour two 9×13-inch pans and set aside. This prevents sticking and helps get those clean edges.
- Mix dry ingredients: In a large bowl, sift together the all-purpose flour, granulated sugar, cocoa powder, baking soda, and salt. Sifting here is not just for show—it really helps the cake have a light texture.
- Combine wet ingredients: In another bowl, whisk the buttermilk, vegetable oil, eggs, red food coloring, vanilla extract, and white vinegar until fully blended. The vinegar and baking soda reaction will give the cake a nice rise.
- Make the batter: Gradually add the wet ingredients to the dry, mixing on low speed just until combined. Overmixing can make the cake dense, so stop when you see no flour streaks.
- Divide the batter evenly between your two prepared pans. Use an offset spatula to smooth the tops for even baking.
- Bake for 30-35 minutes or until a toothpick inserted in the center comes out clean. Avoid opening the oven door early to keep the rise steady.
- Cool the cakes in their pans for 10 minutes, then transfer onto cooling racks to cool completely. This step is crucial so the cake layers don’t crumble during decorating.
- Prepare the cream cheese stars: Beat the softened cream cheese and butter in a medium bowl until smooth and creamy, about 2-3 minutes. Gradually add the sifted powdered sugar, vanilla extract, and a pinch of salt, then beat until fluffy. You want a spreadable yet pipeable consistency.
- Assemble the flag design: Place one cake layer on your serving platter. Using a sharp knife, trim the edges if needed for a neat rectangle. Spread a thin layer of frosting on top to help the second layer stick.
- Add the second cake layer on top and gently press down. Now, with the piping bag fitted with a small star tip, pipe cream cheese stars in the top-left corner to mimic the flag’s stars.
- Fill the rest of the cake with smooth stripes of cream cheese frosting or red velvet cake crumbs to complete the flag pattern. For a neat finish, chill the cake for 15-20 minutes before serving.
Quick tip: If your cream cheese frosting feels too soft to pipe stars, pop it in the fridge for 10 minutes—it firms up nicely without losing spreadability. Also, don’t rush when piping the stars; a steady hand makes all the difference.
Cooking Tips & Techniques
Making a red velvet flag cake with cream cheese stars can feel intimidating, but a few tried-and-true tips make it much easier.
- Don’t skip sifting: It really helps avoid clumps in your flour and powdered sugar, giving you a smoother batter and frosting.
- Use room temperature ingredients: Eggs, buttermilk, cream cheese, and butter all mix better and create a fluffier cake and creamier frosting.
- Mix just until combined: Overmixing the batter can make the cake tough. Stop as soon as the flour disappears.
- Test for doneness carefully: Use a toothpick or cake tester; if it comes out with just a few moist crumbs, it’s ready. Overbaked red velvet becomes dry real fast.
- Chill your frosting if needed: Cream cheese frosting can soften quickly. Chilling it slightly makes piping stars easier and cleaner.
- Practice your piping: If you’re new to piping stars, practice on parchment paper first. It helps get a feel for pressure and speed.
- Cut clean edges: For a sharp flag look, trim cake edges with a serrated knife to get neat rectangular layers.
I remember the first time I tried this design, the stars looked more like blobs thanks to an over-soft frosting and shaky hands. After a few tries and chilling the frosting, I got the hang of it. It’s all about patience and a little practice. Also, multitasking by prepping frosting while the cake cools saves time and keeps you from getting overwhelmed.
Variations & Adaptations
Want to switch things up or accommodate dietary needs? Here are some ideas to personalize your Perfect Red Velvet Flag Cake with Cream Cheese Stars:
- Gluten-Free Version: Use an almond flour blend or a gluten-free all-purpose flour mix instead of regular flour. The texture will be slightly different but still delicious.
- Dairy-Free Adaptation: Swap out cream cheese and butter for dairy-free alternatives like vegan cream cheese and margarine. Use coconut milk or almond milk in place of buttermilk (add a splash of vinegar for tang).
- Flavor Twist: Add a teaspoon of espresso powder to the cake batter to deepen the chocolate notes without overpowering the red velvet flavor.
- Mini Flag Cakes: Use a cupcake pan and pipe mini cream cheese stars on each cupcake for individual servings—perfect for picnics or kids’ parties.
- Seasonal Flair: Swap red food coloring with natural beet juice for a more natural approach, or use fresh blueberries in the star section for a patriotic berry twist.
Personally, I once made a batch where I added a splash of orange zest to the cream cheese stars for a subtle citrus zing. It surprised everyone and made the cake feel a little fancier without extra effort.
Serving & Storage Suggestions
This red velvet flag cake is best served at room temperature, allowing the cream cheese stars to be soft and creamy. For a stunning presentation, slice the cake carefully with a serrated knife to keep those star and stripe patterns intact.
Pair this cake with a cold glass of milk or a lightly brewed iced tea for a refreshing contrast. It also holds up well alongside classic summer desserts like chocolate-covered strawberry mousse cups for a truly festive spread.
To store, cover the cake loosely with plastic wrap and refrigerate. It will keep well for 3-4 days. Because of the cream cheese frosting, refrigeration is a must. When ready to serve again, let it sit at room temperature for 20-30 minutes to soften up.
If you want longer storage, the cake layers freeze beautifully (wrapped in plastic and foil) for up to 3 months. Thaw overnight in the fridge, then assemble and decorate as usual.
Flavors actually deepen and meld a bit after resting overnight, so if you can wait, that’s even better.
Nutritional Information & Benefits
Here’s a rough estimate per serving (1/12th of cake):
| Calories | 320 |
|---|---|
| Fat | 15g |
| Carbohydrates | 42g |
| Protein | 4g |
| Sugar | 28g |
While this isn’t a health food by any means, red velvet cake provides some calcium and protein from the buttermilk and cream cheese. The cocoa powder adds a little antioxidant value, and using real buttermilk and fresh eggs contributes to the overall richness and nutrition.
If you’re watching allergens, this recipe contains gluten, dairy, and eggs. For alternatives, check the variations section above. Despite being indulgent, it’s a satisfying treat that brings people together, which in my book counts as a wellness benefit of its own.
Conclusion
This Perfect Red Velvet Flag Cake with Cream Cheese Stars is proof that you don’t need hours or fancy ingredients to create a dessert that wows. It’s approachable, fun, and, frankly, a little comforting—just what you want when life’s a bit hectic but you still want to celebrate.
Feel free to make it your own by trying different frostings, colors, or sizes. It’s a recipe that invites creativity and always brings smiles. Personally, it holds a special place on my holiday table, reminding me that the best memories are made in kitchens that are a little messy and full of laughter.
If you try this recipe, I’d love to hear how your cream cheese stars turned out or what variations you came up with. Sharing your twists makes the baking journey even sweeter!
FAQs About Perfect Red Velvet Flag Cake with Cream Cheese Stars
Can I make the cake ahead of time?
Yes! Bake the layers a day or two in advance, wrap them tightly, and store in the fridge. Assemble and decorate the day you plan to serve for best freshness.
What type of cream cheese is best for the stars?
Full-fat cream cheese like Philadelphia works best for smooth, creamy stars that hold their shape but stay soft inside.
How do I make the stars look neat?
Use a piping bag with a small star tip and chill the frosting slightly if it feels too soft. Practice piping on parchment paper first if you’re nervous.
Can I use a homemade red velvet cake instead of a mix?
Absolutely! This recipe is designed for scratch baking, but you can adapt it if you prefer a boxed cake mix—just make sure to adjust textures when piping the stars.
How should I store leftovers?
Cover the cake with plastic wrap and keep refrigerated for up to 4 days. Bring to room temperature before serving to enjoy the best flavor and texture.
Pin This Recipe!
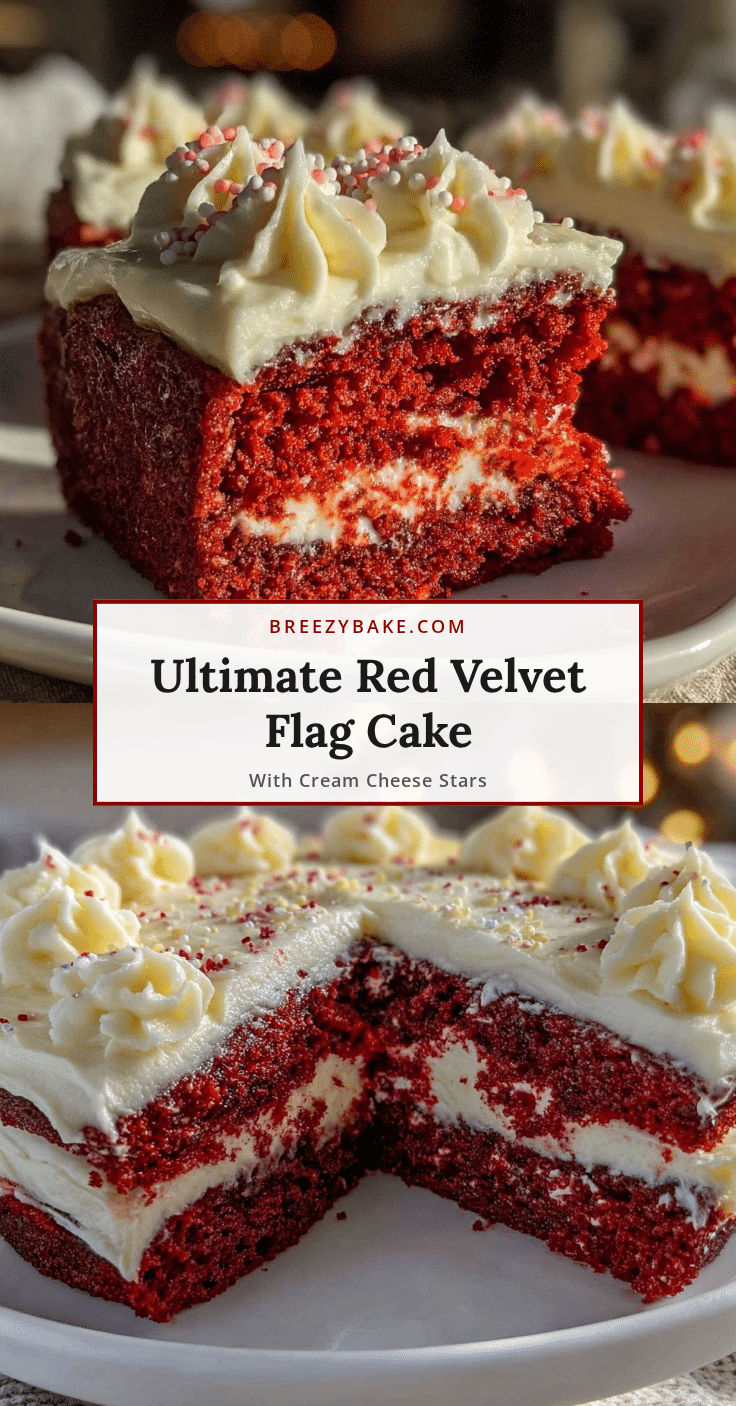
Perfect Red Velvet Flag Cake Recipe with Easy Cream Cheese Stars Tutorial
A quick and festive red velvet cake decorated with creamy piped cream cheese stars, perfect for patriotic celebrations and easy to make with simple ingredients.
- Prep Time: 20 minutes
- Cook Time: 35 minutes
- Total Time: 55 minutes
- Yield: 12 servings 1x
- Category: Dessert
- Cuisine: American
Ingredients
- 2 ½ cups (315g) all-purpose flour, sifted
- 1 ½ cups (300g) granulated sugar
- 2 tablespoons (15g) unsweetened cocoa powder
- 1 teaspoon baking soda
- ½ teaspoon salt
- 1 cup (240ml) buttermilk, room temperature
- ½ cup (120ml) vegetable oil
- 2 large eggs, room temperature
- 2 tablespoons red food coloring (liquid or gel)
- 1 teaspoon vanilla extract
- 1 teaspoon white vinegar
- 8 oz (225g) cream cheese, softened
- ¼ cup (57g) unsalted butter, softened
- 1 cup (120g) powdered sugar, sifted
- 1 teaspoon vanilla extract
- Pinch of salt
Instructions
- Preheat oven to 350°F (175°C). Grease and flour two 9×13-inch pans and set aside.
- In a large bowl, sift together flour, sugar, cocoa powder, baking soda, and salt.
- In another bowl, whisk buttermilk, vegetable oil, eggs, red food coloring, vanilla extract, and white vinegar until fully blended.
- Gradually add wet ingredients to dry ingredients, mixing on low speed just until combined. Do not overmix.
- Divide batter evenly between prepared pans and smooth tops with an offset spatula.
- Bake for 30-35 minutes or until a toothpick inserted in the center comes out clean.
- Cool cakes in pans for 10 minutes, then transfer to cooling racks to cool completely.
- For the cream cheese stars, beat cream cheese and butter until smooth and creamy (2-3 minutes). Gradually add powdered sugar, vanilla extract, and salt; beat until fluffy.
- Place one cake layer on serving platter. Trim edges if needed for a neat rectangle. Spread a thin layer of frosting on top.
- Add second cake layer on top and gently press down.
- Using a piping bag fitted with a small star tip, pipe cream cheese stars in the top-left corner to mimic flag stars.
- Fill the rest of the cake with smooth stripes of cream cheese frosting or red velvet cake crumbs to complete the flag pattern.
- Chill cake for 15-20 minutes before serving for a neat finish.
Notes
If cream cheese frosting is too soft to pipe stars, chill it in the fridge for 10 minutes. Practice piping stars on parchment paper if new to piping. Use room temperature ingredients for best texture. Avoid overmixing batter to keep cake tender. Cake layers can be baked ahead and stored in fridge; assemble before serving.
Nutrition
- Serving Size: 1 slice (1/12th of c
- Calories: 320
- Sugar: 28
- Fat: 15
- Carbohydrates: 42
- Protein: 4
Keywords: red velvet cake, cream cheese stars, flag cake, patriotic dessert, easy red velvet, 4th of July cake, celebration cake


