“Mom, this tastes like a hug.”
My seven-year-old said that last fall, face smeared with oat crumble and caramel, and honestly? I couldn’t have described it better myself. That was the moment I knew this salted caramel apple crisp was something special — not just another dessert, but the kind of recipe that becomes a family landmark.
I’d been tinkering with apple crisp recipes for years. Some were too sweet, others too watery, and most just felt… boring. You know that disappointment when you bite into what looks like a perfect dessert and it just falls flat? That was me, standing over a sink full of dishes, wondering why I bothered. Then one rainy October afternoon, I had a jar of homemade salted caramel sitting in my fridge that needed using up. I drizzled it over the apples before adding the oat topping, crossed my fingers, and shoved it in the oven.
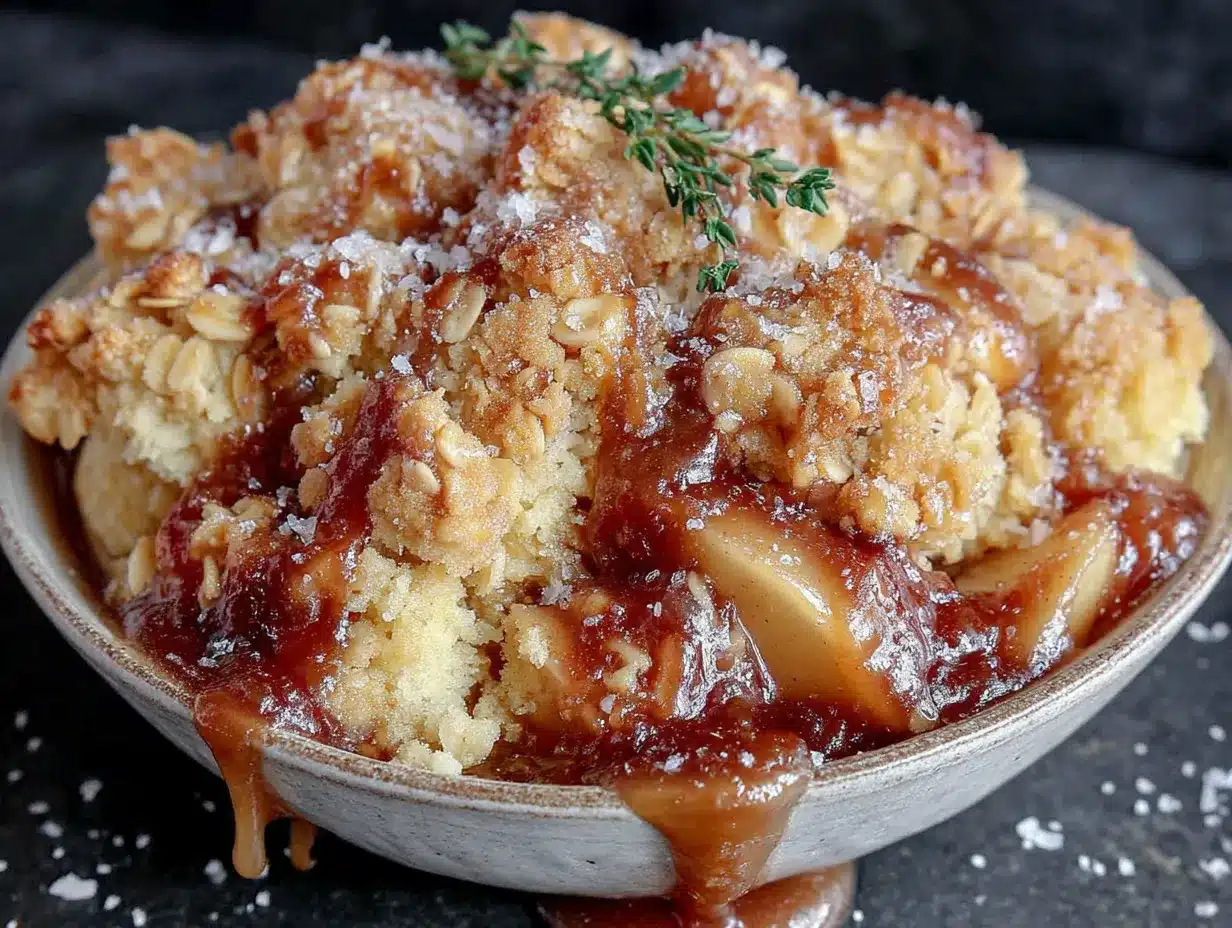
The kitchen smelled like a bakery in a Hallmark movie. Seriously — butter, cinnamon, brown sugar, and that unmistakable salty-sweet aroma of caramel melting into tart apples. When I pulled it out, the topping was golden and craggy, the juices were bubbling up around the edges, and I knew I’d accidentally created something worth sharing.
This isn’t a fussy recipe. It doesn’t require a pastry degree or special equipment. It just needs good apples, a little patience, and the willingness to trust that salted caramel belongs on everything — including your next apple crisp. Trust me on this one.
Why You’ll Love This Recipe
I’ve tested this recipe more times than I care to admit. Seven different apple varieties. Three types of oats. A whole sticky experiment with homemade versus store-bought caramel. So when I say this version is the one, I mean it with my whole flour-dusted heart. Here’s why this salted caramel apple crisp stands out from every other recipe you’ll find:
- Quick & Easy: From start to oven in about 20 minutes flat. No complicated steps, no special techniques — just simple, honest cooking that works every time.
- Simple Ingredients: You probably have most of these in your pantry right now. Apples, oats, butter, flour, brown sugar, and a jar of good salted caramel sauce. That’s it.
- Perfect for Cozy Gatherings: This dessert shines at fall dinners, Thanksgiving, Friendsgiving, or any night when you need something warm and comforting. It’s also incredible for holiday brunch with a scoop of vanilla ice cream.
- Crowd-Pleaser: I’ve served this to picky kids, dessert snobs, and my mother-in-law (who never likes anything). Every single person asked for the recipe. Every single one.
- Unbelievably Delicious: The oat crumble gets perfectly crispy on top while staying tender underneath. The apples turn jammy and soft. And the salted caramel? It weaves through everything, creating pockets of gooey sweetness that make every bite different from the last.
What makes this recipe different is the layering technique. Instead of just dumping caramel on top after baking — which leaves you with a slippery mess — I swirl it into the apples and drizzle more between the fruit and the crumble. This way, the caramel actually bakes into the filling, infusing every apple slice with that deep, buttery flavor. It’s a small tweak that changes everything.
This is the kind of dessert that makes people close their eyes after the first bite. It’s comfort food at its finest — warm, nostalgic, and just a little bit fancy thanks to that salt-sweet finish. Perfect for impressing guests without breaking a sweat, or turning a regular Tuesday into something worth remembering.
What Ingredients You Will Need
This recipe uses simple, wholesome ingredients that work together to create something truly special. No weird additives, no hard-to-find specialty items — just real food that tastes amazing. Here’s what you’ll need:
For the Apple Filling
- 6 medium apples, peeled, cored, and sliced into ¼-inch thick pieces (I prefer Honeycrisp or Granny Smith — more on that below)
- ¼ cup granulated sugar (adds sweetness and helps the apples break down)
- 2 tablespoons all-purpose flour (thickens the juices so you don’t get a watery mess)
- 1 teaspoon ground cinnamon (the backbone of any good apple crisp)
- ¼ teaspoon ground nutmeg (freshly grated if you have it — worth the extra effort)
- 1 tablespoon fresh lemon juice (balances sweetness and prevents browning)
- ½ cup salted caramel sauce, divided (use good quality store-bought or homemade — I like Trader Joe’s or Stonewall Kitchen)
For the Oat Crumble Topping
- 1 cup old-fashioned rolled oats (not quick oats — they get mushy)
- ¾ cup all-purpose flour
- ½ cup packed light brown sugar (dark brown works too, for deeper flavor)
- ¼ cup granulated sugar
- ½ teaspoon salt (crucial for that salted caramel balance)
- ½ cup cold unsalted butter, cut into small cubes
- ½ teaspoon vanilla extract
For Finishing
- Flaky sea salt (like Maldon — trust me, this matters)
- Extra salted caramel sauce for drizzling after baking
A note on apples: After extensive testing, I’ve found that a mix of tart and sweet apples gives the best results. Granny Smith apples hold their shape beautifully and provide that necessary tang to balance the caramel. Honeycrisp adds natural sweetness and a lovely texture. Fuji or Braeburn also work well. Avoid Red Delicious — they turn into mush. If you’re looking for a change of pace, you might enjoy the blush pink mini dessert platter for another fruit-forward treat.
On the caramel: I’ve made this with both homemade and store-bought caramel sauce. Homemade is incredible, obviously, but on busy weeknights, a good jarred version works perfectly. Just make sure it’s salted caramel — regular caramel won’t give you that same salty-sweet magic. If you only have regular caramel, add an extra pinch of flaky salt to the filling.
Equipment Needed
You don’t need a fancy kitchen to make this recipe. Here’s what you’ll actually use:
- 9×13-inch baking dish (or any 3-quart baking dish — ceramic, glass, or metal all work)
- Large mixing bowl for the apples
- Medium mixing bowl for the crumble topping
- Sharp knife and cutting board for slicing apples
- Vegetable peeler (a Y-peeler makes this job so much faster)
- Measuring cups and spoons
- Pastry cutter or fork for cutting butter into the flour mixture (your hands work too)
- Rubber spatula for folding everything together
If you don’t have a pastry cutter, don’t stress. I’ve used two forks, a food processor (pulse carefully!), and even my bare hands. Cold hands work best — the goal is pea-sized butter pieces throughout the flour mixture. If your hands run warm, stick to the fork method.
One tip: glass baking dishes let you see the caramel bubbling up around the edges, which is both beautiful and useful for judging doneness. But metal pans conduct heat more evenly, giving you a crisper bottom crust. Both work great — just adjust your baking time by a few minutes if needed.
Preparation Method
Let’s make this happen. Preheat your oven to 375°F (190°C) and get everything ready. This recipe moves fast once you start, so having your ingredients prepped makes all the difference.
- Prepare the apples: Peel, core, and slice your apples into even ¼-inch thick pieces. I know peeling apples is tedious, but leaving the skins on makes the filling tough and chewy. Take your time here — uniform slices mean even cooking. You should end up with about 8 cups of sliced apples.
- Make the filling: In your large mixing bowl, toss the apple slices with granulated sugar, flour, cinnamon, nutmeg, and lemon juice. Use your hands or a spatula to make sure every slice is coated. Let this sit for 5 minutes while you make the topping. You’ll notice the apples start releasing their juices — that’s good. That’s flavor.
- Drizzle in half the caramel: Pour ¼ cup of your salted caramel sauce over the apples and gently fold it through. Don’t overmix — you want ribbons of caramel, not a uniform coating. Set the remaining ¼ cup aside for later.
- Make the oat crumble: In your medium bowl, whisk together the oats, flour, brown sugar, granulated sugar, and salt. Add the cold butter cubes and vanilla extract. Using your pastry cutter or fingers, work the butter into the dry ingredients until the mixture resembles coarse meal with pea-sized butter pieces scattered throughout. Some larger chunks are fine — they’ll get extra crispy in the oven. Don’t overwork it or the topping will be dense instead of crumbly.
- Assemble the crisp: Transfer the apple mixture to your baking dish and spread it into an even layer. Drizzle the remaining ¼ cup of caramel sauce over the top of the apples. Then sprinkle the oat crumble evenly over everything. Don’t press it down — you want those craggy peaks that get golden and crunchy.
- Bake: Place the dish on a baking sheet (trust me on this — it will bubble over) and bake for 40-45 minutes. The crisp is done when the topping is deep golden brown, the filling is bubbling up around the edges, and your kitchen smells like heaven. If the topping is browning too quickly, tent loosely with foil for the last 10 minutes.
- Rest and finish: Let the crisp cool on a wire rack for at least 15 minutes. I know it’s tempting to dig in right away, but the filling needs time to set. If you serve it too soon, you’ll get apple soup. While it’s still warm, sprinkle generously with flaky sea salt and drizzle with extra caramel sauce.
Pro tip from someone who learned the hard way: Place your baking dish on a foil-lined baking sheet before it goes in the oven. That caramel bubble-over is no joke — I once had to scrub burnt sugar off my oven floor for an hour. Learn from my mistakes.
Cooking Tips & Techniques
After making this recipe more times than I can count, I’ve picked up a few tricks that make a real difference. Here’s what I wish someone had told me:
Don’t skip the resting time. I know, I know — you want that warm, gooey dessert right now. But letting the crisp rest for 15-20 minutes allows the juices to thicken into a syrupy consistency instead of running all over your plate. The texture changes completely. Patience pays off here.
Butter temperature matters. Cold butter is non-negotiable for the crumble topping. If your butter is even slightly soft, you’ll end up with a paste instead of a crumble. Pop your butter in the freezer for 10 minutes before you start if your kitchen is warm. I’ve ruined more than one batch by getting impatient with butter temperature.
Watch your oven like a hawk. Every oven runs differently. My old oven would burn the topping at 375°F, while my current one needs the full 45 minutes. Start checking at 35 minutes — the topping should be deep golden brown, not pale. If it’s browning unevenly, rotate the dish halfway through.
Multitask like a pro: While the apples are sitting in their sugar mixture, make your crumble topping. While the crisp bakes, clean up your kitchen and make your coffee or whip some cream. The total active time is only about 20 minutes, but the baking time is perfect for getting other things done.
One mistake I’ll never make again: I once used quick oats because that’s what I had in the pantry. The topping turned into a sad, mushy layer that had zero crunch. Old-fashioned rolled oats are the only way to go — they hold their texture and give you that satisfying crispy-chewy contrast. If you’re looking for another dessert where texture matters, the chocolate-dipped strawberry coconut bars deliver that same satisfying crunch.
Variations & Adaptations
This recipe is wonderfully flexible. Here are some variations I’ve tried and loved:
Gluten-Free Version: Substitute the all-purpose flour with a good 1:1 gluten-free baking flour blend. I’ve had success with Bob’s Red Mill and King Arthur brands. The oat crumble works perfectly since oats are naturally gluten-free — just make sure you’re using certified gluten-free oats if that’s a concern.
Dairy-Free Adaptation: Use cold coconut oil or vegan butter in place of regular butter. I’ve tested this with Miyoko’s European Style Cultured Vegan Butter and it worked beautifully. The topping won’t be quite as crispy, but it’s still delicious. Skip the caramel or use a dairy-free caramel sauce.
Seasonal Fruit Swaps: This recipe works beautifully with pears, peaches, or a mix of apples and cranberries. In the fall, try adding fresh cranberries for a tart pop of color. In summer, swap in ripe peaches and reduce the sugar slightly. For a fun twist, try the rainbow breakfast biscuit pops for a completely different kind of fruity treat.
Spice It Up: Add a pinch of cardamom or ginger along with the cinnamon for a more complex flavor profile. A tiny bit of black pepper (seriously!) enhances the caramel notes in a surprising way. I tried this on a whim and it’s become my secret weapon.
Nutty Crunch: Add ½ cup of chopped pecans or walnuts to the oat crumble for extra texture. Toast them first for maximum flavor. This is my husband’s favorite variation — he says it makes the crisp feel more substantial.
Serving & Storage Suggestions
This salted caramel apple crisp is best served warm, but it’s honestly delicious at any temperature. Here’s how to make the most of it:
Serving: Scoop into bowls while still warm (but not piping hot — remember that 15-minute rest). Top with vanilla ice cream for the classic experience, or try whipped cream for something lighter. A drizzle of extra salted caramel and a final sprinkle of flaky salt takes it over the top. For a brunch spread, serve it alongside yogurt or even a dollop of mascarpone cheese.
What to serve with it: A scoop of good vanilla bean ice cream is the obvious choice, but don’t sleep on cinnamon ice cream, bourbon vanilla, or even a drizzle of heavy cream. For drinks, hot coffee or spiced apple cider complement the flavors beautifully. If you’re serving this after a big meal, keep portions modest — it’s rich in the best way.
Storage: Cover the baking dish tightly with foil or transfer leftovers to an airtight container. It will keep in the refrigerator for up to 4 days. The topping will soften over time, but reheating helps bring back some crunch.
Reheating: The best way to revive leftovers is in a 350°F oven for 10-15 minutes. This crisps up the topping and warms the filling through. The microwave works in a pinch (about 60 seconds), but the topping will be soft. If you’re meal-prepping for a gathering, you can assemble the entire crisp (without baking) a day ahead, cover it, and refrigerate. Add 5-10 minutes to the baking time if starting from cold.
Freezing: Baked apple crisp freezes beautifully for up to 3 months. Cool completely, wrap tightly in plastic wrap and foil, and freeze. Thaw overnight in the refrigerator and reheat in a 350°F oven until bubbly. I like to make a double batch and freeze one for emergencies — like random Tuesday cravings.
Nutritional Information & Benefits
Let’s be real — this is dessert, not a health food. But it does have some redeeming qualities worth mentioning.
Estimated per serving (based on 8 servings): Calories: 420 | Fat: 16g | Carbohydrates: 68g | Fiber: 5g | Sugar: 42g | Protein: 4g | Sodium: 310mg
Health highlights: Apples are packed with fiber and vitamin C, and oats provide soluble fiber that’s great for heart health. The cinnamon adds anti-inflammatory properties, and there’s actually some research showing that the antioxidants in apples may support brain health. So while I wouldn’t call this a health food, it’s certainly not the worst dessert you could choose.
Dietary considerations: This recipe is vegetarian and can be made gluten-free and dairy-free with the substitutions mentioned above. It contains wheat and dairy in its standard form. The sugar content is moderate for a dessert, but you can reduce the sugar in the filling if your apples are very sweet.
My take: I believe in balance. This dessert uses real ingredients — butter, oats, apples, sugar — and that’s something I can feel good about. It’s not about being perfect; it’s about enjoying something made with love. If you’re looking for a lighter option, the chicken veggie skillet wraps make a great counterpart for a balanced meal.
FAQs
Can I use quick oats instead of old-fashioned oats?
I really don’t recommend it. Quick oats absorb more liquid and break down during baking, leaving you with a soft, mushy topping instead of that beautiful crunchy crumble. Old-fashioned rolled oats are worth the trip to the store — they hold their shape and give you that perfect texture contrast.
Why did my apple crisp turn out watery?
This usually happens for one of two reasons: either you didn’t let the apples sit with the sugar and flour long enough, or you cut the apples too thick. The flour helps thicken the juices as they bake. Also, make sure you’re using the right apples — some varieties (like Red Delicious) release too much liquid. Stick with Granny Smith or Honeycrisp for best results.
Can I make this ahead of time?
Absolutely. You can assemble the entire crisp (without baking) up to 24 hours in advance. Cover it tightly and refrigerate. When you’re ready to bake, add about 5-10 minutes to the baking time since you’re starting from cold. The crumble might not be quite as crispy, but it’s still delicious. For best results, I recommend baking it fresh and reheating if needed.
How do I get the topping extra crispy?
Three things: cold butter, don’t overwork the crumble, and make sure your oven is fully preheated. If the topping still isn’t crispy enough, try broiling it for the last 1-2 minutes — but watch it like a hawk because it can burn fast. Also, letting the crisp rest after baking helps the topping firm up.
Can I use homemade caramel sauce?
Yes, and it’s incredible if you have the time. Homemade salted caramel takes the flavor to another level. But honestly, a good store-bought version works beautifully and saves you a sticky mess. Just make sure it’s salted caramel — the salt is what makes this recipe special. If you’re using unsalted caramel, add an extra pinch of flaky salt to the filling.
Conclusion
This salted caramel apple crisp with oat crumble is more than just a dessert — it’s the kind of recipe that becomes a tradition. The one your family requests for every gathering. The one you make on cozy Sunday afternoons when the leaves are changing and the air smells like cinnamon. The one that makes people close their eyes and smile.
I love this recipe because it’s forgiving. It doesn’t demand perfection. You can use slightly different apples, a little more or less caramel, a handful of nuts thrown in — and it still works. It’s generous like that. And honestly, that’s what home cooking should be: adaptable, forgiving, and full of love.
I’d love to hear how yours turns out. Did you try a fun variation? Did your family love it as much as mine does? Drop a comment below, share your photos, and tag me — I read every single one. And if you’re looking for more cozy dessert inspiration, check out the chocolate strawberry cloud tartlets for another showstopper that’s easier than it looks.
Now go preheat that oven. Your kitchen is about to smell amazing.
Pin This Recipe!

Perfect Salted Caramel Apple Crisp with Oat Crumble

This salted caramel apple crisp features tender, jammy apples swirled with salted caramel and topped with a crispy oat crumble. It’s a cozy, crowd-pleasing dessert that tastes like a warm hug.
- Prep Time: 20 minutes
- Cook Time: 45 minutes
- Total Time: 1 hour 5 minutes
- Yield: 8 servings 1x
- Category: Dessert
- Cuisine: American
Ingredients
- 6 medium apples, peeled, cored, and sliced into ¼-inch thick pieces (Honeycrisp or Granny Smith recommended)
- ¼ cup granulated sugar
- 2 tablespoons all-purpose flour
- 1 teaspoon ground cinnamon
- ¼ teaspoon ground nutmeg
- 1 tablespoon fresh lemon juice
- ½ cup salted caramel sauce, divided
- 1 cup old-fashioned rolled oats
- ¾ cup all-purpose flour
- ½ cup packed light brown sugar
- ¼ cup granulated sugar
- ½ teaspoon salt
- ½ cup cold unsalted butter, cut into small cubes
- ½ teaspoon vanilla extract
- Flaky sea salt for finishing
- Extra salted caramel sauce for drizzling after baking
Instructions
- Preheat oven to 375°F (190°C).
- Prepare the apples: Peel, core, and slice apples into even ¼-inch thick pieces (about 8 cups).
- Make the filling: In a large bowl, toss apple slices with granulated sugar, flour, cinnamon, nutmeg, and lemon juice. Let sit for 5 minutes.
- Drizzle in ¼ cup of salted caramel sauce and gently fold through the apples. Set remaining ¼ cup aside.
- Make the oat crumble: In a medium bowl, whisk together oats, flour, brown sugar, granulated sugar, and salt. Add cold butter cubes and vanilla extract. Use a pastry cutter or fingers to work butter into dry ingredients until mixture resembles coarse meal with pea-sized butter pieces.
- Assemble the crisp: Transfer apple mixture to a 9×13-inch baking dish and spread evenly. Drizzle remaining ¼ cup caramel sauce over apples. Sprinkle oat crumble evenly on top without pressing down.
- Place dish on a baking sheet and bake for 40-45 minutes, until topping is deep golden brown and filling is bubbling around edges. Tent with foil if browning too quickly.
- Let cool on a wire rack for at least 15 minutes. Sprinkle with flaky sea salt and drizzle with extra caramel sauce before serving.
Notes
Place baking dish on a foil-lined baking sheet to catch caramel bubble-over. Let crisp rest for 15-20 minutes after baking to allow juices to thicken. Cold butter is essential for a crispy crumble topping. Old-fashioned rolled oats are recommended over quick oats for best texture.
Nutrition
- Serving Size: 1 serving
- Calories: 420
- Sugar: 42
- Sodium: 310
- Fat: 16
- Saturated Fat: 10
- Carbohydrates: 68
- Fiber: 5
- Protein: 4
Keywords: apple crisp, salted caramel, oat crumble, fall dessert, apple dessert, easy apple crisp, comfort food


