My neighbor Dave wasn’t trying to impress anyone. I’d stopped by to borrow a ladder on a Tuesday afternoon, and the smell hit me before I even got to his screen door. That warm, buttery, brown-sugar scent that makes you stop mid-sentence and just breathe in. He was standing there in his garage apron, holding a spatula, looking mildly surprised that anyone would find this noteworthy.
“Oh, these?” he said when I asked what on earth that incredible smell was. “Just cookies. Small batch. The kids ate the last batch before I even got a taste, so I figured I’d make just enough for me.” He said it like it was nothing. Like he hadn’t just created the most perfect, golden-brown, slightly-crunchy-on-the-edges, perfectly-soft-in-the-middle chocolate chip cookies I’d smelled in years. I stood there in his kitchen, maybe you’ve been there, watching him pull a tiny tray of six perfect cookies out of the oven, and I honestly felt a little jealous. Not of the cookies, but of the casual confidence. He wasn’t following some famous recipe. He was just making cookies, for himself, on a Tuesday.
I asked for the recipe, of course. He shrugged and scribbled it on a napkin. I’ve made it every week since. The whole point is the smallness of it. No giant batch that goes stale before you finish it. No massive mixing bowls and stand mixers. Just six perfect cookies, made in about twenty minutes, for when you need a little something sweet without the commitment. It’s the kind of recipe that makes you feel like a genius, even though you barely did anything. Let me tell you, that first bite of a warm, melty cookie straight from your own oven? It’s worth borrowing a ladder for.
Why You’ll Love This Recipe
This isn’t just another chocolate chip cookie recipe. After testing Dave’s napkin scribbles and tweaking them about a dozen times, I can honestly say this is the best small batch version I’ve ever made. Here’s why it works so well for a home cook feeding a family on a sensible budget:
- Quick & Easy: From start to finish, you’re looking at about 20 minutes. No chilling required, no complicated techniques. Perfect for a Tuesday afternoon craving or a quick after-school treat.
- Simple Ingredients: You likely have everything in your pantry right now. Butter, sugar, an egg, flour, chocolate chips. No fancy extracts or specialty flours needed.
- No Waste: This makes exactly six cookies. No leftover dough languishing in the fridge, no stale cookies a week later. It’s the perfect amount for a small family or for when you just want a taste.
- Crowd-Pleaser: These cookies have that perfect texture—crispy edges, chewy centers, and melty pockets of chocolate. Kids devour them, and adults sneak them when nobody’s looking.
- Unbelievably Delicious: The secret is in the ratio. A bit more brown sugar than white gives them that deep, caramel-like flavor. And the technique of browning the butter? It’s a game-changer that makes these taste like you spent hours, not minutes.
What makes these different from every other cookie recipe out there is the browned butter. It adds a nutty, toasty depth that regular melted butter just can’t match. It’s the kind of detail that makes you close your eyes after the first bite. This is comfort food reimagined—faster, simpler, but with the same soul-soothing satisfaction. Perfect for impressing your family without any stress, or turning a simple afternoon into something memorable.
What Ingredients You Will Need
This recipe uses simple, wholesome ingredients to deliver big flavor without the fuss. Most of these are pantry staples, so you can whip up a batch anytime the mood strikes.
- Unsalted butter, 3 tablespoons (42g) – We’re browning this, so unsalted is key to controlling the salt level. I prefer using a good quality butter like Kerrygold for the richest flavor, but any unsalted butter works fine.
- Light brown sugar, 3 tablespoons (40g), packed – This is what gives the cookies their chewy texture and deep, molasses-like flavor. Pack it firmly into the measuring spoon for accuracy.
- Granulated sugar, 2 tablespoons (25g) – Adds just enough sweetness and helps with those crispy edges.
- 1 large egg yolk – You only need the yolk for richness and tenderness. Save the white for scrambled eggs or another recipe. (If you’re feeling wasteful, you can use the whole egg, but the cookies will be a bit less chewy.)
- Vanilla extract, 1/2 teaspoon – Pure vanilla is best, but imitation works in a pinch. It rounds out the flavor beautifully.
- All-purpose flour, 1/2 cup (60g) – Spoon and level it for accuracy. Don’t scoop directly from the bag or you’ll end up with dense cookies.
- Baking soda, 1/4 teaspoon – Helps the cookies spread just the right amount and gives them a slight lift.
- Salt, 1/4 teaspoon – I use fine sea salt. It balances the sweetness and enhances the chocolate.
- Semi-sweet chocolate chips, 1/3 cup (60g) – I prefer Ghirardelli or Guittard for their meltability. You can also chop up a good quality chocolate bar for bigger, more irregular pools of chocolate.
Equipment Needed
You don’t need a lot of fancy tools for these cookies, which is part of the beauty. Here’s what you’ll need:
- Small saucepan – For browning the butter. A light-colored pan helps you see the color change.
- Mixing bowls – One medium bowl for the wet ingredients, one small bowl for the dry.
- Whisk – For combining the wet ingredients smoothly.
- Rubber spatula or wooden spoon – For folding everything together.
- Baking sheet – A standard half-sheet pan works perfectly. No need to line with parchment if it’s non-stick, but parchment makes cleanup a breeze.
- Cookie scoop or tablespoon – A 1.5-tablespoon scoop gives you perfectly uniform cookies. If you don’t have one, just use a spoon and your hands.
- Cooling rack – Optional, but helps the cookies cool evenly without soggy bottoms.
I’ve made these with a cheap baking sheet from the dollar store and they still turned out great. The only thing I’d splurge on is a good quality butter. Everything else is negotiable.
Preparation Method
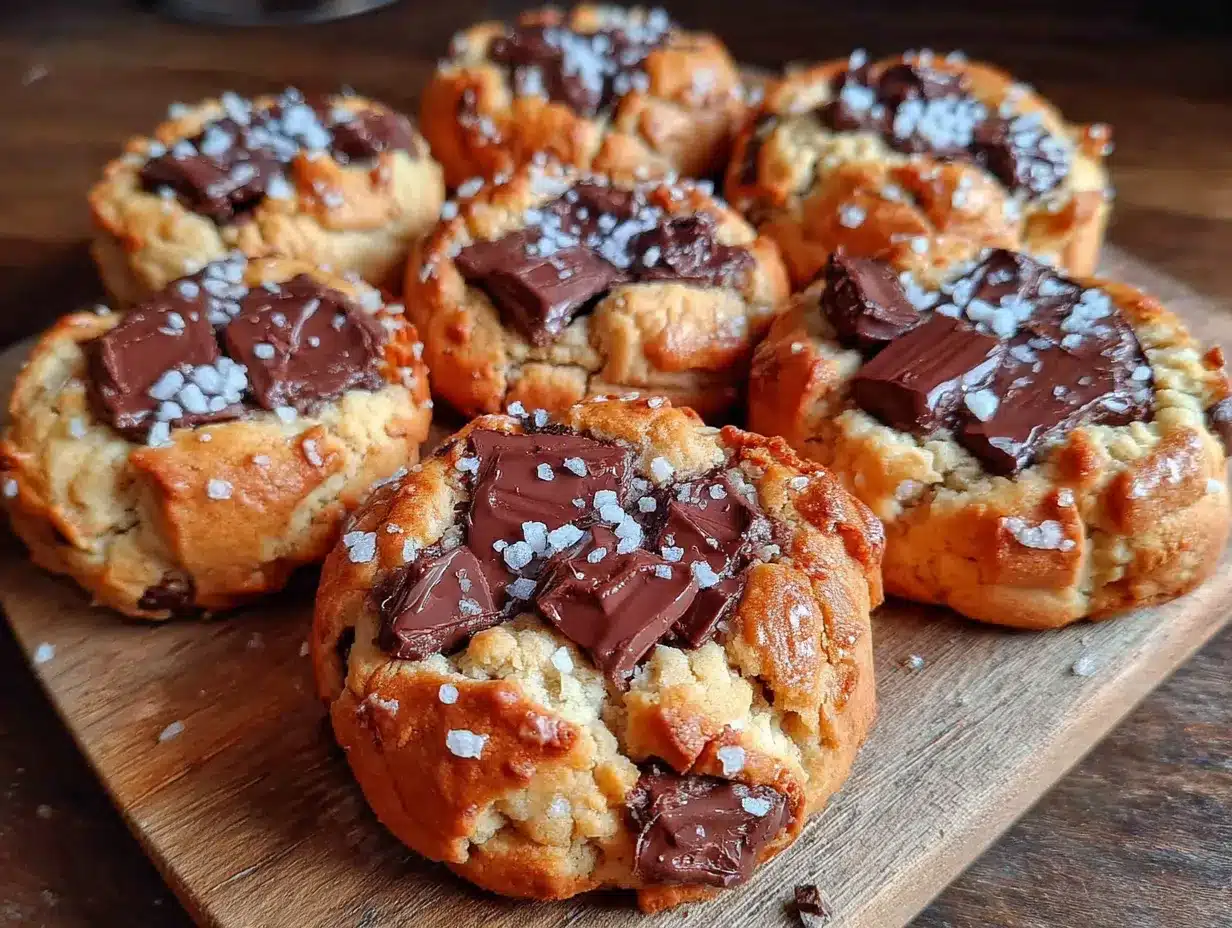
Follow these steps carefully, and you’ll have six perfect cookies in about 20 minutes.
- Brown the butter. Place the 3 tablespoons of unsalted butter in a small saucepan over medium heat. Let it melt completely, then swirl the pan occasionally. After a few minutes, it will start to foam and then turn a golden amber color. You’ll smell a nutty, toasty aroma. This takes about 3-4 minutes. Watch it carefully—it can go from browned to burnt in seconds. Once it’s a deep amber color, immediately pour it into a medium mixing bowl to stop the cooking. Let it cool for 2-3 minutes. (I forgot to watch it once and ended up with black butter. Smelled terrible. Don’t be me.)
- Mix the sugars and egg yolk. To the warm browned butter, add the 3 tablespoons packed light brown sugar and 2 tablespoons granulated sugar. Whisk until combined. It will look a bit grainy. Then add the 1 large egg yolk and 1/2 teaspoon vanilla extract. Whisk vigorously for about 30 seconds until the mixture is smooth, thick, and slightly lighter in color. This is where the magic starts.
- Combine the dry ingredients. In a separate small bowl, whisk together the 1/2 cup all-purpose flour, 1/4 teaspoon baking soda, and 1/4 teaspoon salt. Make sure there are no lumps.
- Fold everything together. Pour the dry ingredients into the wet ingredients. Use a rubber spatula to fold gently until just combined. A few streaks of flour are okay. Do not overmix, or the cookies will be tough. Then fold in the 1/3 cup semi-sweet chocolate chips until evenly distributed. The dough will be thick and slightly sticky.
- Portion the dough. Using a 1.5-tablespoon cookie scoop or a spoon, scoop out 6 equal portions of dough. Roll each into a ball and place them on a baking sheet, spaced about 2 inches apart. (I like to press a few extra chocolate chips on top of each ball for a prettier look.)
- Bake. Place the baking sheet in a preheated 350°F (175°C) oven. Bake for 8-10 minutes. The edges should be golden brown and set, but the centers will still look soft and slightly puffy. They will continue to set as they cool. For softer, chewier cookies, pull them at 8 minutes. For slightly crisper cookies, go to 10 minutes. I usually pull mine at 9 minutes.
- Cool. Let the cookies cool on the baking sheet for 5 minutes. This is crucial—they are very fragile when hot. After 5 minutes, transfer them to a cooling rack to cool completely. Or, you know, eat one warm. I won’t tell anyone.
Cooking Tips & Techniques
I’ve made these cookies about twenty times now, and I’ve learned a few things the hard way. Here’s what I wish I knew from the start.
Don’t skip browning the butter. I know it’s an extra step, but it’s what makes these cookies taste like they came from a fancy bakery. The nutty flavor is irreplaceable. Just watch it like a hawk. I once got distracted by a phone call and ended up with a smoky kitchen and a ruined pan. Set a timer if you have to.
Measure your flour correctly. This is the most common mistake I see. Scooping directly from the bag compacts the flour, giving you way too much. The cookies will be dry and cakey. Instead, spoon the flour into your measuring cup and level it off with a knife. It takes two extra seconds and makes a huge difference.
Let the cookies cool on the pan. I know it’s tempting to move them immediately, but trust me on this. They need those 5 minutes on the hot baking sheet to finish setting up. If you try to move them too soon, they’ll fall apart. I learned this the messy way when I tried to rush things for a hungry toddler.
For consistent results, use a cookie scoop. It ensures every cookie is the same size, so they bake evenly. If you don’t have one, wet your hands slightly and roll the dough into balls. The moisture helps prevent sticking.
Timing is everything. Every oven runs a little differently. Start checking at 8 minutes. The cookies should look slightly underdone in the center. They will continue to cook from the residual heat of the pan. Overbaked cookies are sad cookies.
Variations & Adaptations
This recipe is a great base for experimentation. Here are a few variations I’ve tried and loved.
- Chocolate Lover’s Version: Swap 1 tablespoon of flour for 1 tablespoon of unsweetened cocoa powder. Use dark chocolate chips instead of semi-sweet. The result is a deeply chocolatey, almost fudgy cookie.
- Nutty Crunch: Replace 2 tablespoons of the chocolate chips with 2 tablespoons of toasted, chopped pecans or walnuts. Toast them in a dry pan for 2-3 minutes before adding to the dough for extra flavor.
- Gluten-Free Option: Substitute the all-purpose flour with a 1-to-1 gluten-free baking flour blend. I’ve used Bob’s Red Mill with good results. The texture will be slightly more tender, but still delicious.
- Sea Salt Finish: Just before baking, sprinkle a tiny pinch of flaky sea salt (like Maldon) on top of each dough ball. The salty-sweet combination is absolutely irresistible.
- Double Chocolate Chip: Add 1 tablespoon of mini chocolate chips along with the regular chips. They melt into tiny pockets of chocolate throughout the cookie.
I once tried a version with white chocolate chips and dried cranberries for a holiday twist. It was pretty good, but honestly, nothing beats the classic. Stick with the semi-sweet chips for the best balance of sweetness.
Serving & Storage Suggestions
These cookies are best enjoyed warm, straight from the oven. The edges are crispy, the center is soft, and the chocolate is still melty. That’s the peak experience, and I highly recommend it.
For serving, I like to place them on a small plate with a glass of cold milk. It’s a classic pairing for a reason. They also go beautifully with a scoop of vanilla ice cream for a simple dessert. If you’re feeling fancy, drizzle a little melted chocolate over the top.
To store leftovers (if there are any), place them in an airtight container at room temperature. They will stay soft and chewy for up to 3 days. I’ve found that placing a slice of bread in the container helps keep them moist. The bread absorbs the excess air and releases moisture, which keeps the cookies from drying out. Just replace the bread slice every day.
You can also freeze the baked cookies for up to 2 months. Wrap them individually in plastic wrap, then place them in a freezer bag. To thaw, just leave them at room temperature for about 15 minutes. For a warm cookie experience, pop one in the microwave for 10 seconds.
If you want to freeze the raw dough, scoop it into balls and place them on a baking sheet in the freezer until solid. Then transfer the frozen dough balls to a freezer bag. You can bake them directly from frozen, just add 1-2 minutes to the baking time. This is my favorite trick for having fresh cookies on demand.
Nutritional Information & Benefits
Here’s the approximate nutritional breakdown for one cookie (based on 6 cookies per batch):
| Nutrient | Amount Per Cookie |
|---|---|
| Calories | 185 |
| Total Fat | 11g |
| Saturated Fat | 7g |
| Cholesterol | 45mg |
| Sodium | 125mg |
| Total Carbohydrates | 22g |
| Dietary Fiber | 1g |
| Sugars | 15g |
| Protein | 2g |
Please note that these are estimates and can vary based on the specific brands and ingredients you use. While these aren’t health food, they are a small batch, which naturally helps with portion control. The dark chocolate chips provide a small amount of antioxidants, and the butter contains fat-soluble vitamins. Enjoy them as an occasional treat, and savor every bite.
If you’re watching your sugar intake, you can reduce the granulated sugar by 1 tablespoon, but the texture will be slightly less crispy. For a lower-fat option, you can substitute half the butter with unsweetened applesauce, but the cookies will be more cake-like.
Conclusion
These perfect small batch chocolate chip cookies are everything I want in a dessert. They’re quick, they’re simple, and they deliver that incredible, nostalgic flavor that makes you feel like a kid again. The browned butter is the secret weapon that makes them taste special, but the small batch size keeps them from being overwhelming. You get just enough to satisfy your craving, without a giant tin of cookies tempting you for days.
I love that this recipe came from a casual Tuesday afternoon, from a neighbor who wasn’t trying to be impressive. It’s a reminder that the best things in life are often the simplest. I hope you make these cookies for yourself, for your family, or just because it’s Tuesday. Customize them with your favorite add-ins, bake them until they’re just right, and enjoy every warm, melty bite.
If you try this recipe, I’d love to hear how it goes. Leave a comment below and let me know if you added any twists, or if you ate all six before they even cooled down. No judgment here. Happy baking!
Frequently Asked Questions
Can I use salted butter instead of unsalted?
Yes, you can. Just reduce the added salt in the recipe to a pinch (about 1/8 teaspoon). The browned butter flavor will still come through beautifully.
Do I have to brown the butter?
No, but I really recommend it. If you’re short on time, you can just melt the butter and use it as is. The cookies will still be good, but they won’t have that deep, nutty flavor that makes them special.
Can I double this recipe?
Absolutely! Just double all the ingredients. You’ll get 12 cookies. The baking time might increase by a minute or two, so keep an eye on them.
Why did my cookies turn out flat?
This usually happens if the butter was too warm when you added the dry ingredients, or if you used too much sugar. Make sure the browned butter has cooled for a few minutes before adding the egg yolk. Also, measure your flour correctly—too little flour can cause spreading.
Can I use a different type of chocolate?
Of course. Milk chocolate, dark chocolate, white chocolate, or even butterscotch chips all work. Just keep the total amount the same (1/3 cup). I personally love semi-sweet for the best balance of sweetness and richness.
Pin This Recipe!
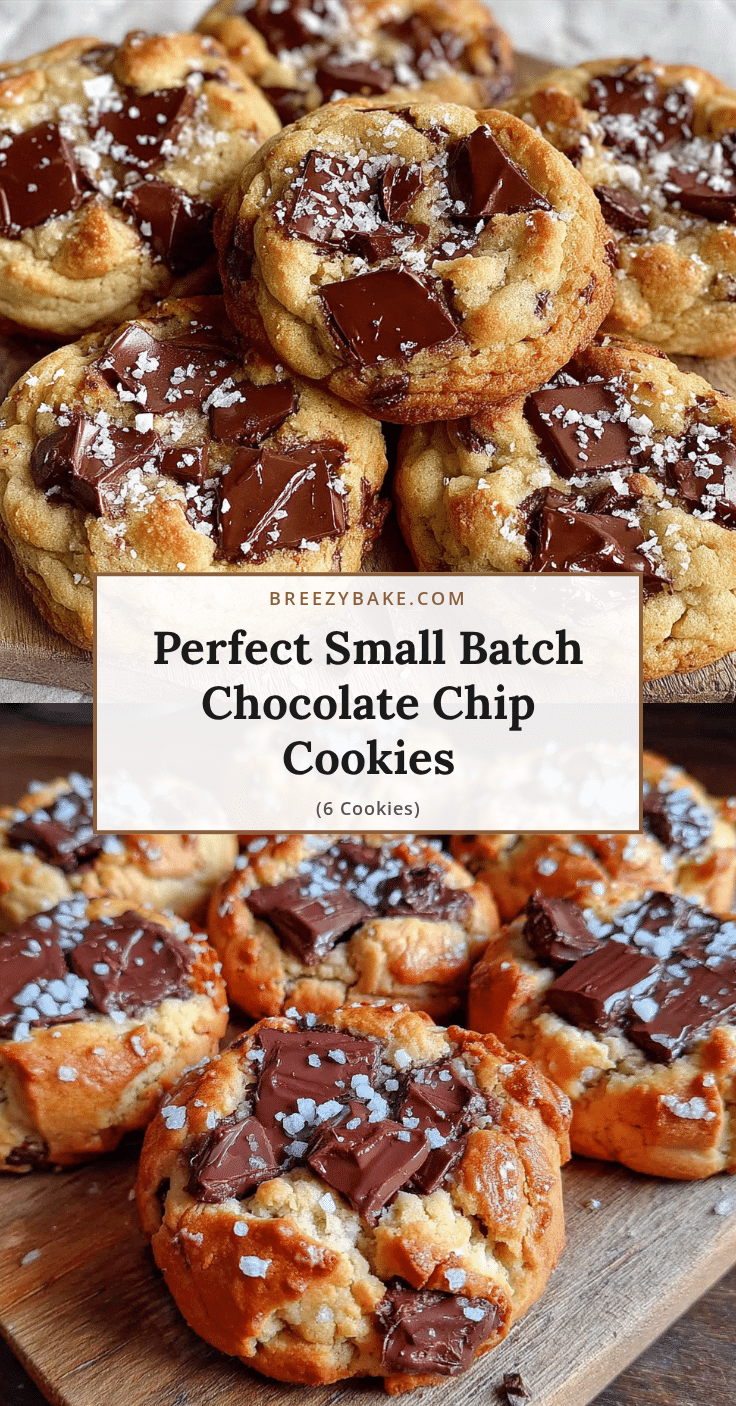
Perfect Small Batch Chocolate Chip Cookies (6 Easy Cookies)

These small batch chocolate chip cookies are quick, easy, and yield just six perfect cookies with crispy edges, chewy centers, and melty chocolate. The secret is browned butter for a nutty, toasty depth that makes them taste like they came from a fancy bakery.
- Prep Time: 10 minutes
- Cook Time: 10 minutes
- Total Time: 20 minutes
- Yield: 6 cookies 1x
- Category: Dessert
- Cuisine: American
Ingredients
- 3 tablespoons (42g) unsalted butter
- 3 tablespoons (40g) light brown sugar, packed
- 2 tablespoons (25g) granulated sugar
- 1 large egg yolk
- 1/2 teaspoon vanilla extract
- 1/2 cup (60g) all-purpose flour
- 1/4 teaspoon baking soda
- 1/4 teaspoon salt
- 1/3 cup (60g) semi-sweet chocolate chips
Instructions
- Brown the butter: Place 3 tablespoons unsalted butter in a small saucepan over medium heat. Melt completely, then swirl occasionally. After 3-4 minutes, it will foam and turn golden amber with a nutty aroma. Immediately pour into a medium mixing bowl to stop cooking. Let cool 2-3 minutes.
- Mix the sugars and egg yolk: To the warm browned butter, add 3 tablespoons packed light brown sugar and 2 tablespoons granulated sugar. Whisk until combined. Add 1 large egg yolk and 1/2 teaspoon vanilla extract. Whisk vigorously for about 30 seconds until smooth, thick, and slightly lighter in color.
- Combine dry ingredients: In a separate small bowl, whisk together 1/2 cup all-purpose flour, 1/4 teaspoon baking soda, and 1/4 teaspoon salt until no lumps remain.
- Fold everything together: Pour dry ingredients into wet ingredients. Use a rubber spatula to fold gently until just combined (a few streaks of flour are okay). Fold in 1/3 cup semi-sweet chocolate chips until evenly distributed. Dough will be thick and slightly sticky.
- Portion the dough: Using a 1.5-tablespoon cookie scoop or spoon, scoop 6 equal portions. Roll into balls and place on a baking sheet about 2 inches apart. Optionally press extra chocolate chips on top.
- Bake: Place baking sheet in a preheated 350°F (175°C) oven. Bake for 8-10 minutes. Edges should be golden brown and set, centers soft and slightly puffy. For chewier cookies, bake 8 minutes; for crisper, 10 minutes.
- Cool: Let cookies cool on baking sheet for 5 minutes (they are fragile when hot). Then transfer to a cooling rack to cool completely, or enjoy one warm.
Notes
Don’t skip browning the butter—it’s the key to the nutty flavor. Measure flour correctly by spooning and leveling. Let cookies cool on the pan for 5 minutes to set. For consistent results, use a cookie scoop. Start checking at 8 minutes; cookies should look slightly underdone in the center.
Nutrition
- Serving Size: 1 cookie
- Calories: 185
- Sugar: 15
- Sodium: 125
- Fat: 11
- Saturated Fat: 7
- Carbohydrates: 22
- Fiber: 1
- Protein: 2
Keywords: small batch chocolate chip cookies, easy chocolate chip cookies, browned butter cookies, 6 cookies, quick cookies, no chill cookies