I burned the first batch of these spiced pumpkin cheesecake bars so badly the smoke alarm went off and my neighbor actually knocked on the door to check if everything was okay. Not my finest cooking moment, honestly. The crust was charcoal, the filling had turned into some kind of weird scrambled egg situation, and I was ready to give up on the whole idea entirely. But here’s the thing—I couldn’t stop thinking about the flavor combination. Pumpkin and cheesecake together with that gingersnap crunch? It felt like it had to work. So I tried again. And again. And somewhere around attempt number four, something clicked. The crust stayed crisp without burning, the filling set up perfectly creamy, and the spices hit that sweet spot between warming and bold. Now these bars are the first thing I bring to fall gatherings, and people always ask for the recipe before they even finish their first bite. Funny how failure can teach you more than success ever does.
These are not your average pumpkin bars. The gingersnap crust brings this deep molasses warmth that regular graham crackers just can’t touch. And the filling? It’s luscious without being heavy, spiced without being overpowering. I’ve made them for Thanksgiving dinners, cozy Friendsgiving get-togethers, and random Tuesday nights when I needed something sweet. They work for every occasion. Let me show you exactly how to nail them on your first try—no smoke alarms required.
Why You’ll Love This Recipe
These spiced pumpkin cheesecake bars have earned a permanent spot in my fall baking rotation, and I think they’ll earn one in yours too. Here’s why:
- Simple Ingredients: You probably already have most of what you need in your pantry right now. No hunting down obscure spices or specialty items.
- No Water Bath Needed: Traditional cheesecake requires that fussy water bath setup. These bars skip it entirely and still come out perfectly creamy.
- Make-Ahead Friendly: They actually taste better after a night in the fridge. Make them a day or two ahead and cross one thing off your holiday to-do list.
- Crowd-Pleaser: I’ve served these to pumpkin lovers and pumpkin skeptics alike. The cream cheese tames the pumpkin flavor just enough that everyone goes back for seconds.
- Perfect for Fall Gatherings: Whether it’s a Thanksgiving dessert table or a casual potluck, these bars travel well and look impressive with minimal effort.
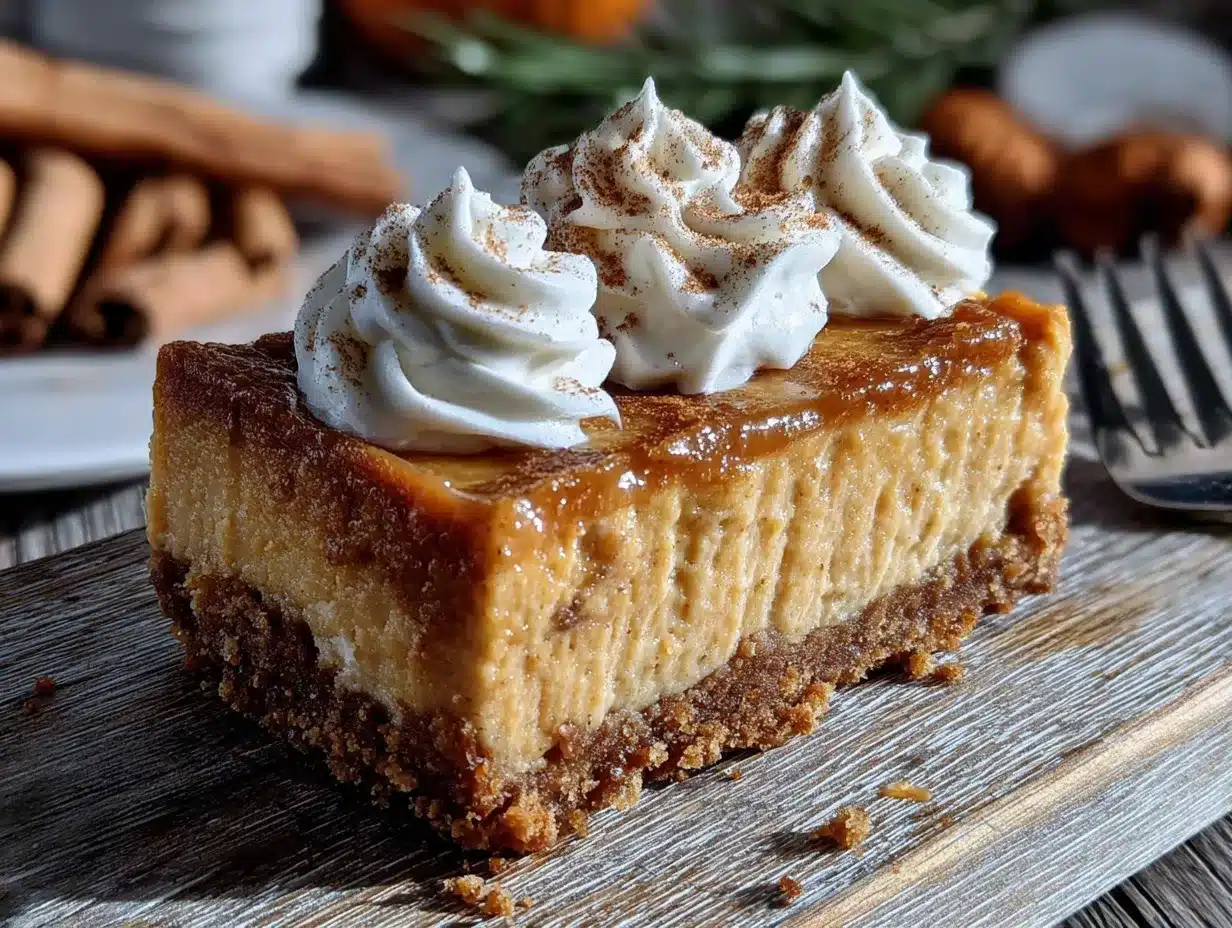
What makes these bars different from every other pumpkin dessert out there? It’s the texture contrast. That crisp, spiced gingersnap crust against the silky, smooth cheesecake filling creates something truly special. And the swirl on top? It makes everyone think you spent hours on presentation when really it takes about thirty seconds.
This is the kind of dessert that makes you close your eyes after the first bite. It’s familiar enough to feel like comfort food, but special enough to feel like an occasion. Plus, it fills your kitchen with the most incredible smell while it bakes. Honestly, that alone is worth the effort.
What Ingredients You Will Need
This recipe uses simple, wholesome ingredients to deliver big flavor without the fuss. Most are pantry staples, especially if you do any fall baking at all.
For the Gingersnap Crust
- 2 cups gingersnap cookie crumbs (about 8 ounces, or roughly 40 cookies crushed). I prefer Nabisco brand for consistent texture, but store brand works fine too. Pulse them in a food processor or crush them in a ziplock bag with a rolling pin.
- 1/4 cup granulated sugar
- 1/2 cup unsalted butter, melted (1 stick). Use real butter here—margarine changes the texture and flavor.
- 1/4 teaspoon salt (skip this if your gingersnaps are already salted)
For the Pumpkin Cheesecake Filling
- 16 ounces cream cheese, softened to room temperature (two 8-ounce blocks). Full-fat is best for texture, but reduced-fat works in a pinch. Do not use spreadable cream cheese from a tub.
- 3/4 cup granulated sugar
- 1/4 cup packed light brown sugar (adds depth and moisture)
- 3 large eggs, room temperature (cold eggs will make the filling lumpy)
- 1 teaspoon vanilla extract
- 1 cup pumpkin puree (not pumpkin pie filling). Libby’s is my go-to brand for consistent results.
- 1 teaspoon pumpkin pie spice (or make your own with cinnamon, nutmeg, ginger, and cloves)
- 1/2 teaspoon cinnamon
- 1/4 teaspoon ground ginger
- 1/8 teaspoon nutmeg, freshly grated if possible
- 1 tablespoon all-purpose flour (helps stabilize the filling and prevents cracking)
For the Spiced Swirl Topping
- 1/2 cup reserved cheesecake filling (set aside before adding pumpkin)
- 1 tablespoon maple syrup (adds sweetness and a subtle fall flavor)
- 1/2 teaspoon pumpkin pie spice
One quick note on pumpkin puree—make sure you’re buying 100% pure pumpkin, not pumpkin pie filling. The pie filling has sugar and spices already added, which will throw off the whole recipe. If you’re feeling ambitious, you can roast and puree your own pumpkin, but honestly, canned works beautifully here and saves a ton of time.
For the cream cheese, let it sit on the counter for at least an hour before you start baking. Cold cream cheese creates lumps that are nearly impossible to beat out completely. Trust me on this one—I learned the hard way.
Equipment Needed
You don’t need a professional kitchen to make these bars, but having the right tools makes the process much smoother.
- 9×13-inch baking pan—glass or metal both work, just adjust baking time slightly if using glass
- Parchment paper—this is non-negotiable for easy removal. Leave overhang on two sides for handles.
- Food processor or ziplock bag and rolling pin—for crushing the gingersnaps
- Electric hand mixer or stand mixer—a whisk and elbow grease won’t get the cream cheese smooth enough
- Large mixing bowls—one for crust, one for filling
- Spatula—for scraping every last bit of filling into the pan
- Measuring cups and spoons
- Knife for swirling—a butter knife or offset spatula works perfectly
- Cooling rack—lets the bars cool evenly without soggy bottoms
If you don’t have a food processor, don’t worry. I’ve crushed plenty of gingersnaps the old-fashioned way—put them in a sturdy ziplock bag, seal it tight, and go to town with a rolling pin. It’s a great way to work out any frustrations, honestly. Just make sure the crumbs are fairly uniform so the crust bakes evenly.
Preparation Method
Let’s walk through this step by step. I’ll tell you exactly what to look for at each stage so you know you’re on the right track.
Step 1: Prep Your Pan and Preheat
Preheat your oven to 350°F (175°C). Line your 9×13-inch baking pan with parchment paper, leaving about 2 inches of overhang on the long sides. These parchment handles will let you lift the entire batch of bars out cleanly later. Lightly spray the parchment with non-stick cooking spray just to be safe.
Step 2: Make the Gingersnap Crust
Pulse the gingersnap cookies in your food processor until you have fine, uniform crumbs. You should end up with about 2 cups. Transfer to a medium bowl and stir in the sugar and salt. Pour the melted butter over the crumbs and stir with a fork until every crumb is moistened. The mixture should look like wet sand and hold together when you squeeze it in your fist. Press this mixture firmly and evenly into the bottom of your prepared pan. I use the bottom of a measuring cup to really pack it down—this prevents the crust from crumbling when you cut the bars later. Bake for 10 minutes at 350°F, then set aside to cool slightly while you make the filling. Leave the oven on.
Step 3: Beat the Cream Cheese Base
In a large mixing bowl, beat the softened cream cheese with an electric mixer on medium speed until completely smooth—about 2 minutes. Scrape down the sides and bottom of the bowl with a spatula. Add the granulated sugar and brown sugar and beat for another 2 minutes until light and fluffy. This step is important for texture, so don’t rush it.
Step 4: Add the Eggs
Add the eggs one at a time, beating on low speed after each addition just until incorporated. Overbeating at this stage adds too much air, which can cause the cheesecake to puff up and crack. Scrape the bowl after each egg. Stir in the vanilla extract.
Step 5: Divide and Season the Filling
Here’s the trick that makes this recipe work. Scoop out about 1/2 cup of the plain cheesecake filling and set it aside in a small bowl—this will become your spiced swirl topping. To the remaining filling in the large bowl, add the pumpkin puree, pumpkin pie spice, cinnamon, ginger, nutmeg, and flour. Beat on low speed until just combined. The mixture should be smooth and a beautiful pale orange color. Don’t overmix or the filling can become too thin.
Step 6: Assemble the Layers
Pour the pumpkin cheesecake filling over the pre-baked crust and spread it evenly with a spatula. Now take that reserved 1/2 cup of plain cheesecake filling and stir in the maple syrup and pumpkin pie spice. Drop spoonfuls of this spiced mixture randomly over the top of the pumpkin filling. Use a butter knife or skewer to gently swirl the two together—figure-eight motions work well. Don’t over-swirl or you’ll lose the distinct pattern.
Step 7: Bake to Perfection
Bake at 350°F for 35-40 minutes. The edges should be set and slightly puffed, but the center should still have a slight jiggle when you gently shake the pan. This jiggle is important—it means the center will set up creamy instead of dry. If the top starts browning too quickly around the 25-minute mark, tent loosely with aluminum foil.
Step 8: Cool and Chill
Place the pan on a cooling rack and let it cool completely at room temperature—about 1 hour. Then cover with plastic wrap and refrigerate for at least 4 hours, but overnight is better. This chilling time is crucial. The bars need to set fully before you cut them, or you’ll end up with a delicious but messy situation. Trust me, I’ve been impatient before and regretted it.
Step 9: Slice and Serve
Once completely chilled, use the parchment handles to lift the entire block of bars out of the pan. Place on a cutting board and use a sharp knife to slice into squares. For clean cuts, wipe the knife clean between each slice. I usually get 12 generous bars or 16 smaller ones, depending on the crowd.
Cooking Tips & Techniques
After multiple batches and plenty of trial and error, here are the things I wish someone had told me from the start.
Room temperature ingredients matter more than you think. Cold cream cheese creates lumps. Cold eggs can seize up the batter. Take everything out of the fridge at least an hour before you start. If you’re in a hurry, cut the cream cheese into cubes and let it sit on the counter while you crush the cookies.
Don’t overbake. This is probably the most common mistake with cheesecake bars. That slight jiggle in the center when you take them out? That’s exactly what you want. The residual heat will finish cooking the center as they cool. Overbaked cheesecake turns grainy and dry, and there’s no fixing it.
Press the crust firmly. A loose crust will crumble when you cut the bars. I use the bottom of a measuring cup or a flat-bottomed glass to really pack it down. Take an extra minute on this step—it makes a huge difference.
Let them chill fully. I know it’s hard to wait, especially when your kitchen smells amazing. But cutting into warm or even slightly cool bars will give you a runny mess. The texture needs time to set. Make them the day before you plan to serve them, and you’ll be so glad you did.
Use parchment paper. I cannot emphasize this enough. Without parchment handles, getting the bars out of the pan in one piece is nearly impossible. Spend the thirty seconds to line the pan properly, and thank me later.
One more thing—if you notice cracks forming on top during baking, don’t panic. The swirl pattern actually hides minor cracks really well. And if a big crack does appear, just cover it with a dollop of whipped cream before serving. No one will ever know.
Variations & Adaptations
One of the best things about this recipe is how flexible it is. Here are some variations I’ve tried and loved.
Gluten-Free Version: Use gluten-free gingersnap cookies for the crust. Most brands work well, just check the label. The filling is naturally gluten-free as long as you use a gluten-free flour blend or cornstarch instead of all-purpose flour. I’ve made this for friends with celiac disease and they couldn’t tell the difference.
Dairy-Free Adaptation: Substitute the cream cheese with a high-quality dairy-free alternative like Kite Hill or Miyoko’s. Use vegan butter or coconut oil for the crust. The texture will be slightly different—a bit softer—but the flavor is still fantastic. I tested this version last fall and it was a hit at a Friendsgiving where half the guests were dairy-free.
Bourbon Maple Swirl: For an adult twist, add 1 tablespoon of bourbon to the reserved cheesecake filling along with the maple syrup. The bourbon adds warmth that pairs beautifully with the pumpkin and ginger flavors. Just be aware that this version won’t set up quite as firmly, so chill it extra long.
Pecan Praline Topping: After the bars have chilled and been sliced, drizzle with a simple pecan praline sauce. Melt 1/4 cup butter with 1/2 cup brown sugar, stir in 1/2 cup chopped pecans and 2 tablespoons cream, and spoon over individual bars right before serving. This turns an already good dessert into something absolutely decadent.
Mini Bar Version: Press the crust into a mini muffin tin (lined with paper liners) and fill with the cheesecake mixture. Bake for 12-15 minutes instead of 35-40. These are perfect for parties where people want to sample multiple desserts. I brought a batch to a fall potluck alongside some creamy mint chip cream cheese bars and they disappeared within minutes.
Feel free to experiment with the spice blend too. If you love ginger, bump it up to 1 teaspoon. If nutmeg isn’t your thing, leave it out. This recipe is forgiving and welcomes your personal touch.
Serving & Storage Suggestions
These bars are delicious at room temperature or straight from the fridge. I actually prefer them chilled—the texture is firmer and the flavors seem more pronounced. If you’re serving them at a party, take them out of the fridge about 15-20 minutes before serving to take the chill off slightly.
Presentation Ideas: A light dusting of powdered sugar or cinnamon looks beautiful against the dark swirl on top. A dollop of freshly whipped cream and a sprinkle of candied ginger takes them to the next level. For holidays, I sometimes add a few sugared cranberries on top for color.
What to Serve With Them: These bars pair beautifully with coffee or chai tea. For a full dessert spread, serve them alongside irresistible mint mocha cookie bars for a fall dessert table that covers all the flavor bases. A scoop of vanilla ice cream on the side never hurts either.
Storage: Keep the bars in an airtight container in the refrigerator for up to 5 days. Layer them with parchment paper between layers to prevent sticking. The flavors actually deepen over the first 24-48 hours, so day-old bars are even better than fresh ones.
Freezing Instructions: These freeze beautifully. Wrap individual bars tightly in plastic wrap, then place them in a freezer-safe bag or container. They’ll keep for up to 3 months. To thaw, transfer to the refrigerator overnight or let sit at room temperature for about 30 minutes. I always keep a stash in my freezer for unexpected guests or late-night cravings.
Reheating: I don’t recommend reheating these bars—they’re meant to be served cold or at room temperature. But if you want a warm dessert experience, microwave a single bar for about 10-15 seconds. The crust will soften slightly, but the filling will become extra creamy.
Nutritional Information & Benefits
Let’s be real—these are a treat, not a health food. But they do have some redeeming qualities worth mentioning.
Estimated nutrition per bar (based on 12 servings): Calories: 385, Fat: 24g, Saturated Fat: 14g, Carbohydrates: 38g, Sugar: 26g, Protein: 7g, Fiber: 2g, Sodium: 320mg. These values are estimates and will vary based on specific ingredients and brands used.
Pumpkin is actually a nutritional powerhouse. It’s packed with vitamin A (great for eye health), vitamin C, and fiber. One cup of pumpkin puree has more vitamin A than a whole sweet potato. It also adds moisture and richness to the cheesecake without requiring extra fat.
Ginger in the gingersnap crust has anti-inflammatory properties and can aid digestion. Not that a few cookies make a huge difference, but every little bit counts, right?
Dietary Considerations: This recipe contains gluten, dairy, and eggs. For gluten-free and dairy-free alternatives, check the variations section above. If you’re watching your sugar intake, you can reduce the sugar in the filling to 1/2 cup total, though the texture will be slightly less creamy.
I try to keep things balanced—I eat nourishing meals most of the time so I can enjoy desserts like this without guilt. Life is too short to skip the good stuff.
Conclusion
These spiced pumpkin cheesecake bars have become my signature fall dessert, and I think they’ll become yours too. They hit that perfect sweet spot between impressive and approachable—fancy enough for company, simple enough for a random Tuesday. The gingersnap crust adds warmth that regular graham crackers just can’t match, and the creamy pumpkin filling with that beautiful swirl on top makes everyone think you worked way harder than you actually did.
I love that this recipe lets you customize based on what you have and what you love. Swap the spices, try a different crust, add a topping—make it yours. That’s the beauty of a good base recipe. It gives you a solid foundation to build on.
If you make these bars, I’d love to hear about it. Drop a comment below and let me know how they turned out, what variations you tried, or if you have any questions. And if you’re looking for more fall baking inspiration, check out these perfect shamrock green velvet bars for another crowd-pleasing bar recipe. Happy baking, friends—your kitchen is about to smell incredible.
Frequently Asked Questions
Can I use a different type of cookie for the crust?
Absolutely. Graham crackers, shortbread cookies, or even vanilla wafers all work well. The flavor will change, so adjust the spices accordingly. If using a less-spiced cookie, consider adding an extra 1/2 teaspoon of ginger or cinnamon to the crust mixture.
Why did my cheesecake filling crack on top?
Cracks usually happen from overbaking or sudden temperature changes. Make sure you take the bars out while the center still has a slight jiggle. Also, let them cool gradually at room temperature before refrigerating—don’t put hot bars directly in the fridge. The swirl pattern on top does a great job of hiding minor cracks, so don’t stress too much.
Can I make these bars ahead of time for a party?
Yes, and I actually recommend it. These bars taste better after a day in the fridge. Make them up to 2 days ahead, keep them covered in the refrigerator, and add any toppings right before serving. This makes them perfect for holiday entertaining when you’re already juggling a dozen other dishes.
How do I get clean, neat slices?
Use a sharp knife and wipe it clean between each cut. For the cleanest slices, chill the bars for at least 4 hours (overnight is better). You can also run the knife under hot water and dry it before each cut—the warmth helps the knife glide through the cheesecake without dragging.
Can I use pumpkin pie filling instead of pumpkin puree?
I don’t recommend it. Pumpkin pie filling already has sugar and spices added, which will throw off the sweetness and spice balance of this recipe. Stick with 100% pure pumpkin puree for the best results. If you accidentally bought pie filling, you can still use it—just reduce the sugar in the recipe by half and skip the added spices.
Pin This Recipe!
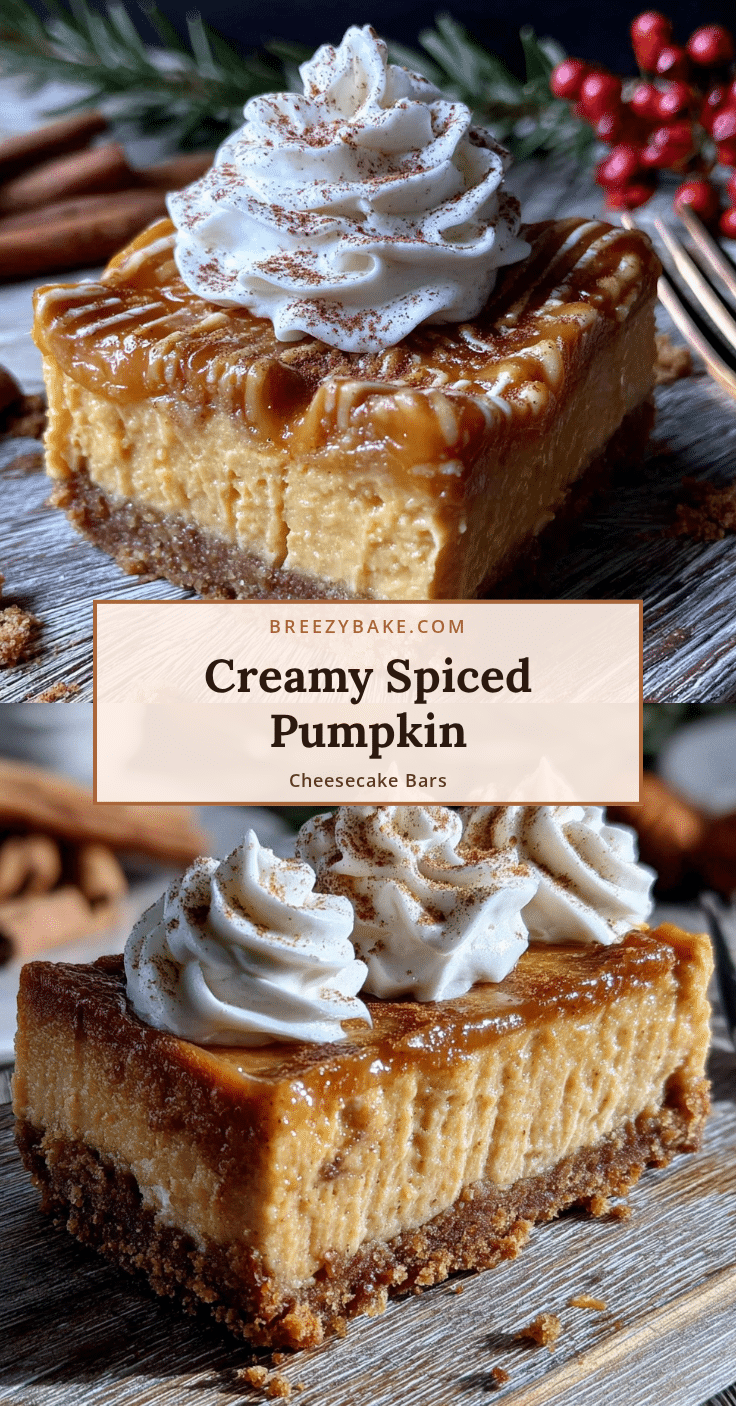
Perfect Spiced Pumpkin Cheesecake Bars Easy Dessert Recipe
These spiced pumpkin cheesecake bars feature a crisp gingersnap crust and a creamy pumpkin cheesecake filling with a beautiful spiced swirl on top. They’re the perfect fall dessert that’s make-ahead friendly and always a crowd-pleaser.
- Prep Time: 20 minutes
- Cook Time: 35-40 minutes
- Total Time: 5 hours (including chilling time)
- Yield: 12 servings 1x
- Category: Dessert
- Cuisine: American
Ingredients
- 2 cups gingersnap cookie crumbs (about 8 ounces, or roughly 40 cookies crushed)
- 1/4 cup granulated sugar
- 1/2 cup unsalted butter, melted (1 stick)
- 1/4 teaspoon salt (skip if gingersnaps are salted)
- 16 ounces cream cheese, softened to room temperature (two 8-ounce blocks)
- 3/4 cup granulated sugar
- 1/4 cup packed light brown sugar
- 3 large eggs, room temperature
- 1 teaspoon vanilla extract
- 1 cup pumpkin puree (not pumpkin pie filling)
- 1 teaspoon pumpkin pie spice
- 1/2 teaspoon cinnamon
- 1/4 teaspoon ground ginger
- 1/8 teaspoon nutmeg, freshly grated if possible
- 1 tablespoon all-purpose flour
- 1/2 cup reserved cheesecake filling (set aside before adding pumpkin)
- 1 tablespoon maple syrup
- 1/2 teaspoon pumpkin pie spice
Instructions
- Preheat your oven to 350°F (175°C). Line your 9×13-inch baking pan with parchment paper, leaving about 2 inches of overhang on the long sides. Lightly spray the parchment with non-stick cooking spray.
- Pulse the gingersnap cookies in your food processor until you have fine, uniform crumbs (about 2 cups). Transfer to a medium bowl and stir in the sugar and salt. Pour the melted butter over the crumbs and stir with a fork until every crumb is moistened. Press this mixture firmly and evenly into the bottom of your prepared pan. Bake for 10 minutes at 350°F, then set aside to cool slightly while you make the filling. Leave the oven on.
- In a large mixing bowl, beat the softened cream cheese with an electric mixer on medium speed until completely smooth—about 2 minutes. Scrape down the sides and bottom of the bowl with a spatula. Add the granulated sugar and brown sugar and beat for another 2 minutes until light and fluffy.
- Add the eggs one at a time, beating on low speed after each addition just until incorporated. Scrape the bowl after each egg. Stir in the vanilla extract.
- Scoop out about 1/2 cup of the plain cheesecake filling and set it aside in a small bowl—this will become your spiced swirl topping. To the remaining filling in the large bowl, add the pumpkin puree, pumpkin pie spice, cinnamon, ginger, nutmeg, and flour. Beat on low speed until just combined.
- Pour the pumpkin cheesecake filling over the pre-baked crust and spread it evenly with a spatula. Stir the maple syrup and pumpkin pie spice into the reserved 1/2 cup of plain cheesecake filling. Drop spoonfuls of this spiced mixture randomly over the top of the pumpkin filling. Use a butter knife or skewer to gently swirl the two together in figure-eight motions.
- Bake at 350°F for 35-40 minutes. The edges should be set and slightly puffed, but the center should still have a slight jiggle when you gently shake the pan. If the top starts browning too quickly around the 25-minute mark, tent loosely with aluminum foil.
- Place the pan on a cooling rack and let it cool completely at room temperature—about 1 hour. Then cover with plastic wrap and refrigerate for at least 4 hours, but overnight is better.
- Once completely chilled, use the parchment handles to lift the entire block of bars out of the pan. Place on a cutting board and use a sharp knife to slice into squares. Wipe the knife clean between each slice. Makes 12 generous bars or 16 smaller ones.
Notes
Room temperature ingredients are crucial for a smooth filling. Don’t overbake—the center should still jiggle slightly when you remove it from the oven. Chill for at least 4 hours (overnight is better) for clean slices. Use parchment paper with overhang for easy removal. If cracks form, the swirl pattern hides them well, or cover with whipped cream.
Nutrition
- Serving Size: 1 bar
- Calories: 385
- Sugar: 26
- Sodium: 320
- Fat: 24
- Saturated Fat: 14
- Carbohydrates: 38
- Fiber: 2
- Protein: 7
Keywords: pumpkin cheesecake bars, spiced pumpkin bars, fall dessert, gingersnap crust, pumpkin dessert, cheesecake bars, Thanksgiving dessert


