That first crackle of a chocolate chip cookie fresh from the oven—the one that promises something special—still takes me straight back to my friend Jenna’s tiny apartment kitchen three Octobers ago. She was attempting to make a “spooky” dessert for her annual Halloween movie marathon, and let’s just say, things got messy. Flour on the ceiling, butter on the cat, and a pan of cookie dough that looked more like a crime scene than a treat. But then, she grabbed a toothpick, dipped it in some leftover chocolate, and started drawing. A circle here, a swoop there, and suddenly, a perfect little spider web appeared on top of the cookie. We both just stared at it, then at each other, and laughed until our sides hurt. That was the moment this Perfect Spider Web Chocolate Chip Cookie Cake was born—out of chaos, friendship, and a desperate need for something fun.
This isn’t just a cookie; it’s a giant, shareable, show-stopping cake that tastes like the classic chocolate chip cookie you grew up loving, but with a festive, creepy-crawly makeover. Honestly, it’s the easiest way to get that “wow” factor at your Halloween party without spending hours in the kitchen. You get a soft, chewy, buttery base loaded with melty chocolate chips, all topped with a simple spider web design that looks way more impressive than it actually is. It’s the kind of dessert that makes people do a double-take, then grab a slice before you’ve even finished taking pictures.
I’ve made this cookie cake for everything from spooky movie nights to classroom parties, and it never fails to get a cheer. There’s just something about that web—it feels like a secret you’re in on, a little bit of kitchen magic that anyone can pull off. And the best part? It tastes just as good as it looks, which isn’t always the case with themed desserts, you know? This one is all substance and style, a perfect balance of nostalgia and novelty that I think you’re really going to love.
Why You’ll Love This Recipe
Let’s be real—most Halloween desserts are either a total pain to make or they taste like pure sugar and regret. This Perfect Spider Web Chocolate Chip Cookie Cake is the glorious exception. It’s the dessert that says, “I put in effort,” without actually requiring you to, you know, put in that much effort. Here’s why it’s going to become your new October go-to:
- Quick & Easy: From start to finish, this cookie cake comes together in under 45 minutes. No chilling dough, no complicated piping bags, just mix, spread, bake, and decorate. Perfect for those “I forgot about the school bake sale until 8 PM” moments.
- Simple Ingredients: You probably have everything you need in your pantry right now. Butter, sugar, eggs, flour, chocolate chips—the usual suspects. No need to hunt down specialty candy melts or weird food coloring.
- Perfect for Halloween Parties: This is the ultimate centerpiece for any spooky gathering. It’s big, it’s dramatic, and it’s completely sliceable. Way easier than trying to frost a whole cake, and way more fun than a tray of regular cookies.
- Crowd-Pleaser: Kids absolutely love it (hello, spider web!), and adults love that it’s a legitimately delicious chocolate chip cookie. It’s the rare dessert that makes everyone happy.
- Unbelievably Delicious: This isn’t just a gimmick. The cookie base is soft, chewy, and buttery, with just the right amount of salt to balance the sweetness. The chocolate chips melt into little pools of goodness, and the web adds a subtle, rich chocolate finish.
What makes this recipe different from all the other Halloween cookies out there? It’s the texture. I’ve tested this base a dozen times to get that perfect balance—crispy edges, soft center, and a structure that can hold up to the web design without falling apart. Plus, the web technique is foolproof. You don’t need a steady hand or any artistic talent. If you can draw a circle with a toothpick, you can make this cookie cake look like it came from a bakery. It’s the kind of recipe that builds confidence, even for beginner bakers.
This isn’t just a good Halloween dessert. It’s the one that makes you close your eyes after the first bite, because it tastes like the best parts of childhood and the best parts of a holiday all rolled into one warm, chocolatey slice. It’s comfort food with a spooky twist, and honestly, that’s my favorite kind of comfort.
What Ingredients You Will Need
This recipe uses simple, pantry-friendly ingredients to build a cookie cake that’s both structurally sound for decorating and incredibly delicious. Each component plays a specific role, so let’s break it down.
For the Cookie Cake Base
- Unsalted Butter (1 cup / 2 sticks, softened): The foundation of any great cookie. Using unsalted butter lets you control the salt level. I always use Kerrygold for its rich flavor, but any good-quality butter works. Make sure it’s truly softened—you should be able to press a finger into it easily—but not melted.
- Granulated Sugar (3/4 cup / 150g): Adds sweetness and helps create those crispy, caramelized edges we all love.
- Light Brown Sugar (3/4 cup / 150g, packed): This is the secret to a soft, chewy center. The molasses in brown sugar adds moisture and a subtle, warm flavor that pairs perfectly with chocolate.
- Large Eggs (1 whole egg + 1 egg yolk, room temperature): The whole egg provides structure, while the extra yolk adds richness and tenderness. Room temperature eggs incorporate more evenly into the batter, creating a smoother dough.
- Vanilla Extract (2 teaspoons): Pure vanilla is non-negotiable here. It amplifies the sweetness and adds a warm, aromatic depth. Skip the imitation stuff for this one.
- All-Purpose Flour (2 cups + 2 tablespoons / 270g): The structure builder. I’ve found that a little extra flour (beyond the standard 2 cups) helps the cookie cake hold its shape better, especially when you’re slicing it into wedges.
- Baking Soda (1 teaspoon): This is our leavening agent. It helps the cookie cake spread just the right amount and gives it a slight lift.
- Salt (1 teaspoon): Don’t skip this! Salt is crucial for balancing the sweetness and bringing out the flavor of the chocolate. I prefer fine sea salt for baking.
- Semi-Sweet Chocolate Chips (2 cups / 340g): The star of the show. I use Guittard or Ghirardelli for their superior flavor and meltability. You can also use a mix of milk and dark chocolate chips for a more complex taste.
For the Spider Web Decoration
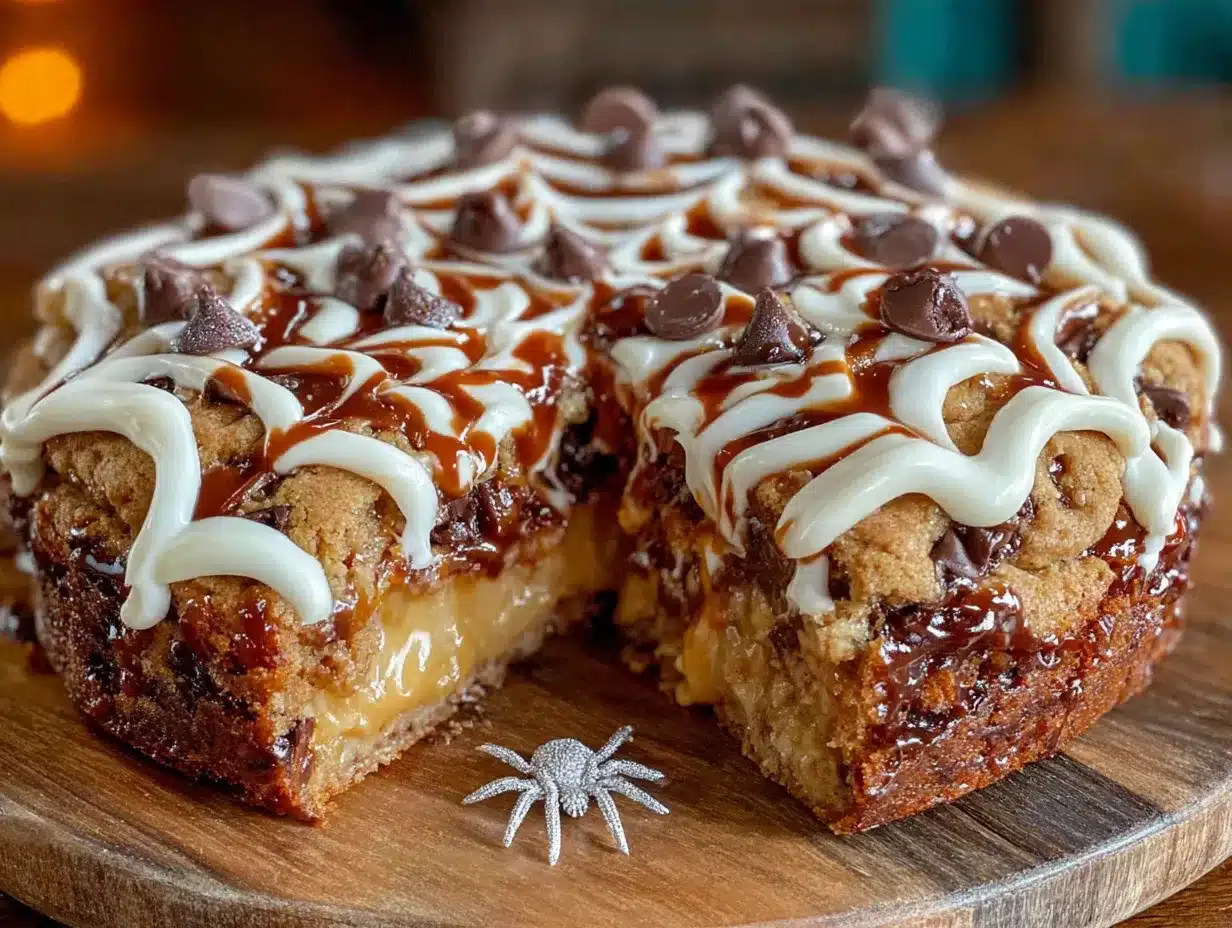
- Semi-Sweet or Dark Chocolate Chips (1/4 cup / 45g): These will be melted down to create the web. Dark chocolate provides a nice contrast against the lighter cookie.
- Coconut Oil or Vegetable Shortening (1/2 teaspoon): This is optional, but adding a tiny bit of coconut oil to the melted chocolate makes it smoother and easier to pipe. It also gives the web a nice shine.
- Powdered Sugar (for dusting, optional): A light dusting of powdered sugar over the finished web makes it look like a frosty, haunted web. It’s purely for aesthetics, but it adds a lovely touch.
Ingredient Selection Tip: For the best texture, make sure your eggs and butter are truly at room temperature. Cold ingredients can lead to a dense, unevenly baked cookie cake. If you’re in a rush, you can place the eggs in a bowl of warm water for 5 minutes, and cut the butter into small cubes to help it soften faster.
Equipment Needed
You don’t need a tricked-out kitchen to make this Perfect Spider Web Chocolate Chip Cookie Cake. Here’s what you’ll need:
- 10-inch or 12-inch Cast Iron Skillet or Round Cake Pan: A cast iron skillet is my absolute favorite for this. It gives you those perfectly crispy, golden-brown edges that are just divine. A standard 10-inch round cake pan works perfectly too. Just make sure it’s at least 2 inches deep.
- Electric Hand Mixer or Stand Mixer: While you could cream the butter and sugar by hand with a wooden spoon, a mixer makes it much easier and faster. A hand mixer is perfectly fine.
- Large Mixing Bowls: You’ll need one for the dry ingredients and one for the wet.
- Whisk and Rubber Spatula: A whisk for combining dry ingredients, and a spatula for folding in the chocolate chips and scraping down the bowl.
- Small Microwave-Safe Bowl or Piping Bag: For melting the chocolate for the web. A small zip-top bag with a tiny corner snipped off works just as well as a piping bag.
- Toothpick or Small Skewer: This is the most important tool! This is what you’ll use to drag the chocolate and create the web pattern. A simple toothpick is perfect.
- Parchment Paper (optional): If you’re using a cake pan, lining it with parchment paper makes for easy removal.
Budget-Friendly Tip: Don’t have a cast iron skillet? No problem. A standard 9-inch pie plate or even a disposable aluminum cake pan will work. Just keep an eye on the baking time, as different materials conduct heat differently.
Preparation Method
Alright, let’s get baking! This process is straightforward, but I’ll share my little tricks for the best results.
- Preheat and Prep: First things first, preheat your oven to 350°F (175°C). If you’re using a cast iron skillet, place it in the oven while it preheats. If you’re using a cake pan, grease it well with butter or non-stick spray. A preheated skillet gives you the crispiest edges.
- Cream the Butter and Sugars: In your large mixing bowl, beat the softened butter, granulated sugar, and packed brown sugar together. Beat on medium speed for a good 2-3 minutes, until the mixture is light, fluffy, and pale in color. You’re incorporating air here, which is key for a tender cookie. Scrape down the sides of the bowl with your spatula.
- Add the Wet Ingredients: Add the whole egg, the extra egg yolk, and the vanilla extract. Beat on low speed until just combined. Don’t overmix here, or your cookie cake could become tough. The mixture might look a little separated, and that’s totally fine.
- Combine the Dry Ingredients: In a separate, medium bowl, whisk together the all-purpose flour, baking soda, and salt. This ensures the leavening agent and salt are evenly distributed.
- Mix Wet and Dry: With the mixer on low, gradually add the dry ingredients to the wet ingredients. Mix until just combined—you should see a few streaks of flour remaining. Overmixing at this stage develops gluten, which leads to a tough cookie.
- Fold in the Chocolate Chips: Use your rubber spatula to gently fold in all 2 cups of chocolate chips. Fold until they are evenly distributed throughout the dough. The dough will be thick and a little sticky—that’s what we want!
- Press into the Pan: Carefully remove your hot skillet from the oven (if you preheated it) and let it cool for a minute. Transfer the cookie dough into your prepared skillet or cake pan. Use your hands or the back of a spatula to press the dough into an even layer. It should be about 1/2 to 3/4 of an inch thick. Don’t press it up the sides; you want a flat, even surface for the web.
- Bake to Perfection: Bake for 20-25 minutes. The edges should be golden brown and set, but the center will still look slightly soft and puffy. This is the secret to a soft, gooey center! A toothpick inserted into the center should come out with a few moist crumbs, not wet batter. For a 10-inch pan, start checking at 20 minutes. For a 12-inch skillet, it might take closer to 22-25 minutes.
- Cool Completely: This is the hardest part! Let the cookie cake cool in the pan on a wire rack for at least 30 minutes. It needs to be completely cool before you add the spider web, or the chocolate will just melt into a puddle. I’ve made that mistake, and trust me, it’s not a good look.
Sensory Cue: When it’s done, your kitchen will smell like a bakery. The edges will look a deep, golden brown, and the center will be puffed up and pale. If you gently shake the pan, the center should jiggle just a tiny bit. That’s the promise of a soft, chewy interior.
Cooking Tips & Techniques
Over the years, I’ve learned a few things the hard way so you don’t have to. Here are my best tips for nailing this Perfect Spider Web Chocolate Chip Cookie Cake every single time.
Don’t Overbake! This is the number one mistake people make with cookie cakes. Because it’s so thick, it’s tempting to leave it in the oven until it looks fully set. But remember, it continues to cook from the residual heat of the pan after you pull it out. If you wait until the center looks completely firm, you’ll end up with a dry, crumbly cookie cake. Pull it out when the center is still slightly soft and puffy.
The Toothpick Trick for the Web: The spider web design is all about the order of operations. First, pipe or spoon a small pool of melted chocolate in the center of the cooled cookie. Then, using a toothpick, drag the chocolate outward from the center to the edge, creating a series of “spokes” (like a bicycle wheel). You should have about 8-10 spokes. Then, starting from the center, use the toothpick to gently drag an arc from one spoke to the next, creating a curved line. Continue this process, moving outward, until you have a complete web. The key is to work quickly while the chocolate is still wet.
Room Temperature Ingredients are Your Friend: I cannot stress this enough. Cold butter won’t cream properly, and cold eggs can cause the batter to seize up. Take your butter and eggs out of the fridge at least 30 minutes before you start baking. It makes a world of difference in the texture.
My Biggest Failure: The first time I made this, I used a 9-inch pan and the dough was way too thick. It baked for 35 minutes and the edges were burnt while the center was still raw. Lesson learned: use the right size pan! A 10-inch or 12-inch pan is essential for even baking.
Variations & Adaptations
This recipe is a fantastic base, so feel free to make it your own. Here are some of my favorite twists:
- Spooky Season Swap: Swap out half of the semi-sweet chocolate chips for white chocolate chips and add 1/2 cup of crushed pretzels. The salty-sweet combo is incredible, and it gives the cookie a different, “mummy” texture.
- Gluten-Free Version: Substitute the all-purpose flour with a 1:1 gluten-free baking flour blend (like King Arthur Measure for Measure). The texture will be slightly more tender, but it’s still delicious. Add an extra tablespoon of milk if the dough seems too dry.
- Peanut Butter Perfection: Reduce the butter to 1/2 cup and add 1/2 cup of creamy peanut butter. Cream it with the butter and sugars. The peanut butter flavor pairs beautifully with the chocolate web. You might also enjoy the Crispy Loaded Bacon Cheeseburger Tater Tot Casserole for a savory twist on a family favorite.
- Mint Chocolate Chip: Add 1/2 teaspoon of peppermint extract to the dough along with the vanilla. Use dark chocolate chips instead of semi-sweet. The cool, minty flavor is surprisingly perfect for Halloween. For another minty treat, check out these Creamy St. Patrick’s Mint Chip Cream Cheese Bars.
- For a Crowd: Double the recipe and press it into a 9×13 inch baking pan. You’ll need to increase the bake time to about 30-35 minutes. This is perfect for a larger party or classroom celebration.
Serving & Storage Suggestions
This cookie cake is best served warm, but it’s also fantastic at room temperature. Here’s how to get the most out of it.
Serving: For the full effect, serve it right in the skillet or pan. It makes for a beautiful, rustic presentation. Slice it into wedges like a pizza. A scoop of vanilla ice cream on top of a warm slice is absolutely heavenly—the cold creaminess against the warm, soft cookie is a match made in dessert heaven. You can also dust it with a little powdered sugar right before serving to make the web look even more mysterious.
Storage: If you have any leftovers (which, let’s be honest, is rare), cover the pan tightly with plastic wrap or aluminum foil. Store it at room temperature for up to 3 days. The cookie will soften a bit over time, but it will still be delicious.
Reheating: To bring back that fresh-from-the-oven warmth, pop a slice in the microwave for 10-15 seconds. For a crispier edge, reheat it in a 300°F (150°C) oven for 5 minutes.
Freezing: You can freeze the undecorated cookie cake for up to 3 months. Let it cool completely, then wrap it tightly in plastic wrap and then a layer of foil. To serve, thaw it in the refrigerator overnight, then add the spider web decoration before serving.
Flavor Development: Honestly, this cookie cake is amazing on day one, but I think it’s even better on day two. The flavors meld together, and the texture becomes even more perfectly soft and chewy. It’s a great make-ahead dessert for your Halloween party.
Nutritional Information & Benefits
Let’s be honest—this is a treat, and it’s meant to be enjoyed as such. But here’s a look at what you’re getting in a typical slice (based on 12 servings):
- Estimated Calories: ~380 per slice
- Fat: ~22g
- Carbohydrates: ~45g
- Protein: ~5g
- Fiber: ~2g
- Sugar: ~28g
Health Highlights: Dark chocolate is a source of antioxidants and can be good for heart health in moderation. The butter provides a source of Vitamin A, and the eggs offer protein and choline. While this isn’t a health food, it’s made with real, recognizable ingredients—no artificial preservatives or hydrogenated oils.
Dietary Considerations: This recipe contains gluten, dairy, and eggs. For a gluten-free option, see the variations section. For a dairy-free version, you can substitute the butter with a high-quality vegan butter stick (like Miyoko’s) and use dairy-free chocolate chips.
My Wellness Perspective: I believe in balance. A dessert like this, made with love and shared with people you care about, is a beautiful part of life. Enjoying a slice of this Perfect Spider Web Chocolate Chip Cookie Cake on a crisp October evening with friends is good for the soul, and that counts for a lot.
Conclusion
There you have it—a show-stopping Halloween dessert that’s as fun to make as it is to eat. This Perfect Spider Web Chocolate Chip Cookie Cake is proof that you don’t need to be a professional baker or spend hours in the kitchen to create something truly magical. It’s about the joy of a simple, delicious cookie, transformed into a centerpiece with a little bit of chocolate and a whole lot of imagination. It’s the kind of recipe that makes you feel like a kitchen witch, conjuring up something wonderful from a few pantry staples.
I love this recipe because it’s a memory-maker. It’s the dessert that gets people talking, laughing, and reaching for another slice. It’s for the chaotic Halloween parties, the quiet movie nights, and the moments when you just want to surprise someone with something special. I really hope you give it a try and make it your own. Play around with the variations, get creative with your web design, and don’t be afraid to get a little messy—that’s where the best stories come from.
Now I want to hear from you! When you make this cookie cake, what’s your favorite part? Do you add any special toppings or twists? Drop a comment below and share your spooky creation. And if you loved this recipe, please share it with a friend who needs a little Halloween magic in their life. Happy baking, and may your webs be perfectly spooky!
Frequently Asked Questions
Can I use a different type of pan?
Absolutely! A 10-inch or 12-inch cast iron skillet is ideal, but a standard round cake pan, a pie plate, or even a 9×13 inch baking dish will work. Just adjust the baking time accordingly—a larger, thinner cookie will bake faster, while a smaller, thicker one will need more time.
My dough seems too dry. What did I do wrong?
This is usually a measurement issue. Make sure you’re spooning your flour into the measuring cup and leveling it off with a knife, rather than scooping it directly. Scooping can pack the flour, leading to too much in the dough. If the dough is still dry, add one tablespoon of milk at a time until it comes together.
Can I make the dough ahead of time?
Yes! You can prepare the dough, press it into the pan, cover it tightly with plastic wrap, and refrigerate it for up to 24 hours. Let it sit at room temperature for 15 minutes before baking. You may need to add 2-3 minutes to the baking time.
How do I prevent the spider web from looking messy?
The key is to work quickly while the chocolate is still wet and fluid. If the chocolate starts to thicken, pop the bowl back in the microwave for 5-second intervals. Also, use a light touch with the toothpick—you’re just dragging the chocolate, not scraping through it to the cookie.
Can I use milk chocolate for the web instead of dark chocolate?
You can, but keep in mind that milk chocolate is softer and may not show up as clearly against the light cookie. Dark or semi-sweet chocolate provides the best contrast. If you only have milk chocolate, you can mix it with a teaspoon of cocoa powder to darken it.
Pin This Recipe!
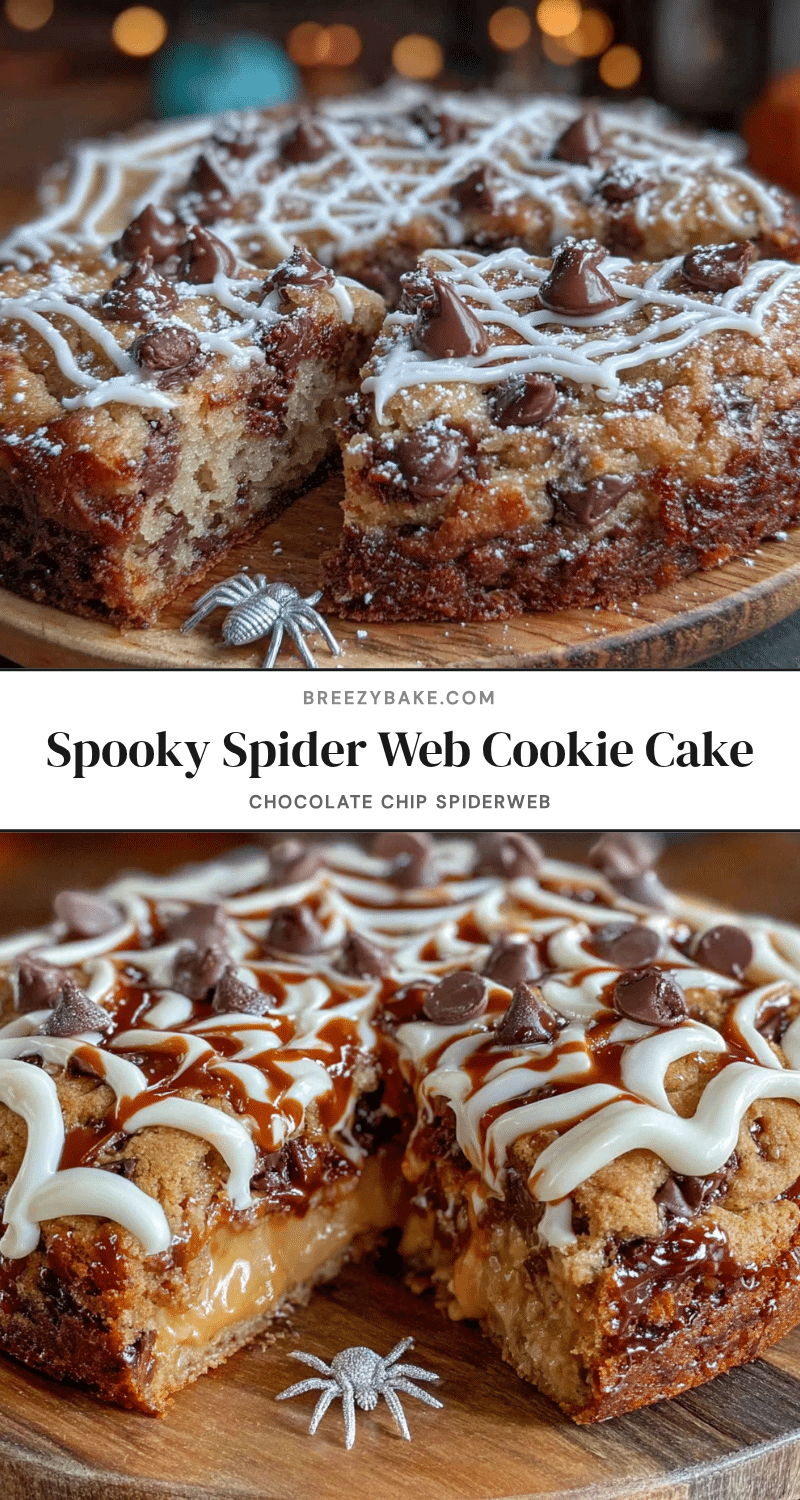
Perfect Spider Web Cookie Cake: Easy Halloween Dessert
A giant, shareable chocolate chip cookie cake topped with a simple spider web design. It’s a soft, chewy, buttery dessert that’s perfect for Halloween parties and easy enough for beginner bakers.
- Prep Time: 15 minutes
- Cook Time: 25 minutes
- Total Time: 40 minutes
- Yield: 12 servings 1x
- Category: Dessert
- Cuisine: American
Ingredients
- 1 cup (2 sticks) unsalted butter, softened
- 3/4 cup (150g) granulated sugar
- 3/4 cup (150g) light brown sugar, packed
- 1 large egg + 1 egg yolk, room temperature
- 2 teaspoons vanilla extract
- 2 cups + 2 tablespoons (270g) all-purpose flour
- 1 teaspoon baking soda
- 1 teaspoon salt
- 2 cups (340g) semi-sweet chocolate chips
- 1/4 cup (45g) semi-sweet or dark chocolate chips (for web)
- 1/2 teaspoon coconut oil or vegetable shortening (optional, for web)
- Powdered sugar for dusting (optional)
Instructions
- Preheat oven to 350°F (175°C). If using a cast iron skillet, place it in the oven to preheat. If using a cake pan, grease it well with butter or non-stick spray.
- In a large mixing bowl, beat the softened butter, granulated sugar, and brown sugar together on medium speed for 2-3 minutes until light, fluffy, and pale. Scrape down the sides of the bowl.
- Add the whole egg, egg yolk, and vanilla extract. Beat on low speed until just combined. The mixture may look slightly separated.
- In a separate medium bowl, whisk together the flour, baking soda, and salt.
- With the mixer on low, gradually add the dry ingredients to the wet ingredients. Mix until just combined, with a few streaks of flour remaining.
- Use a rubber spatula to gently fold in the 2 cups of chocolate chips until evenly distributed. The dough will be thick and slightly sticky.
- Carefully remove the hot skillet from the oven (if preheated) and let it cool for a minute. Transfer the dough into the prepared skillet or cake pan. Press it into an even layer about 1/2 to 3/4 inch thick. Do not press it up the sides.
- Bake for 20-25 minutes. The edges should be golden brown and set, but the center will still look slightly soft and puffy. A toothpick inserted into the center should come out with a few moist crumbs.
- Let the cookie cake cool completely in the pan on a wire rack for at least 30 minutes before decorating.
- For the spider web: Melt the 1/4 cup of chocolate chips with the coconut oil (if using) in a small microwave-safe bowl in 20-second intervals, stirring until smooth. Pipe or spoon a small pool of melted chocolate in the center of the cooled cookie. Using a toothpick, drag the chocolate outward from the center to the edge to create 8-10 spokes. Then, starting from the center, use the toothpick to gently drag an arc from one spoke to the next, creating curved lines. Continue moving outward until y…
- Optional: Dust with powdered sugar before serving.
Notes
For best results, use room temperature butter and eggs. Do not overbake; the center should still be slightly soft when removed from the oven as it will continue to cook from residual heat. The spider web design works best when the cookie is completely cool. If the chocolate for the web thickens, reheat it in 5-second intervals.
Nutrition
- Serving Size: 1 slice (1/12 of cak
- Calories: 380
- Sugar: 28
- Sodium: 280
- Fat: 22
- Saturated Fat: 13
- Carbohydrates: 45
- Fiber: 2
- Protein: 5
Keywords: Halloween dessert, spider web cookie cake, chocolate chip cookie cake, easy Halloween recipe, spooky dessert, cookie cake


