The kitchen was filled with the faint scent of vanilla and cinnamon, and honestly, I wasn’t expecting much when I pulled out that old star-shaped cookie cutter from the back of the drawer. It was one of those moments when I just wanted an easy, festive treat without the fuss. I mean, holiday baking can feel overwhelming, right? But as I rolled out the dough and pressed those star shapes, something clicked. The crisp edges, the buttery scent wafting up—it was like a little holiday magic unfolding on my countertop.
My kids wandered in, curious about the sparkly white icing I was mixing, and before I knew it, our quiet afternoon turned into a full-on decorating party. These perfect star-shaped sugar cookies with royal icing quickly became our favorite tradition—not just because they’re pretty enough to frame but because they’re genuinely easy to make and fun to personalize. I’m sharing this recipe because it’s been my go-to for a no-fail, homemade holiday treat that brings a little sparkle to any gathering or quiet night in.
What stuck with me most was how these cookies manage to be both simple and special—a little slice of holiday joy that’s approachable for any baker, whether you’re a seasoned pro or “not really a baker” like me. Plus, the royal icing dries just right for stacking or gifting without turning into a sticky mess. So, if you’ve ever wanted a cookie recipe that hits all the right notes—taste, look, and ease—this one’s for you.
Why You’ll Love This Recipe
Making these star-shaped sugar cookies with royal icing became something I couldn’t stop repeating during the holidays. Here’s why you might find yourself baking them over and over, too:
- Quick & Easy: The dough comes together in about 15 minutes, and chilling time included, you’re ready to bake in under an hour. Perfect for last-minute cookie cravings or when the oven needs to be put to work fast.
- Simple Ingredients: You probably have all of these in your pantry already—no specialty stores or weird add-ins required.
- Perfect for Holiday Gatherings: Whether you’re hosting a cookie swap, holiday brunch, or just want a festive treat for cozy nights, these star cookies fit right in.
- Crowd-Pleaser: Kids love decorating them, and adults can’t get enough of that buttery, soft-crisp texture paired with the smooth royal icing.
- Unbelievably Delicious: This recipe isn’t just another sugar cookie. The balance of vanilla and a hint of almond extract, combined with the perfectly smooth royal icing, makes for a flavor and texture combo that has people closing their eyes after the first bite.
- Unique Twist: The royal icing is whipped to the perfect consistency for detailed decorating, but dries hard enough to stack or gift without worry. Plus, the star shape adds a touch of whimsy that’s just right for the season.
Honestly, this recipe is the kind that turns simple cookie baking into a memory-maker, with just the right amount of festive sparkle. If you want to try a cookie recipe that’s as fun to make as it is to eat, and that’s way easier than it looks, you’re going to love these stars.
What Ingredients You Will Need
This recipe uses simple, wholesome ingredients to deliver bold flavor and a satisfying texture without too much fuss. Most are pantry staples, and you can find everything at your local grocery store. Here’s the breakdown:
- For the Sugar Cookie Dough:
- All-purpose flour – 2 ¾ cups (345 g), sifted for a tender crumb
- Baking powder – 1 teaspoon (4 g), for a light lift
- Salt – ½ teaspoon (3 g), balances sweetness
- Unsalted butter – 1 cup (227 g), softened (I prefer Kerrygold for creaminess)
- Granulated sugar – 1 cup (200 g), for sweetness and crisp edges
- Large egg – 1, room temperature (helps dough bind without toughness)
- Pure vanilla extract – 1 teaspoon (5 ml), for warm flavor
- Almond extract – ½ teaspoon (2.5 ml), optional but highly recommended for that holiday touch
- For the Royal Icing:
- Powdered sugar – 4 cups (480 g), sifted to avoid lumps
- Pasteurized egg whites or meringue powder – 3 tablespoons (45 ml), for smooth, stable icing
- Fresh lemon juice – 1 tablespoon (15 ml), brightens flavor
- Water – 2-4 tablespoons (30-60 ml), to adjust consistency
- Food coloring – gel or paste recommended for vibrant colors without thinning the icing
For substitutions, if you need gluten-free, swap all-purpose flour with a 1-to-1 gluten-free baking blend like Bob’s Red Mill. And if you prefer a dairy-free version, use a plant-based butter alternative (make sure it’s one that bakes well). I also find that using meringue powder rather than raw egg whites is safer and just as reliable.
These ingredients come together to make cookies that are crisp on the edges, tender inside, and topped with royal icing that dries perfectly hard but isn’t brittle. If you want to try fun color combos or add edible glitter, that’s where the decorating can really shine.
Equipment Needed
- Mixing bowls – medium and large sizes
- Electric hand mixer or stand mixer – makes creaming butter and sugar effortless
- Measuring cups and spoons – accuracy matters for baking success
- Rolling pin – a smooth, sturdy one for rolling out dough evenly
- Star-shaped cookie cutters – I use a 3-inch size, but any star shape works
- Baking sheets – lined with parchment paper or silicone mats
- Cooling racks – essential to cool cookies completely before decorating
- Small piping bags or squeeze bottles – for precise royal icing decorating
- Toothpicks or scribe tools – handy for smoothing icing or fixing tiny mistakes
If you don’t have a stand mixer, no worries—an electric hand mixer works just fine. For rolling, sometimes I use a silicone baking mat to keep things tidy and to make transferring dough easier. I also recommend silicone baking mats over parchment paper for reusability and even baking. When it comes to piping, disposable bags are budget-friendly, but reusable silicone bags cut down on waste and clean-up.
Preparation Method

- Mix Dry Ingredients: In a medium bowl, whisk together 2 ¾ cups (345 g) of sifted all-purpose flour, 1 teaspoon (4 g) baking powder, and ½ teaspoon (3 g) salt. Set aside. (This keeps the leavening and salt evenly distributed.)
- Cream Butter and Sugar: Using a stand mixer or hand mixer, beat 1 cup (227 g) softened unsalted butter with 1 cup (200 g) granulated sugar on medium speed until light and fluffy—about 3-4 minutes. This is key for tender, melt-in-your-mouth cookies.
- Add Egg and Extracts: Beat in 1 large room-temperature egg, 1 teaspoon (5 ml) vanilla extract, and ½ teaspoon (2.5 ml) almond extract until fully combined. The almond extract gives a subtle holiday warmth you’ll notice.
- Combine Wet and Dry: Gradually add the dry ingredients to the wet mixture, mixing on low speed just until the dough comes together. Avoid overmixing here to keep cookies tender.
- Chill the Dough: Form the dough into two discs, wrap tightly in plastic wrap, and refrigerate for at least 1 hour (up to 24 hours). Chilling prevents spreading and helps with rolling.
- Preheat Oven and Prepare Baking Sheets: Set your oven to 350°F (175°C). Line baking sheets with parchment paper or silicone mats.
- Roll and Cut: On a lightly floured surface, roll out one disc of chilled dough to about ¼ inch (6 mm) thickness. Use your star-shaped cookie cutter to cut shapes, and transfer them carefully to the prepared sheets.
- Bake: Bake cookies for 8-10 minutes, until edges are lightly golden but centers remain pale. This keeps them tender inside with crisp edges.
- Cool Completely: Transfer cookies to wire racks to cool fully before decorating. Warm cookies will cause royal icing to melt or run.
- Prepare Royal Icing: In a clean bowl, beat 4 cups (480 g) sifted powdered sugar with 3 tablespoons (45 ml) pasteurized egg whites or meringue powder, 1 tablespoon (15 ml) lemon juice, and 2-4 tablespoons (30-60 ml) water until smooth. Adjust water to get a thick but pipeable consistency.
- Color and Decorate: Divide icing into small bowls and tint with gel or paste food coloring as desired. Use piping bags or squeeze bottles to decorate cookies, adding details or flooding areas. Use toothpicks to smooth or fix any mistakes.
- Dry: Let decorated cookies sit at room temperature for several hours or overnight until icing is fully hardened for stacking or gifting.
Some tips: If your dough gets too soft while rolling, pop it back in the fridge for 10 minutes. Also, I find decorating faster if I prep all my icing colors and piping tools before the cookies cool completely. That way, once cooled, it’s go time.
Cooking Tips & Techniques
Working with sugar cookies and royal icing can feel intimidating at first, but these tips come from the many times I’ve learned the hard way:
- Chill Your Dough: Don’t skip this step. It makes rolling easier and prevents cookies from spreading too much in the oven.
- Don’t Overmix: When combining wet and dry ingredients, mix just until combined. Overworking the dough can cause tough cookies.
- Use Room Temperature Ingredients: Butter and eggs at room temp cream better and create a smoother dough.
- Roll Evenly: Aim for consistent thickness—about ¼ inch (6 mm)—so cookies bake evenly. A rolling pin with thickness rings can help here.
- Bake Until Just Golden: The edges should be lightly browned but centers pale to keep that tender texture.
- Royal Icing Consistency: For outlining, use thick icing that holds shape. For flooding, thin it with water until it flows smoothly but isn’t runny.
- Practice Piping: If you’re new to royal icing, practice lines on parchment first. Toothpicks are great for smoothing or fixing small mistakes.
- Patience is Key: Let icing dry fully—rushing this step leads to smudges or cracks.
Multitasking tip: While cookies bake and cool, prepare your royal icing and set up your decorating station. This keeps things moving smoothly without last-minute scrambling.
Variations & Adaptations
One of the best parts about this recipe is how easy it is to customize. Here are a few ways I’ve played around with it:
- Flavor Variations: Swap almond extract for peppermint oil for a cool holiday twist. Or add a tablespoon of orange zest to the dough for a citrusy note.
- Dietary Adaptations: Use a gluten-free flour blend (such as King Arthur’s Measure for Measure) to make these cookies gluten-free without losing texture. Dairy-free butter substitutes like Earth Balance work well for those avoiding dairy.
- Alternative Decorating: Instead of royal icing, try a simple glaze with powdered sugar and lemon juice for a more rustic look. Or use colored sugar sprinkles on wet icing for quick sparkle.
- Shape Swaps: While stars are perfect for holidays, other cookie cutters like hearts or snowflakes work beautifully and make these cookies versatile year-round.
- Personal Favorite: One year, I mixed white chocolate chips into the dough before baking—unexpected but delicious. It added a melty surprise inside each cookie.
Serving & Storage Suggestions
These star-shaped sugar cookies shine best served at room temperature. I like to arrange them on a festive platter with a few sprigs of fresh rosemary or pine for that extra holiday vibe. They pair wonderfully with a hot cup of spiced tea, coffee, or even a glass of cold milk—classic combo.
If you’re gifting these, stacking them between layers of parchment paper in a sturdy tin keeps them safe and fresh. Store leftover cookies in an airtight container at room temperature for up to 5 days. For longer storage, freeze undecorated cookies in a single layer wrapped well in plastic; thaw completely before icing.
Royal icing hardens to a smooth, matte finish that keeps cookies from sticking together, so you can safely stack decorated batches for gifting or transport. Just remember, once iced, avoid airtight containers with condensation or the icing can soften.
Flavors actually deepen the next day, so if you can wait, letting cookies rest overnight before serving is totally worth it.
Nutritional Information & Benefits
Each star-shaped sugar cookie (without icing) contains approximately 150-170 calories, with around 8-10 grams of fat and 20 grams of carbohydrates. The royal icing adds a bit more sugar and calories but is used sparingly in decorating.
Key ingredients like butter provide richness and texture, while vanilla and almond extracts contribute aroma without added calories. Using pasteurized egg whites or meringue powder in royal icing offers a protein boost and safer handling.
For dietary considerations, this recipe can easily be adapted gluten-free or dairy-free as mentioned. It’s a festive treat best enjoyed in moderation, and for me, it’s about the joy and memories baked into every batch rather than nutrition alone.
Conclusion
Perfect star-shaped sugar cookies with royal icing aren’t just a holiday dessert—they’re a little tradition that anyone can make and enjoy. They strike that sweet spot between simplicity and show-stopping, bringing a bit of sparkle without stress.
Whether you want to impress guests, entertain kids, or just sneak a treat with your coffee, these cookies have become my go-to. I encourage you to play with the flavors and decorations to make them truly your own. After all, the best cookies come from a bit of personality and a lot of heart.
So grab your rolling pin and star cutters, and let these little stars light up your holidays. And if you love this recipe, I’d be thrilled to hear how you made it your own—drop a comment, share your photos, or tell me your favorite tweaks!
FAQs
- Q: Can I make the dough ahead of time?
A: Absolutely! The dough can be refrigerated for up to 24 hours or frozen for up to 3 months. Just thaw before rolling. - Q: How do I store decorated cookies?
A: Store them in an airtight container at room temperature for up to 5 days. Make sure the icing is fully dry before storing. - Q: What if I don’t have meringue powder for royal icing?
A: You can use pasteurized egg whites or buy meringue powder online or at specialty stores. Avoid raw egg whites for safety. - Q: Can I use a different shape cookie cutter?
A: Definitely! This recipe works great with any cookie cutter you love, from snowflakes to hearts. - Q: How do I fix royal icing that’s too runny or too thick?
A: Add powdered sugar to thicken or a few drops of water to thin. Adjust gradually to get the perfect piping consistency.
For those interested in other delicious treats, you might enjoy trying the pink velvet cookie crumble board for a colorful twist, or the creamy pink strawberry cream puff bars for a smooth, indulgent option perfect for celebrations.
Pin This Recipe!
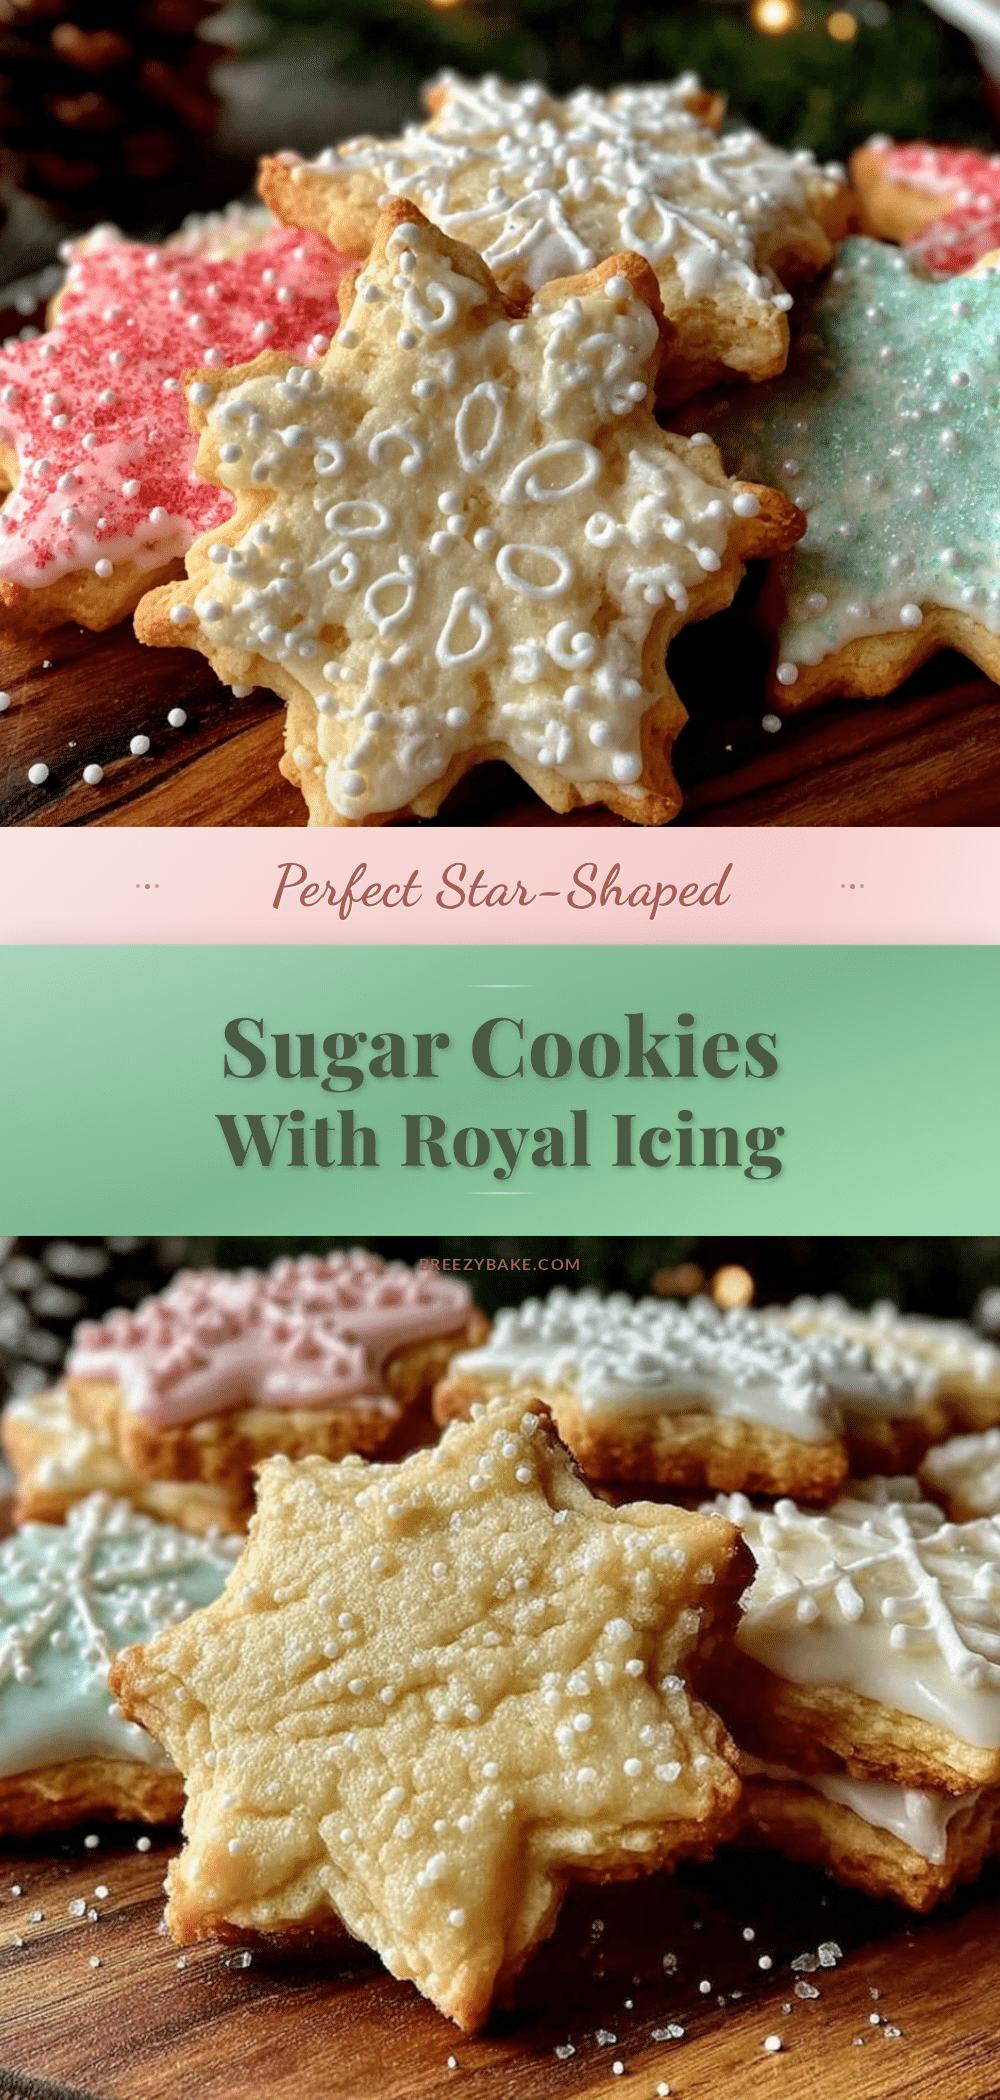
Perfect Star-Shaped Sugar Cookies Recipe Easy Homemade Holiday Treats

These star-shaped sugar cookies with royal icing are an easy, festive treat perfect for holiday gatherings. They feature a tender crumb, buttery flavor, and smooth royal icing that dries hard for stacking or gifting.
- Prep Time: 15 minutes
- Cook Time: 8-10 minutes
- Total Time: 1 hour 30 minutes
- Yield: 24 cookies 1x
- Category: Dessert
- Cuisine: American
Ingredients
- 2 ¾ cups (345 g) all-purpose flour, sifted
- 1 teaspoon (4 g) baking powder
- ½ teaspoon (3 g) salt
- 1 cup (227 g) unsalted butter, softened
- 1 cup (200 g) granulated sugar
- 1 large egg, room temperature
- 1 teaspoon (5 ml) pure vanilla extract
- ½ teaspoon (2.5 ml) almond extract (optional)
- 4 cups (480 g) powdered sugar, sifted
- 3 tablespoons (45 ml) pasteurized egg whites or meringue powder
- 1 tablespoon (15 ml) fresh lemon juice
- 2–4 tablespoons (30–60 ml) water
- Food coloring (gel or paste)
Instructions
- In a medium bowl, whisk together sifted all-purpose flour, baking powder, and salt. Set aside.
- Using a stand mixer or hand mixer, beat softened unsalted butter with granulated sugar on medium speed until light and fluffy, about 3-4 minutes.
- Beat in the large room-temperature egg, vanilla extract, and almond extract until fully combined.
- Gradually add the dry ingredients to the wet mixture, mixing on low speed just until the dough comes together. Avoid overmixing.
- Form the dough into two discs, wrap tightly in plastic wrap, and refrigerate for at least 1 hour (up to 24 hours).
- Preheat oven to 350°F (175°C). Line baking sheets with parchment paper or silicone mats.
- On a lightly floured surface, roll out one disc of chilled dough to about ¼ inch (6 mm) thickness. Use star-shaped cookie cutters to cut shapes and transfer to prepared sheets.
- Bake cookies for 8-10 minutes, until edges are lightly golden but centers remain pale.
- Transfer cookies to wire racks to cool completely before decorating.
- Prepare royal icing by beating powdered sugar with pasteurized egg whites or meringue powder, lemon juice, and water until smooth. Adjust water to achieve thick but pipeable consistency.
- Divide icing into small bowls and tint with gel or paste food coloring as desired. Use piping bags or squeeze bottles to decorate cookies, smoothing with toothpicks if needed.
- Let decorated cookies sit at room temperature for several hours or overnight until icing is fully hardened.
Notes
Chill dough for at least 1 hour to prevent spreading. Avoid overmixing dough to keep cookies tender. Use room temperature ingredients for best results. Let royal icing dry fully before stacking or storing. If dough softens while rolling, chill again for 10 minutes. Practice piping on parchment paper before decorating cookies.
Nutrition
- Serving Size: 1 cookie
- Calories: 160
- Sugar: 14
- Sodium: 80
- Fat: 9
- Saturated Fat: 5
- Carbohydrates: 22
- Protein: 2
Keywords: star-shaped sugar cookies, holiday cookies, royal icing, easy sugar cookies, festive treats, homemade cookies, holiday baking


