I figured a zodiac-themed cake would be mostly about the decorations—icing colors, a star chart, maybe some fancy piping. It took about one bite of this vanilla bean cake with its perfectly tight crumb and subtle hint of almond for that assumption to fall apart completely. This cake isn’t just decorated for a Virgo; it tastes like one—precise, refined, and quietly impressive without any need for loud, over-the-top flavors.
My best friend is a Virgo (the most organized person I know), and every year, I try to make her a birthday cake that actually matches her energy. She doesn’t want a sugar bomb that leaves you crashing. She wants something that looks like it took effort—because she would have put in the effort herself—and tastes clean, elegant, and intentional. The first time I made this cake, I used a simple vanilla bean paste I found at a local baking shop, and the tiny black specks running through the pale crumb just felt right. It was understated but exact.
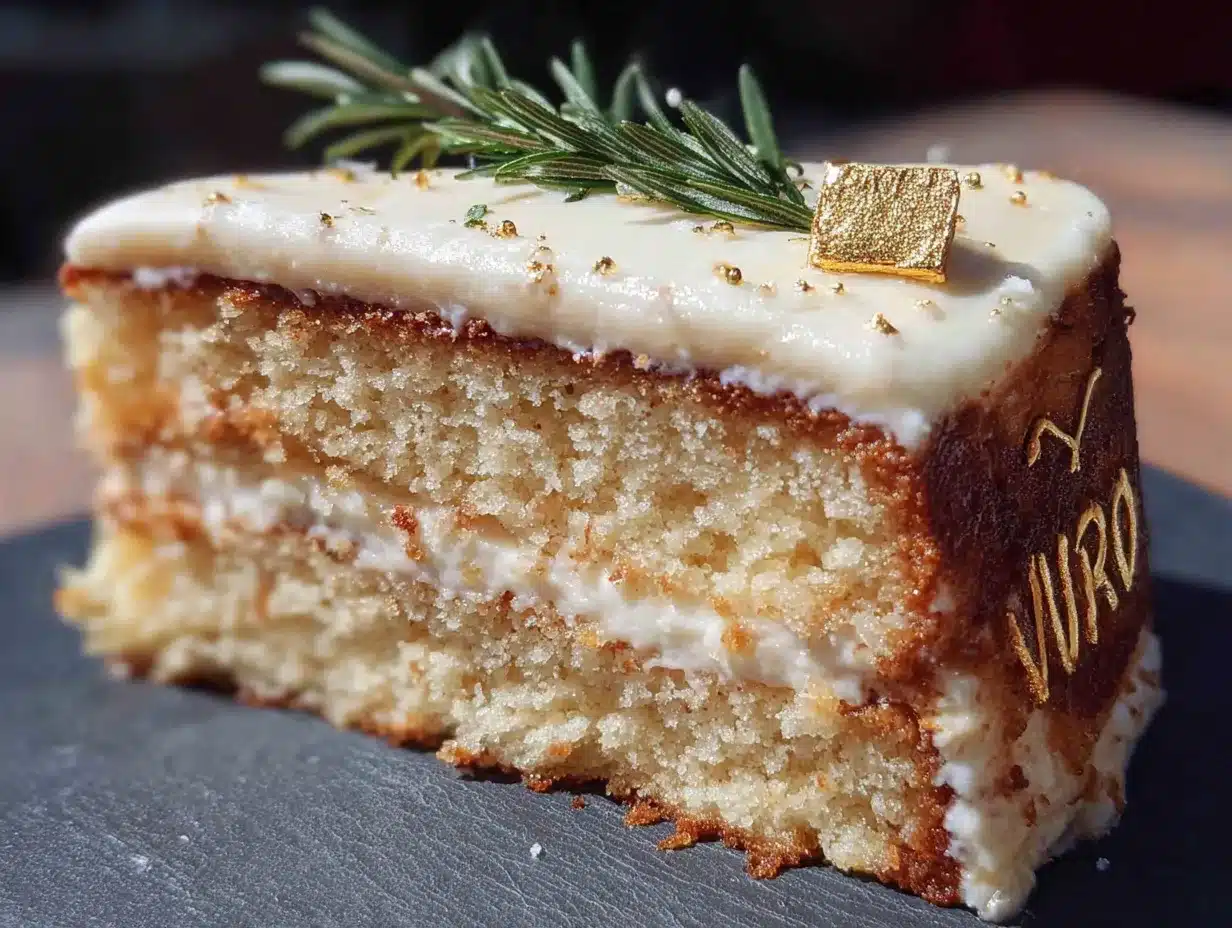
The gold leaf was almost an afterthought, honestly. I bought a small packet on a whim, thinking it might be too fussy. But when I placed those delicate, shimmering flakes on the smooth buttercream, something clicked. It wasn’t gaudy. It was like a quiet celebration of getting the details right—which is the most Virgo thing I can think of.
Why You’ll Love This Recipe
This Perfect Virgo Birthday Cake with Gold Leaf is the kind of recipe that feels special without being stressful. It’s designed for bakers who want to create something beautiful and delicious but also want to actually enjoy the party.
- Looks Stunning, Tastes Even Better : The gold leaf adds a luxurious, custom finish, but the real star is the tender, moist vanilla cake with a perfectly balanced buttercream. It’s not just a pretty face.
- Elegant and Understated : This cake isn’t about loud colors or clashing flavors. It’s a refined vanilla bean cake with a hint of almond, finished with a silky Swiss meringue buttercream. Perfect for the Virgo who appreciates quality over quantity.
- Detailed but Doable : The steps are clear and broken down. You don’t need to be a professional pastry chef, but you do need to follow the instructions. The payoff is a cake that looks like it came from a high-end bakery.
- Customizable for Any Zodiac : While this is built for Virgo, the technique is perfect for any minimalist or elegant celebration. Swap the colors, change the topper, or keep it gold for a timeless look.
- Crowd-Pleaser : The flavor is universally loved. It’s not too sweet, not too rich—just a perfect slice of cake that everyone will ask for seconds of.
What Ingredients You Will Need
This recipe uses high-quality, straightforward ingredients. The magic is in the technique, not a long list of obscure items. Most of these are pantry staples, with a couple of special touches that make all the difference.
For the Vanilla Bean Cake
- 2 ½ cups (315g) all-purpose flour – Spoon and level for accuracy. Too much flour makes a dry cake.
- 2 ½ teaspoons baking powder – Make sure it’s fresh for the best rise.
- ½ teaspoon salt – Balances the sweetness and enhances the vanilla.
- 1 cup (226g) unsalted butter, softened to room temperature – I prefer Kerrygold for its rich flavor, but any good-quality unsalted butter works.
- 1 ¾ cups (350g) granulated sugar – Provides structure and sweetness.
- 4 large eggs, room temperature – Cold eggs can seize the batter. Let them sit out for 30 minutes.
- 1 tablespoon vanilla bean paste (or the seeds of 2 vanilla beans) – This is the flavor backbone. Don’t use imitation vanilla. The little specks are what make it look so professional.
- ½ teaspoon almond extract – This is the secret ingredient. It adds a subtle, almost floral note that elevates the vanilla without overpowering it.
- 1 cup (240ml) whole milk, room temperature – Whole milk gives the best texture and richness.
For the Swiss Meringue Buttercream
- 5 large egg whites – Save the yolks for another recipe (they freeze well!).
- 1 ½ cups (300g) granulated sugar
- 1 ½ cups (339g) unsalted butter, softened to room temperature, cut into cubes
- 2 teaspoons vanilla bean paste (or vanilla extract)
- Pinch of salt
For the Decoration
- Edible gold leaf sheets – You can find these at craft stores or online. A little goes a long way.
- Optional: Fresh edible flowers or a simple star-shaped cake topper – For an extra Virgo touch, use flowers like chamomile or small white roses.
Equipment Needed
You don’t need a ton of fancy gadgets, but the right tools make a big difference. I’ve learned the hard way that using a cheap cake pan can ruin a good batter (uneven baking is the worst).
- Two 8-inch round cake pans – I recommend Fat Daddio’s anodized aluminum pans. They heat evenly and are affordable.
- Stand mixer or hand mixer – A stand mixer makes the Swiss meringue buttercream much easier, but a hand mixer works if you have patience.
- Parchment paper rounds – Non-negotiable for easy release.
- Offset spatula – For smoothing the buttercream.
- Cake turntable – Not essential, but it makes frosting look professional. A lazy Susan works in a pinch.
- Kitchen scale – I highly recommend this for accuracy. Baking is a science, and grams don’t lie.
- Candy thermometer – Needed for the Swiss meringue to ensure the egg whites are properly pasteurized.
Preparation Method
Take your time with this one. Read through all the steps before you start. The cake itself is straightforward, but the buttercream requires a bit of attention. Trust the process—it’s worth it.
Step 1: Prepare the Cake Pans and Preheat
Preheat your oven to 350°F (175°C). Grease two 8-inch round cake pans, line the bottoms with parchment paper rounds, then grease and flour the entire pan. This is my non-stick insurance policy.
Step 2: Make the Vanilla Bean Cake Batter
- In a medium bowl, whisk together the flour, baking powder, and salt. Set aside.
- In the bowl of a stand mixer fitted with the paddle attachment, beat the softened butter and granulated sugar on medium-high speed until light and fluffy—about 3-4 minutes. It should look pale and feel airy. Don’t rush this step.
- Add the eggs one at a time, beating well after each addition. Scrape down the sides of the bowl as needed.
- Mix in the vanilla bean paste and almond extract. The batter will smell amazing at this point.
- With the mixer on low speed, add the flour mixture in three additions, alternating with the milk. Start and end with the flour. Mix just until combined after each addition. Overmixing will make the cake tough.
- Divide the batter evenly between the two prepared pans. Use a kitchen scale for accuracy if you have one (about 600g per pan). Smooth the tops with a spatula.
Step 3: Bake the Cakes
Bake for 28-32 minutes, or until a toothpick inserted into the center comes out clean or with a few moist crumbs. The cakes should be golden on top and just starting to pull away from the sides of the pan. Let them cool in the pans for 10 minutes, then turn them out onto a wire rack to cool completely. Don’t even think about frosting them until they are 100% cool. I’ve made that mistake—it’s a melty mess.
Step 4: Make the Swiss Meringue Buttercream
- In the heatproof bowl of your stand mixer, combine the egg whites and sugar. Place the bowl over a pot of simmering water (make sure the bottom of the bowl doesn’t touch the water).
- Whisk constantly until the sugar is completely dissolved and the mixture reaches 160°F (71°C) on a candy thermometer. This takes about 5-7 minutes. The mixture should feel smooth when you rub a bit between your fingers—no graininess.
- Transfer the bowl to your stand mixer fitted with the whisk attachment. Beat on medium-high speed until stiff, glossy peaks form and the bowl is cool to the touch. This can take 8-10 minutes. Be patient.
- Switch to the paddle attachment. With the mixer on medium speed, add the softened butter cubes one at a time. The mixture might look like it’s curdling or separating—this is normal! Keep beating. It will come together into a silky, smooth buttercream.
- Add the vanilla bean paste and salt, and beat for another minute until combined.
Step 5: Assemble and Frost the Cake
- Level the tops of your cooled cake layers with a serrated knife if they are domed.
- Place one cake layer on your serving plate or turntable. Spread a generous layer of buttercream on top (about 1 cup).
- Place the second cake layer on top, cut-side down.
- Apply a thin crumb coat—a thin layer of buttercream that traps any loose crumbs. Refrigerate for 15 minutes to set.
- Apply the final layer of buttercream. Use your offset spatula to create smooth sides and a flat top. For a rustic look, you can leave swirls on top.
Step 6: Apply the Gold Leaf
This is the fun part. Using a dry, clean brush or your fingers (make sure they are completely dry and oil-free), gently pick up a piece of gold leaf and apply it to the frosted cake. It will tear and crinkle—that’s the look we want! Apply it in small, random patches around the top and sides. Less is more. You want it to look like delicate flakes, not a solid gold cake.
Cooking Tips & Techniques
I’ve made this cake about six times now, and I’ve learned a few things the hard way. Here are my best tips to help you nail it on the first try.
- Room temperature ingredients are non-negotiable. Cold butter won’t cream properly, and cold eggs can cause the batter to curdle. Set everything out on the counter an hour before you start baking.
- Don’t skip the crumb coat. I know it’s tempting to just slather on the final layer, but the crumb coat is what gives you that clean, professional finish. It takes 5 minutes and makes a world of difference.
- If your Swiss meringue buttercream looks curdled, keep beating. This is the most common panic moment. The butter and egg whites have to emulsify, and they look like a mess before they get it right. Just let the mixer run for 5-10 more minutes, and it will smooth out.
- Use a cake leveler or a long serrated knife for even layers. An uneven cake is a wobbly cake. I once tried to freehand it and ended up with a leaning tower of buttercream. Not cute.
- Chill the cake before applying the gold leaf. A cold, firm buttercream surface makes the gold leaf easier to handle and less likely to stick to your fingers in the wrong spots.
Variations & Adaptations
This cake is a fantastic base for customization. Here are a few ways to make it your own or adapt it for different needs.
- Gluten-Free Version : Substitute the all-purpose flour with a high-quality gluten-free 1:1 baking flour blend. I’ve used King Arthur’s Measure for Measure with great results. The texture will be slightly more tender, but it’s still delicious.
- Different Zodiac Signs : This cake is a perfect base for any sign. For a Leo, use a vibrant orange buttercream and gold leaf. For a Pisces, use a pale blue buttercream and silver dragées. The vanilla bean cake is a neutral canvas.
- Flavor Twist : Swap the almond extract for lemon zest and lemon extract for a bright, citrusy version. This is fantastic for a spring or summer birthday.
- Dairy-Free Adaptation : Use a high-quality vegan butter block (like Miyoko’s) and a dairy-free milk alternative (like oat milk). The Swiss meringue buttercream is a bit trickier with vegan butter, but it can be done. Make sure the butter is very cold.
- Simple Decorating : If gold leaf feels too intimidating, you can skip it entirely and top the cake with a simple sprinkle of edible glitter, fresh berries, or a piped border. It will still look elegant.
Serving & Storage Suggestions
This cake is best served at room temperature, which allows the buttercream to soften to a silky, melt-in-your-mouth texture. Take it out of the refrigerator about 30-45 minutes before you plan to serve it.
It pairs beautifully with a cup of strong black tea, like Earl Grey, or a crisp glass of Champagne. For a more casual affair, a cold glass of milk is always a winner. If you’re serving this as part of a dessert spread, it goes wonderfully with a simple fresh berry parfait mini platter for a contrast in textures and flavors.
For storage, keep the cake in an airtight cake carrier or under a large inverted bowl at room temperature for up to 2 days. For longer storage, you can refrigerate it for up to 5 days. The gold leaf will stay intact, but the buttercream will harden slightly. Let it come to room temperature before serving.
This cake also freezes beautifully. Wrap the unfrosted cake layers tightly in plastic wrap and then foil, and freeze for up to 3 months. The buttercream can also be frozen in an airtight container for up to 3 months. Thaw overnight in the refrigerator and re-whip before using.
Nutritional Information & Benefits
Let’s be honest—this is a celebration cake, not a health food. But knowing what’s in it helps you enjoy it mindfully. Here’s the estimated nutritional breakdown for one slice (based on 12 servings):
- Calories: ~480
- Fat: 28g
- Carbohydrates: 54g
- Protein: 6g
- Sugar: 38g
The butter provides a source of healthy fats and fat-soluble vitamins (A, D, E, K), while the eggs contribute high-quality protein and choline. The vanilla bean has been used in traditional medicine for its antioxidant properties, though the amount in this cake is minimal. The gold leaf is non-reactive and passes through your system without being digested—it’s purely for the visual wow factor.
This recipe contains gluten, dairy, and eggs. For those with allergies, please see the variations section above for suitable substitutions.
Conclusion
This Perfect Virgo Birthday Cake with Gold Leaf is more than just a dessert—it’s a tribute to getting the details right. It’s for the friend who always has a plan, who notices the little things, and who deserves a cake that matches their level of care and precision. The vanilla bean cake is tender and flavorful, the Swiss meringue buttercream is silky and not too sweet, and the gold leaf adds that final, intentional touch that says, “I thought about this.”
I love making this cake because it feels like a quiet act of love. It’s not about showing off—it’s about honoring someone’s unique energy. Whether you’re a Virgo yourself or baking for one, I hope this recipe helps you create a moment that feels special.
If you make this cake, I’d love to hear about it! Leave a comment below and let me know how it turned out, or share your own decorating ideas. And if you’re looking for another elegant, make-ahead dessert, you might also enjoy these creamy pink velvet strawberry cheesecake cups for a single-serving option that’s just as refined. Happy baking!
Frequently Asked Questions
Can I use vanilla extract instead of vanilla bean paste?
Yes, you can use 1 tablespoon of pure vanilla extract in place of the paste. You won’t get the beautiful black vanilla bean specks in the cake, but the flavor will still be delicious.
How do I get the gold leaf to stick to the cake?
The gold leaf naturally adheres to the buttercream’s surface. Make sure your buttercream is slightly chilled but not rock hard. Use a dry, clean brush or your fingers (completely oil-free) to gently press the leaf onto the frosting.
Can I make this cake a day ahead of time?
Absolutely! This cake actually tastes better the next day as the flavors meld. Bake and frost the cake completely, then store it in an airtight container in the refrigerator. Apply the gold leaf just before serving for the best shine.
My Swiss meringue buttercream looks soupy. What went wrong?
If the buttercream is soupy, it likely means the mixture was too warm when you added the butter. Pop the bowl in the refrigerator for 15-20 minutes, then beat it again. It should come together into a thick, spreadable consistency.
Can I use a different frosting instead of Swiss meringue?
Yes! A classic American buttercream (butter, powdered sugar, milk, vanilla) works perfectly and is much simpler to make. It will be sweeter and slightly less silky, but it’s a great option if you’re short on time.
Pin This Recipe!
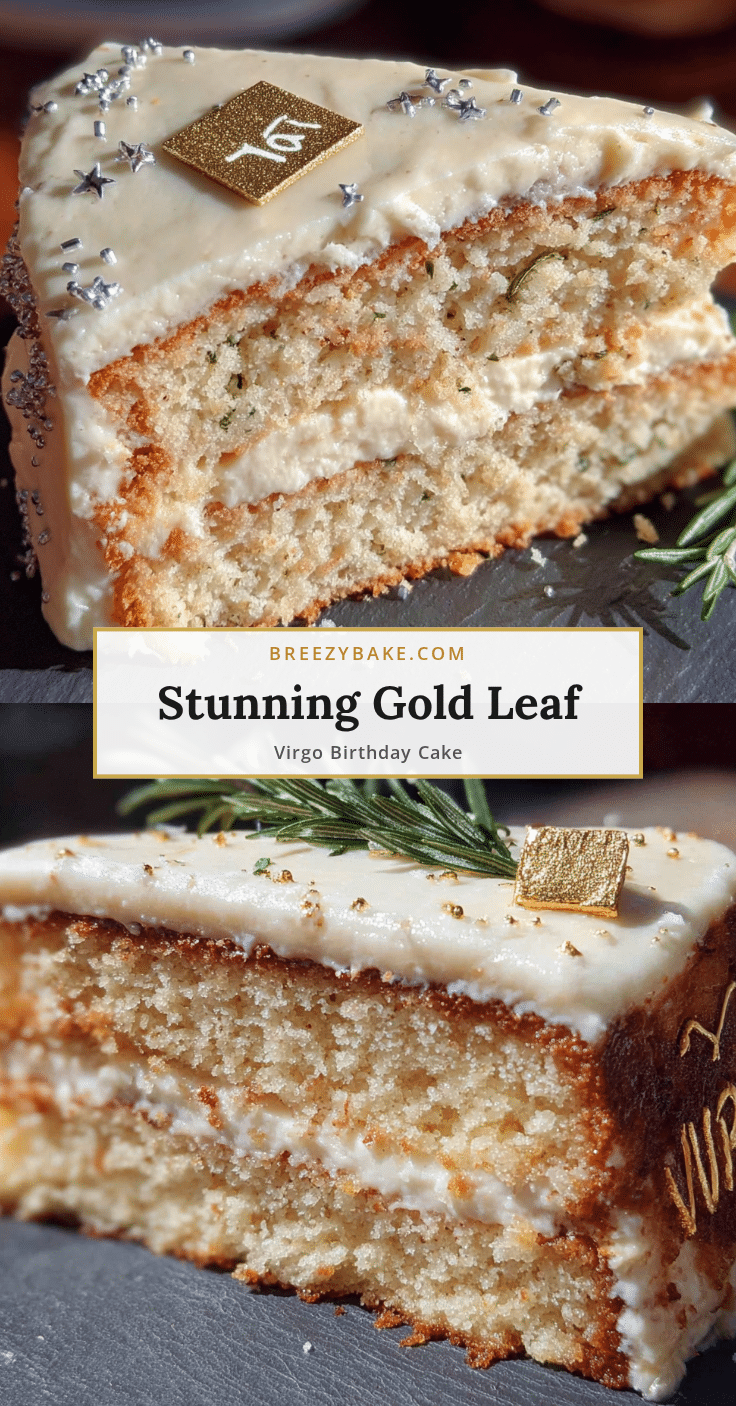
Perfect Virgo Birthday Cake Recipe with Gold Leaf
A refined vanilla bean cake with a hint of almond, finished with silky Swiss meringue buttercream and delicate gold leaf. This elegant, understated cake is perfect for celebrating a Virgo’s precision and love for quality.
- Prep Time: 30 minutes
- Cook Time: 30 minutes
- Total Time: 1 hour 30 minutes
- Yield: 12 servings 1x
- Category: Dessert
- Cuisine: American
Ingredients
- 2 ½ cups (315g) all-purpose flour
- 2 ½ teaspoons baking powder
- ½ teaspoon salt
- 1 cup (226g) unsalted butter, softened to room temperature
- 1 ¾ cups (350g) granulated sugar
- 4 large eggs, room temperature
- 1 tablespoon vanilla bean paste (or seeds of 2 vanilla beans)
- ½ teaspoon almond extract
- 1 cup (240ml) whole milk, room temperature
- 5 large egg whites
- 1 ½ cups (300g) granulated sugar
- 1 ½ cups (339g) unsalted butter, softened to room temperature, cut into cubes
- 2 teaspoons vanilla bean paste (or vanilla extract)
- Pinch of salt
- Edible gold leaf sheets
- Optional: Fresh edible flowers or a simple star-shaped cake topper
Instructions
- Preheat oven to 350°F (175°C). Grease two 8-inch round cake pans, line bottoms with parchment paper, then grease and flour the pans.
- In a medium bowl, whisk together flour, baking powder, and salt. Set aside.
- In a stand mixer with paddle attachment, beat softened butter and granulated sugar on medium-high until light and fluffy (3-4 minutes).
- Add eggs one at a time, beating well after each addition. Scrape down sides as needed.
- Mix in vanilla bean paste and almond extract.
- With mixer on low, add flour mixture in three additions, alternating with milk, starting and ending with flour. Mix just until combined.
- Divide batter evenly between prepared pans (about 600g per pan). Smooth tops.
- Bake for 28-32 minutes, until a toothpick inserted in center comes out clean or with a few moist crumbs. Cool in pans 10 minutes, then turn out onto wire rack to cool completely.
- For Swiss meringue buttercream: In a heatproof bowl, combine egg whites and sugar. Place over simmering water, whisking constantly until sugar dissolves and mixture reaches 160°F (71°C).
- Transfer bowl to stand mixer with whisk attachment. Beat on medium-high until stiff, glossy peaks form and bowl is cool (8-10 minutes).
- Switch to paddle attachment. With mixer on medium, add softened butter cubes one at a time. Mixture may look curdled; keep beating until smooth.
- Add vanilla bean paste and salt, beat for another minute.
- Level cooled cake layers with a serrated knife if domed.
- Place one cake layer on serving plate. Spread about 1 cup buttercream on top.
- Place second cake layer on top, cut-side down.
- Apply a thin crumb coat of buttercream. Refrigerate 15 minutes to set.
- Apply final layer of buttercream, smoothing sides and top with an offset spatula.
- Using a dry, clean brush or fingers, gently apply gold leaf in small, random patches on the frosted cake.
Notes
Room temperature ingredients are essential. Don’t skip the crumb coat for a clean finish. If Swiss meringue buttercream looks curdled, keep beating until smooth. Chill cake before applying gold leaf. Cake can be made a day ahead; apply gold leaf just before serving.
Nutrition
- Serving Size: 1 slice
- Calories: 480
- Sugar: 38
- Sodium: 210
- Fat: 28
- Saturated Fat: 17
- Carbohydrates: 54
- Fiber: 1
- Protein: 6
Keywords: vanilla bean cake, birthday cake, gold leaf cake, Virgo cake, Swiss meringue buttercream, elegant cake, homemade cake


