I swore I hated hot cocoa bars. For years. Every holiday party, every winter gathering—there it sat, this sad lineup of powdered packets and stale mini-marshmallows that somehow turned something wonderful into a disappointment. I’d walk past those tables with a polite nod, clutching my mug of coffee like it was a lifeline. Then last December, my sister cornered me at her annual cookie exchange. “Just taste mine,” she said, shoving a mug under my nose. I took a sip to shut her up, honestly. And there it was—real melted chocolate, a whisper of peppermint, and this homemade marshmallow that practically floated on top. I stood there, caught in the act of proving myself wrong, with chocolate mustache and everything. She just smiled. That night changed how I think about winter entertaining forever.
You know that feeling when something so simple turns out so much better than you expected? That’s this quick hot cocoa bar with peppermint marshmallows. It’s not fussy or complicated. It’s the kind of setup that makes people stop and say “wait, you made these?” while reaching for a second cup. I mean, I nearly burned my tongue on that first sip because I couldn’t wait for it to cool down. Worth it.
The whole thing comes together in about 20 minutes, which is exactly what you need when guests are on their way or the kids are begging for something warm after building snowmen. No standing over a stove stirring for ages. No hunting down obscure ingredients. Just real, honest cocoa with that little peppermint surprise floating on top. And honestly? Once you’ve had a homemade marshmallow, you can never go back to the bagged kind. I keep making this because it turns an ordinary Tuesday night into something that feels like a celebration—without actually trying very hard.
Why You’ll Love This Recipe
Let me tell you why this quick hot cocoa bar with peppermint marshmallows has become my secret weapon for winter gatherings. I’ve tested this setup at least a dozen times—family movie nights, book club meetings, even a neighbor’s impromptu caroling party—and it never fails to deliver.
- Quick & Easy: Comes together in under 20 minutes, perfect for busy weeknights or last-minute cravings. The marshmallows set while you prep the cocoa base, so everything’s ready at the same time.
- Simple Ingredients: No fancy grocery trips needed. You likely already have cocoa powder, sugar, milk, and vanilla in your kitchen. The peppermint extract and gelatin are the only “special” items, and both are easy to find.
- Perfect for Winter Gatherings: Great for holiday parties, snow day treats, cozy movie nights, or even a quiet evening by the fire when you need something warm.
- Crowd-Pleaser: Always gets rave reviews from kids and adults alike. I’ve watched skeptical teenagers go back for thirds.
- Unbelievably Delicious: The texture and flavor combo is next-level comfort food. Real melted chocolate beats powder packets every single time.
What makes this recipe different from the rest? It’s the marshmallows. Most hot cocoa bars use store-bought marshmallows that dissolve into sad little puddles. These homemade peppermint marshmallows stay pillowy and soft, infusing the cocoa with just a hint of cool mint as they melt. Plus, the cocoa base uses a simple technique—blooming the cocoa powder in hot milk—that unlocks deeper chocolate flavor without any extra work.
This recipe isn’t just good—it’s the kind that makes you close your eyes after the first bite. Or sip, I guess. It’s comfort food reimagined—faster, easier, but with the same soul-soothing satisfaction. Perfect for impressing guests without stress, or turning a simple weeknight into something memorable.
What Ingredients You Will Need
This recipe uses simple, wholesome ingredients to deliver bold chocolate flavor and that fluffy peppermint marshmallow goodness without the fuss. Most of these are pantry staples, which makes this quick hot cocoa bar with peppermint marshmallows perfect for spontaneous winter cravings.
For the Peppermint Marshmallows
- 3 envelopes unflavored gelatin (about 3 tablespoons or 21g) — I recommend Knox brand for consistent results. This gives the marshmallows their signature bounce.
- 1 cup cold water (240ml), divided — Half goes into blooming the gelatin, half into the sugar syrup.
- 2 cups granulated sugar (400g) — Regular white sugar works best. Don’t substitute brown sugar here; it changes the texture.
- 1 cup light corn syrup (340g) — This prevents crystallization and keeps marshmallows soft. Golden syrup works in a pinch.
- 1/4 teaspoon salt — Balances the sweetness.
- 1 teaspoon vanilla extract — Pure is better, but imitation works fine for this recipe.
- 1 teaspoon peppermint extract — Start with this amount and adjust to taste. I prefer Nielsen-Massey for a clean, natural flavor.
- 1/2 cup powdered sugar (60g), for dusting — Keeps the marshmallows from sticking together.
- Red food coloring (optional) — For that classic peppermint swirl look. Gel food coloring gives the best control.
For the Hot Cocoa Base
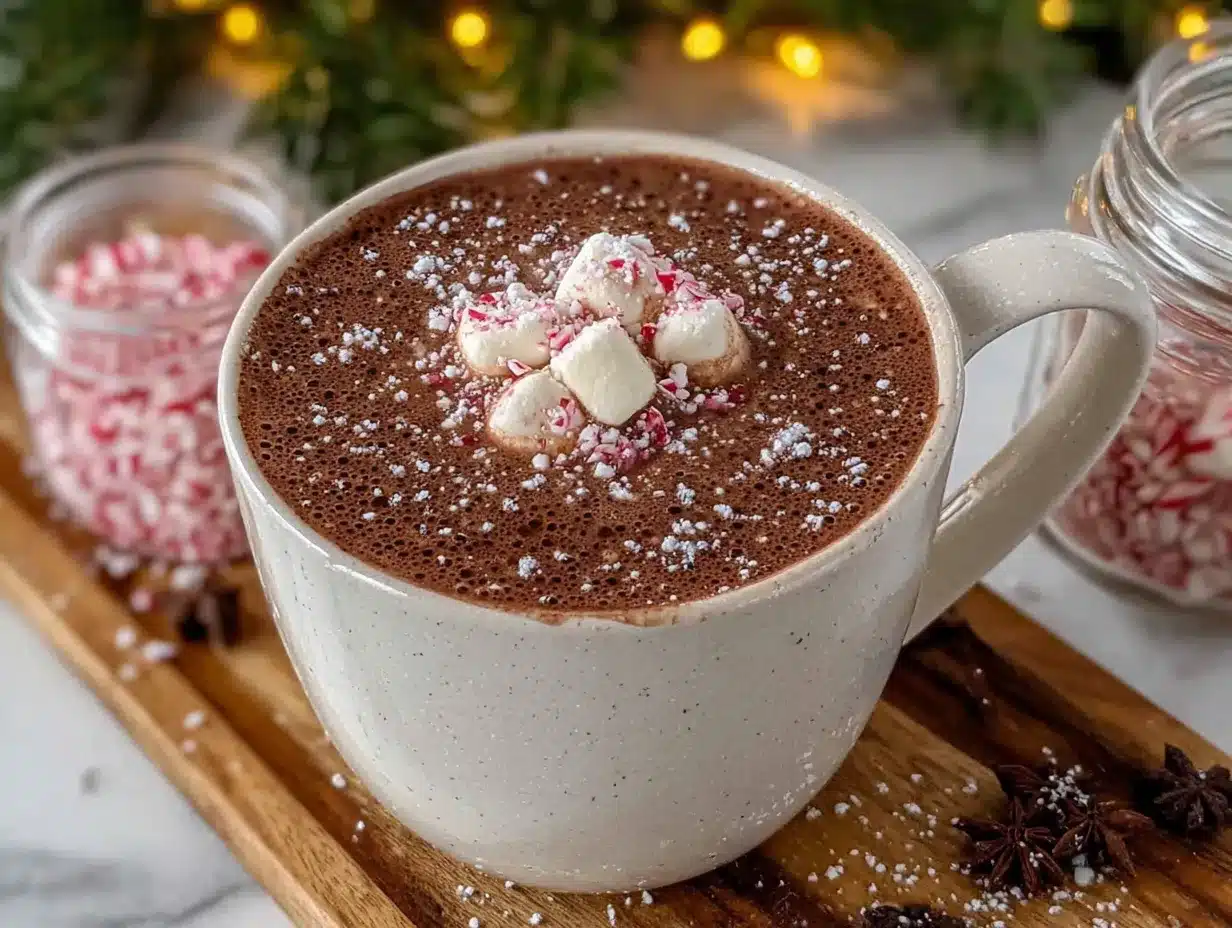
- 1/2 cup unsweetened cocoa powder (50g) — Dutch-process gives a smoother, richer flavor. I use Ghirardelli or Valrhona when I’m feeling fancy.
- 1/2 cup granulated sugar (100g) — Adjust up or down depending on your sweetness preference.
- 1/4 teaspoon salt — Enhances the chocolate flavor without making it salty.
- 4 cups whole milk (960ml) — Whole milk gives the creamiest results. For a lighter version, use 2% or oat milk.
- 1 teaspoon vanilla extract — Adds warmth and depth.
- 1/2 cup semi-sweet chocolate chips (90g) — Optional, but highly recommended for extra richness. I like Guittard or Ghirardelli.
For the Toppings Bar (Optional but Fun)
- Whipped cream
- Crushed candy canes or peppermint candies
- Chocolate shavings or curls
- Caramel sauce
- Cinnamon sticks (for stirring)
- Mini chocolate chips
Substitution Guidance: Use almond milk or coconut milk for a dairy-free cocoa base (just know it won’t be as creamy). For a gluten-free option, these marshmallows are naturally gluten-free, but double-check your corn syrup brand. If you’re avoiding corn syrup, try this recipe with honey—though the texture will be slightly different.
Selection Tip: Look for peppermint extract labeled “pure” or “natural” for the cleanest flavor. Artificial extracts can sometimes taste medicinal. And for the cocoa powder, I’ve found that splurging on a good brand makes a noticeable difference in depth of flavor.
Equipment Needed
You don’t need a professional pastry kitchen for this quick hot cocoa bar with peppermint marshmallows. Most of these tools you probably already own.
- Stand mixer or hand mixer — Whipping the marshmallow mixture by hand is possible but exhausting. A stand mixer with the whisk attachment makes this effortless.
- Candy thermometer — Crucial for getting the sugar syrup to the right temperature (240°F/115°C). I’ve ruined batches by guessing, trust me.
- 8×8-inch baking pan (20x20cm) — For setting the marshmallows. Glass or metal both work fine.
- Parchment paper — Lining the pan prevents sticking disasters.
- Medium saucepan — For heating the milk and making the cocoa base.
- Small saucepan — For the marshmallow sugar syrup.
- Spatula — Silicone is best for scraping every last bit of marshmallow.
- Sharp knife or pizza cutter — For cutting the marshmallows cleanly. A pizza cutter dusted with powdered sugar works like magic.
- Fine-mesh sieve — For dusting powdered sugar evenly over the marshmallows.
- Mugs or heatproof glasses — For serving. Clear glasses show off the pretty layers.
Budget-Friendly Alternatives: No candy thermometer? You can test the syrup by dropping a small amount into cold water—if it forms a firm ball that holds its shape, you’re there. No stand mixer? A hand mixer works, it just takes a few minutes longer. I’ve made these marshmallows in a tiny apartment kitchen with a $20 hand mixer and they turned out perfect.
Maintenance Tip: Clean your candy thermometer immediately after use. Sugar syrup hardens like concrete if left to cool, and nobody wants to scrub that off.
Preparation Method
Let’s get into the actual making of this quick hot cocoa bar with peppermint marshmallows. I’ll walk you through each step with the little tricks I’ve learned from making this about fifteen times now.
Make the Peppermint Marshmallows (Start first, they need to set)
- Prepare your pan. Line an 8×8-inch baking pan with parchment paper, leaving some overhang on two sides. Lightly spray the parchment with nonstick cooking spray. In a small bowl, whisk together 1/4 cup powdered sugar and 1/4 cup cornstarch. Dust this mixture generously over the parchment. Tap out any excess. This step sounds fussy, but it’s what keeps your marshmallows from becoming permanent fixtures in the pan.
- Bloom the gelatin. In the bowl of your stand mixer, combine 1/2 cup cold water (120ml) with the 3 envelopes of gelatin. Stir gently with a fork until the gelatin is evenly moistened. Let it sit for about 10 minutes while you prepare the syrup. It should look like a thick, jiggly paste. Don’t skip the waiting time—unbloomed gelatin leads to lumpy marshmallows.
- Cook the sugar syrup. In a small saucepan, combine 2 cups granulated sugar, 1 cup light corn syrup, 1/2 cup cold water (120ml), and 1/4 teaspoon salt. Stir gently over medium heat until the sugar dissolves completely. Stop stirring once it comes to a boil. Attach your candy thermometer and cook until the mixture reaches 240°F (115°C) — the “soft ball” stage. This takes about 8-10 minutes. Watch it carefully; the temperature climbs slowly at first, then suddenly.
- Combine and whip. With the mixer running on low speed (using the whisk attachment), slowly pour the hot syrup into the bloomed gelatin. Be careful—that syrup is dangerously hot. Once all the syrup is added, gradually increase the speed to high. Whip for about 10-12 minutes. The mixture will transform from clear liquid to thick, white, billowy marshmallow. It should look glossy and hold stiff peaks when you lift the whisk. During the last minute, add 1 teaspoon vanilla extract and 1 teaspoon peppermint extract.
- Add color (optional). For a pretty swirl effect, dollop a few drops of red gel food coloring on top of the marshmallow after whipping. Use a knife or skewer to gently swirl it through — don’t overmix, or you’ll lose the marbled look.
- Spread and set. Scrape the marshmallow mixture into your prepared pan. Use a lightly oiled spatula to spread it evenly. It’s sticky stuff, so don’t stress about perfection. Dust the top generously with more of the powdered sugar-cornstarch mixture. Let it sit uncovered at room temperature for at least 4 hours, or overnight. I usually make these the night before I plan to serve them.
- Cut and store. Once set, turn the marshmallow block out onto a cutting board dusted with powdered sugar. Peel off the parchment. Use a sharp knife or pizza cutter (dusted with powdered sugar) to cut into 1-inch cubes. Toss each cube in the powdered sugar mixture to coat all sides. Store in an airtight container at room temperature for up to 2 weeks — if they last that long.
Make the Hot Cocoa Base
- Bloom the cocoa. In a medium saucepan, whisk together 1/2 cup cocoa powder, 1/2 cup sugar, and 1/4 teaspoon salt. Add about 1/2 cup of the milk and whisk into a smooth paste. This prevents lumps from forming later. I learned this trick after years of lumpy cocoa — it makes a real difference.
- Add remaining milk. Pour in the remaining 3 1/2 cups milk and whisk to combine. Place the saucepan over medium heat. Whisk occasionally as it heats up. You’re looking for small bubbles forming around the edges — don’t let it boil, or the milk might scorch.
- Add chocolate and vanilla. Once the cocoa is hot (about 5-7 minutes), remove from heat. Stir in 1/2 cup chocolate chips and 1 teaspoon vanilla extract. Keep stirring until the chocolate is completely melted and the cocoa is smooth and glossy. Taste it. If you want it sweeter, add another tablespoon of sugar. If you want it more chocolatey, toss in a few more chips.
- Keep warm. Transfer the cocoa to a slow cooker set to “warm” if you’re serving a crowd. Or just keep it on the stove over very low heat, stirring occasionally. You can also reheat individual mugs in the microwave if needed.
Assemble the Hot Cocoa Bar
- Set up your station. Arrange the warm cocoa in a large dispenser or slow cooker. Place the peppermint marshmallows in a pretty bowl nearby. Set out small bowls of toppings: crushed candy canes, chocolate shavings, whipped cream, cinnamon sticks.
- Serve. Ladle the cocoa into mugs. Let everyone add their own marshmallows and toppings. The marshmallows will slowly melt, releasing that peppermint flavor into the cocoa. It’s pure winter magic in a mug.
Cooking Tips & Techniques
After making this quick hot cocoa bar with peppermint marshmallows more times than I can count, I’ve collected a few hard-earned lessons. Let me save you some trouble.
Marshmallow Temperature is Everything. Getting the sugar syrup to exactly 240°F (115°C) is non-negotiable. Too low, and your marshmallows won’t set — they’ll be sticky puddles. Too high, and they’ll be tough and chewy. I ruined my first batch by walking away for “just a second” and came back to syrup at 255°F. Those marshmallows could’ve been used as hockey pucks. Set a timer and watch that thermometer like a hawk.
Humidity is Your Enemy. Marshmallows are hygroscopic — they absorb moisture from the air. On humid days, they get sticky and refuse to set properly. If you live in a humid climate (hello, fellow Southerners), run your air conditioner or dehumidifier while making these. I learned this the hard way during a July “winter recipe test” that turned into a sticky disaster.
The Slow Pour Matters. When adding hot syrup to the gelatin, pour it in a thin, steady stream down the side of the bowl. If you dump it all in at once, you’ll scramble the gelatin and end up with grainy marshmallows. This is one of those steps that feels fussy until you mess it up once.
Multitasking Strategy: Make the marshmallows first (they need 4+ hours to set). While they’re setting, prep your toppings and measure out your cocoa ingredients. When you’re ready to serve, the cocoa takes about 10 minutes to make. This way, everything comes together without last-minute chaos.
Consistency Check: Your marshmallow mixture is done whipping when it holds a stiff peak and looks glossy, like shaving cream. If it’s still runny after 12 minutes, keep whipping. If it starts looking curdled or separated, you’ve over-whipped — unfortunately, there’s no saving it at that point.
Cutting Cleanly: Dust your knife or pizza cutter with powdered sugar between every cut. Wipe it clean if sticky residue builds up. For perfectly square marshmallows, trim the edges first, then cut into even rows. I use a ruler as a guide because I’m extra like that.
Variations & Adaptations
This quick hot cocoa bar with peppermint marshmallows is endlessly adaptable. Here are some ways I’ve customized it over the years.
Dietary Variations
Dairy-Free Cocoa: Substitute the whole milk with oat milk or full-fat coconut milk. Oat milk gives the creamiest texture without any weird aftertaste. I’ve used oat milk for a friend with lactose intolerance and honestly couldn’t tell the difference. Skip the chocolate chips or use dairy-free ones.
Vegan Marshmallows: Traditional marshmallows require gelatin (which is animal-based). For a vegan version, use agar-agar powder instead. The texture is slightly different — firmer and less pillowy — but still delicious. You’ll need to adjust the liquid ratio; follow a specific vegan marshmallow recipe for best results.
Lower Sugar Option: Use a sugar-free sweetener like monk fruit or allulose in the cocoa base. For the marshmallows, you can reduce the sugar by about 25% without major texture changes, but going lower will affect structure. Honestly, marshmallows are a treat — I just enjoy them as-is and keep portions reasonable.
Flavor Twists
Mexican Hot Chocolate: Add 1/2 teaspoon cinnamon, a pinch of cayenne, and a dash of nutmeg to the cocoa base. Top with marshmallows and a cinnamon stick for stirring. This is my personal favorite on cold, rainy nights.
Orange Chocolate: Replace the peppermint extract in the marshmallows with orange extract. Add a strip of orange zest to the cocoa while it heats. The chocolate-orange combination is unexpectedly elegant.
Salted Caramel: Drizzle caramel sauce over the finished cocoa and sprinkle with flaky sea salt. The salt cuts through the sweetness beautifully. I tried this on a whim last winter and now I can’t go back.
Seasonal Adaptations
Summer Version: Turn this into iced cocoa! Make the cocoa base, let it cool completely, then serve over ice with the marshmallows on top. The marshmallows float on cold liquid just as well as hot. Perfect for those “I want chocolate but it’s 90 degrees outside” moments.
Holiday Variation: Add a drop of red and green food coloring to the marshmallow mixture for Christmas colors. Or shape the marshmallows using cookie cutters — stars, trees, snowflakes. Just dust the cutters with powdered sugar first.
Serving & Storage Suggestions
Serving Temperature: Serve the cocoa piping hot, just below boiling. The marshmallows should start melting within seconds of hitting the liquid. For a pretty presentation, float 2-3 marshmallows on top and sprinkle with crushed candy canes. Clear glass mugs show off the layered effect beautifully.
Complementary Dishes: This hot cocoa pairs perfectly with shortbread cookies, gingerbread, or simple sugar cookies. For a more indulgent spread, add a plate of chocolate-dipped pretzels or biscotti. The salty-sweet combination is irresistible.
Storage Instructions: Store leftover marshmallows in an airtight container at room temperature for up to 2 weeks. Layer them between sheets of parchment paper to prevent sticking. Do not refrigerate — the moisture will make them sticky and weepy.
Reheating Cocoa: Leftover cocoa keeps in the refrigerator for up to 3 days. Reheat gently on the stovetop or in the microwave in 30-second bursts, stirring between each. Add a splash of milk if it’s thickened too much. The flavor actually deepens overnight — I sometimes make the cocoa base a day ahead on purpose.
Freezing Marshmallows: You can freeze peppermint marshmallows for up to 3 months. Place them in a single layer on a baking sheet, freeze until solid (about 2 hours), then transfer to a freezer bag. Thaw at room temperature for about 30 minutes before serving. They lose a tiny bit of fluffiness but still taste amazing.
Flavor Development: The peppermint flavor in the marshmallows mellows and becomes more subtle after a day or two. If you want a stronger mint punch, add an extra 1/4 teaspoon of peppermint extract. I actually prefer them on day two — the flavors have time to settle into something more balanced.
Nutritional Information & Benefits
Here’s the honest truth about this quick hot cocoa bar with peppermint marshmallows: it’s a treat, not a health food. But that doesn’t mean it’s without merit.
Estimated Nutritional Values (per serving, 1 cup cocoa with 2 marshmallows):
- Calories: 320-380
- Fat: 8-12g (depending on milk choice)
- Carbohydrates: 55-65g
- Protein: 8-10g
- Fiber: 2-3g
- Sugar: 45-55g
Health Benefits of Key Ingredients: Cocoa powder is rich in antioxidants called flavanols, which may support heart health and reduce inflammation. Milk provides calcium, vitamin D, and protein. Gelatin (in the marshmallows) contains collagen, which supports joint and skin health — though let’s be real, you’re not eating marshmallows for the health benefits.
Dietary Considerations: This recipe contains dairy and gelatin. It is gluten-free (check your corn syrup brand). For a dairy-free option, use oat milk and skip the chocolate chips. For a vegan version, substitute agar-agar for gelatin and use plant-based milk.
Potential Allergens: Milk, corn (corn syrup), and possibly soy (in some chocolate chips). Always check labels if serving guests with allergies.
My Personal Perspective: I believe in balance. This hot cocoa bar is a winter indulgence meant to be enjoyed fully, without guilt. It’s the kind of treat that warms you from the inside out and makes ordinary moments feel special. One mug won’t derail your health goals, but it might just make your evening a whole lot better.
Conclusion
This quick hot cocoa bar with peppermint marshmallows has become my go-to for winter entertaining, lazy snow days, and everything in between. It’s proof that you don’t need complicated techniques or fancy ingredients to create something that feels genuinely special. The marshmallows are surprisingly easy once you get the hang of them, and the cocoa base is rich enough to satisfy even the most serious chocolate cravings.
I love that this recipe lets everyone customize their own mug—some people go heavy on the marshmallows, others pile on the crushed candy canes, and my brother-in-law drowns his in caramel sauce. There’s no wrong way to enjoy it. That’s the beauty of a hot cocoa bar; it becomes whatever you need it to be on that particular cold night.
If you try this recipe, I’d love to hear about it. Drop a comment below telling me your favorite topping combination, or tag me in your photos if you share them online. Did you add a wild twist I haven’t thought of? Did your kids declare it “the best hot chocolate ever”? Tell me everything. And if you’re looking for more winter-friendly recipes, check out my easy homemade hot chocolate mix for a pantry-staple version, or my no-bake chocolate peppermint bites for a no-mug-needed treat.
Go make yourself some cocoa. You deserve it. And don’t forget the marshmallows.
Frequently Asked Questions
Can I make the marshmallows ahead of time?
Absolutely! These peppermint marshmallows keep beautifully for up to 2 weeks in an airtight container at room temperature. I often make them a week before a party. Just make sure they’re fully set before cutting and storing — at least 4 hours, but overnight is better.
Why did my marshmallows turn out sticky?
Sticky marshmallows usually mean one of two things: humidity got to them during setting, or they weren’t dusted thoroughly enough with the powdered sugar-cornstarch mixture. On humid days, run a dehumidifier or air conditioner while they set. And don’t be shy with the dusting powder — coat every side generously.
Can I use this cocoa base for iced hot chocolate?
Yes! Make the cocoa base as directed, let it cool completely, then refrigerate until cold. Serve over ice with the marshmallows on top. The marshmallows won’t melt as quickly in cold liquid, but they’ll still soften and infuse the drink with peppermint flavor. It’s a great summer treat.
What if I don’t have a candy thermometer?
You can use the cold water test instead. Drop a small spoonful of the sugar syrup into a bowl of very cold water. If it forms a firm, pliable ball that holds its shape when you press it between your fingers, it’s at the soft ball stage (240°F/115°C). If it’s still liquid and dissolves, keep cooking. It takes a bit of practice, but it works.
Can I double this recipe for a larger party?
Definitely. Double the marshmallow recipe and use a 9×13-inch pan instead of 8×8. The setting time stays the same. For the cocoa, simply double all ingredients and use a larger slow cooker to keep it warm. I’ve served this at a party of 20 with no issues — just make sure you have enough mugs!
Pin This Recipe!
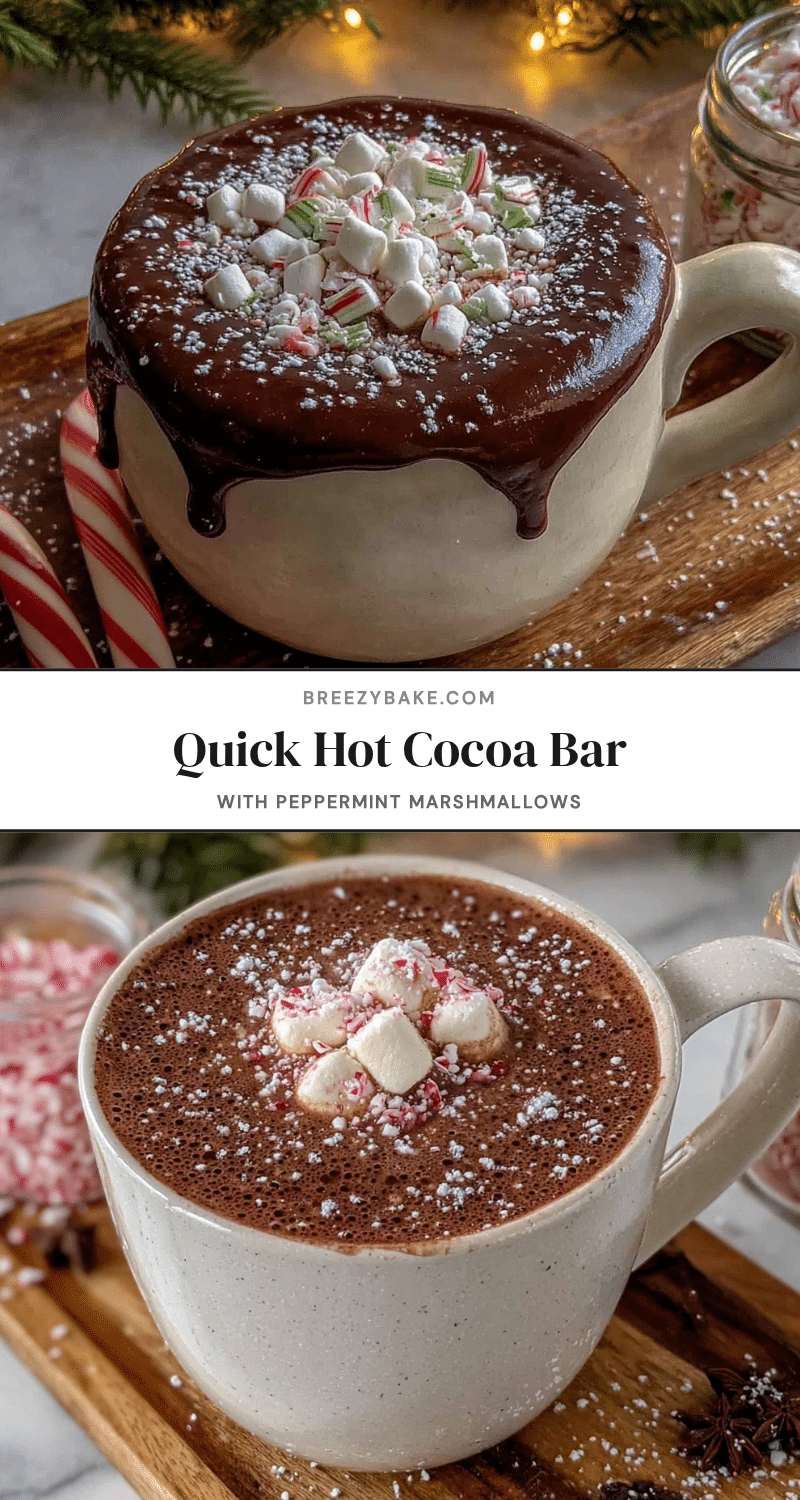
Quick Hot Cocoa Bar with Peppermint Marshmallows: Easy Winter Treat

A quick and easy hot cocoa bar featuring homemade peppermint marshmallows that come together in about 20 minutes. Perfect for winter gatherings, snow days, or cozy nights by the fire.
- Prep Time: 20 minutes
- Cook Time: 10 minutes
- Total Time: 4 hours 30 minutes (includes setting time)
- Yield: 8 servings 1x
- Category: Beverage
- Cuisine: American
Ingredients
- 3 envelopes unflavored gelatin (about 3 tablespoons or 21g)
- 1 cup cold water (240ml), divided
- 2 cups granulated sugar (400g)
- 1 cup light corn syrup (340g)
- 1/4 teaspoon salt
- 1 teaspoon vanilla extract
- 1 teaspoon peppermint extract
- 1/2 cup powdered sugar (60g), for dusting
- Red food coloring (optional)
- 1/2 cup unsweetened cocoa powder (50g)
- 1/2 cup granulated sugar (100g)
- 1/4 teaspoon salt
- 4 cups whole milk (960ml)
- 1 teaspoon vanilla extract
- 1/2 cup semi-sweet chocolate chips (90g)
- Whipped cream (optional)
- Crushed candy canes or peppermint candies (optional)
- Chocolate shavings or curls (optional)
- Caramel sauce (optional)
- Cinnamon sticks (optional)
- Mini chocolate chips (optional)
Instructions
- Prepare the pan: Line an 8×8-inch baking pan with parchment paper, leaving overhang. Lightly spray with nonstick spray. Whisk together 1/4 cup powdered sugar and 1/4 cup cornstarch, dust generously over parchment, and tap out excess.
- Bloom the gelatin: In the bowl of a stand mixer, combine 1/2 cup cold water with 3 envelopes gelatin. Stir gently and let sit for 10 minutes until thick and jiggly.
- Cook the sugar syrup: In a small saucepan, combine 2 cups granulated sugar, 1 cup light corn syrup, 1/2 cup cold water, and 1/4 teaspoon salt. Stir over medium heat until sugar dissolves. Stop stirring once it boils. Attach a candy thermometer and cook until 240°F (115°C), about 8-10 minutes.
- Combine and whip: With mixer on low, slowly pour hot syrup into bloomed gelatin. Increase speed to high and whip for 10-12 minutes until thick, glossy, and stiff peaks form. Add 1 teaspoon vanilla and 1 teaspoon peppermint extract during the last minute.
- Add color (optional): Dollop red gel food coloring on top and gently swirl with a knife or skewer.
- Spread and set: Scrape marshmallow mixture into prepared pan. Use a lightly oiled spatula to spread evenly. Dust top with more powdered sugar-cornstarch mixture. Let sit uncovered at room temperature for at least 4 hours or overnight.
- Cut and store: Turn marshmallow block onto a cutting board dusted with powdered sugar. Peel off parchment. Cut into 1-inch cubes using a knife or pizza cutter dusted with powdered sugar. Toss cubes in powdered sugar mixture. Store in airtight container at room temperature for up to 2 weeks.
- Bloom the cocoa: In a medium saucepan, whisk together 1/2 cup cocoa powder, 1/2 cup sugar, and 1/4 teaspoon salt. Add about 1/2 cup milk and whisk into a smooth paste.
- Add remaining milk: Pour in remaining 3 1/2 cups milk and whisk. Heat over medium heat until small bubbles form around edges (do not boil), about 5-7 minutes.
- Add chocolate and vanilla: Remove from heat. Stir in 1/2 cup chocolate chips and 1 teaspoon vanilla extract until smooth and glossy. Adjust sweetness or chocolate flavor to taste.
- Keep warm: Transfer cocoa to a slow cooker set to ‘warm’ or keep on stove over very low heat, stirring occasionally.
- Assemble the hot cocoa bar: Arrange warm cocoa in a dispenser or slow cooker. Place peppermint marshmallows in a bowl. Set out bowls of toppings: crushed candy canes, chocolate shavings, whipped cream, cinnamon sticks.
- Serve: Ladle cocoa into mugs. Let everyone add their own marshmallows and toppings.
Notes
Make marshmallows first as they need at least 4 hours to set. Humidity can affect marshmallow texture; use a dehumidifier if needed. For dairy-free, use oat milk and dairy-free chocolate chips. For vegan, substitute agar-agar for gelatin. Store marshmallows at room temperature, not refrigerated.
Nutrition
- Serving Size: 1 cup cocoa with 2 m
- Calories: 350
- Sugar: 50
- Sodium: 200
- Fat: 10
- Saturated Fat: 6
- Carbohydrates: 60
- Fiber: 2
- Protein: 9
Keywords: hot cocoa, hot chocolate, peppermint marshmallows, winter treat, holiday drink, easy recipe, homemade marshmallows


