This was supposed to be my neighbor Rosa’s famous conchas. I had the recipe memorized—the soft, pillowy dough, the crumbly sugar topping, the whole Saturday-morning ritual. But somewhere between the flour dusting and my third coffee, I grabbed the wrong measuring cup. Instead of the warm milk, I poured in a cold splash of orange juice that was sitting on the counter. My heart sank. I mean, honestly, who does that? The dough came together weirdly, smelling more like a breakfast drink than a sweet bread. I was already running late for a potluck, and the pressure was on. I just threw it in the pan, said a little prayer, and hoped for the best.
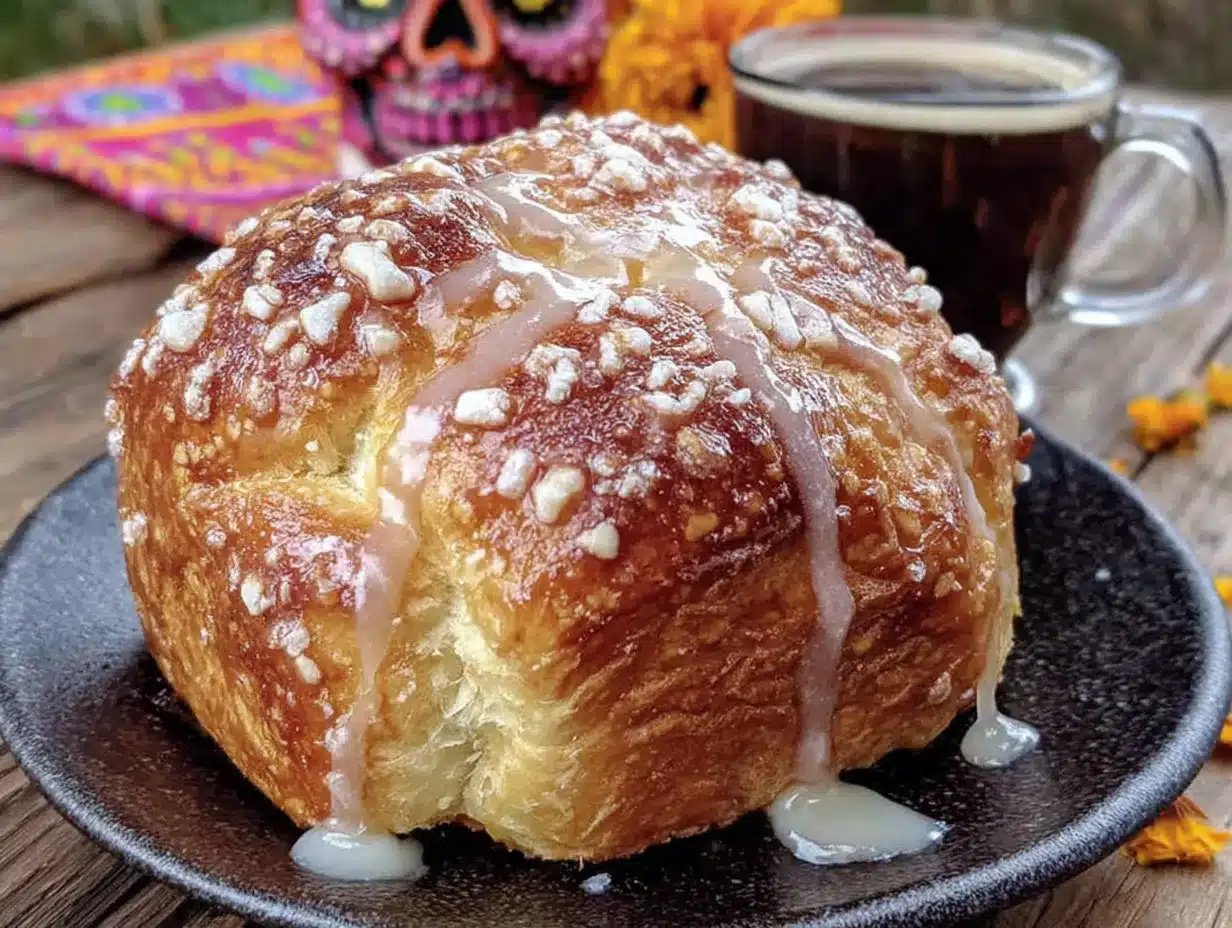
What came out of the oven was nothing like the plan—and better. The bread had this incredible, tender crumb with a whisper of citrus that made everyone at the table stop mid-bite. Someone asked, “Is this pan de muerto?” And I just stood there, flour still on my shirt, realizing that my mistake had accidentally created something special. It wasn’t conchas. It was something entirely its own—a quick, weeknight-friendly version of the traditional Day of the Dead bread, but without the hours of proofing and the complicated shaping.
That happy accident became this recipe. And you know that feeling when you stumble onto something so good, you almost don’t believe it? That’s this bread. It’s quick enough for a Tuesday night when you’re tired and hungry, but it tastes like you spent all day in the kitchen. The orange blossom glaze is the real star here—it soaks into the warm bread and makes everything smell like a garden in spring. Maybe you’ve been there, staring at a ruined batch of dough, wondering if you should just order pizza. Let me tell you, sometimes the best recipes come from the worst mistakes.
Why You’ll Love This Recipe
I’ve tested this quick pan de muerto recipe more times than I care to admit—probably a dozen batches across different ovens, different weather conditions, and different levels of my own kitchen chaos. I’m not a professional baker, but I’ve learned what works and what doesn’t through trial and error (and a few spectacular fails). Here’s why this version is the one you’ll come back to:
- Quick & Easy: From start to finish, this comes together in about 90 minutes. Traditional pan de muerto can take 4-5 hours with all the proofing. This one respects your time.
- Simple Ingredients: You probably have everything except the orange blossom water in your pantry right now. No special flours, no hard-to-find yeast—just basics.
- Perfect for Weeknights: This is the kind of recipe you can start after work and still have warm bread before bedtime. It’s not a weekend project.
- Crowd-Pleaser: I’ve brought this to three different gatherings now, and every single time, someone asks for the recipe. Kids love the sweet glaze, adults love the subtle floral notes.
- Unbelievably Delicious: The texture is soft and slightly dense, like a really good brioche, but lighter. The orange blossom glaze adds this delicate, perfumed sweetness that’s completely addictive.
What makes this different from other pan de muerto recipes? It’s the technique. Most versions require a sponge starter and multiple rises. I use a simplified method with instant yeast and a single, longer rise that develops flavor without the fuss. The orange blossom glaze isn’t just drizzled on top—it’s brushed onto the warm bread so it sinks in, creating a moist, fragrant loaf that stays fresh for days. This isn’t just another version; it’s the one I make when I’m tired, hungry, and need something that feels special without the stress.
What Ingredients You Will Need
This recipe uses simple, wholesome ingredients to deliver that signature pan de muerto flavor without the complicated shopping list. Most of these are pantry staples, and the few specialty items are easy to find.
For the Dough
- All-purpose flour, 3 cups (360g) — I prefer Gold Medal or King Arthur for consistent results. Don’t use bread flour here; it makes the bread too chewy.
- Instant yeast, 2 ¼ teaspoons (one packet) — This is your shortcut. Instant yeast doesn’t need proofing, so you can mix it right in with the dry ingredients.
- Granulated sugar, ½ cup (100g) — Adds sweetness and helps the yeast work. You can reduce to ⅓ cup if you prefer less sweet bread.
- Salt, ½ teaspoon — Don’t skip this. Salt controls the yeast and balances the sweetness.
- Large eggs, 2, room temperature — Room temperature eggs incorporate better. If you forgot to take them out, place them in warm water for 5 minutes.
- Unsalted butter, 4 tablespoons (56g), softened — I use Plugrà for the richest flavor. Make sure it’s really soft, almost spreadable.
- Warm milk, ½ cup (120ml), about 110°F — Warm water works too, but milk gives a softer crumb and richer flavor.
- Orange zest, 1 tablespoon (from about 1 large orange) — This is where the citrus magic starts. Use a microplane for the finest zest.
- Vanilla extract, 1 teaspoon — Pure vanilla is best, but imitation works in a pinch.
For the Orange Blossom Glaze
- Powdered sugar, 1 cup (120g) — Sift it first to avoid lumps. Trust me on this.
- Orange blossom water, 2 tablespoons — You can find this in Middle Eastern grocery stores or online. A little goes a long way.
- Fresh orange juice, 2 tablespoons — Use the orange you zested for the dough. Fresh is non-negotiable here.
- Pinch of salt — Balances the sweetness and brightens the floral notes.
For the Decoration (Optional but Traditional)
- Orange zest strips, for garnish — Use a vegetable peeler to get thin strips without the white pith.
- Coarse sugar, for sprinkling — Sanding sugar or turbinado adds a lovely crunch.
I recommend Nielsen-Massey orange blossom water for its pure flavor without artificial notes. For the butter, avoid margarine—it changes the texture completely. If you’re dairy-free, you can substitute with vegan butter, but the bread will be slightly less tender.
Equipment Needed
You don’t need a professional bakery setup for this. Here’s what you’ll actually use:
- Large mixing bowl — Any bowl works, but a wide one makes kneading easier if you’re doing it by hand.
- Stand mixer with dough hook — This is my preferred method. It saves your arms and gives consistent results. A hand mixer with dough hooks works too, but it’s more work.
- 9-inch round cake pan or springform pan — A springform pan makes removing the bread easier, but a regular cake pan lined with parchment works perfectly.
- Rolling pin — For shaping the bone decorations. You can also use your hands.
- Pastry brush — For applying the glaze while the bread is still warm. A silicone brush is easiest to clean.
- Microplane or zester — For getting that fine orange zest without the bitter pith.
- Cooling rack — Essential for even cooling and proper glaze application.
If you don’t have a stand mixer, you can absolutely knead by hand. It takes about 10 minutes of steady work, and it’s actually pretty therapeutic after a long day. Just make sure you’re using a sturdy bowl and a clean countertop.
Preparation Method
Let’s get into the actual process. I’ve broken this down so it feels manageable, even on a busy weeknight.
- Mix the dry ingredients (5 minutes). In your large mixing bowl or stand mixer bowl, whisk together the flour, instant yeast, sugar, and salt. Make sure everything is evenly distributed. The instant yeast goes right in with the flour—no need to bloom it.
- Add the wet ingredients (2 minutes). Make a well in the center of the dry ingredients. Add the room temperature eggs, softened butter, warm milk, orange zest, and vanilla extract. If your butter isn’t soft enough, it won’t incorporate properly, so take the extra minute to make sure it’s really soft.
- Knead the dough (8-10 minutes with mixer, 12-15 by hand). Start mixing on low speed until a shaggy dough forms, then increase to medium speed. The dough should pull away from the sides of the bowl and become smooth and elastic. If it’s too sticky, add flour one tablespoon at a time. If it’s too dry, add milk one teaspoon at a time. You’re looking for a dough that’s soft and slightly tacky but not sticky.
- First rise (45-60 minutes). Shape the dough into a ball and place it in a lightly greased bowl. Cover with plastic wrap or a clean kitchen towel. Let it rise in a warm, draft-free spot until doubled in size. I usually put it in my oven with the light on—it stays around 80°F, which is perfect. If your kitchen is cold, it might take closer to 75 minutes.
- Shape the bread (10 minutes). Punch down the dough gently to release the air. Turn it out onto a lightly floured surface. Divide the dough into two pieces: one larger piece (about two-thirds of the dough) for the base, and one smaller piece (about one-third) for the decorations. Shape the larger piece into a smooth round and place it in your greased 9-inch cake pan.
- Make the bone decorations (5 minutes). Divide the smaller piece of dough into 4-6 equal pieces. Roll each piece into a rope about 4 inches long. These are your “bones” for the traditional pan de muerto look. Place them on top of the base dough in a cross pattern or radiating from the center. Don’t worry about being perfect—the rustic look is part of the charm.
- Second rise (20-30 minutes). Cover the shaped bread loosely with plastic wrap and let it rise until puffy, about 20-30 minutes. It won’t double this time, but it should look noticeably larger and feel soft when you gently press it.
- Bake (25-30 minutes at 350°F). Preheat your oven to 350°F during the last 10 minutes of the second rise. Bake the bread on the middle rack for 25-30 minutes, until the top is golden brown and the bread sounds hollow when tapped on the bottom. If the top is browning too quickly, tent it with aluminum foil after 15 minutes.
- Make the glaze (5 minutes). While the bread bakes, whisk together the powdered sugar, orange blossom water, fresh orange juice, and a pinch of salt. You want a thick but pourable consistency. If it’s too thick, add more orange juice a teaspoon at a time. If it’s too thin, add more powdered sugar.
- Glaze while warm (2 minutes). This is the most important step. As soon as the bread comes out of the oven, let it cool in the pan for 5 minutes, then transfer it to a cooling rack. While it’s still warm, brush the glaze generously over the top. The warmth helps the glaze soak into the bread, creating that moist, fragrant texture. Let it cool completely before slicing.
Cooking Tips & Techniques
I’ve made this quick pan de muerto enough times to know where things can go sideways. Here are the lessons I learned the hard way:
Temperature matters more than you think. If your milk is too hot (over 120°F), it will kill the yeast. If it’s too cold, the rise will take forever. Use an instant-read thermometer if you have one. If you don’t, the milk should feel warm to your wrist, like baby bottle temperature.
Don’t over-knead. I ruined my first two batches because I thought more kneading meant better bread. Nope. Over-kneaded dough becomes tough and dense. Stop when the dough is smooth and springs back when you poke it. If it tears easily when you stretch it, you’ve gone too far.
The glaze timing is everything. I once waited until the bread was completely cool to add the glaze. Big mistake. It just sat on top like a sad, sugary hat. Brush it on while the bread is still warm—about 5 minutes out of the oven—and it will soak in beautifully. The bread absorbs the orange blossom flavor, and every bite tastes like spring.
Use the oven light trick. If your kitchen is cold (like mine in winter), the dough won’t rise properly. Turn your oven on to the lowest setting for 2 minutes, then turn it off and place the dough inside with the light on. It creates a perfect proofing environment. Just don’t forget it’s in there—I’ve definitely preheated the oven with dough inside before. Not my finest moment.
Let it cool before slicing. I know it’s tempting to tear into warm bread, but if you slice it too soon, the texture will be gummy. Let it cool completely on the rack. The glaze will set, the crumb will firm up, and you’ll get those perfect, clean slices.
Variations & Adaptations
This recipe is flexible, and I’ve tried a few different versions depending on what I have on hand or who I’m feeding.
Dairy-Free Version: Substitute the butter with vegan butter (I like Miyoko’s) and use oat milk or almond milk instead of dairy milk. The texture will be slightly less tender, but the flavor is still fantastic. I made this for a friend with a dairy allergy, and she couldn’t tell the difference.
Citrus Swap: If you don’t have orange blossom water, you can use lemon or lime zest in the dough and a simple lemon glaze (lemon juice + powdered sugar). It’s not traditional, but it’s delicious. I did this once when I ran out of orange blossom water, and it became a summer favorite.
Spiced Version: Add 1 teaspoon of cinnamon and ½ teaspoon of nutmeg to the dry ingredients for a warmer, cozier flavor. This is great for fall or winter baking. It pairs beautifully with the orange zest.
Gluten-Free Option: I’ve tested this with a 1:1 gluten-free flour blend (like Bob’s Red Mill), and it works, but the texture is denser and more cake-like. Add an extra tablespoon of milk to compensate for the drier flour. It’s not the same as the original, but it’s still really good.
Savory Twist: Reduce the sugar to 2 tablespoons, skip the glaze, and add 1 teaspoon of dried rosemary or thyme to the dough. Brush the baked bread with melted butter and sprinkle with sea salt. It’s unexpected but amazing with soup or stew.
Serving & Storage Suggestions
This quick pan de muerto is best served warm, but it’s still wonderful at room temperature. Here’s how to make the most of it:
Serving Temperature: Warm is ideal, especially right after the glaze has been brushed on. The bread is soft, the glaze is slightly sticky, and the orange blossom aroma fills the room. If you’re serving it later, pop it in a 300°F oven for 5 minutes to warm it up.
Presentation: Place the glazed loaf on a wooden board or a simple white plate. Garnish with thin strips of orange zest and a light sprinkle of coarse sugar. It looks beautiful without being fussy—perfect for a weeknight dessert or a casual gathering.
What to Serve With: This bread is fantastic on its own, but it pairs beautifully with a cup of Mexican hot chocolate or a strong coffee. For a dessert spread, serve it alongside fresh fruit and a dollop of whipped cream. It also makes an incredible breakfast with a smear of butter or cream cheese.
Storage: Store the bread in an airtight container at room temperature for up to 3 days. Do not refrigerate—it will dry out the bread. The glaze will stay soft and slightly sticky, which is exactly how it should be.
Freezing: You can freeze the unglazed bread for up to 2 months. Wrap it tightly in plastic wrap and then in foil. When you’re ready to serve, thaw it at room temperature, then warm it in the oven and add the glaze. The flavor actually improves after freezing—the orange zest seems to deepen.
Reheating: For best results, reheat individual slices in a toaster oven or in a skillet with a little butter. The edges get slightly crispy while the inside stays soft. Microwave works in a pinch, but the texture will be a bit chewy.
Nutritional Information & Benefits
Let’s be real—this is a treat, not a health food. But it does have some redeeming qualities. Here’s the estimated nutritional breakdown per serving (based on 8 servings):
- Calories: 285
- Total Fat: 8g
- Saturated Fat: 4g
- Cholesterol: 55mg
- Sodium: 180mg
- Total Carbohydrates: 47g
- Dietary Fiber: 1g
- Sugars: 22g
- Protein: 6g
Health Benefits: The orange zest provides a small dose of vitamin C and antioxidants. The eggs add protein and healthy fats. And honestly? The mental health benefit of eating warm, homemade bread is real. I’m not a nutritionist, but I firmly believe that food made with care is good for the soul.
Dietary Considerations: This recipe contains gluten, dairy, and eggs. It’s not suitable for vegan or gluten-free diets without modifications (see variations above). If you’re watching your sugar intake, you can reduce the sugar in the dough to ⅓ cup and use a lighter hand with the glaze.
Conclusion
This quick pan de muerto started as a mistake—a wrong ingredient, a distracted moment, a happy accident. But it’s become one of my most-requested recipes, and honestly, I’m still a little surprised every time it works. That’s the thing about cooking, right? Sometimes the best dishes come from the moments when you stop trying so hard and just let things happen.
I hope you give this recipe a try, especially on a busy weeknight when you need something that feels special without the stress. Customize it however you like—swap the citrus, add some spice, or keep it traditional. The beauty of this bread is that it’s forgiving. It wants to be good.
If you make this quick pan de muerto, I’d love to hear about it. Drop a comment below and tell me how it turned out, or share your own twist on the recipe. And if you’re looking for more easy weeknight bakes, check out my easy cinnamon rolls or simple soda bread for more quick bread options. Happy baking, friends!
Frequently Asked Questions
Can I make this pan de muerto ahead of time?
Yes! You can prepare the dough through the first rise, then refrigerate it overnight. The next day, let it come to room temperature for about 30 minutes, then shape, rise, and bake as directed. The cold fermentation actually develops more flavor.
What if I can’t find orange blossom water?
No problem. You can substitute with 2 tablespoons of fresh orange juice and ½ teaspoon of vanilla extract. It won’t have the same floral notes, but it will still be delicious. You can also use rose water if you have it—just use 1 tablespoon instead of 2, as it’s stronger.
Why didn’t my dough rise?
This usually happens for one of three reasons: your yeast was expired, your milk was too hot (killed the yeast), or your kitchen was too cold. Check the expiration date on your yeast, use a thermometer for your milk, and find a warm spot for rising. If all else fails, you can still bake the dough—it will be denser but still tasty.
Can I use active dry yeast instead of instant?
Yes, but you’ll need to proof it first. Dissolve the yeast in the warm milk with a pinch of sugar and let it sit for 5-10 minutes until it’s foamy. Then add it with the other wet ingredients. The rise times might be slightly longer, so be patient.
How do I know when the bread is fully baked?
The top should be golden brown, and the bread should sound hollow when you tap the bottom. You can also use an instant-read thermometer—the internal temperature should be around 190-200°F. If you’re unsure, it’s better to bake a few extra minutes than to underbake.
Pin This Recipe!
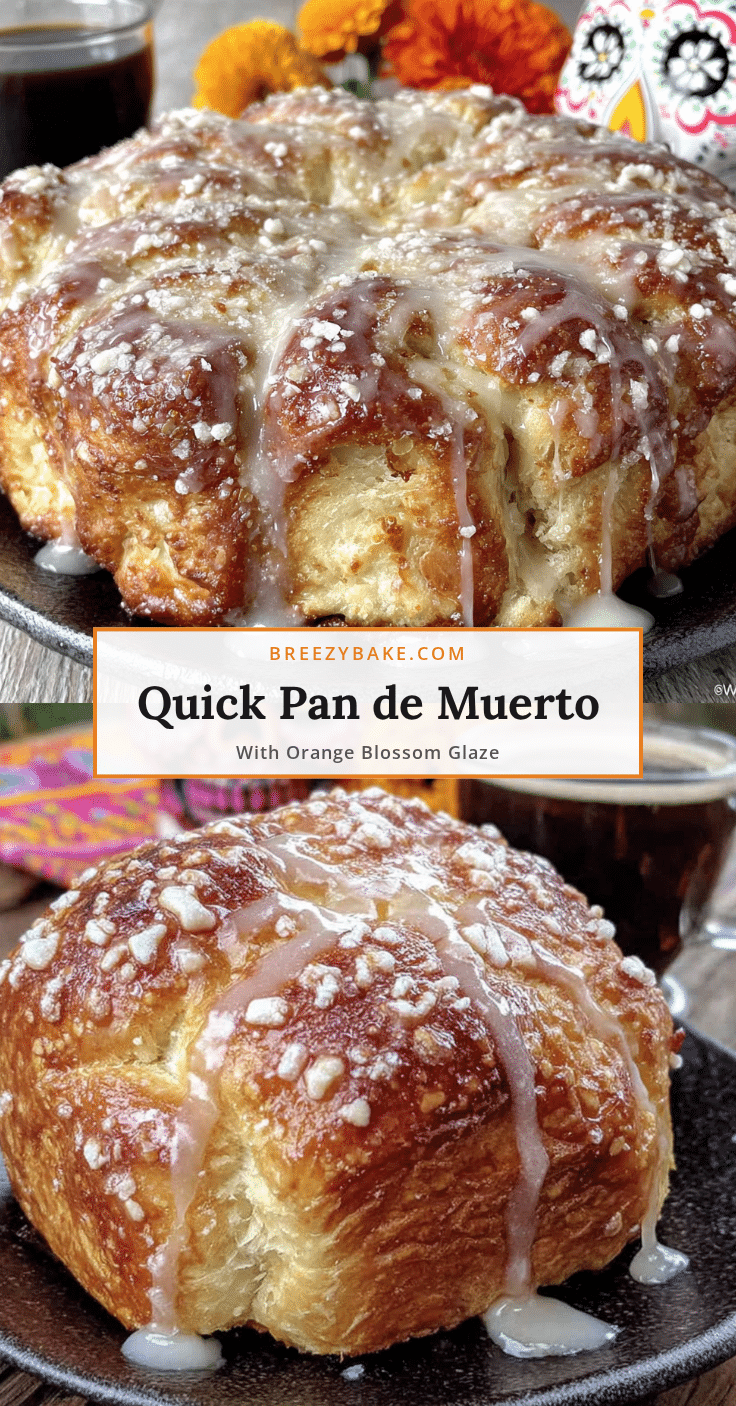
Quick Pan de Muerto with Easy Orange Blossom Glaze

A quick, weeknight-friendly version of the traditional Day of the Dead bread, made with simple ingredients and an orange blossom glaze that soaks into the warm bread for a moist, fragrant loaf.
- Prep Time: 20 minutes
- Cook Time: 30 minutes
- Total Time: 1 hour 30 minutes
- Yield: 8 servings 1x
- Category: Dessert
- Cuisine: Mexican
Ingredients
- 3 cups (360g) all-purpose flour
- 2 ¼ teaspoons instant yeast (one packet)
- ½ cup (100g) granulated sugar
- ½ teaspoon salt
- 2 large eggs, room temperature
- 4 tablespoons (56g) unsalted butter, softened
- ½ cup (120ml) warm milk (about 110°F)
- 1 tablespoon orange zest (from about 1 large orange)
- 1 teaspoon vanilla extract
- 1 cup (120g) powdered sugar, sifted
- 2 tablespoons orange blossom water
- 2 tablespoons fresh orange juice
- Pinch of salt
- Orange zest strips, for garnish (optional)
- Coarse sugar, for sprinkling (optional)
Instructions
- Mix the dry ingredients: In a large mixing bowl or stand mixer bowl, whisk together the flour, instant yeast, sugar, and salt.
- Add the wet ingredients: Make a well in the center of the dry ingredients. Add the room temperature eggs, softened butter, warm milk, orange zest, and vanilla extract.
- Knead the dough: Start mixing on low speed until a shaggy dough forms, then increase to medium speed. Knead for 8-10 minutes with a mixer or 12-15 minutes by hand until the dough is smooth and elastic. If too sticky, add flour one tablespoon at a time; if too dry, add milk one teaspoon at a time.
- First rise: Shape the dough into a ball and place it in a lightly greased bowl. Cover with plastic wrap or a clean kitchen towel. Let it rise in a warm, draft-free spot for 45-60 minutes until doubled in size.
- Shape the bread: Punch down the dough gently. Turn it out onto a lightly floured surface. Divide into two pieces: one larger piece (about two-thirds) for the base, and one smaller piece (about one-third) for decorations. Shape the larger piece into a smooth round and place it in a greased 9-inch cake pan.
- Make the bone decorations: Divide the smaller piece of dough into 4-6 equal pieces. Roll each into a rope about 4 inches long. Place them on top of the base dough in a cross pattern or radiating from the center.
- Second rise: Cover the shaped bread loosely with plastic wrap and let it rise for 20-30 minutes until puffy.
- Bake: Preheat oven to 350°F during the last 10 minutes of the second rise. Bake on the middle rack for 25-30 minutes, until golden brown and the bread sounds hollow when tapped on the bottom. If browning too quickly, tent with foil after 15 minutes.
- Make the glaze: While the bread bakes, whisk together the powdered sugar, orange blossom water, fresh orange juice, and a pinch of salt until thick but pourable.
- Glaze while warm: Let the bread cool in the pan for 5 minutes, then transfer to a cooling rack. While still warm, brush the glaze generously over the top. Let cool completely before slicing.
Notes
Temperature matters: milk should be warm (about 110°F) but not hot. Don’t over-knead; stop when dough is smooth and springs back. Brush glaze on while bread is still warm for best absorption. Use the oven light trick for proofing in cold kitchens. Let bread cool completely before slicing to avoid gummy texture.
Nutrition
- Serving Size: 1 slice (1/8 of loaf
- Calories: 285
- Sugar: 22
- Sodium: 180
- Fat: 8
- Saturated Fat: 4
- Carbohydrates: 47
- Fiber: 1
- Protein: 6
Keywords: pan de muerto, day of the dead bread, orange blossom glaze, quick bread, mexican dessert, citrus bread, weeknight baking


