The elementary school Halloween party was in four hours and I’d completely forgotten. My son reminded me at breakfast, his face a mask of panic that I was trying not to mirror. Every other parent would be bringing elaborate spider cupcakes with fondant legs or those perfectly decorated sugar cookies that look like they belong in a bakery window. I had a box of chocolate sandwich cookies, some pretzel sticks, and about twenty minutes before I had to leave for work. Honestly, I stood in my kitchen staring at the pantry like it was going to magically produce a Pinterest-worthy treat. It didn’t.
But then I remembered a trick my mom used to pull when we were kids and she was running late for a bake sale. She’d take regular cookies, dip them in melted chocolate, and call them something fun. Genius, right? So I grabbed that box of cookies, melted some chocolate chips I found lurking in the back of the cabinet, and started improvising. I mean, I was literally raiding the pantry like a contestant on a cooking show with no budget and a ticking clock. The pretzels became spider legs, and some candy eyes I’d bought for a different project months ago became… well, eyes. It was a mess. Chocolate got on the counter, the floor, and somehow my elbow. But twenty minutes later, I had a plate full of the cutest little spider cookies you’ve ever seen.
The party was a blur of costumes and chaos, but here’s the thing—my quick spider cookies with chocolate cookie crunch were gone in the first fifteen minutes. Kids were coming back for thirds. Parents were asking for the recipe. One dad actually asked if I’d cater his kid’s birthday party next month. And I just stood there, trying not to laugh, because the whole thing started with a forgotten obligation and a box of store-bought cookies. That’s the kind of recipe that stays with you, you know? The one that proves you don’t need three days and a culinary degree to make something that feels special. Maybe you’ve been there—staring at a calendar with a deadline looming and no clue what to make. Trust me, these cookies are your answer.
Why You’ll Love This Recipe
Let me tell you why these quick spider cookies with chocolate cookie crunch have become my secret weapon for every Halloween event, last-minute school function, and even casual get-togethers where I want to look like I tried harder than I actually did.
- Incredibly Fast: From start to finish, you’re looking at about 20 minutes. That’s less time than it takes to watch a single episode of a sitcom. No chilling dough, no complicated shaping, no waiting around.
- Simple Ingredients: You probably have most of these things in your kitchen right now. Chocolate sandwich cookies, chocolate chips, pretzel sticks, and candy eyes. That’s it. No weird specialty items that you’ll use once and forget about.
- Perfect for Halloween Parties: These are literally designed to look like spiders. Kids lose their minds over them, and adults think you’re way more creative than you actually are. It’s a win-win.
- Crowd-Pleaser: I’ve brought these to three different events now, and they disappear every single time. Even people who claim they don’t like sweets end up grabbing one “just to try” and then coming back for more.
- Unbelievably Delicious: The combination of the crunchy cookie base with the smooth chocolate coating and the salty pretzel legs is honestly addictive. It’s the perfect balance of textures and flavors.
What makes this recipe different from every other spider cookie out there? It’s the chocolate cookie crunch, my friend. Most recipes use a plain sugar cookie or a bland shortbread as the base. But starting with a chocolate sandwich cookie? That gives you a deep, rich cocoa flavor and a satisfying crunch that plain cookies just can’t match. Plus, the filling inside the cookie adds a creamy surprise that makes every bite better than the last. This isn’t just another version of a Halloween treat—it’s the best version, born from necessity and perfected through repetition.
This recipe isn’t just good—it’s the kind that makes you close your eyes after the first bite. It’s comfort food disguised as a spooky decoration. It’s healthier on your schedule than a complicated baking project, but with the same soul-soothing satisfaction. And it’s perfect for impressing guests without stress, or turning a simple Tuesday night into something memorable.
What Ingredients You Will Need
This recipe uses simple, everyday ingredients to deliver maximum flavor and fun without the fuss. Every component has a specific job, and together they create something that looks impressive but takes almost no effort. Here’s what you’ll need:
- Chocolate Sandwich Cookies (24 cookies) – This is the star of the show. I recommend using Oreo brand for the best texture and flavor, but any chocolate sandwich cookie with a cream filling will work. The key is that they’re sturdy enough to hold the chocolate coating without falling apart. If you’re feeling fancy, you can even use the double-stuff variety for extra creaminess.
- Semi-Sweet Chocolate Chips (1 cup, about 175g) – These melt down into a smooth coating that hardens beautifully. I prefer Ghirardelli or Guittard for the best melt and shine, but store brands work fine too. You can also use milk chocolate if you prefer a sweeter finish, or dark chocolate if you want a more intense cocoa flavor.
- Coconut Oil (1 tablespoon, 15ml) – This is the secret ingredient for a glossy, smooth chocolate coating that sets up perfectly. It thins the chocolate just enough to make dipping easy and gives it that professional-looking sheen. If you don’t have coconut oil, you can use vegetable oil or skip it entirely—the coating will just be a bit thicker and less shiny.
- Pretzel Sticks (48 pieces) – These become the spider legs. You want the thin, stick-style pretzels, not the thick sourdough ones. They’re the perfect size and shape for eight little spider legs. Plus, the salty flavor contrasts beautifully with the sweet chocolate.
- Candy Eyes (48 pieces) – These are what make your spiders look alive. You can find them at any craft store, grocery store, or online. They come in different sizes—I like the medium ones for the best proportion. If you can’t find candy eyes, you can use white chocolate chips with a tiny dot of dark chocolate in the center.
- Optional: White Chocolate Chips (¼ cup, about 45g) – If you want to add web designs or extra decoration, white chocolate is great for drizzling. It’s totally optional but adds a nice touch for presentation.
One thing I’ve learned from making these multiple times—quality matters with the chocolate. Cheap chocolate chips sometimes have stabilizers that prevent them from melting smoothly. Spend the extra dollar on a good brand. Your cookies will thank you. And for the candy eyes, make sure they’re fresh. Old ones can get hard and lose their shine.
If you need substitutions, here are some options. For a dairy-free version, use dairy-free chocolate chips and skip the white chocolate drizzle. For a gluten-free option, use gluten-free chocolate sandwich cookies and gluten-free pretzels. The recipe is naturally egg-free and nut-free, which makes it great for school parties where allergies are a concern.
Equipment Needed
You don’t need a fancy kitchen to make these cookies. In fact, I’ve made them in a hotel room microwave before. Here’s what you’ll need:
- Microwave-Safe Bowl – For melting the chocolate. Glass or ceramic works best. Avoid plastic bowls because they can retain odors and don’t heat evenly.
- Baking Sheet – Lined with parchment paper or a silicone baking mat. This is where your finished spiders will set. The parchment is non-negotiable unless you want chocolate stuck to your pan forever.
- Spatula or Fork – For dipping the cookies into the chocolate. A fork actually works better because it lets the excess chocolate drip off. I learned this after my first batch came out with thick, lumpy chocolate.
- Small Knife or Toothpick – For placing the candy eyes and adjusting the pretzel legs before the chocolate sets. A toothpick is perfect for tiny adjustments.
- Refrigerator Space – You’ll need a flat spot in your fridge to let the chocolate set quickly. If it’s cold outside, you can use your garage or porch instead.
If you don’t have a microwave, you can melt the chocolate using a double boiler on the stove. Just put a heat-safe bowl over a pot of simmering water, making sure the bottom of the bowl doesn’t touch the water. Stir until smooth. It takes a few extra minutes but works just as well. I’ve also used a hair dryer in a pinch to warm up chocolate that started to seize—don’t ask.
Preparation Method

Let me walk you through this step by step. I’ve made these cookies at least a dozen times now, so I know exactly where things can go wrong and how to fix them.
- Prepare Your Workspace – Line a baking sheet with parchment paper and set it aside. Break the pretzel sticks in half so you have 96 pieces—that’s enough for 24 spiders with 4 legs each. Actually, break a few extra because some will break wrong and you’ll want spares. Trust me on this.
- Melt the Chocolate – Place the semi-sweet chocolate chips and coconut oil in a microwave-safe bowl. Microwave in 30-second intervals, stirring well after each interval. It usually takes about 90 seconds total. Stop when the chocolate is mostly melted and stir until completely smooth. The residual heat will finish the job. Warning: Don’t overheat the chocolate or it will seize up and become grainy. If that happens, you can try adding a teaspoon of coconut oil and stirring vigorously, but sometimes you just have to start over.
- Prepare the Cookies – Gently twist each chocolate sandwich cookie to separate the halves. The cream filling should stay on one side. You can scrape off the filling if you want a cleaner look, but I leave it on because it adds flavor and helps the chocolate coating stick better. Plus, it’s less work.
- Dip the Cookies – Holding a cookie half by the edges, dip the top (non-cream side) into the melted chocolate. Use a fork or spatula to make sure the entire top surface is covered. Let the excess chocolate drip off back into the bowl. Place the cookie, chocolate side up, on the prepared baking sheet. Repeat with all cookie halves. You should have 48 halves total.
- Add the Legs – While the chocolate is still wet, insert four pretzel stick halves into each cookie half—two on each side—angled outward like spider legs. Push them in gently so they stay put. Work quickly because the chocolate starts to set fast. If it hardens before you add the legs, just dip the pretzel tips in melted chocolate and attach them that way.
- Attach the Eyes – Place two candy eyes on the front of each spider, just above where the legs meet the body. Press them gently into the chocolate so they stick. If the chocolate has already started to set, dab a tiny bit of melted chocolate on the back of each eye before placing it.
- Set the Cookies – Place the baking sheet in the refrigerator for 10-15 minutes, or until the chocolate is completely firm. You’ll know it’s ready when the chocolate looks matte and feels hard to the touch. If you’re in a hurry, 10 minutes in the freezer works too—just don’t forget them in there.
- Optional Decoration – If you want to add white chocolate webs or drizzle, melt the white chocolate chips the same way you melted the dark chocolate. Use a fork or a small piping bag to drizzle thin lines over the set spiders. This step is totally optional but makes them look extra fancy.
One thing I want you to know—your first spider might look a little wonky. That’s okay. Mine did too. By the third one, you’ll get the hang of it. And honestly, imperfect spiders look more realistic anyway. Real spiders aren’t perfectly symmetrical, right? That’s my story and I’m sticking to it.
Cooking Tips & Techniques
After making these cookies more times than I care to count, I’ve collected a few tricks that make the process smoother and the results better. Let me share what I’ve learned the hard way.
Temperature Matters – Chocolate is temperamental. If your kitchen is hot and humid, the chocolate will take longer to set and might stay sticky. Work in a cool room if possible. I once made these on a humid August afternoon and had to refrigerate them twice because the chocolate wouldn’t harden. Learn from my mistakes.
Don’t Overcrowd – When you’re dipping cookies, work in batches of 4-6 at a time. If you try to dip all 48 at once, the chocolate in your bowl will start to set and get clumpy. Reheat it in 10-second bursts if needed. Better yet, keep a small bowl of warm water nearby and set your melting bowl on top of it to keep the chocolate fluid.
The Leg Placement Trick – Here’s something I figured out after a few batches. Instead of trying to insert all four legs at once, insert the two front legs first, then the two back legs. This gives you better control over the angle and prevents the legs from crossing in the middle. And make sure the legs are pointing slightly outward and upward—it makes the spiders look more dynamic and less like they’re doing push-ups.
Common Mistake: Too Much Chocolate – When you dip the cookie, you don’t need a thick layer of chocolate. A thin, even coating is enough. If the chocolate is too thick, it will pool around the edges and make the cookies look messy. Tap the fork gently on the edge of the bowl to remove excess chocolate before placing the cookie on the sheet.
Timing Strategy – Here’s how I multitask. While the first batch of dipped cookies is in the fridge setting, I start dipping the next batch. By the time I’m done with the second batch, the first batch is ready for decoration. This keeps the assembly line moving and prevents bottlenecks. You’ll have all 24 spiders done in under 30 minutes this way.
My Biggest Failure – The first time I made these, I forgot to add the coconut oil to the chocolate. The coating was thick, lumpy, and looked terrible. I tried to salvage it by remelting the chocolate with oil, but the cookies were already soggy from sitting in the warm chocolate too long. I had to throw the whole batch away and start over. Now I write the coconut oil on my hand before I start. Not kidding.
Variations & Adaptations
One of the best things about this recipe is how easy it is to customize. Here are some variations I’ve tried and loved.
Peanut Butter Spiders – Instead of using plain chocolate sandwich cookies, use the peanut butter variety. The combination of peanut butter and chocolate is incredible. You can also add a drizzle of melted peanut butter on top for extra flavor. My kids beg for this version every year.
White Chocolate Spiders – Swap the semi-sweet chocolate for white chocolate chips. The white coating makes the spiders look ghostly and pale, which is actually kind of cool for a Halloween theme. Use dark chocolate for the eyes instead of candy eyes for a dramatic contrast. These look like albino spiders—creepy and beautiful at the same time.
Gluten-Free Version – Use gluten-free chocolate sandwich cookies and gluten-free pretzel sticks. Most candy eyes are naturally gluten-free, but always check the label. This version works just as well as the original and tastes identical. I’ve served these to gluten-sensitive friends and they couldn’t tell the difference.
Spider Web Design – After the chocolate sets, melt some white chocolate and use a toothpick to draw spiral webs on top of each spider. Start from the center and work outward. It takes a steady hand but looks amazing. I tried this for a Halloween party and people thought I bought them from a bakery.
Mint Chocolate Spiders – Use mint-flavored chocolate chips instead of semi-sweet. The mint adds a refreshing twist that cuts through the richness of the cookies. You can also crush a peppermint candy and sprinkle it on top before the chocolate sets. This is my personal favorite for Christmas instead of Halloween.
Spicy Chocolate Spiders – Add a pinch of cayenne pepper or chili powder to the melted chocolate. The heat sneaks up on you and pairs beautifully with the sweet cookie. It’s unexpected and memorable. I made these for a grown-up Halloween party and they were a huge hit with the spicy food lovers.
Serving & Storage Suggestions
These cookies are best served at room temperature, straight from the fridge or after sitting out for about 10 minutes. The chocolate should be firm but not rock-hard. If they’ve been in the fridge for more than an hour, let them sit on the counter for a few minutes before serving so the chocolate softens slightly.
For presentation, I like to arrange them on a black or orange platter to match the Halloween theme. You can also place them on a bed of crushed chocolate cookies to look like dirt. Add some plastic spiders or fake cobwebs around the platter for extra spooky effect. Kids love this.
These spiders pair perfectly with warm apple cider, hot chocolate, or a glass of cold milk. For an adult gathering, they go surprisingly well with a dark stout or a bourbon cocktail. The bitterness of the beer or whiskey balances the sweetness of the cookies beautifully.
Storage Instructions – Store the finished spiders in an airtight container in the refrigerator for up to one week. Place them in a single layer with parchment paper between layers to prevent the legs from breaking. Do not stack them too high or the pretzel legs will snap off.
Freezer Instructions – You can freeze these cookies for up to three months. Place them in a single layer on a baking sheet and freeze until solid, then transfer to a freezer-safe container with parchment paper between layers. To thaw, let them sit in the refrigerator overnight or at room temperature for about 30 minutes. The chocolate might develop a slight bloom (white streaks) after freezing, but they’ll still taste great.
Flavor Development – Here’s something interesting. These cookies actually taste better the next day. The flavors meld together overnight, and the chocolate sets to the perfect texture. If you’re making them for a party, I recommend making them the day before. Your future self will thank you.
Nutritional Information & Benefits
Let’s be honest—these are cookies, not health food. But here’s the nutritional breakdown for one spider cookie (based on using standard ingredients).
| Nutrient | Amount per Spider |
|---|---|
| Calories | 145 |
| Total Fat | 8g |
| Saturated Fat | 4g |
| Carbohydrates | 18g |
| Sugar | 12g |
| Protein | 2g |
| Sodium | 120mg |
While these aren’t exactly a health food, the dark chocolate does contain antioxidants and flavonoids that can support heart health in small amounts. The pretzels provide a tiny bit of iron and B vitamins from the enriched flour. And the coconut oil contains medium-chain triglycerides (MCTs) that some studies suggest may support metabolism. But let’s be real—you’re eating these because they’re delicious and fun, not because they’re a superfood.
Dietary Considerations – This recipe is naturally egg-free, nut-free, and soy-free (depending on your chocolate brand). It can be made gluten-free and dairy-free with simple substitutions. Always check labels on chocolate chips and cookies for potential allergens, especially if you’re serving these at a school or public event.
From a wellness perspective, I believe in balance. These cookies are a treat, meant to be enjoyed in moderation. I make them for special occasions and holidays, not for everyday snacking. And honestly, the joy they bring to kids and adults alike is worth every calorie.
Conclusion
These quick spider cookies with chocolate cookie crunch have become more than just a Halloween recipe in my house. They’re the recipe I turn to when I need to look like I have my life together but secretly don’t. They’re the recipe that saves me from last-minute panic and makes me look like a hero at school parties. And honestly, they’re just really, really good.
I hope you give these a try, whether you’re in a time crunch like I was or you just want a fun baking project with your kids. Don’t be afraid to customize them—add different decorations, try different chocolate flavors, make them your own. That’s the beauty of simple recipes like this one. They’re a starting point, not a final destination.
If you make these, I’d love to hear about it. Leave a comment below and tell me how they turned out. Did your kids love them? Did you add your own twist? Did you forget the coconut oil like I did and have to start over? Share your stories with me. And if you’re looking for more quick and easy treats, check out my no-bake chocolate oat bars or my easy Halloween pretzel treats.
Happy haunting, happy baking, and remember—sometimes the best recipes come from the biggest disasters. Now go make some spiders!
Frequently Asked Questions
Can I use milk chocolate instead of semi-sweet?
Absolutely. Milk chocolate will make the spiders sweeter and creamier. Just keep in mind that milk chocolate is softer than semi-sweet, so the coating might not set as firmly. Add an extra teaspoon of coconut oil to help it harden.
How far in advance can I make these cookies?
You can make them up to a week ahead and store them in the refrigerator. They actually taste better after a day or two because the flavors meld together. Just keep them in an airtight container to prevent them from absorbing fridge odors.
My chocolate seized up and became grainy. What went wrong?
This usually happens when the chocolate gets too hot or when a tiny bit of water gets into the bowl. To fix it, try adding a teaspoon of coconut oil or vegetable oil and stirring vigorously. If that doesn’t work, you’ll need to start over with fresh chocolate. Always use dry bowls and utensils when melting chocolate.
Can I use regular pretzels instead of pretzel sticks?
You can, but they won’t look as spider-like. Regular pretzels are thicker and harder to break into leg-shaped pieces. If that’s all you have, try breaking them into thin, stick-like pieces. Or you can use thin breadsticks or even chow mein noodles for a different look.
How do I prevent the pretzel legs from falling off?
Make sure you insert the legs while the chocolate is still wet and sticky. If the chocolate has started to set, dip the tip of each pretzel in melted chocolate before inserting it. Also, don’t wiggle the legs too much once they’re in place—let the chocolate hold them firm.
Pin This Recipe!

Quick Spider Cookies with Easy Chocolate Crunch
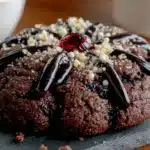
These quick spider cookies with chocolate cookie crunch are the perfect last-minute Halloween treat. Made with chocolate sandwich cookies, melted chocolate, pretzel sticks, and candy eyes, they come together in just 20 minutes and are always a crowd-pleaser.
- Prep Time: 10 minutes
- Cook Time: 10 minutes
- Total Time: 20 minutes
- Yield: 24 spiders 1x
- Category: Dessert
- Cuisine: American
Ingredients
- 24 chocolate sandwich cookies (e.g., Oreo)
- 1 cup semi-sweet chocolate chips (about 175g)
- 1 tablespoon coconut oil (15ml)
- 48 pretzel sticks
- 48 candy eyes
- ¼ cup white chocolate chips, optional (about 45g)
Instructions
- Line a baking sheet with parchment paper. Break pretzel sticks in half to make 96 pieces (plus a few extra for mistakes).
- Place semi-sweet chocolate chips and coconut oil in a microwave-safe bowl. Microwave in 30-second intervals, stirring well after each, until smooth (about 90 seconds total). Do not overheat.
- Gently twist each chocolate sandwich cookie to separate the halves, leaving the cream filling on one side.
- Holding a cookie half by the edges, dip the top (non-cream side) into the melted chocolate. Use a fork to ensure full coverage, then let excess drip off. Place chocolate side up on the prepared baking sheet. Repeat with all 48 halves.
- While the chocolate is still wet, insert four pretzel stick halves into each cookie half—two on each side—angled outward like spider legs. Work quickly.
- Place two candy eyes on the front of each spider, just above where the legs meet the body. Press gently into the chocolate.
- Refrigerate the baking sheet for 10-15 minutes until the chocolate is completely firm.
- Optional: Melt white chocolate chips and drizzle over set spiders for decoration.
Notes
Work in a cool room to help the chocolate set. If the chocolate starts to set before adding legs, dip pretzel tips in melted chocolate to attach. For best results, make the day before serving as flavors meld overnight. Store in an airtight container in the refrigerator for up to one week.
Nutrition
- Serving Size: 1 spider cookie
- Calories: 145
- Sugar: 12
- Sodium: 120
- Fat: 8
- Saturated Fat: 4
- Carbohydrates: 18
- Fiber: 1
- Protein: 2
Keywords: spider cookies, Halloween cookies, no-bake cookies, chocolate cookies, quick dessert, easy Halloween treat, kid-friendly


