My niece asked why I couldn’t just drag a toothpick through the melted chocolate instead of piping those perfect little spiderweb lines. I was halfway through explaining that you need a steady hand and a proper piping bag for that kind of precision work. Then I stopped.
Honestly, I’d been stressing about these spooky spiderweb chocolate cheesecake bars for Halloween for days. The piping bag was giving me grief—chocolate seeping through the tip, my hands shaking from too much coffee. My niece, all of nine years old, watched me struggle and shrugged. “Just use a toothpick. It’s faster.”
I almost laughed. But something about her confidence made me hand her the pan of cheesecake batter. She dropped spoonfuls of melted chocolate on top, grabbed a plain wooden toothpick from the drawer, and dragged it through in one fluid motion. The web formed perfectly. Like, perfectly. I stood there with my fancy piping tip in my hand, feeling both humbled and absolutely delighted.
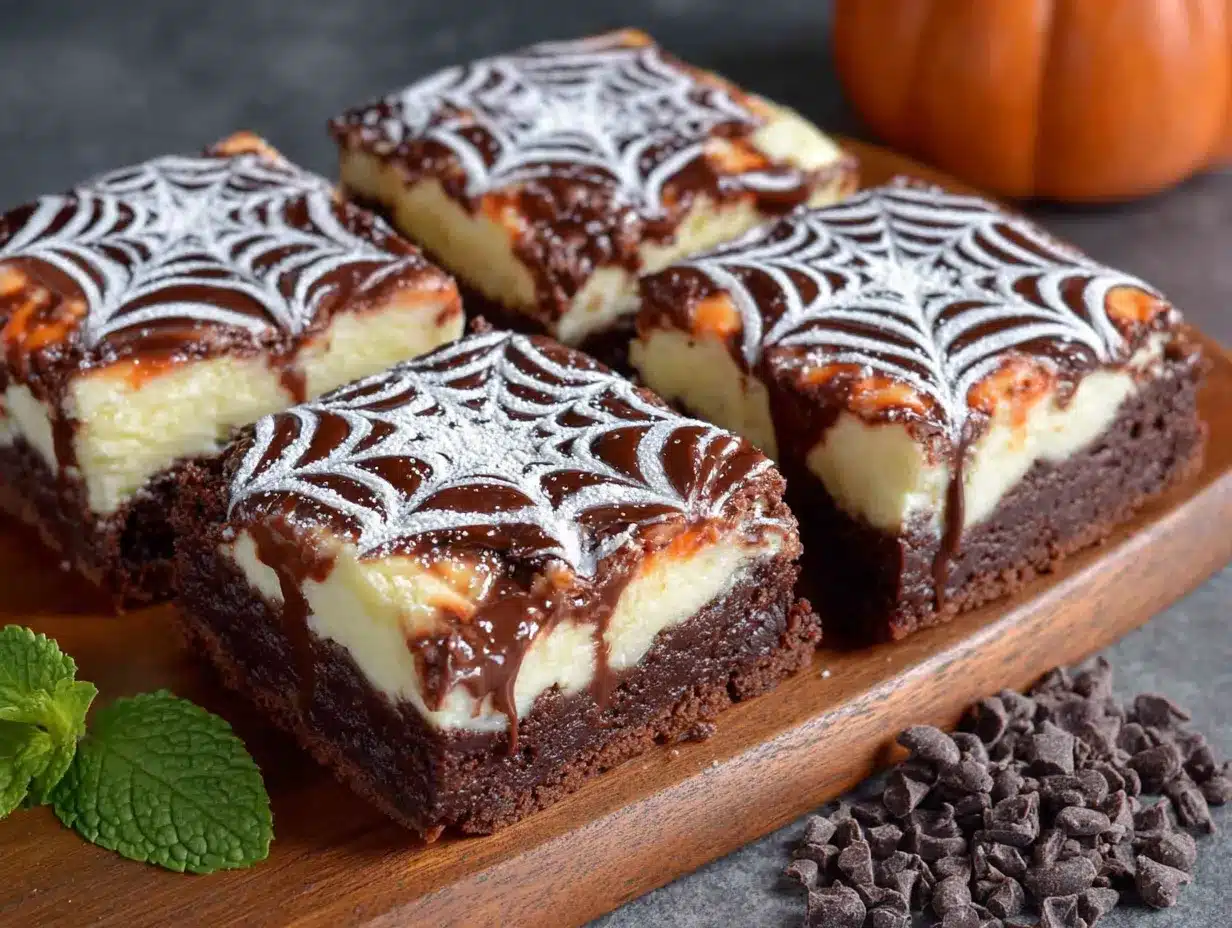
That’s the thing about these spooky spiderweb chocolate cheesecake bars for Halloween—they don’t need to be complicated to look spectacular. The rich, creamy cheesecake layer sits on a buttery Oreo crust, topped with a dramatic chocolate spiderweb that looks like it was spun by a very talented (and very festive) spider. And the best part? You can totally nail that web design on your first try, even if you’ve never decorated a dessert in your life.
Maybe you’ve been there—staring at a Pinterest-perfect Halloween dessert, convinced you need professional pastry skills to pull it off. Let me tell you, I learned the hard way that sometimes the simplest method wins. These bars have become my go-to for every Halloween gathering, and not just because they’re gorgeous. The contrast between the tangy cheesecake and the dark, fudgy chocolate is next-level good. The Oreo crust adds that perfect crunch. And the spiderweb? It’s practically foolproof.
I keep making these bars because they remind me that cooking (and baking) is supposed to be fun. Sometimes the best tricks come from the most unexpected teachers.
Why You’ll Love This Recipe
Let me be real with you—I’ve tested a lot of cheesecake bar recipes over the years. Some were too dense. Some cracked beyond repair. Some just didn’t have that wow factor for Halloween. These spooky spiderweb chocolate cheesecake bars are different. Here’s why you’ll fall for them:
- Quick & Easy : Comes together in about 30 minutes of active prep time. The oven does the rest of the work. Perfect for busy Halloween weeknights when you’re juggling costume shopping and pumpkin carving.
- Simple Ingredients : No weird specialty items. Cream cheese, sour cream, eggs, sugar, Oreos, butter, and chocolate chips. You probably have most of this in your kitchen right now.
- Perfect for Halloween Parties : These bars look like they took hours of intricate decorating. Your guests will think you’re a pastry wizard. I’m not going to tell them about the toothpick trick if you don’t.
- Crowd-Pleaser : Kids love the spooky web design. Adults love the rich, creamy texture. Everyone goes back for seconds. I’ve watched these disappear at three different Halloween potlucks.
- Unbelievably Delicious : The tangy cheesecake balances the sweet chocolate perfectly. The Oreo crust adds that nostalgic cookies-and-cream flavor. Every bite hits that sweet spot.
What makes these bars different from every other Halloween dessert out there? It’s the texture. I use a water bath method that keeps the cheesecake silky smooth without any cracks. And that spiderweb? It’s not just for looks—the melted chocolate creates little pockets of fudgy goodness throughout the top layer. You get the creamy cheesecake, the crunchy crust, and the rich chocolate all in one forkful.
This is the kind of dessert that makes you close your eyes after the first bite. It’s comfort food dressed up in its Halloween best—familiar and cozy, but with a little spooky flair. Perfect for impressing guests without stress, or turning a simple Tuesday night into something memorable.
What Ingredients You Will Need
This recipe uses simple, pantry-friendly ingredients to deliver bold flavor and that show-stopping Halloween look. Most of these are probably already in your kitchen, which makes these spooky spiderweb chocolate cheesecake bars dangerously easy to whip up on a whim.
For the Oreo Crust
- 24 Oreo cookies (regular, not double-stuffed) — (the filling helps bind the crust)
- 5 tablespoons unsalted butter, melted — (use salted butter if that’s what you have, just skip the salt in the crust)
- Pinch of salt — (optional, but balances the sweetness)
For the Cheesecake Filling
- 16 ounces (450g) cream cheese, softened to room temperature — (full-fat is best for that creamy texture, I prefer Philadelphia brand)
- 3/4 cup (150g) granulated sugar
- 2 large eggs, room temperature — (cold eggs can make the batter lumpy)
- 1/2 cup (120ml) sour cream, room temperature — (adds tanginess and keeps the cheesecake silky)
- 1 teaspoon vanilla extract
- 1/4 teaspoon salt
For the Spiderweb Topping
- 1/2 cup (90g) semi-sweet chocolate chips — (I like Ghirardelli for smooth melting)
- 2 tablespoons heavy cream — (helps the chocolate stay fluid for piping)
- 1 tablespoon unsalted butter — (adds shine and makes the chocolate easier to work with)
Ingredient Tips from My Kitchen : Always bring your cream cheese, eggs, and sour cream to room temperature before starting. I know it’s tempting to rush this step, but cold ingredients create a lumpy cheesecake batter. Set them out on the counter about an hour before you start baking. If you’re short on time, you can soften cream cheese in the microwave for about 15 seconds—just watch it carefully so it doesn’t melt.
For the chocolate, I recommend using good-quality chocolate chips or chopped chocolate bars. The melting process is smoother, and the flavor is noticeably richer. If you only have milk chocolate on hand, that works too—your spiderweb will just be a little sweeter and lighter in color.
Substitution Guidance : Need a gluten-free version? Use gluten-free chocolate sandwich cookies for the crust. The rest of the ingredients are naturally gluten-free. For a dairy-free option, use dairy-free cream cheese, coconut cream instead of sour cream, and a vegan butter substitute. The texture will be slightly different, but still delicious.
Equipment Needed
You don’t need a fancy pastry kitchen to pull off these spooky spiderweb chocolate cheesecake bars. Here’s what you’ll actually use:
- 9×9-inch square baking pan — (an 8×8 works too, your bars will just be slightly thicker and need a few extra minutes of baking time)
- Parchment paper — (don’t skip this! It makes lifting the bars out so much easier)
- Food processor or zip-top bag and rolling pin — (for crushing the Oreos)
- Electric hand mixer or stand mixer — (a whisk and some elbow grease works too, but your arm will thank you for the mixer)
- Medium mixing bowls — (one for the crust, one for the cheesecake batter)
- Spatula — (for scraping every last bit of cheesecake goodness)
- Small microwave-safe bowl — (for melting the chocolate)
- Toothpick — (the real hero of this recipe, trust me)
- Large roasting pan — (for the water bath, optional but recommended)
- Aluminum foil — (to wrap the pan if using a water bath)
I’ve made these bars with and without the water bath. The water bath gives you that perfectly smooth, crack-free top. But honestly? If you’re topping them with a spiderweb anyway, nobody will see a few small cracks. Don’t stress about it. I’ve forgotten the water bath before and the bars still disappeared in minutes.
Preparation Method
Ready to make the most talked-about dessert at your Halloween party? Follow these steps carefully, and you’ll have a pan of gorgeous spooky spiderweb chocolate cheesecake bars that look like they came from a bakery.
Step 1: Prep Your Pan
Preheat your oven to 325°F (160°C). Line your 9×9-inch baking pan with parchment paper, leaving some overhang on two opposite sides. This creates handles that make lifting the finished bars out super easy. Lightly grease the parchment with cooking spray or butter.
Step 2: Make the Oreo Crust
Place 24 Oreo cookies in a food processor and pulse until they turn into fine crumbs. If you don’t have a food processor, put the cookies in a zip-top bag and crush them with a rolling pin—it’s a great way to release some frustration. Pour the crumbs into a medium bowl, add the melted butter and salt, and stir until everything looks like wet sand. Press the mixture firmly into the bottom of your prepared pan. I use the bottom of a measuring cup to really pack it down. Bake for 10 minutes, then set aside to cool slightly while you make the filling.
Step 3: Make the Cheesecake Filling
In a large bowl, beat the softened cream cheese with an electric mixer on medium speed until smooth and creamy—about 2 minutes. Scrape down the sides of the bowl. Add the sugar and beat for another 2 minutes until light and fluffy. Add the eggs one at a time, beating on low speed after each addition until just combined. Overmixing at this stage adds too much air, which can cause cracks. Add the sour cream, vanilla, and salt, and mix on low until smooth. The batter should be silky and lump-free.
Step 4: Assemble and Bake
Pour the cheesecake batter over the pre-baked crust and spread it evenly with a spatula. Tap the pan gently on the counter a few times to release any air bubbles. Place the pan in a large roasting pan and carefully pour hot water into the roasting pan until it reaches about halfway up the sides of your cheesecake pan. This water bath creates a humid environment that prevents cracking. Bake for 35-40 minutes, or until the edges are set but the center still jiggles slightly when you shake the pan. Turn off the oven, crack the door open, and let the cheesecake cool inside for 1 hour. This gradual cooling prevents sudden temperature changes that cause cracks.
Step 5: Make the Spiderweb
Once the cheesecake has cooled to room temperature (about 2 hours), it’s time for the fun part. In a small microwave-safe bowl, combine the chocolate chips, heavy cream, and butter. Microwave in 30-second intervals, stirring between each, until the mixture is smooth and glossy. Let it cool for 5 minutes—it should be warm but not hot. Spoon the melted chocolate into a small zip-top bag, snip off a tiny corner, and pipe concentric circles on top of the cheesecake, starting from the center and working outward. Space the circles about 1 inch apart. Working quickly while the chocolate is still warm, drag a toothpick from the center of the cheesecake outward through all the circles. Repeat this every 2 inches around the cheesecake to create the web effect. Wipe the toothpick clean between each drag for clean lines.
Step 6: Chill and Serve
Refrigerate the cheesecake for at least 4 hours, preferably overnight. This step is crucial—the bars need time to set completely for clean slices. When you’re ready to serve, use the parchment handles to lift the entire cheesecake out of the pan. Place it on a cutting board and use a sharp knife to cut into 16 bars. Wipe the knife clean between cuts for those picture-perfect edges.
Cooking Tips & Techniques
After making these spooky spiderweb chocolate cheesecake bars more times than I care to count, I’ve collected a few hard-won lessons. Let me save you from my mistakes.
The Toothpick Trick is Everything. I cannot stress this enough. When you’re dragging the toothpick through the chocolate circles, don’t press too hard. You want to gently pull the chocolate through the surface, not gouge into the cheesecake. And work quickly—if the chocolate starts to set, the web won’t form cleanly. If that happens, just reheat the chocolate for 10 seconds and try again.
Room Temperature Ingredients Are Non-Negotiable. I learned this the hard way when I made these bars for a Halloween party and ended up with a lumpy batter because my cream cheese was still cold. Cold cream cheese doesn’t blend smoothly, and cold eggs can cause the batter to curdle. Set everything out on the counter at least an hour before you start. Your future self will thank you.
Don’t Overbake. The center should still jiggle when you take the cheesecake out of the oven. It will continue to set as it cools. Overbaked cheesecake turns dry and crumbly, and nobody wants that. Trust the jiggle.
Patience with Chilling. I know it’s tempting to cut into these bars after a couple of hours, but 4 hours minimum is essential. Overnight is even better. The flavors meld together, the texture firms up perfectly, and you get those clean, Instagram-worthy slices. I once tried to rush the process and ended up with a gooey mess. Learn from my impatience.
Clean Cuts. Use a sharp knife and wipe it clean between each cut. Run the knife under hot water, dry it off, then slice. This gives you those beautiful, professional-looking bars that make everyone think you’re a baking genius.
Variations & Adaptations
One of the best things about these spooky spiderweb chocolate cheesecake bars is how easy they are to customize. Here are some variations I’ve tried and loved:
Peanut Butter Spiderweb
Swap the semi-sweet chocolate chips for peanut butter chips in the spiderweb topping. Add 1/4 cup of creamy peanut butter to the cheesecake batter for a Reese’s-inspired twist. The salty-sweet combo is absolutely addictive.
White Chocolate Ghost Web
Use white chocolate chips instead of semi-sweet for a ghostly, pale spiderweb. Add a few drops of black food coloring to the cheesecake batter for a dramatic contrast. The white web against the dark cheesecake is seriously spooky.
Pumpkin Spice Version
Add 1/2 cup of pumpkin puree and 1 teaspoon of pumpkin pie spice to the cheesecake batter. Reduce the sour cream to 1/4 cup. The pumpkin pairs beautifully with the chocolate spiderweb. This version is perfect for Thanksgiving leftovers too.
Gluten-Free Adaptation
Use gluten-free chocolate sandwich cookies for the crust. The rest of the ingredients are naturally gluten-free. I’ve tested this with two different brands, and both worked great. Just make sure your chocolate chips are certified gluten-free if that’s a concern.
Vegan Version
Use dairy-free cream cheese, coconut cream instead of sour cream, and vegan butter. For the eggs, use 2 tablespoons of cornstarch mixed with 6 tablespoons of water. The texture is slightly less creamy but still delicious. Use vegan chocolate chips for the spiderweb.
Serving & Storage Suggestions
These spooky spiderweb chocolate cheesecake bars are best served cold, straight from the refrigerator. The firm texture makes them easy to handle, and the flavors are more pronounced when chilled. Arrange them on a black platter for maximum Halloween vibes, and maybe add a few plastic spiders for decoration.
What to Serve With Them : A dollop of whipped cream adds a nice lightness. For a truly indulgent experience, drizzle some warm chocolate sauce over the top. These bars also pair beautifully with a cup of hot coffee or a glass of cold milk. If you’re serving them at a Halloween party, a side of vanilla ice cream makes everything feel extra special.
Storage Instructions : Store the bars in an airtight container in the refrigerator for up to 5 days. Place a sheet of parchment paper between layers to prevent the spiderwebs from smudging. I’ve found that the bars actually taste better on day two—the flavors have more time to meld together.
Freezer Instructions : These bars freeze beautifully. Place the fully cooled and set bars on a baking sheet and freeze until solid, about 2 hours. Then wrap each bar individually in plastic wrap and store in a freezer-safe bag for up to 3 months. To thaw, transfer a bar to the refrigerator overnight. The spiderweb might lose a little definition, but the taste is still amazing.
Reheating Tips : These bars are meant to be served cold. If you prefer a softer texture, let them sit at room temperature for 10-15 minutes before serving. Do not microwave them—the cheesecake will become warm and lose its structure.
Nutritional Information & Benefits
Let’s be honest—these spooky spiderweb chocolate cheesecake bars are a treat, not a health food. But here’s the approximate nutritional breakdown per bar (based on 16 servings):
- Calories: 320
- Total Fat: 22g
- Saturated Fat: 12g
- Cholesterol: 85mg
- Sodium: 220mg
- Total Carbohydrates: 28g
- Dietary Fiber: 1g
- Sugars: 20g
- Protein: 5g
Health Benefits of Key Ingredients : The cream cheese provides calcium and protein, which support bone health and muscle function. Dark chocolate (if you use high-quality semi-sweet chips) contains antioxidants called flavonoids that may support heart health. The eggs provide high-quality protein and essential vitamins like B12 and D. And hey, the Oreo crust has a little bit of iron from the enriched flour—every bit counts, right?
Dietary Considerations : This recipe contains dairy, gluten, and eggs. For gluten-free and vegan adaptations, check the variations section above. If you’re watching your sugar intake, you can reduce the sugar in the cheesecake batter to 1/2 cup without affecting the texture too much.
My Personal Perspective : I believe in balance. These bars are a special occasion dessert, perfect for Halloween celebrations. Enjoy them mindfully, savor every bite, and don’t stress about the numbers. Life is too short to skip dessert.
Conclusion
These spooky spiderweb chocolate cheesecake bars are everything a Halloween dessert should be—dramatic, delicious, and deceptively easy to make. The rich, creamy cheesecake pairs perfectly with the crunchy Oreo crust, and that spiderweb topping is guaranteed to impress your guests. Plus, the toothpick trick means you don’t need any fancy piping skills to pull it off.
I love this recipe because it proves that you don’t need to be a professional baker to create something spectacular. It’s the kind of dessert that makes people say, “Wait, you made this?!” And then you get to smile and nod, knowing the secret is just a humble toothpick.
Don’t be afraid to make these bars your own. Experiment with different chocolate types, add a swirl of caramel, or go all out with Halloween sprinkles. The base recipe is forgiving and flexible. And if your spiderweb doesn’t look perfect on the first try? That’s okay. It adds character. Besides, the taste is what really matters.
I’d love to hear how your spooky spiderweb chocolate cheesecake bars turn out! Drop a comment below and let me know if you tried any fun variations. Share this recipe with your Halloween-loving friends, and don’t forget to pin it for later. Happy Halloween, and happy baking!
Frequently Asked Questions
Can I use a different type of cookie for the crust?
Absolutely! Graham crackers, vanilla wafers, or even chocolate wafer cookies all work great. Just use about 1 1/2 cups of fine crumbs and 5 tablespoons of melted butter. The flavor will change slightly, but the texture will be similar.
How do I prevent the cheesecake from cracking?
The water bath is your best friend here. It creates a humid environment that prevents the cheesecake from drying out and cracking. Also, don’t overmix the batter, and let the cheesecake cool gradually in the oven with the door cracked open. But honestly? A few cracks add character, and the spiderweb covers them up anyway.
Can I make these bars ahead of time?
Yes! These bars are perfect for make-ahead desserts. Prepare them up to 2 days in advance and store them in the refrigerator. The flavors actually improve over time. You can also freeze them for up to 3 months—just wrap them well.
My spiderweb didn’t turn out well. What went wrong?
Most likely, the chocolate was too thick or too thin when you tried to pipe it. If it’s too thick, add a little more cream. If it’s too thin, let it cool for a few more minutes. Also, make sure you’re dragging the toothpick through while the chocolate is still warm and fluid. Practice on a piece of parchment paper first if you’re nervous.
Can I use a different pan size?
An 8×8-inch pan works fine—your bars will just be slightly thicker and need about 5 extra minutes of baking time. A 9×13-inch pan will give you thinner bars and less baking time (about 25-30 minutes). Adjust your expectations for web design accordingly, since the surface area changes.
Pin This Recipe!
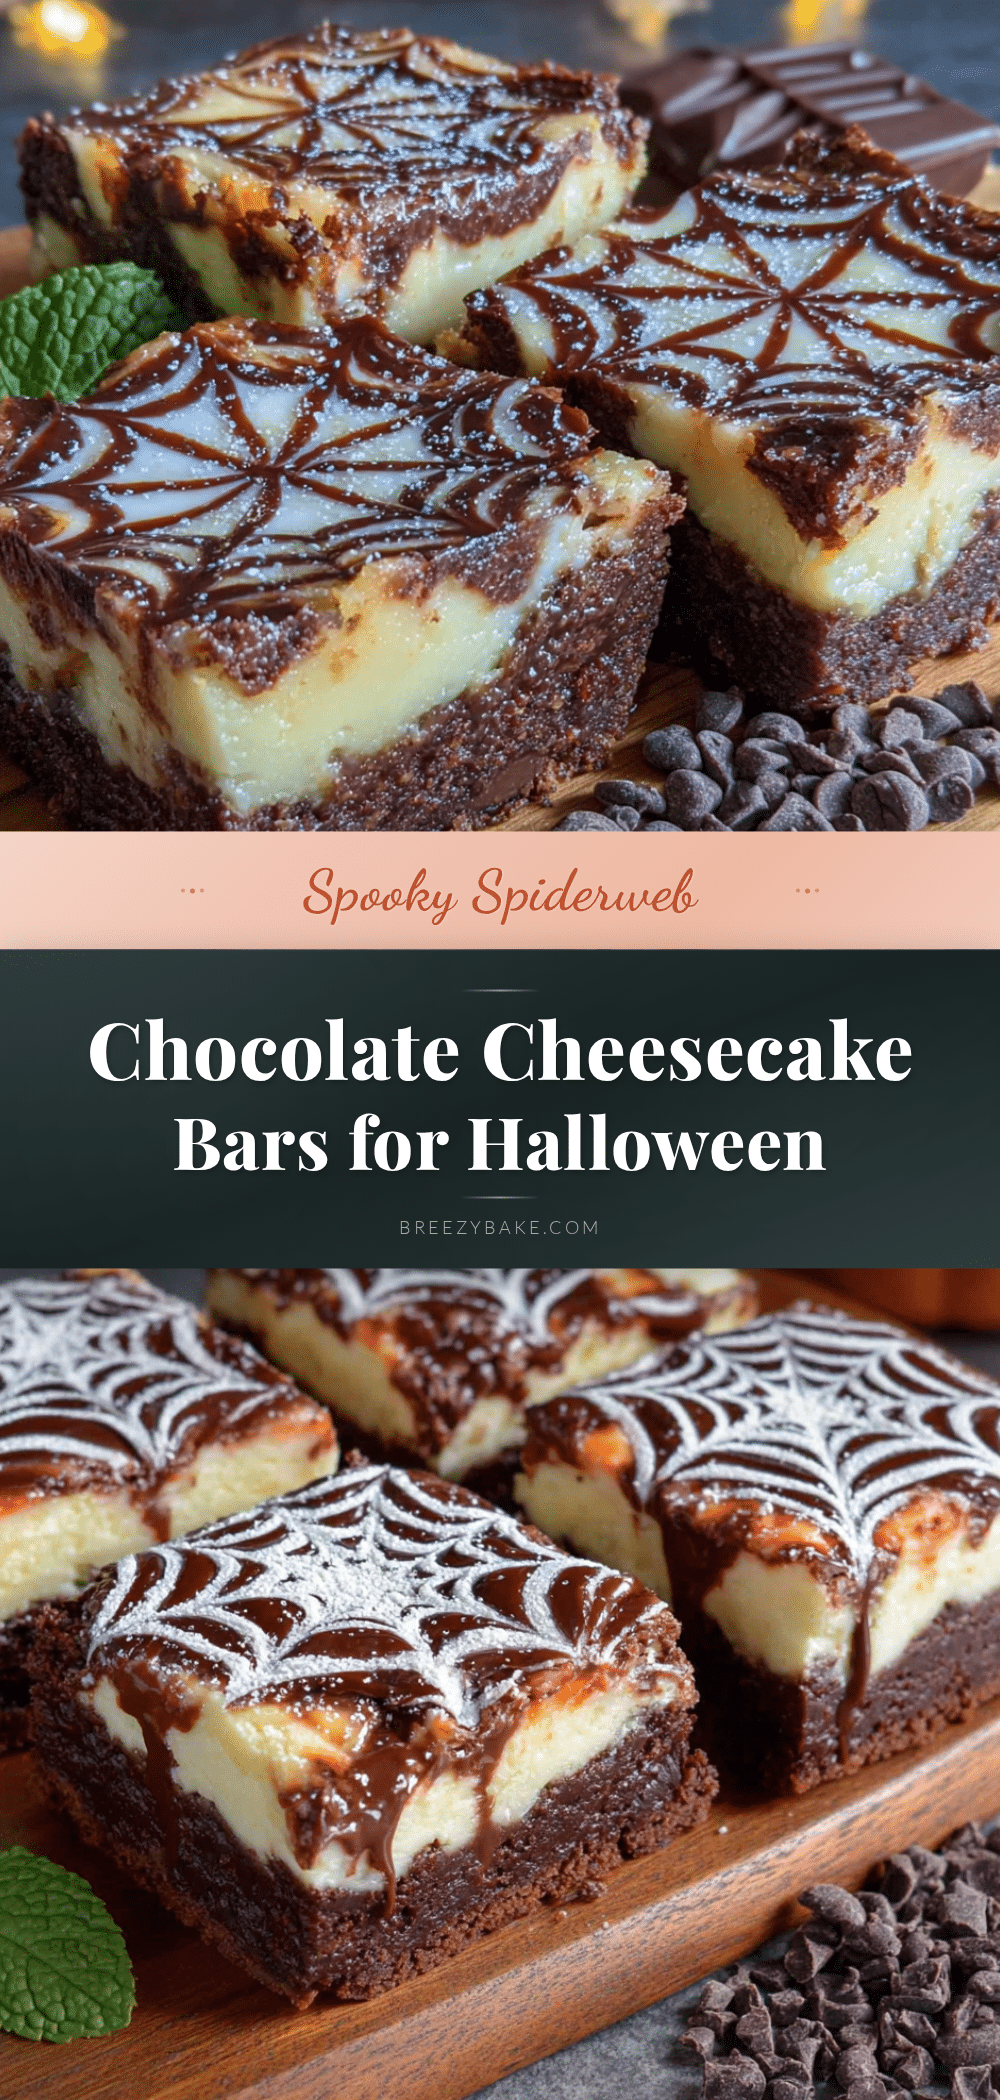
Spooky Spiderweb Chocolate Cheesecake Bars: Easy Halloween Recipe
Rich, creamy cheesecake bars on a buttery Oreo crust, topped with a dramatic chocolate spiderweb that looks like it was spun by a very talented spider. The toothpick trick makes the web design foolproof, even for beginners.
- Prep Time: 30 minutes
- Cook Time: 40 minutes
- Total Time: 5 hours 10 minutes (includes cooling and chilling)
- Yield: 16 bars 1x
- Category: Dessert
- Cuisine: American
Ingredients
- 24 Oreo cookies (regular, not double-stuffed)
- 5 tablespoons unsalted butter, melted
- Pinch of salt (optional)
- 16 ounces (450g) cream cheese, softened to room temperature
- 3/4 cup (150g) granulated sugar
- 2 large eggs, room temperature
- 1/2 cup (120ml) sour cream, room temperature
- 1 teaspoon vanilla extract
- 1/4 teaspoon salt
- 1/2 cup (90g) semi-sweet chocolate chips
- 2 tablespoons heavy cream
- 1 tablespoon unsalted butter
Instructions
- Preheat oven to 325°F (160°C). Line a 9×9-inch baking pan with parchment paper, leaving overhang on two opposite sides. Lightly grease the parchment.
- Pulse 24 Oreo cookies in a food processor until fine crumbs form. Alternatively, crush in a zip-top bag with a rolling pin. Mix crumbs with melted butter and a pinch of salt until it resembles wet sand. Press firmly into the bottom of the prepared pan. Bake for 10 minutes, then set aside to cool slightly.
- In a large bowl, beat softened cream cheese with an electric mixer on medium speed until smooth (about 2 minutes). Add sugar and beat for another 2 minutes until light and fluffy. Add eggs one at a time, beating on low after each addition until just combined. Add sour cream, vanilla, and salt; mix on low until smooth.
- Pour cheesecake batter over the pre-baked crust and spread evenly. Tap the pan gently on the counter to release air bubbles. Place the pan in a large roasting pan and pour hot water into the roasting pan until it reaches halfway up the sides of the cheesecake pan. Bake for 35-40 minutes, until edges are set but center still jiggles. Turn off oven, crack the door, and let cheesecake cool inside for 1 hour.
- Once cheesecake has cooled to room temperature (about 2 hours), combine chocolate chips, heavy cream, and butter in a small microwave-safe bowl. Microwave in 30-second intervals, stirring between each, until smooth and glossy. Let cool for 5 minutes. Spoon melted chocolate into a small zip-top bag, snip off a tiny corner, and pipe concentric circles on top of the cheesecake, starting from the center and spacing about 1 inch apart. Working quickly, drag a toothpick from the center outward through…
- Refrigerate cheesecake for at least 4 hours, preferably overnight. When ready to serve, use parchment handles to lift the cheesecake out of the pan. Cut into 16 bars with a sharp knife, wiping the knife clean between cuts.
Notes
Bring cream cheese, eggs, and sour cream to room temperature before starting. The water bath helps prevent cracking, but small cracks are fine since the spiderweb covers them. For clean cuts, use a sharp knife and wipe it clean between each slice. Bars can be stored in the refrigerator for up to 5 days or frozen for up to 3 months.
Nutrition
- Serving Size: 1 bar
- Calories: 320
- Sugar: 20
- Sodium: 220
- Fat: 22
- Saturated Fat: 12
- Carbohydrates: 28
- Fiber: 1
- Protein: 5
Keywords: Halloween dessert, cheesecake bars, spiderweb, chocolate, Oreo crust, easy recipe, spooky


