Third time in eight days I made these peppers, and this time I finally remembered to buy the celery. The first batch was a Tuesday-night impulse thing—I had leftover rotisserie chicken, a half-empty bottle of Frank’s, and a bag of mini bell peppers that were starting to wrinkle. I stuffed them, baked them, and stood at the counter eating three before they’d even cooled. The second batch I tried with cream cheese mixed right into the filling, which was better but still missing that little something. The third batch? That’s the one where the cream cheese stayed on top, the breadcrumbs got toasty, and I realized these things are basically the Halloween party appetizer I’ve been overthinking for years.
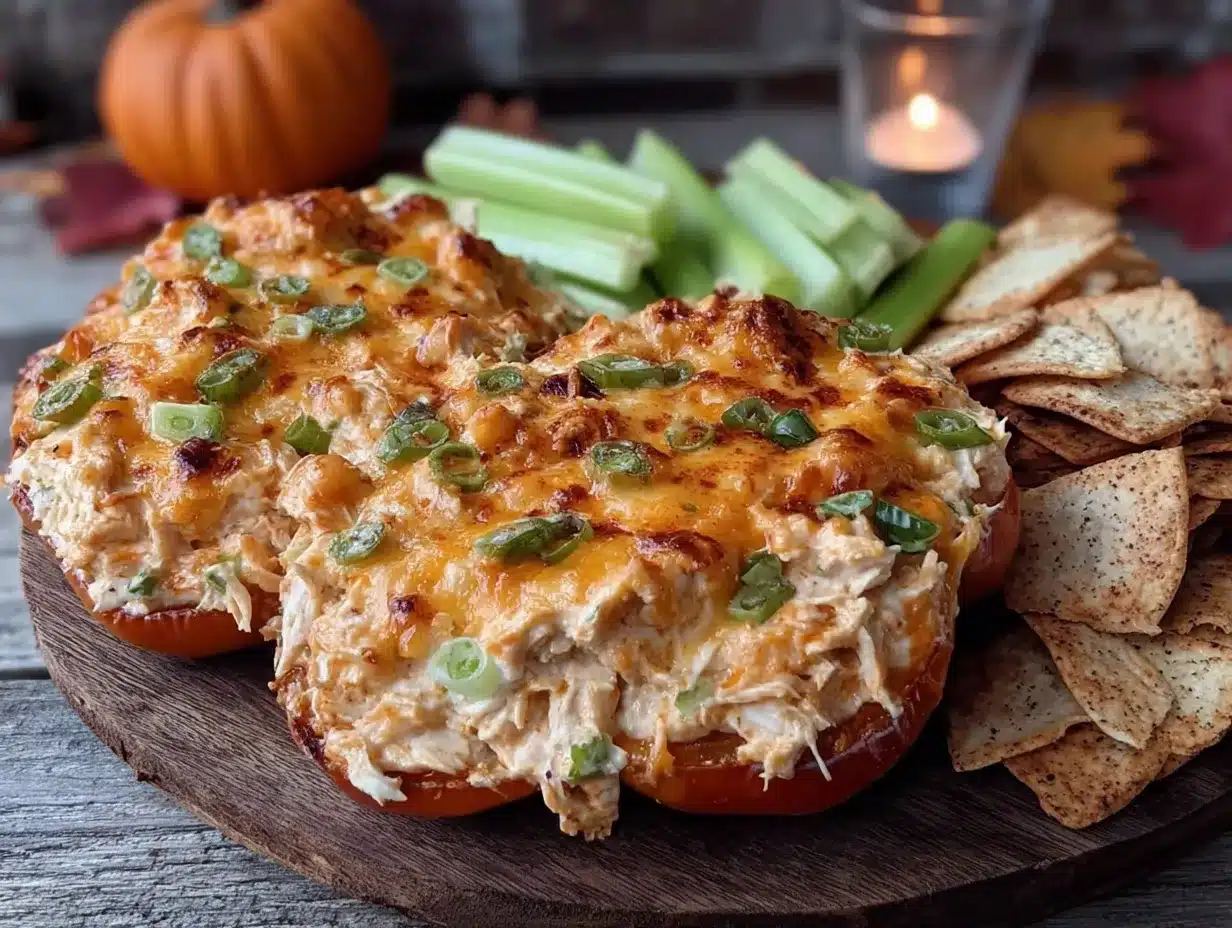
They’re not scary in a gory way—more like a “cute spooky” kind of way. The orange peppers look like little jack-o’-lanterns, the filling has that classic buffalo heat, and the whole thing comes together in under half an hour. I wasn’t trying to make a themed recipe. I was just hungry, and the peppers happened to be orange. But now I can’t unsee it. Every time I pull a tray of these out of the oven, I think about how perfect they’d be for a watch party or a casual get-together where you want something fun but not fussy.
These spooky stuffed buffalo chicken peppers started as a fridge-cleaning accident. They stuck because they’re exactly what I want to eat when I’m craving something spicy, creamy, and just a little ridiculous. And honestly? That’s how the best recipes happen.
Why You’ll Love This Recipe
I’ve tested this one enough times to know what works and what doesn’t. Here’s why these peppers keep showing up in my weekly rotation:
- Ready in 30 minutes flat — From fridge to table in the time it takes to watch one episode of something. No marinating, no complicated steps.
- Simple ingredients you probably have — Chicken, hot sauce, cream cheese, cheddar, breadcrumbs, peppers. That’s it. No weird grocery store hunts.
- Perfect for Halloween parties — The orange bell peppers naturally look festive, and the filling has that fun spicy kick. They’re themed without being cheesy.
- Crowd-pleaser every time — I brought a batch to a friend’s game day gathering last month and watched them disappear in minutes. Even people who “don’t like spicy food” went back for seconds.
- Unbelievably good texture — The peppers stay slightly crunchy, the filling is creamy and tangy, and the breadcrumb topping gets golden and crisp. Every bite has contrast.
What makes this version different from the usual stuffed pepper recipe is the cream cheese situation. Instead of mixing it into the filling where it disappears, I dollop it on top before baking. It melts down over the chicken mixture, creating this creamy layer that balances the heat perfectly. I learned this trick after my second batch turned out too dry—the cream cheese on top keeps everything moist and adds a little tang that cuts through the buffalo sauce.
These peppers are the kind of thing you make when you want to impress people without actually trying that hard. They look like you planned a whole themed menu, but really you just stuffed some peppers and let the oven do the work. That’s my favorite kind of cooking.
What Ingredients You Will Need
This recipe uses simple, everyday ingredients to deliver big flavor without the fuss. Most of these are pantry staples or easy to find at any grocery store.
- Mini sweet bell peppers (orange or mixed colors) — About 12-15 peppers. Orange ones look the most Halloween-themed, but any color works. Look for peppers that are firm and evenly shaped so they stand up straight on the baking sheet.
- Cooked chicken, shredded — 2 cups (about 300g). Rotisserie chicken is my go-to here. You can also use leftover grilled chicken, baked chicken breasts, or even canned chicken in a pinch (just drain it well).
- Buffalo hot sauce — 1/3 cup (80ml). Frank’s RedHot is the classic choice and what I always use. The flavor is tangy with moderate heat. Avoid wing sauces that are already butter-based—you want straight hot sauce here.
- Cream cheese, softened — 4 ounces (113g). Full-fat cream cheese gives the best texture and flavor. Leave it out on the counter for 20 minutes before you start so it softens enough to dollop easily.
- Shredded cheddar cheese — 1/2 cup (60g). Sharp cheddar adds a nice bite. You can also use Monterey Jack or pepper jack for extra heat.
- Panko breadcrumbs — 1/4 cup (30g). Regular breadcrumbs work too, but panko gives a lighter, crunchier topping. I’ve used crushed pork rinds for a low-carb version and it was surprisingly good.
- Butter, melted — 2 tablespoons (28g). This gets mixed with the breadcrumbs to help them brown. Unsalted butter lets you control the salt level.
- Ranch or blue cheese dressing — For serving. This is optional but highly recommended. The cool, creamy dressing balances the heat beautifully.
- Salt and pepper — To taste. Go easy on the salt since the hot sauce and cheese are already salty.
For the best texture, I recommend shredding your own cheddar from a block rather than using pre-shredded bagged cheese. Pre-shredded cheese has anti-caking agents that prevent it from melting as smoothly. It’s a small difference, but when you’re only using half a cup, it matters.
Equipment Needed
You don’t need anything fancy for this recipe. Here’s what I use:
- Baking sheet — A standard half-sheet pan works perfectly. Line it with parchment paper or foil for easier cleanup.
- Mixing bowls — One medium bowl for the chicken mixture and one small bowl for the breadcrumb topping.
- Sharp knife and cutting board — For slicing the tops off the peppers and removing the seeds.
- Small spoon or melon baller — Helps scoop out the pepper seeds quickly without tearing the pepper walls.
- Measuring cups and spoons — For accurate ingredient portions.
If you don’t have a melon baller, a small teaspoon works just fine. I actually prefer using my fingers for the initial seed removal—it’s faster and I can feel if any seeds are stuck. Just wash your hands well afterward because pepper seeds can be surprisingly spicy if you touch your eyes later.
One tip I learned the hard way: don’t use a nonstick baking sheet without lining it. The cream cheese that melts off the peppers can stick and burn, making cleanup a nightmare. Parchment paper saves you every time.
Preparation Method
This comes together fast, so I like to get everything prepped before I start assembling. Here’s the step-by-step:
- Preheat your oven to 400°F (200°C). Line a baking sheet with parchment paper or foil. Getting the oven hot first means you’re not waiting around later.
- Prepare the peppers. Slice the top quarter off each mini bell pepper (the stem end). Use a small spoon or your fingers to remove the seeds and white membranes from inside. Don’t worry if a few seeds remain—they’re edible, just a little bitter. Set the peppers cut-side up on the prepared baking sheet. If some peppers won’t stand upright, trim a tiny slice off the bottom to create a flat surface.
- Make the buffalo chicken filling. In a medium bowl, combine the shredded chicken and buffalo hot sauce. Stir until every piece of chicken is coated. The mixture should look wet but not swimming in sauce. If it seems dry, add another tablespoon of hot sauce. Let it sit for a minute so the chicken absorbs the flavor.
- Stuff the peppers. Spoon the buffalo chicken mixture into each pepper, filling them almost to the top. Don’t pack it down too tightly—you want some air gaps so the filling heats through evenly. A generous tablespoon per pepper is usually about right.
- Add the cream cheese. Dollop about a teaspoon of softened cream cheese on top of the chicken filling in each pepper. It doesn’t need to be perfect—it will melt and spread as it bakes. This is the step I messed up the first time by mixing the cream cheese into the chicken. Trust me, leaving it on top is the move.
- Sprinkle with cheddar. Divide the shredded cheddar evenly over the cream cheese on each pepper. A little goes a long way here—you just want a light blanket of cheese on top.
- Make the breadcrumb topping. In a small bowl, combine the panko breadcrumbs with the melted butter. Stir until the breadcrumbs are evenly coated. Sprinkle this mixture over the cheese-topped peppers. The butter helps the breadcrumbs turn golden and crispy instead of just dry and pale.
- Bake for 15-18 minutes. Place the baking sheet on the middle rack. Bake until the peppers are tender but still hold their shape, the filling is bubbly, and the breadcrumbs are golden brown. At 15 minutes, start checking—ovens vary, and you don’t want the peppers to get mushy.
- Rest for 5 minutes. Let the peppers cool on the baking sheet for a few minutes before serving. This lets the filling set slightly so you don’t burn your mouth. I know it’s hard to wait, but trust me on this one.
- Serve with dressing. Arrange the peppers on a platter with a small bowl of ranch or blue cheese dressing for dipping. Drizzle a little extra hot sauce on top if you want more heat.
The peppers should be tender when you bite into them but still have some structure. If they collapse completely, they’ve baked too long. Aim for that sweet spot where the pepper gives easily to your teeth but doesn’t fall apart.
Cooking Tips & Techniques
After making these peppers eight times in two weeks, I’ve picked up a few things worth sharing:
Don’t overfill the peppers. I know it’s tempting to cram as much chicken as possible in there, but overstuffed peppers tend to burst open during baking. Leave about 1/4 inch of space at the top for the cream cheese and toppings. You’ll get cleaner peppers and less mess on the baking sheet.
Use room-temperature cream cheese. Cold cream cheese doesn’t dollop well—it stays in a stiff blob and doesn’t melt evenly. Let it sit out for 20-30 minutes before you start. If you forget, microwave it for 10 seconds to soften it slightly. Not too long, or it turns into a puddle.
Toast the breadcrumbs separately for extra crunch. If you want an even crispier topping, toast the buttered panko in a dry skillet over medium heat for 2-3 minutes before sprinkling on the peppers. Then bake as usual. This adds a deeper golden color and a crunch that holds up even after the peppers have cooled a bit.
Watch your oven like a hawk the first time. Every oven runs differently. My old oven would brown these perfectly at 18 minutes. My new one? They’re done at 14. Check at the 12-minute mark and go from there. Burnt breadcrumbs are sad breadcrumbs.
I once forgot to line my baking sheet and spent 20 minutes scrubbing burnt cheese off the metal. Learn from my mistakes. Parchment paper is your friend.
Variations & Adaptations
This recipe is flexible enough to adapt to different diets, tastes, and occasions. Here are some variations I’ve tried and loved:
- Low-carb / Keto version: Skip the panko breadcrumbs and use crushed pork rinds mixed with butter instead. The pork rinds get crispy and add a similar texture without the carbs. I tested this for a friend who’s keto, and honestly, I might like it better than the original.
- Vegetarian option: Swap the chicken for 2 cups of cooked, shredded jackfruit or finely chopped mushrooms sautéed with garlic. Toss them in the buffalo sauce just like you would the chicken. The texture is different but still satisfying, and the mushrooms add an earthy depth that works well with the spicy sauce.
- Extra spicy version: Add 1-2 teaspoons of cayenne pepper or a chopped habanero to the chicken mixture. You can also use a hotter buffalo sauce like Melinda’s or mix in some sriracha. Just be careful—this version is not for the faint of heart.
- Bacon-ranch twist: Crumble 4 slices of cooked bacon and mix half into the chicken filling. Sprinkle the remaining bacon on top with the breadcrumbs. Serve with ranch dressing instead of blue cheese. This version disappeared fastest at my last gathering.
- Dairy-free adaptation: Use dairy-free cream cheese and shredded vegan cheddar. The texture will be slightly less creamy, but the flavor still works. Miyoko’s brand has the best dairy-free cream cheese for melting, in my experience.
I personally love the bacon-ranch variation for game days. It feels more indulgent, and the smoky bacon flavor plays nicely with the buffalo sauce. If you’re making these for a Halloween party, stick with the original—the orange peppers are the star of the show visually.
Serving & Storage Suggestions
These peppers are best served warm, right after they’ve rested for a few minutes. Arrange them on a platter with a small bowl of ranch or blue cheese dressing in the center for dipping. If you want to get fancy, sprinkle some chopped chives or green onions on top for color.
They pair beautifully with other game day snacks. I often serve them alongside crispy buffalo ranch pizza bread for a full spicy spread. The pizza bread soaks up any extra dressing, and the textures complement each other perfectly.
For a lighter meal, serve the peppers over a bed of mixed greens with extra dressing as a salad. The warm filling wilts the greens slightly, and the peppers add a sweet crunch. It’s a great way to turn an appetizer into lunch.
Storage: Leftover peppers keep in an airtight container in the refrigerator for up to 4 days. The breadcrumbs will soften over time, but the flavor stays good. I don’t recommend freezing these—the peppers get watery when thawed, and the texture suffers.
Reheating: The best way to reheat these is in the oven or air fryer at 350°F (175°C) for 5-7 minutes. The microwave works in a pinch but will make the peppers soggy and the breadcrumbs sad. If you must use the microwave, do 30-second intervals and eat them immediately.
One thing I’ve noticed: the flavors actually get better after a day in the fridge. The buffalo sauce mellows out and blends with the cream cheese, creating a more cohesive taste. Cold, they’re also surprisingly good straight from the fridge as a snack—kind of like a spicy pepper popper situation.
Nutritional Information & Benefits
These peppers are surprisingly balanced for something that tastes so indulgent. Here’s the approximate nutritional breakdown per serving (3 stuffed peppers):
- Calories: 285
- Protein: 22g
- Fat: 16g
- Carbohydrates: 12g
- Fiber: 3g
- Sugar: 5g
Bell peppers are packed with vitamin C—actually more than oranges gram for gram. They also contain vitamin A, potassium, and antioxidants that support eye health and immune function. The chicken provides lean protein that keeps you full, while the cream cheese and cheddar add calcium and a little satiating fat.
If you’re watching your sodium, use low-sodium hot sauce and go easy on the added salt. The cheese and buffalo sauce already bring plenty of saltiness. For a lower-fat version, use reduced-fat cream cheese and skip the buttered breadcrumb topping—just sprinkle plain panko on top before baking.
This recipe is naturally gluten-free if you use gluten-free breadcrumbs or crushed pork rinds. It’s also nut-free and egg-free, making it a safe option for many common allergies. Always check your specific ingredient labels if you’re cooking for someone with sensitivities.
Conclusion
These spooky stuffed buffalo chicken peppers are proof that the best recipes don’t come from careful planning—they come from looking at what’s in your fridge and making it work. They’re quick enough for a weeknight, festive enough for a Halloween party, and delicious enough that you’ll make them long after October is over.
I love how forgiving this recipe is. You can swap the protein, change the cheese, adjust the spice level, or skip the breadcrumbs entirely, and it still works. That’s the mark of a good recipe in my book—one that bends without breaking.
If you make these peppers, I’d love to hear how they turn out. Leave a comment below and tell me your favorite variation, or tag me in your photos if you share them online. Did you go with blue cheese or ranch? Did you add bacon? Did you make them for a party or just because you were hungry? I want to know.
Go ahead and preheat that oven. These peppers are waiting for you.
Frequently Asked Questions
Can I use regular bell peppers instead of mini ones?
Yes, but you’ll need to adjust the cooking time. Large bell peppers take about 25-30 minutes to become tender. Cut them in half lengthwise and remove the seeds, then stuff each half. The filling amounts will be different—one large pepper holds about the same as 3-4 mini peppers.
How do I make these less spicy?
Use a mild hot sauce or mix the buffalo sauce with an equal amount of melted butter to tone down the heat. You can also use plain shredded chicken without any hot sauce and just season it with salt, pepper, and garlic powder. The cream cheese and cheddar will still give you plenty of flavor.
Can I prepare these ahead of time?
Absolutely. Assemble the peppers up to 24 hours in advance and keep them covered in the refrigerator. Add the breadcrumb topping right before baking so it stays crispy. You may need to add 3-5 minutes to the baking time if they’re going into the oven cold.
What’s the best way to shred chicken for this recipe?
For rotisserie chicken, just pull the meat off the bones and shred it with two forks. For cooking your own chicken, poach boneless skinless chicken breasts in simmering water for 15-18 minutes, then shred. A stand mixer with the paddle attachment on low speed also works surprisingly well for shredding large amounts of chicken in seconds.
Can I make these in an air fryer instead of the oven?
Yes! Air fry at 375°F (190°C) for 10-12 minutes. Check at the 8-minute mark because air fryers cook faster than ovens. The breadcrumbs get especially crispy in the air fryer. You may need to work in batches depending on the size of your air fryer basket.
Pin This Recipe!
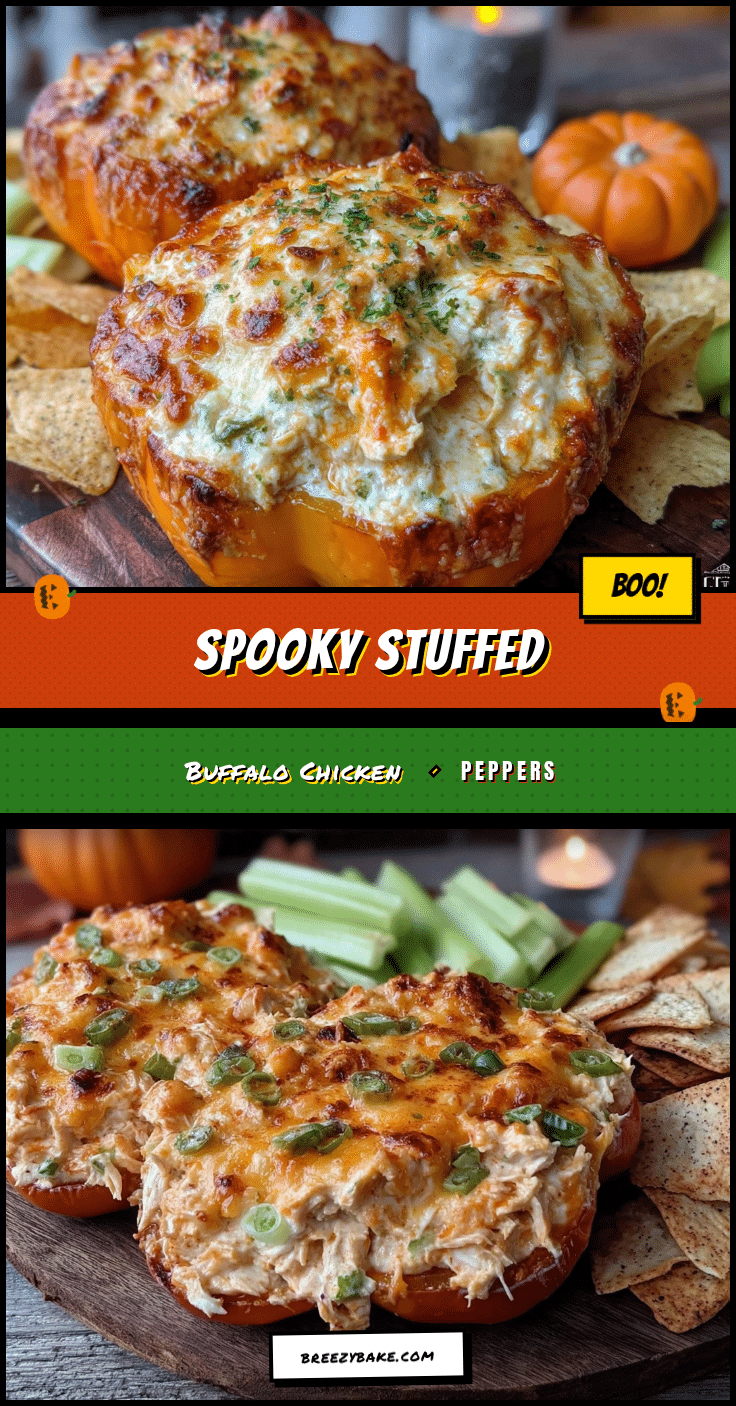
Spooky Stuffed Buffalo Chicken Peppers: Easy 30-Minute Recipe

These spooky stuffed buffalo chicken peppers are a quick and easy 30-minute recipe featuring mini bell peppers stuffed with spicy buffalo chicken, topped with cream cheese, cheddar, and crispy breadcrumbs. Perfect for Halloween parties or game day gatherings.
- Prep Time: 10 minutes
- Cook Time: 15-18 minutes
- Total Time: 25-28 minutes
- Yield: 4 servings (3 peppers per serving) 1x
- Category: Appetizer
- Cuisine: American
Ingredients
- 12–15 mini sweet bell peppers (orange or mixed colors)
- 2 cups (about 300g) cooked chicken, shredded
- 1/3 cup (80ml) buffalo hot sauce (e.g., Frank’s RedHot)
- 4 ounces (113g) cream cheese, softened
- 1/2 cup (60g) shredded cheddar cheese
- 1/4 cup (30g) panko breadcrumbs
- 2 tablespoons (28g) butter, melted
- Ranch or blue cheese dressing, for serving
- Salt and pepper, to taste
Instructions
- Preheat your oven to 400°F (200°C). Line a baking sheet with parchment paper or foil.
- Prepare the peppers: Slice the top quarter off each mini bell pepper (the stem end). Use a small spoon or your fingers to remove the seeds and white membranes. Set the peppers cut-side up on the prepared baking sheet. If some peppers won’t stand upright, trim a tiny slice off the bottom to create a flat surface.
- Make the buffalo chicken filling: In a medium bowl, combine the shredded chicken and buffalo hot sauce. Stir until every piece of chicken is coated. Let it sit for a minute so the chicken absorbs the flavor.
- Stuff the peppers: Spoon the buffalo chicken mixture into each pepper, filling them almost to the top. Don’t pack it down too tightly.
- Add the cream cheese: Dollop about a teaspoon of softened cream cheese on top of the chicken filling in each pepper.
- Sprinkle with cheddar: Divide the shredded cheddar evenly over the cream cheese on each pepper.
- Make the breadcrumb topping: In a small bowl, combine the panko breadcrumbs with the melted butter. Stir until evenly coated. Sprinkle this mixture over the cheese-topped peppers.
- Bake for 15-18 minutes: Place the baking sheet on the middle rack. Bake until the peppers are tender but still hold their shape, the filling is bubbly, and the breadcrumbs are golden brown.
- Rest for 5 minutes: Let the peppers cool on the baking sheet for a few minutes before serving.
- Serve with dressing: Arrange the peppers on a platter with a small bowl of ranch or blue cheese dressing for dipping.
Notes
For best results, use room-temperature cream cheese. Don’t overfill the peppers to prevent bursting. Toast breadcrumbs separately for extra crunch. Check oven at 12 minutes as baking times vary. Leftovers keep in the refrigerator for up to 4 days; reheat in oven or air fryer at 350°F for 5-7 minutes.
Nutrition
- Serving Size: 3 stuffed peppers
- Calories: 285
- Sugar: 5
- Sodium: 800
- Fat: 16
- Saturated Fat: 8
- Carbohydrates: 12
- Fiber: 3
- Protein: 22
Keywords: stuffed peppers, buffalo chicken, Halloween appetizer, game day snack, 30-minute recipe, mini bell peppers, spicy, cream cheese


