The summer I turned thirty, my oven broke. Not dramatically—no smoke, no sparks—just a quiet, wheezing death on a Wednesday afternoon. I was supposed to be hosting a small dinner party that weekend, and let me tell you, panic doesn’t even begin to cover it. I had planned a whole menu, and the centerpiece was going to be my grandmother’s green bean casserole. You know the one—canned soup, canned green beans, those fried onion things from a box. It was nostalgic, sure, but honestly? It was also a bit of a gloppy mess.
My neighbor, a retired accountant named Harold who I’d only ever seen pruning his rose bushes, knocked on my door that same day. He was holding a cast iron skillet and a paper bag full of fresh green beans from his garden. “Heard about your oven,” he said, not really asking. “I don’t do canned soup. Let me show you something.” I wasn’t expecting cooking advice from my quiet, numbers-obsessed neighbor, but there I was, standing in my kitchen, listening to him describe exactly how to make a green bean casserole from scratch. He talked about shallots like they were gold and roux like it was a secret handshake. It was the last place I’d expect a recipe this good to come from, but that’s how the best things happen, isn’t it?
I almost laughed when he pulled out a bottle of heavy cream. No condensed mushroom soup. No mysterious can of cream of anything. Just real ingredients, a bit of patience, and a whole lot of flavor. I had a moment of doubt—maybe you’ve been there—where I thought, “Is it really a green bean casserole if it doesn’t come from a can?” But Harold just smiled and said, “Trust me.” So I did. And honestly, I’ve never looked back. This is the recipe that stole my dinner party that night, and it’s the one I keep making, year after year, for every single gathering.
Why You’ll Love This Recipe
This isn’t just another version of a classic side dish. This is the one that will make your guests ask for the recipe before they even finish their first helping. I’ve tested this casserole more times than I can count—for Thanksgiving, for potlucks, for random Tuesday dinners when I needed a little comfort. And every single time, it delivers.
- No Canned Soup, No Guilt: We’re making a real, from-scratch mushroom sauce that’s creamy, rich, and actually tastes like mushrooms. Your body (and your taste buds) will thank you.
- Crispy Shallot Topping That Stays Crunchy: Those sad, soggy fried onions from a can? Gone. We’re making crispy shallots that stay crunchy even after the casserole sits on the table for an hour.
- Perfect for Hosting: This dish is a showstopper at any gathering. It looks impressive, tastes incredible, and you can prep most of it before your guests arrive. I’ve served it alongside a roasted turkey, a simple roast chicken, and even a vegetarian nut roast—it fits right in.
- Crowd-Pleaser: I’ve watched kids go back for seconds and adults fight over the last spoonful. It’s that good.
- Simple Ingredients, Big Flavor: You don’t need anything fancy. Fresh green beans, mushrooms, cream, and shallots. That’s it. But the way they come together? Pure magic.
This recipe is the kind that makes you close your eyes after the first bite. It’s comfort food reimagined—healthier, faster, and with the same soul-soothing satisfaction. Perfect for impressing guests without stress, or turning a simple meal into something memorable.
What Ingredients You Will Need
This recipe uses simple, wholesome ingredients to deliver bold flavor and satisfying texture without the fuss. Most of these are pantry staples or easy to find at any grocery store. Let’s break it down.
For the Green Bean Base
- Fresh green beans, 1.5 lbs (680g) – Trimmed and cut into 2-inch pieces. I prefer haricots verts (the thin French beans) for a more elegant texture, but regular green beans work perfectly. Look for beans that snap cleanly when bent—that’s how you know they’re fresh.
- Kosher salt, 1 tablespoon – For blanching the beans. Don’t skip this—it seasons them from the inside out.
- Ice water, 1 large bowl – For shocking the beans after blanching. This locks in that vibrant green color.
For the Creamy Mushroom Sauce
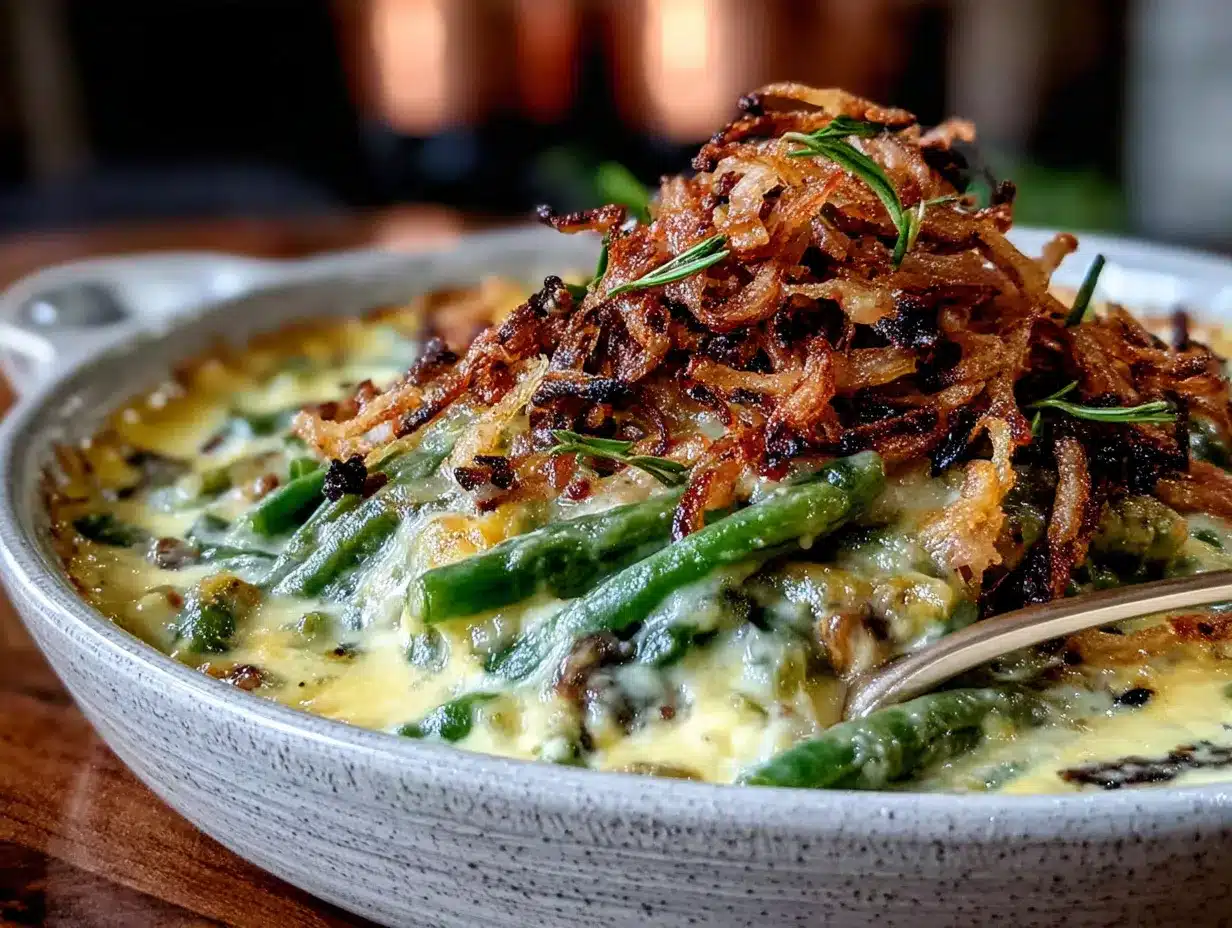
- Unsalted butter, 4 tablespoons (56g) – I use Kerrygold for its rich flavor, but any good quality butter works. This is the base of our roux.
- Cremini mushrooms, 12 oz (340g) – Sliced. Creminis have more flavor than white button mushrooms. You can also use baby bellas or a mix of wild mushrooms for a deeper, earthier taste.
- Yellow onion, 1 medium – Finely diced. About 1 cup.
- Garlic, 4 cloves – Minced. Fresh garlic is non-negotiable here.
- All-purpose flour, 1/4 cup (30g) – This thickens our sauce. For a gluten-free option, use a 1:1 gluten-free flour blend.
- Chicken or vegetable broth, 1 cup (240ml) – Low-sodium is best so you can control the salt. I prefer chicken broth for a richer flavor, but vegetable broth keeps it vegetarian.
- Heavy cream, 1 cup (240ml) – This is what makes the sauce luxuriously creamy. You can substitute with half-and-half for a lighter version, but the sauce won’t be as thick.
- Dry sherry or white wine, 1/4 cup (60ml) – Optional, but highly recommended. It adds a subtle depth that balances the richness. I’ve used a dry vermouth in a pinch and it worked great.
- Fresh thyme, 2 teaspoons – Chopped. Dried thyme works too, but use only 1 teaspoon.
- Freshly ground black pepper, 1/2 teaspoon – Or to taste.
- Nutmeg, a pinch – Freshly grated if you can. It’s a secret weapon that brightens the whole dish.
For the Crispy Shallot Topping
- Large shallots, 4-5 – Thinly sliced into rings. About 1.5 cups. Look for firm, dry shallots without any green sprouts.
- All-purpose flour, 1/2 cup (60g) – For coating the shallots.
- Kosher salt, 1/2 teaspoon – For seasoning the flour.
- Freshly ground black pepper, 1/4 teaspoon
- Vegetable or canola oil, 1 cup (240ml) – For frying. Use a neutral oil with a high smoke point. I’ve used peanut oil before and it adds a nice subtle flavor.
Equipment Needed
You don’t need a professional kitchen for this, but a few key tools will make your life easier. Here’s what I use every time.
- Large pot (6-quart) – For blanching the green beans. A stockpot or large Dutch oven works perfectly.
- Large bowl with ice water – For shocking the beans. A metal bowl is best because it stays cold longer.
- Large skillet or sauté pan (12-inch) – For making the mushroom sauce. A heavy-bottomed pan distributes heat evenly and prevents scorching.
- Small saucepan or deep skillet – For frying the shallots. I use a 2-quart saucepan. A deep fryer works too, but honestly, a simple saucepan does the job.
- 9×13-inch baking dish – For assembling and baking the casserole. A ceramic or glass dish works best. I’ve used a metal pan before and the edges tend to cook faster.
- Slotted spoon or spider strainer – For removing the fried shallots from the oil. A slotted spoon works, but a spider strainer is my go-to—it lets more oil drain off.
- Paper towels – For draining the shallots. A wire rack set over a baking sheet works even better for keeping them crispy.
- Chef’s knife and cutting board – For all that chopping. A sharp knife makes a world of difference.
- Measuring cups and spoons – Accuracy matters, especially with the flour and cream.
Budget-friendly tip: If you don’t have a 9×13-inch dish, use a 10-inch cast iron skillet. It works beautifully and adds a rustic look to the presentation. Just make sure it’s oven-safe.
Preparation Method
Let’s get cooking. I’ve broken this down into clear steps so you can follow along without any stress. Take your time, and don’t rush the sauce—that’s where the magic happens.
Step 1: Blanch the Green Beans
Bring a large pot of water to a rolling boil. Add 1 tablespoon of kosher salt—it should taste like the sea. While the water heats, fill a large bowl with ice water and set it nearby. Drop the trimmed green beans into the boiling water and cook for exactly 2 minutes. They should turn bright green and become slightly tender but still have a nice snap. Immediately transfer them to the ice water bath using a slotted spoon. Let them sit for 2-3 minutes, then drain well and pat dry with a clean kitchen towel. Don’t skip the ice bath—it stops the cooking process and locks in that beautiful color. You can do this step up to 24 hours ahead and store the beans in the fridge.
Step 2: Make the Crispy Shallots
While the beans are cooling, let’s get the shallots going. Separate the thinly sliced shallots into rings. In a shallow bowl, whisk together the flour, 1/2 teaspoon salt, and 1/4 teaspoon pepper. Toss the shallot rings in the flour mixture until they’re evenly coated. Shake off any excess flour—you want a light coating, not a thick crust. Heat 1 cup of oil in a small saucepan over medium-high heat until it shimmers (about 350°F or 175°C if you have a thermometer). Working in batches, fry the shallots for 2-3 minutes, stirring occasionally, until they’re golden brown. They’ll continue to darken a bit after you remove them, so pull them out when they’re just a shade lighter than you want. Transfer to a paper towel-lined plate and sprinkle with a pinch of salt while they’re still hot. Set aside. Pro tip: Don’t overcrowd the pan—it lowers the oil temperature and makes the shallots greasy instead of crispy.
Step 3: Sauté the Mushrooms and Onions
In a large skillet, melt 2 tablespoons of butter over medium-high heat. Add the sliced mushrooms in a single layer—don’t stir them for the first 2 minutes. Let them get a nice golden sear. Then add the diced onion and cook for another 4-5 minutes, stirring occasionally, until the onions are translucent and the mushrooms have released their liquid and started to brown. Add the minced garlic and cook for 30 seconds until fragrant. Your kitchen should smell incredible right about now.
Step 4: Build the Roux and Sauce
Reduce the heat to medium. Add the remaining 2 tablespoons of butter to the skillet. Once melted, sprinkle the flour over the vegetables and stir constantly for 1-2 minutes. This cooks out the raw flour taste and creates a golden roux. Slowly pour in the chicken broth while whisking vigorously to prevent lumps. Then add the heavy cream and the dry sherry (if using). Continue whisking until the sauce thickens, about 3-4 minutes. It should coat the back of a spoon. Stir in the fresh thyme, black pepper, and that pinch of nutmeg. Taste and adjust salt—remember, the shallots are salty, so go easy.
Step 5: Assemble the Casserole
Preheat your oven to 375°F (190°C). Grease your 9×13-inch baking dish with a little butter or non-stick spray. Spread the blanched green beans evenly in the dish. Pour the creamy mushroom sauce over the top and gently stir to coat every bean. Spread it into an even layer. At this point, you can cover and refrigerate the casserole for up to 24 hours. Just bring it to room temperature before baking.
Step 6: Bake and Top
Bake the casserole uncovered for 20-25 minutes, until it’s bubbly around the edges and the sauce is thick and luscious. Remove from the oven and let it rest for 5 minutes. Just before serving, sprinkle the crispy shallots generously over the top. Don’t add them before baking—they’ll get soft and lose that wonderful crunch. Serve immediately while the shallots are still crackling.
Cooking Tips & Techniques
I’ve made this casserole more times than I can count, and I’ve learned a few things the hard way. Here’s what I wish someone had told me the first time.
- Don’t Overcook the Beans: Two minutes in boiling water is all they need. Overcooked green beans turn mushy and lose their vibrant color. Trust the timer.
- Pat the Beans Dry: After blanching and shocking, make sure the beans are thoroughly dried. Any excess water will dilute the sauce and make it watery. I use a salad spinner for this—it’s a game-changer.
- Low and Slow for the Roux: When you add the flour to the butter, keep the heat medium and stir constantly. A burnt roux will ruin the sauce. If you see dark specks, start over. I’ve had to do this twice, and it’s worth it.
- Taste as You Go: This sounds obvious, but it’s easy to forget. The broth, cream, and shallots all have different salt levels. Taste the sauce before you add the beans and adjust accordingly.
- Make Ahead Magic: This casserole is a host’s best friend. You can blanch the beans, make the sauce, and assemble the whole thing a day ahead. Just hold off on the shallot topping until you’re ready to serve. I’ve even baked it halfway, then finished it the next day—works perfectly.
- Frying Shallots Without a Thermometer: If you don’t have a thermometer, drop a single shallot ring into the oil. If it sizzles immediately and rises to the surface, the oil is ready. If it sinks, wait a bit longer.
Variations & Adaptations
This recipe is a fantastic base, and I love playing around with it depending on the season or who’s coming to dinner. Here are a few of my favorite twists.
- Bacon Lover’s Version: Cook 4 slices of thick-cut bacon until crispy, then crumble. Use the rendered bacon fat in place of 2 tablespoons of butter for the roux. Stir the crumbled bacon into the sauce before assembling. It’s indulgent, but honestly, it’s incredible.
- Vegan Adaptation: Substitute the butter with a high-quality vegan butter or olive oil, use full-fat coconut cream or cashew cream instead of heavy cream, and swap the chicken broth for vegetable broth. The sauce will be slightly different in texture, but still rich and delicious. I’ve made this for a vegan friend and she asked for the recipe twice.
- Gluten-Free Option: Use a 1:1 gluten-free flour blend for the roux and the shallot coating. I’ve tested this with Bob’s Red Mill and it works beautifully. Just make sure the flour blend contains xanthan gum for proper thickening.
- Mushroom Mix-Up: Instead of just creminis, try a mix of shiitake, oyster, and cremini mushrooms. The shiitakes add an earthy, almost smoky flavor that’s fantastic. I did this for a Thanksgiving potluck and it was the first dish to disappear.
- Herb Infusion: Add 1 tablespoon of fresh chopped rosemary or sage along with the thyme. It gives the casserole a more aromatic, wintery feel. Perfect for holiday gatherings.
- Cheesy Twist: Stir in 1/2 cup of grated Gruyère or sharp white cheddar into the sauce before baking. The cheese melts into the sauce and adds a whole new layer of flavor. I’ve also used Parmesan on top for a golden, bubbly crust.
Serving & Storage Suggestions
This casserole is a star on its own, but here’s how to make it shine even brighter at your next gathering.
Serving Temperature and Presentation: Serve the casserole hot, straight from the oven. The sauce should be bubbling and the shallots should be golden and crisp. I like to transfer the casserole to a warm serving platter and sprinkle a few extra crispy shallots on top for that dramatic, restaurant-style finish. A sprinkle of fresh thyme leaves or chopped parsley adds a pop of color.
What to Serve Alongside: This casserole pairs beautifully with roasted turkey, of course, but don’t limit yourself. It’s fantastic with a simple roast chicken, grilled steak, or even a hearty vegetarian main like a mushroom Wellington. For a potluck, I often serve it alongside mashed potatoes and a simple green salad. The creamy sauce is also delicious spooned over rice or quinoa.
Storage Instructions: Leftovers (if you have any!) can be stored in an airtight container in the refrigerator for up to 4 days. The shallots will lose their crunch, but the flavor will still be amazing. I actually love the leftovers—the flavors meld together overnight and become even more delicious.
Reheating Tips: To reheat, place the casserole in a 350°F (175°C) oven for 15-20 minutes, or until heated through. You can also reheat individual portions in the microwave, but the texture will be softer. If you want to revive the crispy shallots, make a fresh batch—they only take a few minutes and it’s totally worth it.
Freezer Instructions: You can freeze the assembled casserole (without the shallot topping) for up to 3 months. Thaw overnight in the refrigerator, then bake as directed. Add fresh crispy shallots just before serving. I’ve done this for holiday meal prep and it’s a lifesaver.
Nutritional Information & Benefits
While this is definitely a comfort food dish, it’s made with real, whole ingredients that offer some nutritional perks. Here’s a rough estimate per serving (based on 8 servings).
- Calories: Approximately 320-350 per serving
- Protein: 6-8g
- Fat: 22-25g (mostly from cream and butter)
- Carbohydrates: 18-22g
- Fiber: 4-5g
- Sugar: 5-7g (naturally occurring)
Health Benefits: Green beans are a great source of vitamins A, C, and K, as well as fiber and folate. Mushrooms provide B vitamins and selenium, which supports immune function. Shallots are rich in antioxidants and have anti-inflammatory properties. By making the sauce from scratch, you’re avoiding the preservatives, sodium, and artificial flavors found in canned soups. It’s comfort food you can feel good about eating.
Dietary Considerations: This recipe is vegetarian if you use vegetable broth. For a gluten-free version, use a gluten-free flour blend. It’s not dairy-free or vegan, but I’ve included adaptations above. The main allergens are dairy (butter, cream) and gluten (flour).
Conclusion
This green bean casserole has become my go-to for every gathering, and I honestly can’t imagine going back to the canned stuff. It’s the dish that made my neighbor Harold a legend in my kitchen, and it’s the one that keeps getting requested year after year. There’s something incredibly satisfying about making a classic from scratch—taking the time to caramelize the mushrooms, fry the shallots to perfection, and build a sauce that’s truly creamy and flavorful. It’s not complicated, but it feels special.
I hope you give this recipe a try, and I hope it becomes a tradition in your home too. Feel free to play around with the variations—add bacon, try different mushrooms, or make it your own in whatever way feels right. That’s the beauty of cooking from scratch. And if you make it for your next dinner party or potluck, I’d love to hear how it goes. Drop a comment below and let me know if your guests asked for the recipe. Trust me, they will.
Happy cooking, friends!
Frequently Asked Questions
Can I use frozen green beans instead of fresh?
You can, but I really recommend fresh for this recipe. Frozen green beans tend to be softer and can release more water into the sauce, making it watery. If you’re in a pinch, thaw and pat them very dry before using, and reduce the blanching time to just 1 minute.
Can I make the crispy shallots ahead of time?
Yes, but they’re best within a few hours of frying. You can make them up to a day ahead and store them in an airtight container at room temperature. They won’t be as shatteringly crisp, but they’ll still be delicious. To refresh them, spread them on a baking sheet and warm in a 300°F oven for 3-4 minutes.
What if I don’t have dry sherry or white wine?
No problem! You can simply skip it. The sauce will still be delicious, though it will lack a bit of depth. You can also substitute with an equal amount of chicken broth mixed with 1 teaspoon of lemon juice or apple cider vinegar for a touch of acidity.
Can I double this recipe for a larger crowd?
Absolutely! This recipe doubles beautifully. Use a larger baking dish (like a 12×17-inch roasting pan) or make two separate 9×13-inch casseroles. You may need to increase the baking time by 5-10 minutes since there’s more volume. Just keep an eye on it—you want it bubbly and hot all the way through.
Why did my sauce turn out lumpy?
Lumpy sauce usually happens when the flour isn’t fully incorporated into the butter (the roux stage) or when you add the liquid too quickly. Make sure you stir the flour into the butter for a full minute before adding any liquid, and pour the broth in slowly while whisking constantly. If you do get lumps, you can strain the sauce through a fine-mesh sieve before adding it to the beans. I’ve had to do this once or twice—it’s not the end of the world.
Pin This Recipe!
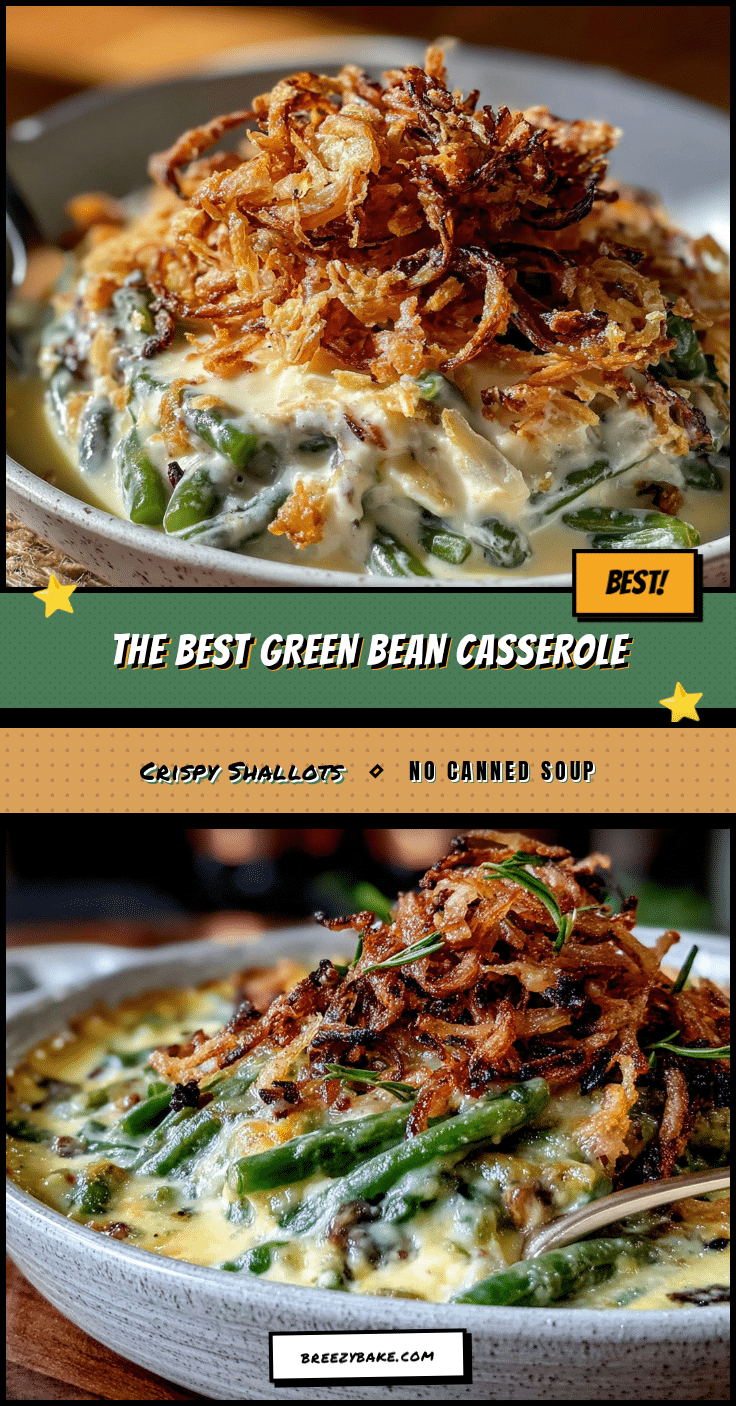
The Best Green Bean Casserole with Crispy Shallots (No Canned Soup)

This from-scratch green bean casserole features a creamy mushroom sauce and crispy shallot topping, made without any canned soup. It’s a showstopper side dish perfect for holidays and gatherings.
- Prep Time: 20 minutes
- Cook Time: 30 minutes
- Total Time: 50 minutes
- Yield: 8 servings 1x
- Category: Side Dish
- Cuisine: American
Ingredients
- 1.5 lbs (680g) fresh green beans, trimmed and cut into 2-inch pieces
- 1 tablespoon kosher salt (for blanching)
- Ice water (for shocking)
- 4 tablespoons (56g) unsalted butter
- 12 oz (340g) cremini mushrooms, sliced
- 1 medium yellow onion, finely diced
- 4 cloves garlic, minced
- 1/4 cup (30g) all-purpose flour
- 1 cup (240ml) low-sodium chicken or vegetable broth
- 1 cup (240ml) heavy cream
- 1/4 cup (60ml) dry sherry or white wine (optional)
- 2 teaspoons fresh thyme, chopped (or 1 teaspoon dried)
- 1/2 teaspoon freshly ground black pepper
- Pinch of nutmeg (preferably freshly grated)
- 4–5 large shallots, thinly sliced into rings (about 1.5 cups)
- 1/2 cup (60g) all-purpose flour (for coating shallots)
- 1/2 teaspoon kosher salt (for shallot coating)
- 1/4 teaspoon freshly ground black pepper (for shallot coating)
- 1 cup (240ml) vegetable or canola oil (for frying)
Instructions
- Blanch the green beans: Bring a large pot of water to a rolling boil and add 1 tablespoon kosher salt. Fill a large bowl with ice water. Drop the trimmed green beans into the boiling water and cook for exactly 2 minutes until bright green and slightly tender. Immediately transfer to the ice water bath using a slotted spoon. Let sit for 2-3 minutes, then drain well and pat dry. (Can be done up to 24 hours ahead.)
- Make the crispy shallots: Separate the thinly sliced shallots into rings. In a shallow bowl, whisk together 1/2 cup flour, 1/2 teaspoon salt, and 1/4 teaspoon pepper. Toss the shallot rings in the flour mixture until evenly coated; shake off excess. Heat 1 cup oil in a small saucepan over medium-high heat until shimmering (about 350°F/175°C). Working in batches, fry the shallots for 2-3 minutes, stirring occasionally, until golden brown. Transfer to a paper towel-lined plate and sprinkle with a …
- Sauté the mushrooms and onions: In a large skillet, melt 2 tablespoons butter over medium-high heat. Add the sliced mushrooms in a single layer and cook without stirring for 2 minutes. Add the diced onion and cook for 4-5 minutes, stirring occasionally, until onions are translucent and mushrooms are browned. Add the minced garlic and cook for 30 seconds until fragrant.
- Build the roux and sauce: Reduce heat to medium. Add the remaining 2 tablespoons butter to the skillet. Once melted, sprinkle 1/4 cup flour over the vegetables and stir constantly for 1-2 minutes to create a golden roux. Slowly pour in the chicken broth while whisking vigorously to prevent lumps. Add the heavy cream and dry sherry (if using). Continue whisking until the sauce thickens, about 3-4 minutes, until it coats the back of a spoon. Stir in the fresh thyme, black pepper, and nutmeg. Taste…
- Assemble the casserole: Preheat oven to 375°F (190°C). Grease a 9×13-inch baking dish with butter or non-stick spray. Spread the blanched green beans evenly in the dish. Pour the creamy mushroom sauce over the top and gently stir to coat every bean. Spread into an even layer. (Can be covered and refrigerated for up to 24 hours at this point; bring to room temperature before baking.)
- Bake and top: Bake the casserole uncovered for 20-25 minutes until bubbly around the edges and the sauce is thick. Remove from oven and let rest for 5 minutes. Just before serving, sprinkle the crispy shallots generously over the top. Serve immediately.
Notes
For best results, don’t overcook the beans—2 minutes in boiling water is enough. Pat the beans dry after blanching to avoid watery sauce. Make the roux over medium heat and stir constantly to prevent burning. Taste the sauce before adding beans to adjust seasoning. The casserole can be assembled a day ahead (without shallots) and baked just before serving. For gluten-free, use a 1:1 gluten-free flour blend. For vegan, use vegan butter, coconut cream or cashew cream, and vegetable broth.
Nutrition
- Serving Size: 1 serving (about 1 c
- Calories: 335
- Sugar: 6
- Sodium: 480
- Fat: 23
- Saturated Fat: 12
- Carbohydrates: 20
- Fiber: 4
- Protein: 7
Keywords: green bean casserole, from scratch, no canned soup, crispy shallots, Thanksgiving side dish, holiday recipe, comfort food, vegetarian option


