Third time in two weeks I’ve assembled this board, and this time I finally remembered to set out the little ramekins before piling on the chips. You’d think after the first two attempts—where I ended up digging sour cream out from under a mountain of shredded chicken—I’d have learned. But honestly, that chaos is part of the charm. The Ultimate Loaded Nacho Football Charcuterie Board isn’t about perfection; it’s about creating a spread that makes people stop mid-conversation, grab a chip, and go “oh, that’s good” without finishing the sentence.
It started because I was tired of watching everyone hover around the stove during the big game, waiting for me to finish layering a single baking sheet of nachos that would get soggy before halftime. I wanted something that sat out for hours, that people could pick at without asking permission, that looked like a party before anyone even took a bite. So I took everything I love about a classic nacho platter—the seasoned beef, the melty cheese, the jalapeño kick—and turned it into a grazing board that practically runs itself.
The first version was a disaster. Too much cheese sauce that solidified into a weird skin. Chips that broke under the weight of the toppings. But by round three, I’d figured out the trick: you build the board in zones, keep the wet stuff in bowls, and let people assemble their own perfect bite. It’s less a recipe and more a strategy, and once you see it come together, you’ll never go back to sheet-pan nachos again.
This board has become my go-to for any gathering where I want to actually enjoy the party. It feeds a crowd without stress, looks impressive with minimal effort, and somehow disappears faster than anything else on the table. Trust me on this one.
Why You’ll Love This Recipe
I’ve tested this board at three different gatherings now—Super Bowl party, casual Friday night with friends, and even a birthday get-together—and every single time, it’s the first thing to get picked clean. Here’s why it works so well:
- No Soggy Chips Ever : Because everything is served separately, your chips stay perfectly crunchy until the very last bite. No more sad, limp nachos.
- Customizable for Every Eater : Picky friend who hates beans? No problem. Someone who wants extra jalapeños? Go for it. Everyone builds their own plate.
- Stays Out for Hours : Unlike baked nachos that need to be eaten immediately, this board holds up beautifully over the course of a game or party. Just refresh the bowls as needed.
- Looks Insanely Impressive : People lose their minds over a well-arranged charcuterie board. Add nacho toppings and you’re basically a kitchen rockstar with minimal actual cooking.
- Perfect for Game Day and Beyond : While it’s designed for football season, I’ve brought this to movie nights, potlucks, and even casual dinners. It always steals the show.
What makes this board different from every other nacho platter out there is the balance. The seasoned beef is juicy but not greasy. The cheese sauce stays smooth and dippable. The fresh toppings add brightness that cuts through all that richness. And the layout? It forces people to interact with the food, which is exactly what you want at a party. It’s not just food—it’s an experience. And honestly? It’s the kind of spread that makes you feel like you’ve got it all together, even if you’re just reheating the beef in a skillet while someone else brings the drinks.
What Ingredients You Will Need
This recipe uses simple, crowd-pleasing ingredients that come together for maximum flavor with minimum fuss. Most of these are pantry staples or easy to find at any grocery store, which is exactly what you want when you’re feeding a crowd.
- Restaurant-style tortilla chips – The sturdy, thick kind that won’t snap when you scoop. I recommend Tostitos Scoops or a similar brand—they hold up best.
- Ground beef (1 lb) – 80/20 blend gives the best flavor without being too greasy. Drain off excess fat after cooking.
- Taco seasoning (1 packet or 3 tbsp homemade) – I use Old El Paso when I’m in a hurry, but making your own with chili powder, cumin, and smoked paprika is worth the extra minute.
- Water or beef broth (1/3 cup) – Helps the seasoning bind to the meat and keeps it moist.
- Shredded Mexican blend cheese (2 cups) – Pre-shredded works fine, but freshly shredded melts creamier if you have the time.
- Queso or nacho cheese sauce (1 ½ cups) – Store-bought is totally fine here. I like the Tostitos brand jarred queso for convenience, but homemade works too.
- Sour cream (1 cup) – Full-fat tastes best, but Greek yogurt works as a lighter substitute.
- Guacamole (1 ½ cups) – Store-bought is fine, but homemade is easy: mash 3 avocados with lime juice, salt, and a little diced onion.
- Pico de gallo or salsa (1 cup) – Fresh pico adds brightness; jarred salsa works for convenience.
- Roma tomatoes (2, diced) – Adds freshness and color.
- Jalapeños (1/2 cup, sliced) – Pickled for tang, fresh for heat. I do a mix of both.
- Black olives (1/2 cup, sliced) – Canned is fine. Drain well before adding.
- Canned black beans (1 can, drained and rinsed) – Adds fiber and heartiness. Optional but recommended.
- Fresh cilantro (1/2 cup, chopped) – For garnish and freshness.
- Green onions (1/4 cup, sliced) – Adds a mild onion kick and color.
- Lime wedges (from 2 limes) – Essential for squeezing over everything right before eating.
- Optional add-ins – Pickled red onions, sliced radishes, cotija cheese crumbles, or even diced mango for a sweet twist.
Equipment Needed
You don’t need anything fancy to pull this board together, but having the right tools makes the process smoother. Here’s what I use:
- Large wooden cutting board or serving platter (at least 16×12 inches) – The bigger, the better. A rimless baking sheet works in a pinch.
- Small ramekins or bowls (4-6) – For wet ingredients like queso, sour cream, guacamole, and salsa. Anchor them into the board so they don’t slide around.
- Large skillet – For cooking the ground beef. A 12-inch nonstick works great.
- Spatula or wooden spoon – For breaking up the meat while it browns.
- Cheese grater – If you’re shredding your own cheese (which I recommend for better melt).
- Small serving spoons and tongs – For guests to serve themselves without touching everything.
- Paper towels or napkins – Trust me, you’ll need them. Game day is messy business.
If you don’t have a large wooden board, a clean cutting board or even a large baking sheet lined with parchment paper works perfectly. The key is surface area—you want room to spread everything out so people can see all the options at once. I’ve used a pastry board from IKEA for years, and it’s held up through countless parties.
Preparation Method
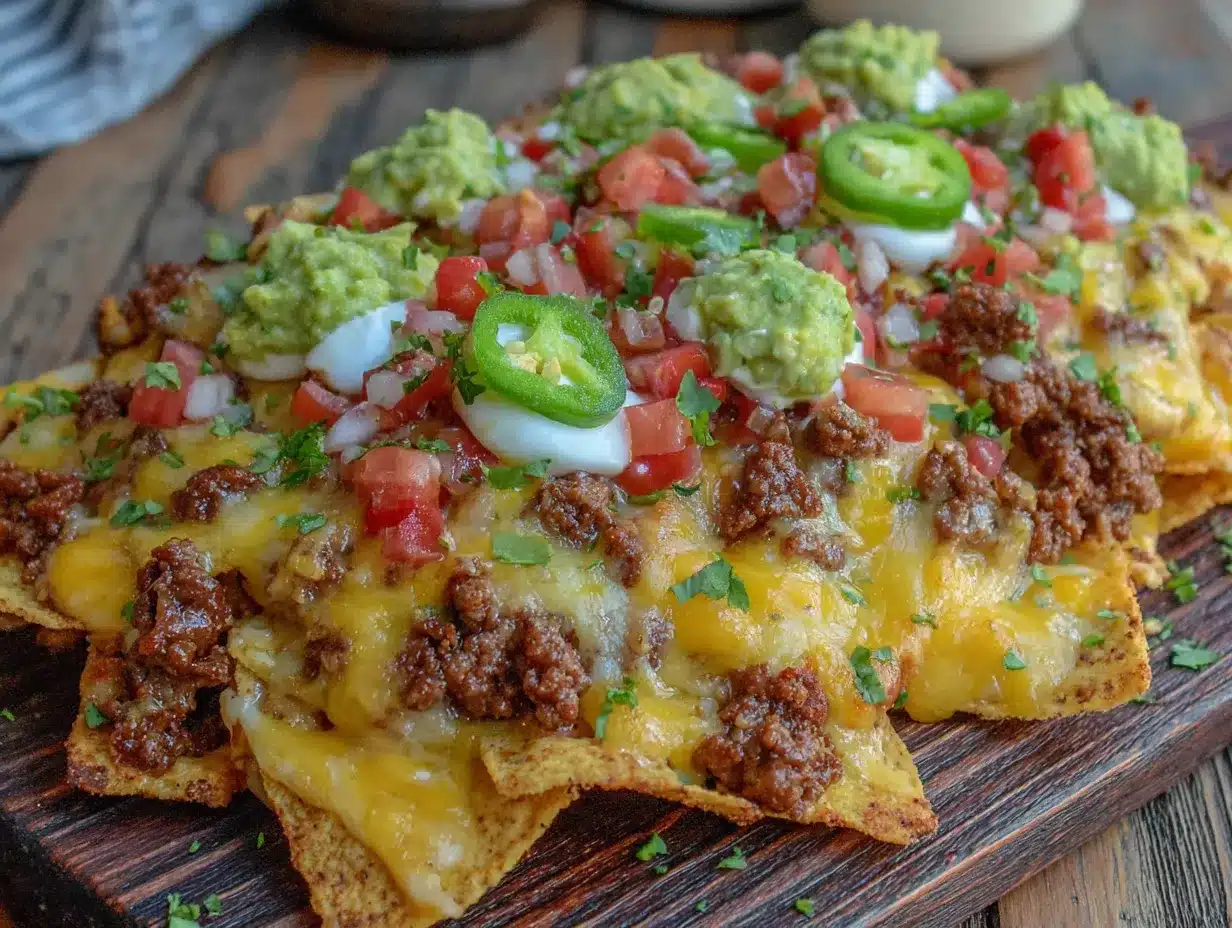
Here’s how to build this board step by step. The secret is cooking the beef and prepping the toppings while you arrange the chips and bowls, so everything comes together in about 30 minutes flat.
- Cook the seasoned beef – Heat a large skillet over medium-high heat. Add the ground beef and break it up with a spatula. Cook for 6-8 minutes until browned, then drain off excess fat (leave about a tablespoon for flavor). Reduce heat to low, add taco seasoning and water or beef broth, and stir. Simmer for 3-4 minutes until the liquid thickens and coats the meat. Transfer to a bowl and set aside.
- Warm the queso – If using jarred queso, transfer to a small saucepan and warm over low heat, stirring occasionally. You can also microwave it in 30-second bursts, stirring between each. Keep it covered to prevent a skin from forming.
- Prep your fresh toppings – Dice the tomatoes, slice the jalapeños, drain and rinse the black beans, slice the olives, chop the cilantro, and slice the green onions. Arrange them in small bowls for easy grabbing.
- Set up your board – Place your large board or platter on a flat surface. Arrange the small ramekins or bowls around the board first—these will hold the queso, sour cream, guacamole, and salsa. Space them out so there’s room for chips and toppings between them.
- Add the chips – Pour the tortilla chips in large piles around the bowls. Don’t be shy—fill the board generously. Leave some open spaces for the beef and shredded cheese.
- Layer the toppings – Spoon the seasoned beef into one or two open spaces on the board. Sprinkle the shredded Mexican cheese blend next to the beef. Add the black beans, diced tomatoes, sliced olives, and jalapeños in small piles around the chips.
- Garnish and serve – Sprinkle the chopped cilantro and green onions over the board for color. Tuck lime wedges in between the piles. Serve immediately with small spoons and tongs so guests can build their own nacho plates.
A few notes from my trials: If you’re making this ahead, cook the beef and prep all toppings up to a day in advance. Store everything separately in the fridge, then assemble the board about 20 minutes before serving. The chips should stay in their bag until the last minute to keep them crunchy. And don’t forget to taste the beef before you add it to the board—adjust the seasoning if needed. I once forgot to add salt and it was tragically bland.
Cooking Tips & Techniques
After making this board more times than I care to count, I’ve picked up a few tricks that make a real difference. Here’s what I wish I’d known from the start:
- Don’t overcrowd the board – It’s tempting to pile everything on, but leaving some negative space makes the board look intentional and easier for guests to navigate. You can always refill as things get eaten.
- Anchor your bowls – Put the heavier bowls (like queso and guacamole) toward the center of the board where they’re less likely to get knocked over. Use a little bit of sour cream or guacamole on the bottom of the bowl to stick it in place if needed.
- Keep the beef warm – If you’re serving over a longer period, transfer the seasoned beef to a small slow cooker or warming tray after cooking. It stays juicy and hot without drying out.
- Layer strategically – Place the ingredients that might drip (like pico de gallo or pickled jalapeños) near the edges of the board so any spills don’t ruin the chips. Keep dry ingredients like olives and cheese closer to the center.
- Refresh as needed – Halfway through the party, take a minute to rearrange and refill empty spots. Add more chips, reheat the queso, and swap out empty bowls. It takes two minutes and keeps the board looking fresh.
- Learn from my mistakes – The first time I made this, I put the queso in a wide, shallow bowl that got knocked over within five minutes. Now I use deeper, narrower ramekins. Also, I once forgot to drain the black beans and they made everything watery. Always rinse and drain thoroughly.
One more thing: if you’re using homemade guacamole, press plastic wrap directly onto the surface before refrigerating. It keeps it from browning and saves you from having to make a fresh batch mid-party.
Variations & Adaptations
This board is endlessly customizable, which is one of the reasons I love it. Here are a few ways to switch it up based on your crowd or cravings:
- Chicken version – Swap the ground beef for shredded rotisserie chicken tossed with taco seasoning and a splash of lime juice. It’s lighter but just as flavorful. If you love this idea, you’ll also enjoy my crispy Super Bowl chicken nacho crust pizza for another game day win.
- Vegetarian option – Replace the beef with seasoned black beans, refried beans, or crumbled tofu cooked with taco seasoning. Load up on extra veggies like roasted corn, bell peppers, and avocado.
- Spicy upgrade – Add diced habanero to the pico de gallo, use spicy chorizo instead of ground beef, and drizzle with hot sauce before serving. For the brave only.
- Breakfast board – Swap the beef for scrambled eggs and breakfast sausage, use queso blanco instead of cheddar, and add hash browns on the side. Perfect for a lazy Sunday game day.
- Low-carb adaptation – Replace tortilla chips with pork rinds or cucumber slices. Use full-fat sour cream and cheese, and load up on guacamole and fresh veggies.
- My personal favorite variation – I once added a small bowl of pickled red onions and a drizzle of crema (Mexican sour cream) on top of everything. The tangy acidity cut through the richness so perfectly that I now include it every time.
Serving & Storage Suggestions
This board is designed to be served at room temperature or slightly warm, which makes it perfect for parties where people graze over a few hours. Here’s how to handle serving and leftovers:
- Serving temperature – Serve the beef and queso warm, but everything else can be at room temperature. If you’re using a slow cooker for the beef, keep it on warm and let guests spoon it onto their plates.
- Presentation tips – Arrange the board so colors contrast—green guacamole next to red tomatoes, white sour cream next to black olives. It looks more appetizing and makes it easier for guests to find what they want.
- Complementary dishes – This board pairs beautifully with crispy Super Bowl chicken wing bites for a full game day spread. For a sweet finish, try creamy pink strawberry crème puff bars for a fun dessert twist.
- Storage – Leftovers should be stored separately. The beef keeps in an airtight container in the fridge for up to 4 days. Chips will go stale if left out, so seal the bag tightly. Guacamole should be eaten within a day (press plastic wrap onto the surface to prevent browning).
- Reheating – Reheat the beef in a skillet over medium heat with a splash of water to bring back moisture. Queso can be microwaved in 20-second bursts, stirring between each. Do not reheat the chips—just eat them stale or toss them.
- Flavor development – The beef actually tastes better the next day after the seasonings have melded. I’ve been known to make it a day ahead on purpose. Just reheat gently before serving.
Nutritional Information & Benefits
Let’s be real—this is game day food, not a health salad. But that doesn’t mean it’s devoid of redeeming qualities. Here’s a rough estimate per serving (about 1 cup of chips with toppings):
- Calories: Approximately 450-550 per serving (varies based on toppings chosen)
- Protein: 22-25g (thanks to the beef, cheese, and beans)
- Fat: 28-35g (mostly from cheese, sour cream, and avocado)
- Carbohydrates: 35-40g (chips and beans are the main sources)
- Fiber: 6-8g (black beans, avocado, and fresh veggies add fiber)
The black beans and avocado provide heart-healthy fiber and good fats. The tomatoes and cilantro add vitamins A and C. And the protein from the beef and cheese will keep everyone full longer than plain chips. For a lighter option, swap sour cream for Greek yogurt and use baked chips. But honestly? Game day is about indulgence. Just balance it out with a veggie-heavy meal the next day.
If you’re watching sodium, use low-sodium taco seasoning and rinse the canned beans thoroughly. The pickled jalapeños and olives add salt too, so go easy if that’s a concern.
Conclusion
This Ultimate Loaded Nacho Football Charcuterie Board has become my secret weapon for every gathering where I want to feed people well without being stuck in the kitchen. It’s forgiving, flexible, and somehow always impresses even the pickiest eaters. Whether you’re hosting the Super Bowl, a weekly game night, or just a casual hangout with friends, this board delivers every single time.
I love that it lets everyone build their own perfect bite—some people go heavy on the beef and cheese, others load up on fresh veggies and guacamole. No two plates look the same, and that’s the beauty of it. It’s interactive, it’s delicious, and it makes you look like you put in way more effort than you actually did.
So grab your biggest board, raid your pantry, and give this a try for your next game day. I’d love to hear how it turned out—drop a comment below with your favorite topping combination, or tag me in your board photos. And if you come up with a wild variation I haven’t tried yet, definitely let me know. Happy snacking, and may your chips stay crunchy and your queso stay warm!
Frequently Asked Questions
Can I make this board ahead of time?
Yes, absolutely. Cook the beef and prep all toppings up to a day in advance. Store everything separately in the fridge, then assemble the board about 20 minutes before serving. Keep the chips in their bag until the last minute to maintain crunchiness.
How do I keep the queso from getting cold and thick?
Serve the queso in a small slow cooker or a ramekin set on a warming tray. Alternatively, microwave it in 30-second bursts and stir just before serving. You can also add a splash of milk to thin it out if it thickens too much.
What if I don’t have a large board?
No problem! Use a rimless baking sheet, a large cutting board, or even a clean countertop covered with parchment paper. The key is surface area—you want enough room to spread everything out so guests can see all the options.
Can I make this vegetarian or vegan?
Definitely. Replace the beef with seasoned black beans, refried beans, or crumbled tofu. Use vegan queso and dairy-free sour cream. Load up on extra veggies like roasted corn, bell peppers, and avocado. It’s just as satisfying.
How many people does this board serve?
This board serves 8-10 people as a main snack or appetizer. If you’re serving it as part of a larger spread with other dishes like crispy bacon ranch chicken flatbread minis, it can stretch to 12-14 people. Just double the beef and cheese if you have a big crowd.
Pin This Recipe!
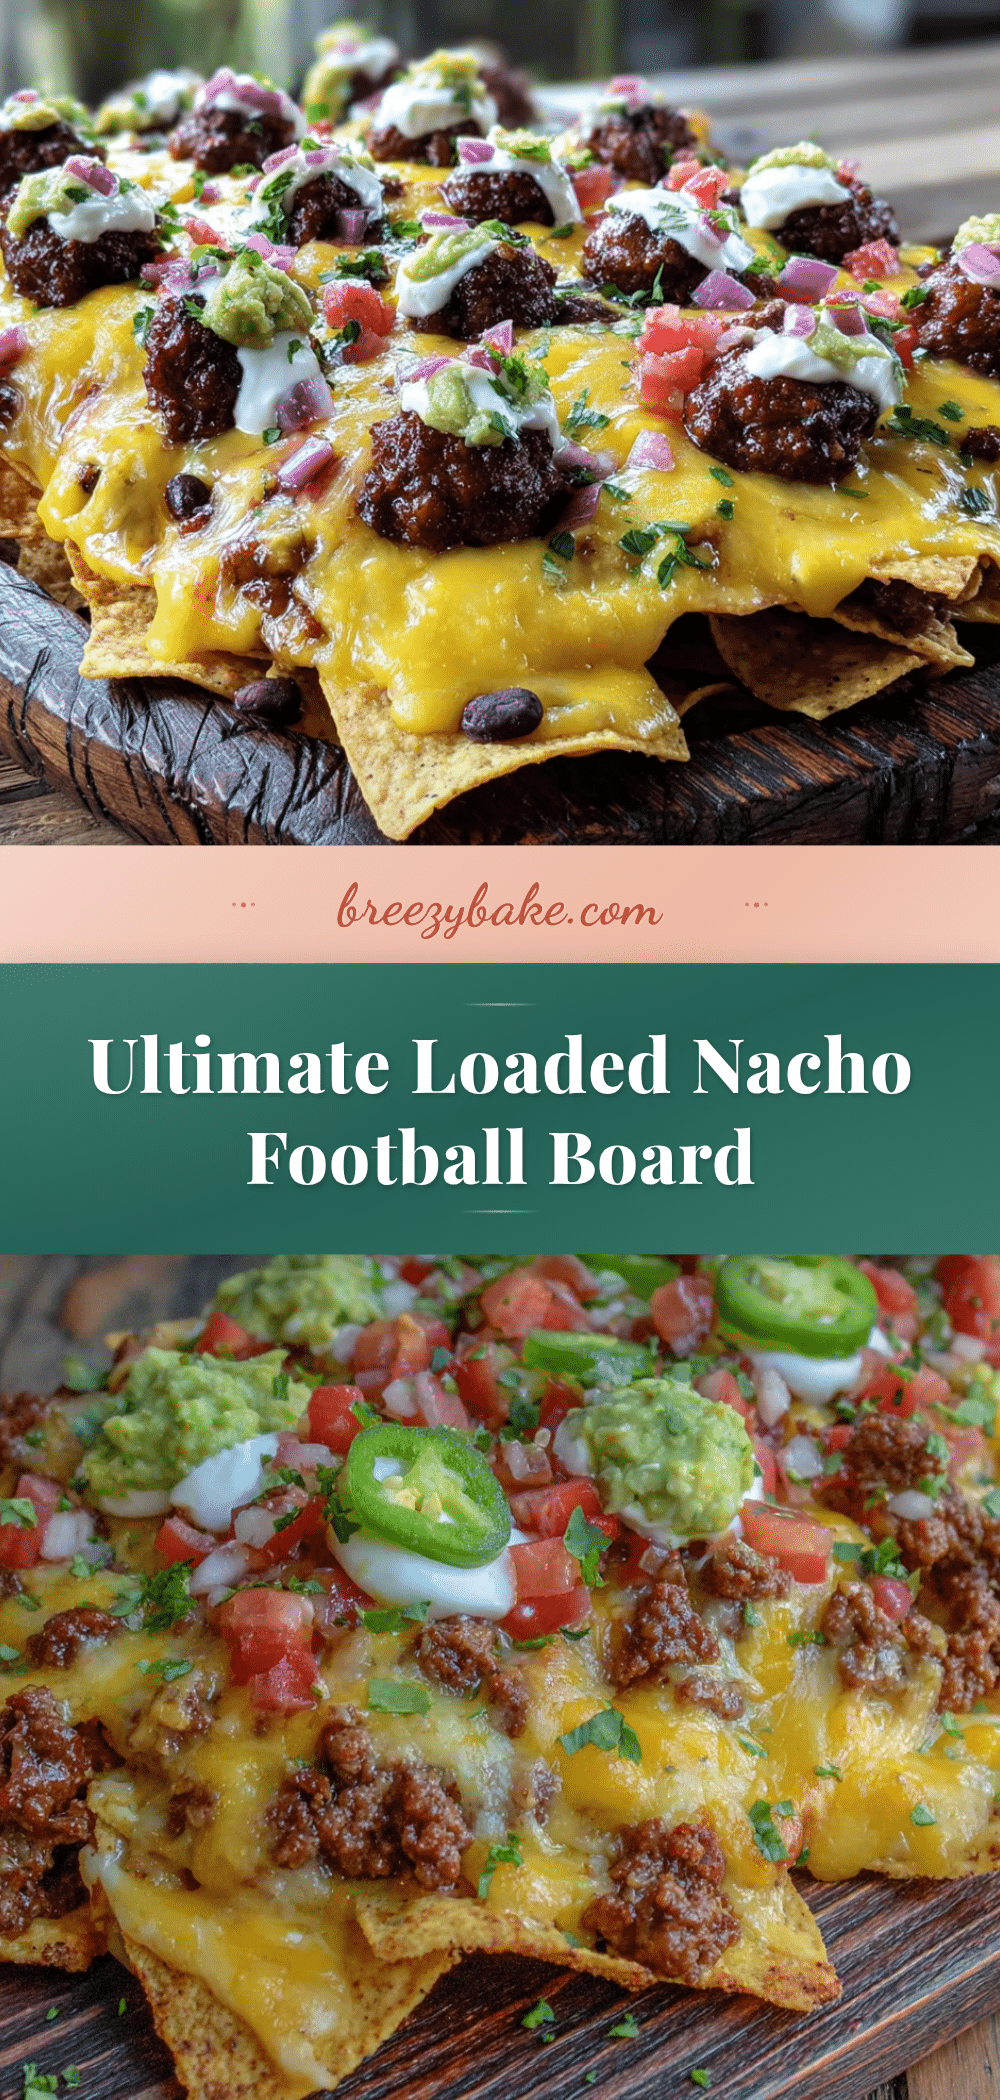
Ultimate Loaded Nacho Football Charcuterie Board: Easy Game Day Best
A build-your-own nacho grazing board with seasoned beef, melty cheese, and all the fixings, designed for game day parties where chips stay crunchy and guests assemble their perfect bite.
- Prep Time: 20 minutes
- Cook Time: 15 minutes
- Total Time: 35 minutes
- Yield: 8-10 servings 1x
- Category: Appetizer
- Cuisine: Mexican-American
Ingredients
- 1 lb ground beef (80/20 blend)
- 1 packet (3 tbsp) taco seasoning
- 1/3 cup water or beef broth
- Restaurant-style tortilla chips (e.g., Tostitos Scoops)
- 2 cups shredded Mexican blend cheese
- 1 1/2 cups queso or nacho cheese sauce
- 1 cup sour cream
- 1 1/2 cups guacamole
- 1 cup pico de gallo or salsa
- 2 Roma tomatoes, diced
- 1/2 cup sliced jalapeños (pickled or fresh)
- 1/2 cup sliced black olives (canned, drained)
- 1 can (15 oz) black beans, drained and rinsed
- 1/2 cup chopped fresh cilantro
- 1/4 cup sliced green onions
- 2 limes, cut into wedges
- Optional: pickled red onions, sliced radishes, cotija cheese crumbles, diced mango
Instructions
- Cook the seasoned beef: Heat a large skillet over medium-high heat. Add ground beef and break it up with a spatula. Cook for 6-8 minutes until browned, then drain off excess fat (leave about 1 tablespoon for flavor). Reduce heat to low, add taco seasoning and water or beef broth, and stir. Simmer for 3-4 minutes until liquid thickens and coats the meat. Transfer to a bowl and set aside.
- Warm the queso: Transfer jarred queso to a small saucepan and warm over low heat, stirring occasionally. Alternatively, microwave in 30-second bursts, stirring between each. Keep covered to prevent a skin from forming.
- Prep fresh toppings: Dice tomatoes, slice jalapeños, drain and rinse black beans, slice olives, chop cilantro, and slice green onions. Arrange in small bowls.
- Set up the board: Place a large board or platter on a flat surface. Arrange small ramekins or bowls around the board for queso, sour cream, guacamole, and salsa. Space them out to leave room for chips and toppings.
- Add chips: Pour tortilla chips in large piles around the bowls. Leave some open spaces for beef and shredded cheese.
- Layer toppings: Spoon seasoned beef into one or two open spaces. Sprinkle shredded Mexican cheese blend next to the beef. Add black beans, diced tomatoes, sliced olives, and jalapeños in small piles around the chips.
- Garnish and serve: Sprinkle chopped cilantro and green onions over the board. Tuck lime wedges between piles. Serve immediately with small spoons and tongs so guests can build their own nacho plates.
Notes
Cook beef and prep toppings up to a day in advance. Store separately in the fridge, then assemble 20 minutes before serving. Keep chips in their bag until last minute to maintain crunch. For homemade guacamole, press plastic wrap directly onto surface before refrigerating to prevent browning. Use deeper, narrower ramekins for queso to avoid spills. Drain black beans thoroughly to prevent watery board.
Nutrition
- Serving Size: 1 cup chips with top
- Calories: 450550
- Sugar: 46
- Sodium: 8001000
- Fat: 2835
- Saturated Fat: 1015
- Carbohydrates: 3540
- Fiber: 68
- Protein: 2225
Keywords: nacho board, charcuterie board, game day food, football party, loaded nachos, easy appetizer, crowd-pleasing snack


