The school Halloween party was in less than six hours and I’d completely forgotten. Everyone else would be bringing those elaborate themed treats — you know, the ones that look like little monsters or witches’ fingers that take three days to assemble. I had a pumpkin I’d just carved with my son the night before and a bag of sea salt in the pantry. And honestly? A little bit of panic setting in.
I stood there staring at the slimy pile of pumpkin guts on the newspaper, thinking, “Well, this is what we’ve got.” My four-year-old, Leo, was already digging his hands into the mess, pulling out seeds and flinging them across the kitchen floor. “Look, Mama, they’re slippery!” he shrieked, and I just laughed because, let’s face it, the floor was already a disaster anyway.
So I scooped up what I could, rinsed them in a colander — seeds flying everywhere, naturally — and threw together the simplest recipe I could think of. Sea salt. A little oil. Hot oven. That was it. I wasn’t trying to win anything. I was just trying to show up with something that didn’t come from a bag.
The party was chaos, as you’d expect. Kids running everywhere, parents trying to keep it together. I put my little bowl of pumpkin seeds on the snack table next to the elaborate spider web cupcakes and the graveyard dirt dessert cups. And you know what happened? The kids went straight for the seeds. They stood around that bowl like it was the main attraction, little hands grabbing handful after handful. One mom asked me for the recipe. Then another. By the end of the party, three people had asked. The seeds were gone before the cupcakes were even touched.
That’s the thing about this best easy oven roasted pumpkin seeds recipe for kids — it’s simple enough that you don’t stress, but good enough that everyone thinks you did something special. I’ve been making it every pumpkin season since, and it never fails. Maybe you’ve been there — the scramble, the mess, the happy surprise when something unplanned turns out to be the star of the show.
Why You’ll Love This Recipe
Let me tell you why this recipe has become a staple in our house, and why I think it’ll become one in yours too. I’ve tested this method more times than I can count — through burnt batches, under-salted disasters, and seeds that were somehow both chewy and crunchy at the same time. This version? It’s the one that finally worked every single time.
- Kid-Friendly & Fun to Make : This is hands-down the best easy oven roasted pumpkin seeds recipe for kids because they can help with almost every step. Separating seeds from pulp? That’s a sensory activity they’ll love. Sprinkling salt? That’s their job. My son now insists on being the official “salt sprinkler” every time.
- Simple Ingredients, No Fuss : You need exactly three things — pumpkin seeds, oil, and sea salt. That’s it. No weird spices you’ll never use again, no special ingredients that require a trip to a specialty store. These are things you probably already have in your kitchen.
- Budget-Friendly Snacking : You’re already buying pumpkins for carving or cooking, right? The seeds are basically free. Instead of throwing them away, you’re turning trash into a snack that costs pennies to make. That’s the kind of resourcefulness that makes feeding a family on a budget feel good.
- Perfect for Lunchboxes & After-School : These seeds store beautifully for weeks, which means you can make a big batch and have snacks ready to go. They’re great for lunchboxes, after-school munching, or even a quick protein boost before homework time.
- Crowd-Pleaser Guaranteed : I’ve brought these to playdates, school events, and family gatherings. Kids love the crunch, adults love the salty simplicity, and everyone asks how you got them so perfectly crispy. It’s the kind of recipe that makes you look like you know what you’re doing — even when you’re just trying to use up what you’ve got.
What makes this recipe different from all the others I tried? It’s the method. Most recipes tell you to boil the seeds first or dry them overnight. Who has time for that? This method skips the fuss and goes straight to the good part — a hot oven, a little patience, and perfectly crunchy seeds every single time. No boiling, no waiting, no complicated steps. Just pure, simple, kid-approved goodness.
Honestly, this recipe is the kind that makes you close your eyes after the first bite. That salty crunch, the way it melts in your mouth just a little before you chew — it’s comfort food in its purest form. And knowing you made it from something you were about to throw away? That’s a pretty good feeling too.
What Ingredients You Will Need
This recipe uses the simplest ingredients to deliver big, satisfying crunch without any fuss. Most of these are things you’ll have on hand, especially during pumpkin season.
- Fresh Pumpkin Seeds : About 1 ½ cups, straight from your carving pumpkin. You’ll want to rinse them well and pick out the big chunks of pulp. The fresher the seeds, the better they’ll roast. If you’re using seeds from a cooking pumpkin like sugar pumpkins, those work great too — they’re just a little smaller and more tender.
- Olive Oil : 2 tablespoons. I use extra virgin because that’s what I always have, but regular olive oil or even avocado oil works perfectly. The oil helps the salt stick and gives the seeds that gorgeous golden color as they roast. I’ve tried this with melted butter too, and honestly? It’s amazing — just watch them a little more closely because butter burns faster.
- Fine Sea Salt : 1 teaspoon, plus more for sprinkling at the end. I prefer fine sea salt because it distributes evenly and sticks to the seeds better than coarse salt. You can use table salt in a pinch, but sea salt gives a cleaner, brighter salty flavor that really makes these seeds shine.
That’s literally it. Three ingredients. I know it sounds too simple to be good, but trust me — the magic is in the method, not the ingredient list.
Now, let me share a few things I’ve learned about picking the best pumpkin seeds. When you’re scooping out your pumpkin, look for seeds that are plump and full, not flat or shriveled. Flat seeds tend to be hollow and won’t give you that satisfying crunch. Also, try to get as much of the stringy pulp off as possible before rinsing — it’s easier to remove when the seeds are still wet than after they’ve dried.
One thing I wish someone had told me earlier: don’t use seeds from pumpkins that have been sitting out for weeks. Fresh is best. If your pumpkin has been on the porch since October 1st and it’s now Halloween, the seeds might be a little dried out already. They’ll still work, but they won’t be quite as tender inside.
For the oil, any neutral oil works. I’ve used coconut oil (melted) and it gave the seeds a subtle sweetness that was really nice. My sister swears by bacon fat, but that’s a whole different flavor profile — delicious, but not what we’re going for here with the kids.
And the salt? This is where you can get creative once you’ve mastered the basic recipe. I keep it simple with sea salt for the kids, but sometimes I’ll add a pinch of garlic powder or smoked paprika for the grown-up version. But for this best easy oven roasted pumpkin seeds recipe for kids, plain sea salt is the way to go.
Equipment Needed
You don’t need fancy equipment for this recipe, which is part of why I love it. Here’s what you’ll need:
- Colander : For rinsing those slimy seeds. A fine-mesh colander works best so the small seeds don’t escape down the drain.
- Kitchen Towel or Paper Towels : For drying the seeds after rinsing. You want them as dry as possible before they hit the oil.
- Mixing Bowl : Any medium bowl will do. I use my favorite ceramic one, but glass or stainless steel works just fine.
- Baking Sheet : A standard half-sheet pan is perfect. If you have a rimmed baking sheet, even better — it keeps the seeds from rolling off when you’re moving the pan around.
- Parchment Paper or Silicone Baking Mat : This is optional but highly recommended. It makes cleanup so much easier and prevents any sticking. I’ve made these seeds without it and they still came out great, but the parchment just saves you a little scrubbing time.
- Spatula or Wooden Spoon : For stirring the seeds halfway through baking. A thin metal spatula works best for flipping them, but anything works.
If you don’t have parchment paper, you can grease the baking sheet lightly with oil or cooking spray. I’ve done it both ways, and honestly, the seeds turn out the same. The parchment just makes me feel a little more organized.
One tip I learned the hard way: don’t use a dark-colored baking sheet if you can help it. Dark pans absorb more heat and can burn the bottoms of your seeds before the tops are done. A light-colored, shiny pan gives you more even roasting. If you only have a dark pan, just check the seeds a few minutes early and maybe lower your oven temperature by 25 degrees.
Preparation Method
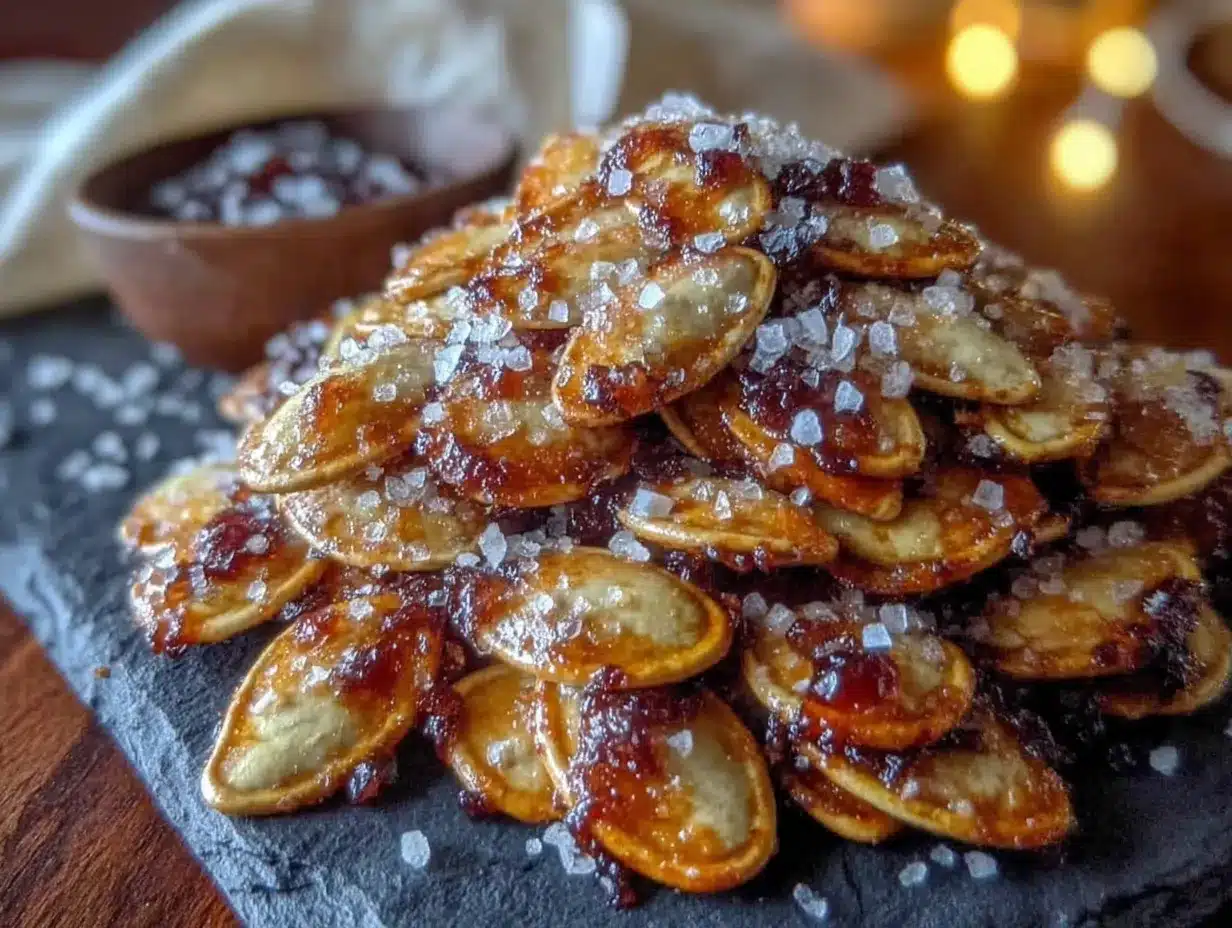
Alright, let’s get to the good part. Here’s how to make the best easy oven roasted pumpkin seeds recipe for kids, step by step.
- Preheat your oven to 350°F (175°C). This is important — get that oven hot before you start prepping. A properly preheated oven ensures even cooking from the moment the seeds go in.
- Separate the seeds from the pumpkin pulp. This is the messy part, and honestly, it’s the most fun part if you’re making this with kids. Grab handfuls of pumpkin guts and squeeze them over a bowl. The seeds will pop right out. Don’t worry about getting every last bit of pulp off — you’ll rinse them next. Let the kids go to town on this step. It’s messy, it’s sensory, and they’ll love it. Just put down some newspaper first.
- Rinse the seeds in a colander under cool running water. Use your fingers to rub the seeds gently, loosening any remaining pulp. You want the seeds clean but not scrubbed completely dry — a little moisture is fine. Pick out any big chunks of pumpkin string that are stubbornly attached. This takes about 2-3 minutes.
- Dry the seeds thoroughly. Spread them out on a clean kitchen towel or paper towels and pat them dry. Let them sit for about 5-10 minutes while you get everything else ready. The drier they are, the crispier they’ll get. If you’re in a hurry, you can use a salad spinner — it works surprisingly well for getting seeds dry.
- Toss the seeds with oil and salt. In your mixing bowl, combine the dried seeds, 2 tablespoons of olive oil, and 1 teaspoon of fine sea salt. Stir until every seed is coated. This is another great step for little helpers — let them stir while you hold the bowl steady. The oil should coat the seeds evenly without pooling at the bottom of the bowl.
- Spread the seeds in a single layer on your baking sheet. Use a spatula to spread them out evenly. Make sure no seeds are overlapping — they need room to breathe and crisp up. If they’re piled on top of each other, they’ll steam instead of roast, and nobody wants soggy pumpkin seeds.
- Bake for 10 minutes. Set a timer. Don’t wander off. Ten minutes is just the first stretch.
- Stir the seeds and rotate the pan. After 10 minutes, pull the pan out and give the seeds a good stir with your spatula. This ensures even browning. Rotate the pan front to back so the seeds that were in the back of the oven are now in the front. Put it back in the oven.
- Bake for another 10-15 minutes. Start checking at the 10-minute mark. You’re looking for a golden brown color and that wonderful toasty smell filling your kitchen. The seeds should sound hollow when you tap them. Some people like them just barely golden, others like them darker and crunchier — this is where you get to decide your preference.
- Remove from the oven and let cool completely. This is the hardest part — waiting. But trust me, the seeds continue to crisp up as they cool. If you eat them straight out of the oven, they’ll still be a little soft in the middle. Give them at least 15-20 minutes on the baking sheet. Sprinkle with a tiny pinch more sea salt while they’re still warm — it’ll stick better.
A few things to watch for: if you hear popping sounds, that’s normal — it’s just moisture escaping. If you see smoke, your oven might be too hot or your oil might be burning. And if the seeds start to smell nutty and toasty, you’re almost there. Trust your nose as much as your timer.
One more thing — don’t overcook them. Burnt pumpkin seeds are bitter and unpleasant. They go from perfectly golden to burnt very quickly in that last minute, so keep a close eye on them. When in doubt, take them out a minute early. You can always pop them back in if they’re not crispy enough after cooling.
Cooking Tips & Techniques
I’ve made this best easy oven roasted pumpkin seeds recipe for kids about twenty times now, and I’ve learned a few things the hard way. Let me save you some trouble.
The biggest mistake I made? Not drying the seeds enough. The first time I made these, I was in such a hurry that I just shook off the excess water and threw them in the oven. They came out chewy and sad. Now I know that drying is half the battle. Pat them dry, let them sit, pat them again if you have time. Dry seeds = crispy seeds. It’s that simple.
Another thing I learned: don’t crowd the pan. I know it’s tempting to dump all the seeds on one pan and call it done, but they need space. If they’re touching each other, they’ll steam. If they’re spread out, they’ll roast. Use two pans if you have a lot of seeds. Trust me, it’s worth the extra pan to wash.
Timing strategy: I like to get the seeds in the oven while I’m cleaning up the pumpkin carving mess. That way, by the time I’ve wiped down the table and swept the floor, the seeds are ready to stir. Then by the time I’ve put away the carving tools and washed the last bowl, they’re done. It’s a perfect little workflow.
For consistent results every time, use the same brand of salt and the same type of oil. I know that sounds a little obsessive, but ingredients vary. One brand of sea salt might be saltier than another. One olive oil might have a stronger flavor. Once you find a combination you love, stick with it.
One more tip: if you want extra-crunchy seeds, let them cool completely on the baking sheet before transferring them to a bowl. If you move them too soon while they’re still warm, they’ll trap steam and lose some of that crunch. Patience, my friend. Patience.
And here’s a little secret I discovered by accident: if your seeds come out a little less crispy than you’d like, you can spread them back on the baking sheet and pop them in a 300°F oven for another 5 minutes. They’ll crisp right up. Just watch them carefully so they don’t burn.
Variations & Adaptations
Once you’ve mastered the basic version, the possibilities are endless. Here are some of my favorite variations to keep things interesting.
Sweet Cinnamon Seeds: Skip the salt and toss the seeds with 1 tablespoon of melted butter, 1 tablespoon of brown sugar, and ½ teaspoon of cinnamon. Bake at 325°F for about 15-18 minutes, stirring halfway. These are dangerously good — like a crunchy, salty-sweet snack that disappears fast. My son calls them “pumpkin cookies.”
Spicy Ranch Seeds: For the grown-ups who want a little kick, mix 1 teaspoon of ranch seasoning mix with ½ teaspoon of cayenne pepper (or less, depending on your heat tolerance). Toss with the oil before baking. These are amazing on salads or just eaten by the handful. Fair warning: they’re addictive.
Garlic & Herb Seeds: Add ½ teaspoon of garlic powder and ½ teaspoon of dried rosemary or thyme to the salt before tossing. This version is fantastic on soups or as a crunchy topping for pasta dishes. It’s also great for kids who like savory snacks — my nephew calls them “pizza seeds.”
Dietary Adaptations: This recipe is naturally gluten-free and dairy-free if you use olive oil. For a lower-sodium version, use just ½ teaspoon of salt and add a squeeze of lemon juice after baking for brightness. For nut-free families, you’re already good — just make sure your salt and oil are processed in nut-free facilities if that’s a concern.
Different Cooking Methods: If you’re in a hurry, you can make these in an air fryer. Set it to 300°F and cook for about 10-12 minutes, shaking the basket halfway through. They come out even crispier than the oven version, honestly. Just watch them closely because air fryers run hot.
My personal favorite variation? I do half the batch plain with sea salt for the kids and the other half with garlic powder and a pinch of smoked paprika for me. That way everyone’s happy, and I don’t have to share my spicy ones.
Serving & Storage Suggestions
These seeds are best served at room temperature, straight from the baking sheet or from a bowl on the counter. They’re perfect for snacking, but they also make a fantastic topping for all kinds of dishes.
Serving Ideas: Sprinkle them over a simple green salad for crunch. Add them to soups — they’re amazing on butternut squash or pumpkin soup. Use them as a topping for yogurt parfaits or oatmeal. Or just put a bowl out at your next gathering and watch them disappear. For lunchboxes, pack them in a small container for a crunchy, protein-packed snack that holds up well.
Storage: Once the seeds are completely cool, transfer them to an airtight container. A glass jar with a tight lid works perfectly, or a resealable plastic bag with the air pressed out. They’ll stay fresh at room temperature for up to 2 weeks. If you live in a humid climate, you might want to store them in the refrigerator to keep them crispy longer.
Freezer Instructions: These seeds freeze beautifully. Place them in a freezer-safe bag or container and freeze for up to 3 months. They thaw in just a few minutes at room temperature, and they retain their crunch perfectly. I like to make a double batch and freeze half for later — it’s such a treat to pull them out months later.
Reheating: If your seeds lose their crunch over time (it happens, especially in humid weather), spread them on a baking sheet and pop them in a 300°F oven for 3-5 minutes. Let them cool completely before storing again. This revives them like magic.
One thing I’ve noticed: the flavors actually develop a little more after a day or two. The salt mellows and blends with the toasted flavor of the seeds. So don’t worry if they taste different on day one versus day three — both are delicious, just in different ways.
Nutritional Information & Benefits
Let’s talk about why these little seeds are actually a powerhouse snack. Pumpkin seeds — also called pepitas — are packed with nutrition that makes them a smart choice for growing kids and busy parents alike.
Estimated Nutritional Values (per ¼ cup serving):
- Calories: 180
- Protein: 9g
- Fat: 15g (mostly healthy unsaturated fats)
- Carbohydrates: 4g
- Fiber: 2g
- Sodium: 290mg (varies with salt amount)
- Magnesium: 37% of daily value
- Zinc: 23% of daily value
- Iron: 14% of daily value
Health Benefits: Pumpkin seeds are one of the best natural sources of magnesium, which is important for sleep, muscle function, and bone health. They’re also rich in zinc, which supports immune function — perfect for cold and flu season. The protein and healthy fats make them a satisfying snack that keeps kids full between meals.
Dietary Considerations: This basic recipe is naturally gluten-free, dairy-free, and vegetarian. It’s also low in sugar and high in fiber, making it a great option for families watching their sugar intake. The only potential allergen is the seeds themselves, so if you have a seed allergy in the family, this one’s not for you.
I love that I can feel good about giving these to my son. He thinks he’s getting a treat, and I know he’s getting a nutrient-dense snack that supports his growing body. That’s a win-win in my book.
Conclusion
This best easy oven roasted pumpkin seeds recipe for kids has become a fall tradition in our house, and I hope it becomes one in yours too. It’s simple enough that you can make it on a busy weeknight, special enough that it feels like a treat, and budget-friendly enough that you’ll never throw away pumpkin seeds again.
What I love most about this recipe is how it turns something ordinary — those slimy seeds you’d normally toss in the trash — into something everyone gathers around. It’s the kind of recipe that makes you feel resourceful and capable, like you’ve discovered a little secret that not everyone knows. And honestly? Watching my son’s face light up when he sees that bowl of golden, salty seeds is worth every bit of the mess.
I’d love to hear how yours turn out. Did your kids help with the messy part? Did you try any fun variations? Drop a comment below and let me know — I read every single one. And if you loved this recipe, share it with a friend who’s about to carve pumpkins and doesn’t know what to do with the seeds yet. Trust me, they’ll thank you.
Happy roasting, friends. Here’s to simple food, happy kids, and not wasting a single seed.
Frequently Asked Questions
Do I have to boil the pumpkin seeds before roasting?
Nope! That’s the beauty of this recipe. No boiling required. Just rinse, dry, toss with oil and salt, and roast. Skipping the boil saves time and still gives you perfectly crispy seeds.
Can I use seeds from any type of pumpkin?
Absolutely. Carving pumpkins, sugar pumpkins, even butternut squash seeds — they all work. The size might vary a little, so just keep an eye on them and adjust the baking time if needed. Smaller seeds will cook faster.
How do I get the seeds really clean?
Rinse them in a colander under cool water while rubbing them gently with your fingers. Most of the pulp will come off easily. If there are stubborn bits, let the seeds soak in a bowl of water for 10 minutes, then rinse again. The pulp floats to the top, making it easy to pour off.
Why did my pumpkin seeds turn out chewy instead of crispy?
Two most likely reasons: either the seeds weren’t dried thoroughly before baking, or they were crowded on the pan. Make sure you pat them really dry with a towel, and spread them in a single layer with space between each seed.
How long do these roasted pumpkin seeds last?
Stored in an airtight container at room temperature, they’ll stay fresh and crispy for up to 2 weeks. In the refrigerator, they’ll last even longer — about a month. And in the freezer, they’re good for up to 3 months. Just let them come to room temperature before serving.
Pin This Recipe!
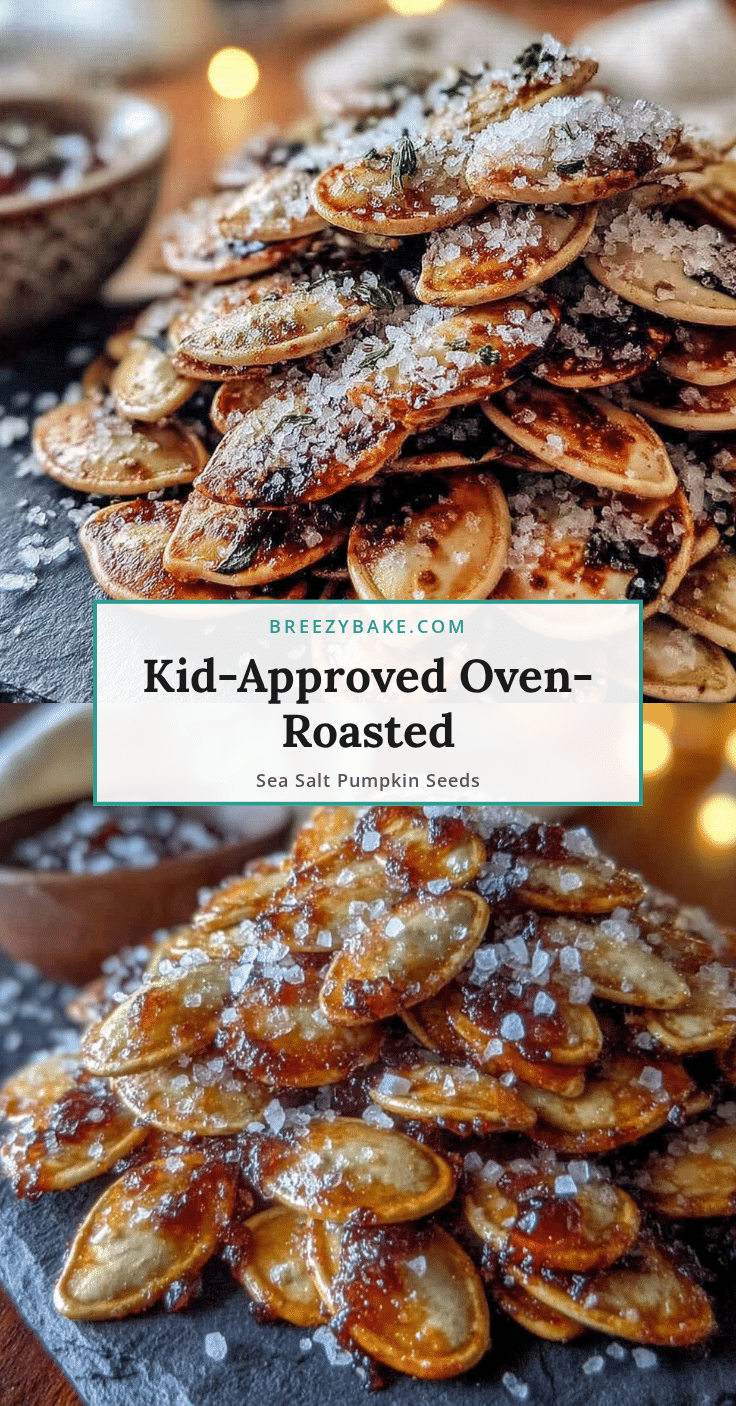
Best Easy Oven Roasted Pumpkin Seeds Recipe for Kids

A simple, kid-friendly recipe for perfectly crispy roasted pumpkin seeds with just three ingredients. Perfect for using up pumpkin seeds after carving, this snack is a crowd-pleaser at parties and lunchboxes alike.
- Prep Time: 15 minutes
- Cook Time: 20-25 minutes
- Total Time: 35-40 minutes
- Yield: 4 servings 1x
- Category: Snack
- Cuisine: American
Ingredients
- 1 ½ cups fresh pumpkin seeds
- 2 tablespoons olive oil (or avocado oil, melted coconut oil, or melted butter)
- 1 teaspoon fine sea salt, plus more for sprinkling
Instructions
- Preheat your oven to 350°F (175°C).
- Separate the seeds from the pumpkin pulp. Let kids help squeeze the pumpkin guts over a bowl to pop out the seeds.
- Rinse the seeds in a colander under cool running water, rubbing gently to remove remaining pulp. Pick out any large stringy bits.
- Dry the seeds thoroughly by spreading them on a clean kitchen towel or paper towels. Pat dry and let sit for 5-10 minutes.
- In a mixing bowl, toss the dried seeds with 2 tablespoons olive oil and 1 teaspoon fine sea salt until every seed is coated.
- Spread the seeds in a single layer on a baking sheet (lined with parchment paper if desired). Make sure no seeds are overlapping.
- Bake for 10 minutes.
- Stir the seeds and rotate the pan front to back.
- Bake for another 10-15 minutes, until golden brown and toasty. Start checking at the 10-minute mark.
- Remove from the oven and let cool completely on the baking sheet (at least 15-20 minutes). Sprinkle with a tiny pinch more sea salt while still warm.
Notes
For extra-crunchy seeds, let them cool completely on the baking sheet before transferring. If seeds lose crunch over time, reheat at 300°F for 3-5 minutes. For air fryer: cook at 300°F for 10-12 minutes, shaking halfway. Variations include Sweet Cinnamon (skip salt, use 1 tbsp melted butter, 1 tbsp brown sugar, ½ tsp cinnamon; bake at 325°F for 15-18 min), Spicy Ranch (add 1 tsp ranch seasoning + ½ tsp cayenne), and Garlic & Herb (add ½ tsp garlic powder + ½ tsp dried rosemary or thyme).
Nutrition
- Serving Size: ¼ cup
- Calories: 180
- Sodium: 290
- Fat: 15
- Saturated Fat: 2
- Carbohydrates: 4
- Fiber: 2
- Protein: 9
Keywords: roasted pumpkin seeds, easy pumpkin seeds, kid-friendly snack, Halloween snack, healthy snack, pumpkin seeds recipe


