There used to be a tiny coffee cart tucked behind a bookstore near my old apartment that made the most incredible iced coffee drink. When they closed—just up and vanished one Tuesday—I honestly felt a little lost. That brown sugar oat milk concoction was my Tuesday morning ritual, my small luxury, the thing that made standing in line for fifteen minutes feel worthwhile. After about twelve tries—some of them truly undrinkable, let me tell you—I finally cracked the code. And the best part? This version costs pennies compared to what I was spending at that cart, and definitely way less than the Starbucks version that became my backup obsession.
The first time I made this at home, I accidentally used cold brew instead of espresso and ended up with something that tasted like sweetened iced coffee that had given up on life. My kitchen floor was sticky, I had oat milk splattered on my favorite sweater, and I was ready to throw in the towel. But then, on attempt number four, it happened. That first sip literally made me stop mid-step. The brown sugar syrup was perfectly dissolved, the espresso had that bold kick, and the oat milk swirled in like a creamy cloud. I may have done a little dance right there by my counter.
Maybe you’ve been there—spending five or six bucks on a coffee drink that disappears in about three gulps. It feels good in the moment, but your wallet definitely notices over time. This copycat recipe gives you that same satisfaction, that same morning treat feeling, without the guilt of watching your coffee budget balloon. And honestly, it tastes even better knowing you made it yourself, with ingredients you actually recognize.
Why You’ll Love This Recipe
Let’s be real for a second. I’ve tested this recipe more times than I care to count, tweaking ratios and shaking techniques until I got it just right. My husband, who is my toughest critic, actually said “this is better than Starbucks” on the third attempt. That’s not something he says lightly—the man has strong opinions about coffee.
- Quick & Easy: Comes together in under five minutes, perfect for rushed mornings when you need caffeine fast.
- Simple Ingredients: No fancy syrups or specialty equipment needed. You probably have most of this in your kitchen right now.
- Perfect for Budget-Conscious Families: Each serving costs about 80 cents instead of five dollars. That adds up fast when you’re feeding a household of coffee drinkers.
- Crowd-Pleaser: My kids sneak sips (decaf version, obviously), and guests always ask for the recipe. It’s that good.
- Unbelievably Delicious: The brown sugar syrup gets all caramelized and rich, the espresso cuts through with boldness, and the oat milk makes everything creamy without being heavy.
This recipe isn’t just good—it’s the kind that makes you close your eyes after the first sip. It’s comfort in a glass, reimagined for your home kitchen, faster and cheaper but with the same soul-soothing satisfaction. Perfect for impressing yourself on a Tuesday morning, or turning a regular afternoon into something special without leaving the house.
What Ingredients You Will Need
This recipe uses simple, everyday ingredients to deliver that bold, sweet, creamy coffee shop experience without the markup. Most of these are pantry staples or easy to find at any grocery store.
- Espresso or strong brewed coffee: 2 shots (about 2 ounces or 60 ml). I recommend using a dark roast for that bold coffee shop flavor. If you don’t have an espresso machine, a strong brew from a Moka pot or Aeropress works beautifully.
- Brown sugar: 2 tablespoons (25 grams), packed. Light or dark brown sugar both work, but dark brown gives a deeper molasses flavor that’s incredible.
- Hot water: 2 tablespoons (30 ml). This helps dissolve the brown sugar into a simple syrup.
- Oat milk: 1 cup (240 ml), cold. I recommend Oatly or Chobani oat milk for the creamiest texture. Barista blends work best because they don’t separate.
- Ice cubes: A generous handful (about 1 cup or 150 grams). Use large cubes if possible—they melt slower and keep your drink stronger.
- Vanilla extract: 1/4 teaspoon (optional, but adds that Starbucks-like depth).
- Cinnamon: A pinch for garnish (optional, but highly recommended).
For the brown sugar syrup, you can make a larger batch and keep it in the fridge for up to two weeks. Just combine equal parts brown sugar and water, heat until dissolved, and store in a jar. I make a cup at a time and it lasts through the week.
If you’re watching your sugar intake, you can substitute with a brown sugar alternative like Swerve or monk fruit sweetener. Just note that the texture might be slightly different. For a dairy-free option, oat milk is naturally dairy-free, but you can also use almond or soy milk—though the creaminess won’t be quite the same.
One thing I learned the hard way: don’t skip the hot water for the syrup. I tried just shaking brown sugar with cold espresso once, and ended up with gritty sugar at the bottom of my glass. Not pleasant. Dissolving it first makes all the difference.
Equipment Needed
You don’t need a fancy coffee setup for this recipe, which is honestly one of the best things about it. Here’s what you’ll need:
- Cocktail shaker or mason jar with tight-fitting lid: This is essential for getting that frothy, shaken texture. A 16-ounce mason jar works perfectly if you don’t have a shaker.
- Espresso machine, Moka pot, or Aeropress: Any method that produces concentrated coffee works. I use a stovetop Moka pot most mornings because it’s affordable and reliable.
- Measuring spoons: For accurate brown sugar and water measurements.
- Tall glass: A 16-ounce glass is ideal for serving.
- Small saucepan or microwave-safe bowl: For making the brown sugar syrup if you’re doing a larger batch.
- Stirring spoon: For mixing the syrup before shaking.
If you don’t have a cocktail shaker, don’t worry—I used a repurposed spaghetti sauce jar for months before upgrading. Just make sure the lid is secure and you hold it tightly while shaking. I learned that lesson after a particularly vigorous shake sent oat milk flying across my kitchen. My dog was very confused.
For a budget-friendly option, check thrift stores for cocktail shakers. I found mine for three dollars, and it works perfectly. You really don’t need expensive equipment to make great coffee at home.
Preparation Method
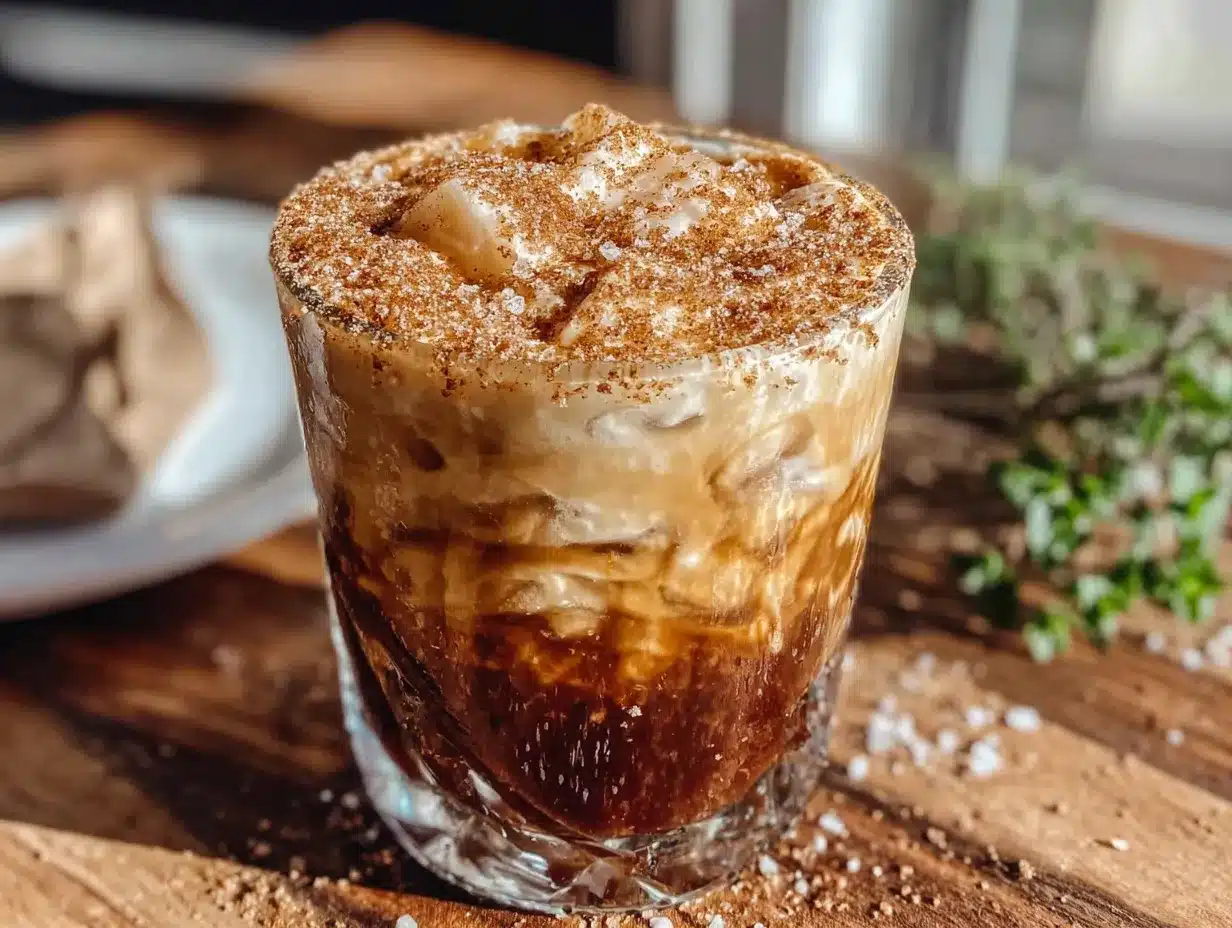
- Make the brown sugar syrup: In a small saucepan or microwave-safe bowl, combine 2 tablespoons (25 grams) packed brown sugar with 2 tablespoons (30 ml) hot water. Stir until the sugar is completely dissolved. If using the microwave, heat for 20 seconds, then stir. The mixture should look like a thin caramel. Set aside to cool slightly while you prepare the espresso.
- Brew your espresso: Prepare 2 shots (about 2 ounces or 60 ml) of espresso using your preferred method. If using a Moka pot, brew until you hear a sputtering sound, then remove from heat immediately to avoid bitterness. If using an Aeropress, use the inverted method for a stronger brew. Let the espresso cool for about 30 seconds—you don’t want it hot enough to melt the ice immediately.
- Combine syrup and espresso: Pour the brown sugar syrup into your cocktail shaker or mason jar. Add the warm espresso and stir gently to combine. The warmth helps everything meld together. If you’re using vanilla extract, add it now.
- Add ice: Fill the shaker with ice cubes—about 1 cup (150 grams) or a generous handful. Don’t skimp here; the ice is crucial for proper dilution and temperature.
- Shake vigorously: Secure the lid tightly and shake for 15-20 seconds. You want to hear the ice clanking and feel the shaker getting cold in your hands. This step aerates the espresso and creates that beautiful frothy layer on top. I usually count to twenty in my head, but honestly, I’ve been known to get distracted and shake longer—it just gets better.
- Prepare your serving glass: Fill a tall 16-ounce glass with fresh ice cubes. If you want to be extra fancy, you can drizzle a little extra brown sugar syrup around the inside of the glass before adding the ice.
- Pour and add oat milk: Strain the shaken espresso mixture into the prepared glass, leaving the ice from the shaker behind. Pour 1 cup (240 ml) cold oat milk over the top. The oat milk will swirl and create beautiful layers—don’t stir it immediately unless you want a uniform color. I like to let it settle for a few seconds.
- Garnish and serve: Sprinkle a pinch of cinnamon on top if desired. Give the drink a gentle stir with a straw before drinking to combine all the layers. Serve immediately while the ice is still fresh and the froth is at its peak.
A few notes: If you want a stronger coffee flavor, use 3 shots of espresso instead of 2. If you prefer it sweeter, add an extra tablespoon of brown sugar to the syrup. And if you’re making this for kids or someone sensitive to caffeine, use decaf espresso—the flavor is still fantastic.
Cooking Tips & Techniques
After making this drink more times than I can count, I’ve picked up a few tricks that make a real difference. The biggest mistake I made early on was using cold syrup straight from the fridge. It doesn’t dissolve properly into the espresso, and you end up with clumps of sugar at the bottom of your glass. Always make your syrup fresh or warm it slightly before using.
The shaking technique matters more than you’d think. I used to just give it a few gentle shakes, but that barely aerates the espresso. You want to really go for it—think of it like you’re trying to win a shaking competition. The more aggressive you are, the better the froth. I once shook so hard the lid popped off, so make sure it’s really secure. That was a sad morning, cleaning espresso off my cabinets.
Temperature control is another thing I had to figure out. If your espresso is too hot, it melts the ice too quickly and dilutes the drink. If it’s too cold, it doesn’t mix well with the syrup. Let it cool for about 30 seconds after brewing—just enough so it’s warm but not scorching. You want that sweet spot where it’s still warm enough to dissolve the sugar but not hot enough to turn your ice into a puddle.
For consistency, I always use the same measuring spoon for my brown sugar. I’ve noticed that a packed tablespoon versus a loose one makes a noticeable difference in sweetness. Be consistent with your measurements, and you’ll get the same great result every time.
One last tip: if you’re making multiple drinks for the family, you can scale up the syrup recipe and keep it in the fridge. Just warm it for 10 seconds in the microwave before using. It saves so much time on busy mornings.
Variations & Adaptations
This recipe is incredibly flexible, which is one of the reasons I love it so much. Here are some variations I’ve tried and loved:
- Dairy-Free Version: This recipe is already dairy-free if you use oat milk, but you can also try it with coconut milk for a tropical twist or almond milk for a lighter texture. Just keep in mind that different milks froth differently—oat milk is definitely the creamiest option.
- Sugar-Free Option: Substitute the brown sugar with a brown sugar alternative like Swerve or monk fruit sweetener. The taste is slightly different—less molasses-y—but still delicious. I’ve made this for a friend who’s diabetic, and she was thrilled.
- Extra Bold Version: Use 3 shots of espresso and reduce the oat milk to 3/4 cup (180 ml). This gives you a stronger coffee kick that serious caffeine lovers will appreciate. My husband’s favorite version.
- Seasonal Spice Version: Add 1/4 teaspoon of pumpkin pie spice or chai spice blend to the brown sugar syrup before shaking. This turns it into a cozy fall drink that rivals any pumpkin spice latte. I make this version constantly from October through December.
- Iced Latte Version: If you don’t have a shaker, you can simply stir the syrup and espresso together in a glass, then pour over ice and add oat milk. It won’t be as frothy, but it still tastes amazing. I’ve done this on camping trips with instant espresso powder, and it works surprisingly well.
For allergen substitutions, oat milk is naturally nut-free and soy-free, making this a safe option for many people with allergies. If you need a nut-free alternative to oat milk, try soy milk or coconut milk. Just avoid almond milk if nuts are a concern.
Serving & Storage Suggestions
This drink is best served immediately over fresh ice. The froth starts to settle after a few minutes, so don’t let it sit around. I like to serve it in a clear glass so you can see those beautiful layers—the dark espresso at the bottom, the creamy oat milk swirling in, and the frothy top. It’s almost too pretty to drink. Almost.
For presentation, a cinnamon stick makes a lovely stirrer, and a sprinkle of cinnamon on top adds a nice visual touch. If you’re serving this to guests, you can rim the glass with brown sugar for an extra special touch. Just wet the rim with a little water or syrup, then dip it in brown sugar.
As for what to serve alongside, this drink pairs beautifully with a simple breakfast like toast with jam, or a pastry like a croissant or muffin. It’s also perfect with a savory breakfast sandwich—the sweetness balances the saltiness wonderfully. I’ve been known to enjoy one with a slice of banana bread in the afternoon as a pick-me-up.
Storage isn’t really applicable for this drink since it’s best fresh, but you can make the brown sugar syrup ahead of time and keep it in the refrigerator for up to two weeks. Just store it in an airtight jar. The flavors actually meld together nicely over time.
If you have leftover oat milk, use it within 5-7 days of opening. Shake it well before each use, as oat milk can separate naturally. And if you’ve made extra espresso, you can store it in the fridge for up to 24 hours and use it for iced drinks the next day.
Nutritional Information & Benefits
Here’s the approximate nutritional breakdown for one serving of this brown sugar oat milk shaken espresso (using 2 tablespoons brown sugar and 1 cup oat milk):
- Calories: 180
- Fat: 4g
- Carbohydrates: 32g
- Fiber: 2g
- Sugar: 22g
- Protein: 3g
- Caffeine: 150mg (approximately, depending on espresso strength)
Oat milk is a great source of fiber and is often fortified with calcium and vitamin D, making it a nutritious choice. Brown sugar provides a quick energy boost, though it’s best enjoyed in moderation. The espresso itself contains antioxidants and can improve focus and alertness.
This recipe is naturally dairy-free and can be made sugar-free with substitutions. It’s also vegan-friendly as written. If you’re watching your caffeine intake, use decaf espresso for a similar flavor without the jolt. I personally love that I can enjoy a coffee shop-quality drink at home without any of the questionable additives or preservatives found in some commercial syrups.
Conclusion
This budget-friendly copycat brown sugar oat milk shaken espresso has honestly become a staple in our house. It saves us money, tastes incredible, and makes even a regular Tuesday feel a little special. I love that I can whip it up in under five minutes, using ingredients I already have, and get that same coffee shop satisfaction without leaving my kitchen.
I really hope you give this recipe a try. Play around with the ratios, make it your own, and don’t be afraid to get a little messy in the process. That’s half the fun, honestly. And when you nail that first sip, you’ll know exactly what I mean about that little happy dance moment.
If you make this, I’d love to hear how it turned out. Drop a comment below, share your own tweaks, or tag me in your photos. Let’s save some money and drink great coffee together. Cheers to homemade happiness!
Frequently Asked Questions
Can I use regular milk instead of oat milk?
Absolutely! While oat milk gives the creamiest texture and that classic Starbucks taste, regular dairy milk works perfectly fine. Whole milk will be the creamiest, but 2% or skim also work. Just note that the flavor will be slightly different—less sweet and more milky.
How do I make this without an espresso machine?
No espresso machine? No problem. Use a Moka pot, Aeropress, or even strong brewed coffee from a French press. The key is using a dark roast and brewing it strong. For every 2 ounces of water, use about 2 tablespoons of coffee grounds. It won’t be exactly the same, but it’ll still be delicious.
Can I make a large batch for a party?
Yes! Multiply the ingredients by the number of servings you need. Make the brown sugar syrup in a larger batch and store it in the fridge. Brew a large amount of espresso and let it cool slightly. When ready to serve, shake individual portions or combine everything in a large pitcher (minus the ice) and pour over ice in each glass. Just don’t shake too much at once—it’s easier to do individual servings for best froth.
Why did my drink turn out watery?
This usually happens when the espresso is too hot and melts the ice too quickly. Let your espresso cool for about 30 seconds before shaking. Also, using larger ice cubes helps—they melt slower than small or crushed ice. If you’re still having trouble, try chilling the espresso in the fridge for 5 minutes before shaking.
How can I make this less sweet?
Easy—reduce the brown sugar to 1 tablespoon or even 1 1/2 teaspoons. You can also use a sugar-free brown sugar alternative. Another trick is to use unsweetened oat milk, which cuts down on sweetness without sacrificing creaminess. Taste as you go and adjust to your preference.
Pin This Recipe!
Budget-Friendly Copycat Brown Sugar Oat Milk Shaken Espresso

A quick and easy copycat recipe for a brown sugar oat milk shaken espresso that costs pennies compared to coffee shop versions. This creamy, bold, and sweet iced coffee drink comes together in under five minutes with simple ingredients.
- Prep Time: 5 minutes
- Cook Time: 0 minutes
- Total Time: 5 minutes
- Yield: 1 serving 1x
- Category: Beverages
- Cuisine: American
Ingredients
- 2 shots (2 ounces or 60 ml) espresso or strong brewed coffee
- 2 tablespoons (25 grams) packed brown sugar
- 2 tablespoons (30 ml) hot water
- 1 cup (240 ml) cold oat milk
- 1 cup (150 grams) ice cubes
- 1/4 teaspoon vanilla extract (optional)
- Pinch of cinnamon for garnish (optional)
Instructions
- Make the brown sugar syrup: In a small saucepan or microwave-safe bowl, combine 2 tablespoons packed brown sugar with 2 tablespoons hot water. Stir until the sugar is completely dissolved. If using the microwave, heat for 20 seconds, then stir. Set aside to cool slightly.
- Brew your espresso: Prepare 2 shots of espresso using your preferred method. Let the espresso cool for about 30 seconds.
- Combine syrup and espresso: Pour the brown sugar syrup into a cocktail shaker or mason jar. Add the warm espresso and stir gently to combine. If using vanilla extract, add it now.
- Add ice: Fill the shaker with ice cubes—about 1 cup or a generous handful.
- Shake vigorously: Secure the lid tightly and shake for 15-20 seconds until the shaker feels cold.
- Prepare your serving glass: Fill a tall 16-ounce glass with fresh ice cubes.
- Pour and add oat milk: Strain the shaken espresso mixture into the prepared glass, leaving the ice from the shaker behind. Pour 1 cup cold oat milk over the top.
- Garnish and serve: Sprinkle a pinch of cinnamon on top if desired. Give the drink a gentle stir with a straw before drinking. Serve immediately.
Notes
For a stronger coffee flavor, use 3 shots of espresso. For a sweeter drink, add an extra tablespoon of brown sugar. Make the brown sugar syrup ahead of time and store in the refrigerator for up to two weeks. Use large ice cubes to prevent dilution. For best froth, shake vigorously for 15-20 seconds.
Nutrition
- Serving Size: 1 serving (16 ounces
- Calories: 180
- Sugar: 22
- Sodium: 100
- Fat: 4
- Saturated Fat: 0.5
- Carbohydrates: 32
- Fiber: 2
- Protein: 3
Keywords: brown sugar oat milk shaken espresso, copycat Starbucks, iced coffee, homemade coffee drink, budget-friendly coffee, oat milk espresso


