I was standing in the produce aisle of my local grocery store last Tuesday, just staring at a bin of these funny little striped squashes. They looked like butternut squash that had been put through a shrink ray, and I honestly had no idea what to do with them. But then a woman walked by, grabbed a handful, and said to her friend, “Oh, these are honeynuts—they’re like candy when you roast them.” That was it. That one offhand comment from a stranger, and I was transported back to my aunt Carol’s tiny kitchen in Vermont, the autumn I turned twelve.
She had this old cast iron skillet that was practically black with seasoning, and she’d fill it with chunks of squash and a whole stick of butter. The smell that filled her cabin—nutty and sweet and warm—was something I’d never been able to recreate. Until now. I mean, I’d tried making regular butternut squash a dozen times, but it was never quite right. Something was always missing. That specific toasty, almost caramelized flavor that I could still almost taste if I thought hard enough. So when I saw those honeynut squashes, something clicked. Maybe this was it. Maybe this was the exact squash she used, back before anyone knew what to call them.
I grabbed three of them and practically ran home. Let me tell you, my kitchen was a mess by the time I was done—squash seeds everywhere, butter splattered on the stove. But when I pulled that pan out of the oven and took my first bite? Honestly, I sat down at my counter and just closed my eyes for a minute. It was that good. And now I make this dish every time I’m hosting, because nothing says “I love you, now sit down and eat” quite like brown butter and roasted squash. Maybe you’ve been chasing a taste from your past too. This might just be the one.
Why You’ll Love This Recipe
This cozy brown butter honeynut squash is the kind of side dish that steals the whole show at a dinner party. I’ve brought it to potlucks, Thanksgiving dinners, and casual weeknight gatherings, and every single time, someone asks for the recipe. Here’s why it works so well for hosts like us:
- Quick & Easy: Comes together in under 30 minutes, which means you can prep it while your guests are sipping wine and catching up. No stress, no fuss.
- Simple Ingredients: You only need a handful of things—honeynut squash, butter, salt, and maybe some fresh herbs if you’re feeling fancy. Chances are you already have most of this in your kitchen.
- Perfect for Gatherings: This dish is designed to impress a crowd. It looks gorgeous on a platter, smells incredible, and pairs beautifully with roasted meats, hearty salads, or even a simple pasta.
- Crowd-Pleaser: I’ve yet to meet someone who doesn’t love it. Kids go for the sweetness, adults go for that nutty brown butter flavor, and everyone goes back for seconds.
- Unbelievably Delicious: There’s something about the combination of caramelized squash and browned butter that just hits different. It’s comfort food that feels special without being complicated.
What makes this recipe different from all the other roasted squash recipes out there? It’s the technique. Most recipes just toss squash in oil and roast it, but browning the butter first changes everything. That nutty, toasty flavor seeps into every single bite, and the squash gets these gorgeous golden edges that are honestly addictive. Plus, honeynut squash is naturally sweeter and creamier than butternut, so you don’t need to add sugar or maple syrup to make it taste like dessert.
This isn’t just another side dish. It’s the kind that makes people close their eyes after the first bite. The kind you’ll find yourself making even when nobody’s coming over, just because you’re craving it. And when you’re hosting, it’s the perfect way to look like you spent hours in the kitchen when really, it took you twenty minutes. That’s the kind of magic we all need in our lives.
What Ingredients You Will Need
This recipe uses simple, wholesome ingredients to deliver that big, bold flavor without any fuss. Most of these are pantry staples or easy to find at any grocery store, especially during fall and winter. Here’s what you’ll need:
For the Squash
- 3 to 4 medium honeynut squashes (about 2 pounds total) — Look for ones that feel heavy for their size and have firm, unblemished skin. Honeynuts are smaller and sweeter than butternut, so you’ll need more of them.
- 4 tablespoons unsalted butter — I prefer Kerrygold or any European-style butter for browning, because the higher fat content gives you a richer, nuttier flavor. Salted butter works too, just reduce the added salt a bit.
- 1/2 teaspoon fine sea salt — Or kosher salt, if that’s what you have. Just adjust to taste.
- 1/4 teaspoon black pepper — Freshly ground is always better here.
- 1 tablespoon olive oil — Helps the squash roast evenly and get those crispy edges. A good extra virgin olive oil adds a nice fruity note.
Optional Garnishes
- Fresh sage leaves (about 6-8) — These crisp up beautifully in the brown butter and add an earthy, aromatic flavor that pairs perfectly with the squash.
- Flaky sea salt — Like Maldon, for that final pop of texture and saltiness right before serving.
- Maple syrup or honey — A light drizzle if you want to amp up the sweetness, though honestly the squash is sweet enough on its own.
- Toasted pepitas or pecans — Adds crunch and makes the dish feel even more special for a dinner party.
- Fresh thyme or rosemary sprigs — Tuck these into the pan while roasting for an herby infusion.
One thing I’ve learned from making this dish more times than I can count: don’t skip the step of halving the squash lengthwise and scooping out the seeds. Some people try to peel and cube them, but you lose that beautiful presentation and the skin of honeynut squash is actually tender enough to eat once roasted. Plus, the halves hold the brown butter beautifully in their little cavities. If you can’t find honeynut squash, you can substitute with small butternut squash or even delicata squash—just adjust the cooking time slightly since they vary in size.
As for the butter, I highly recommend using unsalted so you can control the salt level. I’ve made the mistake of using salted butter before and ended up with a dish that was a little too salty for my taste. You can always add more salt at the end, but you can’t take it out. Trust me on this one.
Equipment Needed
You don’t need a ton of fancy equipment for this recipe, which is part of why I love it so much. Here’s what you’ll need:
- Large rimmed baking sheet — A half-sheet pan works perfectly. Make sure it has edges so the butter doesn’t drip off into your oven. I use my Nordic Ware sheet pan for this and it’s never let me down.
- Small skillet or saucepan — For browning the butter. Light-colored pans work best because you can see the butter change color clearly. I’ve burned my fair share of butter in dark nonstick pans.
- Sharp chef’s knife — Honeynut squashes are small but dense, so a good knife makes cutting them in half much safer and easier. A 8-inch chef’s knife is my go-to.
- Large spoon or ice cream scoop — For scooping out the seeds and stringy bits. An ice cream scoop with a sharp edge works like a charm.
- Pastry brush — Optional, but helpful for brushing the brown butter mixture evenly over the squash halves. A silicone brush is easy to clean.
- Measuring spoons — For the salt, pepper, and oil.
If you don’t have a pastry brush, no worries. You can just use a regular spoon to drizzle the butter over the squash. And if you don’t have a light-colored pan for browning butter, just keep a close eye on it and take it off the heat the second it starts to smell nutty. I’ve definitely had to start over a few times because I got distracted and let it go too far. It happens to the best of us.
Preparation Method
Alright, let’s get cooking. This recipe comes together in about 30 minutes, and most of that is hands-off oven time. Here’s exactly how to do it:
- Preheat your oven to 400°F (200°C). Position a rack in the middle of the oven. While it’s heating up, line your baking sheet with parchment paper or aluminum foil for easier cleanup. Trust me, the brown butter can get sticky.
- Prepare the squash. Carefully cut each honeynut squash in half lengthwise from stem to tip. Use a sharp chef’s knife and go slow—these little guys are dense. Once halved, use a sturdy spoon to scoop out all the seeds and stringy pulp. Don’t worry about getting every last bit, just the big clumps. Place the squash halves cut-side up on your prepared baking sheet.
- Brown the butter. In a small skillet or saucepan over medium heat, melt the 4 tablespoons of butter. Swirl the pan occasionally as it melts. The butter will start to foam and bubble—that’s normal. Keep cooking, swirling every now and then, until the foam subsides and you see little brown specks forming at the bottom of the pan. The butter will smell intensely nutty and toasty. This usually takes about 3 to 5 minutes. As soon as it turns a golden amber color, remove it from the heat immediately. Don’t walk away from it—brown butter can go from perfect to burnt in seconds.
- Season the squash. Drizzle the olive oil over the cut sides of the squash halves, then sprinkle with the salt and pepper. Use your hands or a brush to rub it in evenly. Now, spoon or brush the brown butter over each squash half, making sure to get some of those brown bits onto each piece. That’s where all the flavor is.
- Roast the squash. Place the baking sheet in the preheated oven and roast for 20 to 25 minutes, or until the squash is tender when pierced with a fork. The edges should be caramelized and golden brown. If you’re adding fresh sage leaves, tuck them into the pan around the squash during the last 10 minutes of roasting—they’ll crisp up beautifully.
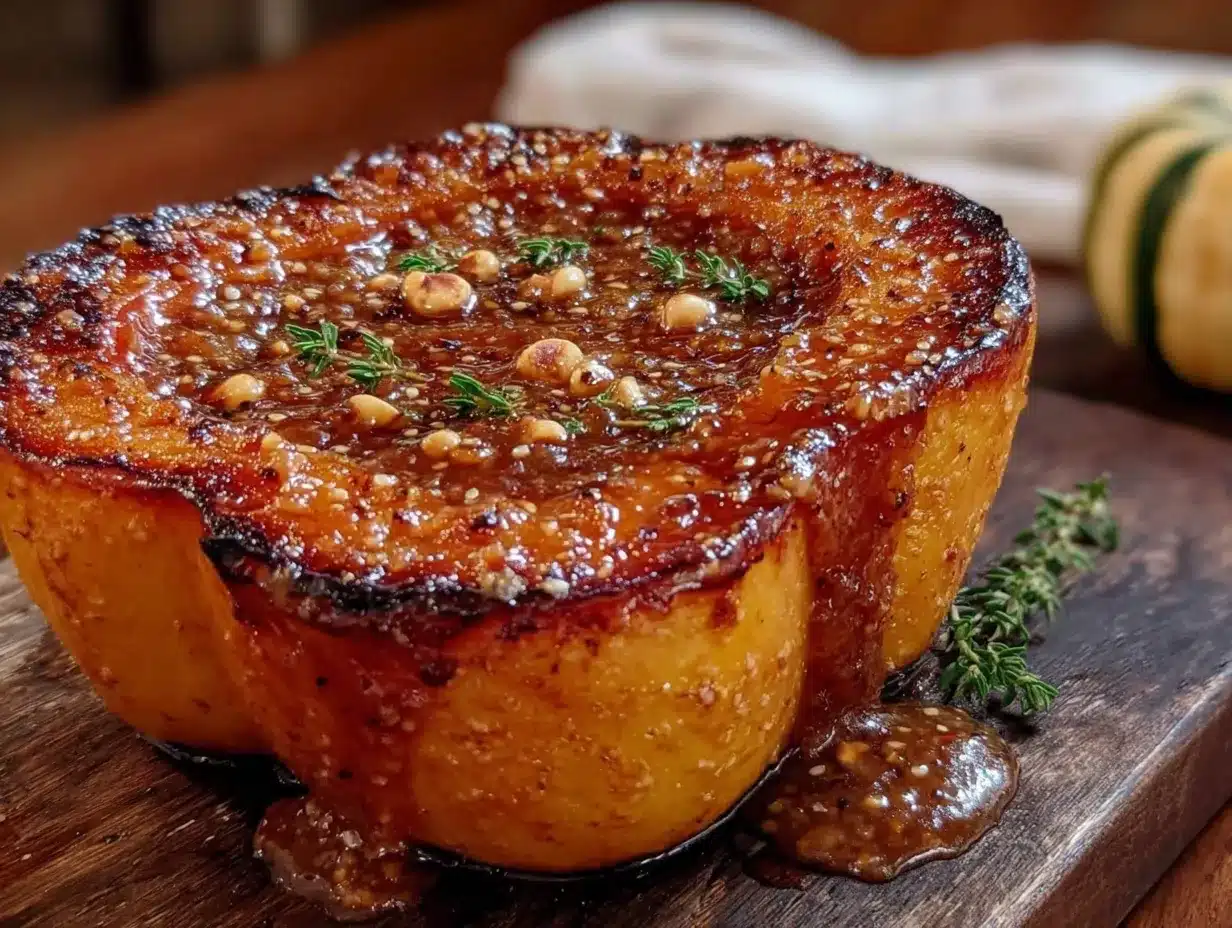
- Finish and serve. Remove the baking sheet from the oven. If you’re using flaky salt, sprinkle a little over the hot squash. You can also drizzle a tiny bit of maple syrup or honey if you want extra sweetness, but I usually skip it. Transfer the squash halves to a serving platter, spoon any remaining brown butter from the pan over the top, and garnish with crispy sage leaves and toasted pepitas if desired. Serve hot or warm.
One thing I always tell my friends: the squash is done when a fork slides in easily but the squash still holds its shape. You don’t want it mushy. And if you’re making this for a crowd, you can easily double the recipe—just use two baking sheets and rotate them halfway through cooking.
Cooking Tips & Techniques
After making this dish more times than I can count, I’ve picked up a few tricks that make a real difference. Here’s what I’ve learned:
Don’t overcrowd the pan. Give each squash half a little breathing room on the baking sheet. If they’re crammed together, they’ll steam instead of roast, and you won’t get those beautiful caramelized edges. I learned this the hard way when I tried to fit eight halves on one sheet pan—they came out soft and pale, not golden and crispy.
Watch the butter like a hawk. I cannot stress this enough. Brown butter is amazing, but burnt butter is bitter and ruins everything. The moment you see those brown specks form and smell that nutty aroma, pull it off the heat. If you’re nervous, you can even take the pan off the heat a few seconds early—the residual heat will continue cooking it. I’ve definitely had to dump a pan of burnt butter and start over. It’s frustrating, but worth it.
Cut the squash evenly. Try to halve the squashes so both sides are roughly the same thickness. This ensures they cook at the same rate. If some halves are much thicker than others, they’ll need more time in the oven. You can always check the smaller ones first and remove them early if needed.
Use the pan juices. After roasting, there will be a glorious mixture of brown butter and squash juices pooled in the pan. Don’t leave that behind! Spoon it over the squash before serving. It’s liquid gold, honestly. I sometimes find myself sopping it up with a piece of bread after everyone’s done.
Prep ahead for hosting. If you’re having people over, you can halve and seed the squash up to a day in advance. Store the halves in an airtight container in the fridge. You can also brown the butter ahead of time and keep it in the fridge—just reheat it gently before using. Then all you have to do on the day of your gathering is assemble and roast. It takes maybe 5 minutes of active work, and your kitchen will smell incredible while guests are arriving.
Variations & Adaptations
This recipe is pretty perfect as is, but I love playing around with different flavors depending on the season or what I’m serving. Here are some of my favorite variations:
Savory Herb Version
Add 2 to 3 sprigs of fresh rosemary and thyme to the baking sheet before roasting. The herbs infuse the brown butter as it cooks, giving the squash a woodsy, aromatic flavor. I make this version when I’m serving the squash alongside a roast chicken or pork tenderloin—it’s a match made in heaven.
Spicy Maple Glaze
Whisk 1 tablespoon of maple syrup and a pinch of cayenne pepper or red pepper flakes into the brown butter before brushing it onto the squash. The heat and sweetness play off each other beautifully, and it adds a little kick that wakes up your taste buds. This is my go-to for fall dinner parties when I want something a little unexpected.
Vegan Option
Substitute the butter with a high-quality vegan butter or coconut oil. I’ve used Miyoko’s European-style cultured vegan butter with great results—it browns surprisingly well and has a rich, buttery flavor. Just keep an eye on it, as vegan butter can brown faster than dairy butter.
Balsamic Glaze Finish
After roasting, drizzle the squash with a good-quality balsamic glaze or reduction. The tangy sweetness cuts through the richness of the brown butter and adds a gorgeous dark swirl. I tried this on a whim one night and now it’s my secret weapon for impressing guests.
Nut-Free Crunch
If you’re avoiding nuts, skip the pepitas and sprinkle the squash with toasted sesame seeds or sunflower seeds instead. They add the same satisfying crunch without any allergy concerns. I’ve also used crispy fried shallots on top, which is absolutely divine.
Serving & Storage Suggestions
This cozy brown butter honeynut squash is incredibly versatile when it comes to serving. Here’s how I like to do it:
Serving Temperature: Serve it hot or warm, straight from the oven. The brown butter is at its most flavorful when it’s still liquid and glossy. If it cools down too much, the butter will solidify slightly, but it’s still delicious. I’ve even eaten leftovers cold from the fridge and enjoyed them.
Presentation Tips for Hosting: Arrange the squash halves on a large wooden board or white platter, cut-side up, so the golden brown centers are visible. Spoon any remaining pan juices over the top. Sprinkle with flaky salt, crispy sage leaves, and toasted pepitas. It looks stunning and rustic at the same time. I like to serve it family-style so everyone can grab their own half.
What to Serve Alongside: This squash pairs beautifully with roasted chicken, grilled steak, or pan-seared fish. It’s also wonderful alongside a hearty grain salad or as part of a vegetarian spread with lentil loaf and roasted Brussels sprouts. For holiday dinners, it fits right in next to the turkey and mashed potatoes.
Storage: Store any leftovers in an airtight container in the refrigerator for up to 4 days. The squash will soften a bit more as it sits, but the flavor actually deepens overnight as the brown butter soaks in. I’ve been known to eat the leftovers cold, straight from the container, as a snack.
Reheating: The best way to reheat is in a 350°F oven for about 10 minutes, or until warmed through. You can also use an air fryer at 350°F for 5 to 6 minutes. The microwave works in a pinch, but the squash will be softer and lose some of those caramelized edges. If you’re reheating for a party, add a tiny pat of fresh butter on top to bring back some richness.
Flavor Development: Honestly, this dish tastes even better the next day. The brown butter seeps into every nook and cranny, and the flavors meld together beautifully. I sometimes make a double batch just so I have leftovers for lunch the next day.
Nutritional Information & Benefits
This dish is surprisingly nutritious for how indulgent it tastes. Here’s a rough breakdown per serving (one squash half):
| Nutrient | Amount |
|---|---|
| Calories | 180-220 |
| Total Fat | 12g |
| Saturated Fat | 7g |
| Carbohydrates | 20g |
| Fiber | 4g |
| Sugar | 8g |
| Protein | 3g |
| Vitamin A | 300% DV |
| Vitamin C | 35% DV |
| Potassium | 15% DV |
Honeynut squash is a powerhouse of nutrition. It’s loaded with vitamin A from beta-carotene, which supports eye health and immune function. It’s also a great source of fiber, which keeps you full and helps with digestion. The brown butter adds healthy fats that help your body absorb those fat-soluble vitamins. Plus, this dish is naturally gluten-free and can easily be made dairy-free or vegan with a few swaps. If you’re watching your sugar intake, the squash provides natural sweetness without any added sugar, so you can skip the maple syrup drizzle.
I love that I can serve this to guests with different dietary needs and not have to worry. It’s whole-food based, nutrient-dense, and honestly feels like a treat. That’s my favorite kind of cooking—food that’s good for you but doesn’t taste like it.
Conclusion
This cozy brown butter honeynut squash has become my go-to side dish for every gathering, and I don’t see that changing anytime soon. It’s simple enough for a Tuesday night but impressive enough for Thanksgiving, and the flavor is genuinely unforgettable. That nutty, caramelized sweetness with a hint of salt and herbs—it’s the kind of dish that makes people close their eyes and sigh with contentment.
What I love most about this recipe is how adaptable it is. You can dress it up with fancy garnishes for a dinner party or keep it simple for a weeknight meal. It works with so many different mains and cuisines, and it never fails to get compliments. Plus, it’s ready in under 30 minutes, which means you can spend less time in the kitchen and more time with your guests.
I’d love to hear how this recipe turns out for you. Did you try any of the variations? Did your guests go back for seconds? Drop a comment below and let me know—I read every single one. And if you’re looking for more crowd-pleasing side dishes, don’t forget to share this post with your friends. Happy cooking, and remember: the best meals are the ones shared with people you love.
Frequently Asked Questions
Can I use butternut squash instead of honeynut?
Absolutely. Honeynut squash is smaller and sweeter, but butternut squash works well too. Just cut it into smaller chunks or slices so it cooks evenly, and expect a slightly longer roasting time—around 30 to 35 minutes at 400°F.
Do I need to peel honeynut squash before roasting?
Nope! The skin of honeynut squash is thin and tender once roasted. You can eat it right along with the flesh. Plus, leaving the skin on helps the squash hold its shape and makes for a prettier presentation.
Can I make this dish ahead of time?
You can prep the squash and brown the butter up to a day in advance. Store the halved squash in the fridge and the browned butter in a sealed container. When you’re ready to serve, just assemble and roast as directed. The squash is best served fresh from the oven.
How do I know when the brown butter is done?
Watch for the butter to turn a golden amber color with small brown specks forming at the bottom of the pan. It should smell intensely nutty and toasty. The whole process takes about 3 to 5 minutes over medium heat. Remove it from the heat immediately once it reaches that stage, as it can burn very quickly.
Is this recipe gluten-free and dairy-free friendly?
This recipe is naturally gluten-free. For a dairy-free version, simply substitute the butter with a high-quality vegan butter or coconut oil. I’ve tested it with Miyoko’s vegan butter and it works beautifully. Just watch it closely as it browns, since vegan butter can go from perfect to burnt faster than dairy butter.
Pin This Recipe!
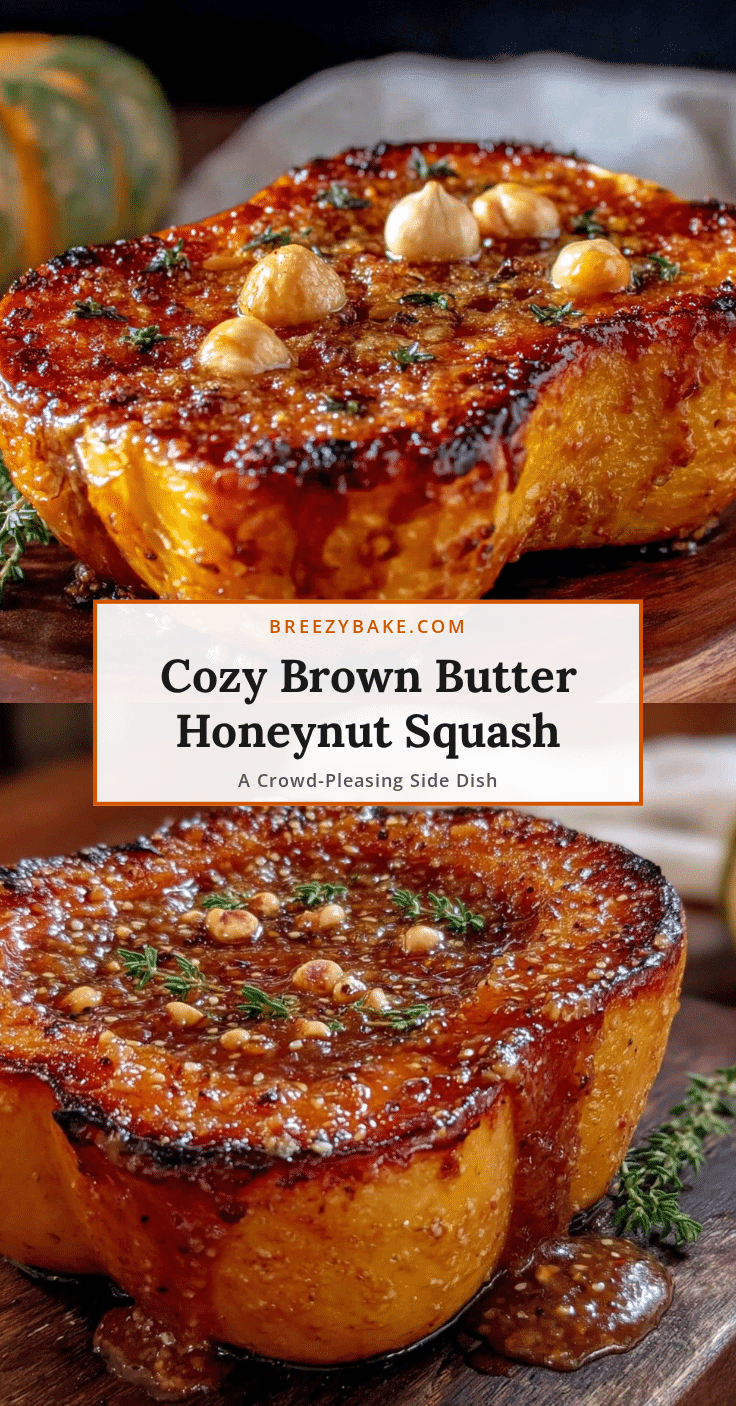
Cozy Brown Butter Honeynut Squash – Easy 30-Minute Side Dish
This cozy brown butter honeynut squash is a quick and easy side dish that steals the show at any gathering. With caramelized edges and a nutty, toasty flavor, it’s comfort food that feels special without being complicated.
- Prep Time: 10 minutes
- Cook Time: 25 minutes
- Total Time: 35 minutes
- Yield: 4 servings 1x
- Category: Side Dish
- Cuisine: American
Ingredients
- 3 to 4 medium honeynut squashes (about 2 pounds total)
- 4 tablespoons unsalted butter
- 1/2 teaspoon fine sea salt
- 1/4 teaspoon black pepper
- 1 tablespoon olive oil
- Fresh sage leaves (about 6-8, optional)
- Flaky sea salt (optional)
- Maple syrup or honey (optional)
- Toasted pepitas or pecans (optional)
- Fresh thyme or rosemary sprigs (optional)
Instructions
- Preheat your oven to 400°F (200°C). Line a baking sheet with parchment paper or aluminum foil.
- Carefully cut each honeynut squash in half lengthwise. Scoop out the seeds and stringy pulp. Place the squash halves cut-side up on the prepared baking sheet.
- In a small skillet or saucepan over medium heat, melt the butter. Swirl occasionally until it foams, then brown specks form and it smells nutty (3 to 5 minutes). Remove from heat immediately.
- Drizzle olive oil over the cut sides of the squash, then sprinkle with salt and pepper. Spoon or brush the brown butter over each squash half, including the brown bits.
- Roast for 20 to 25 minutes, until tender when pierced with a fork and edges are caramelized. If using sage, add it during the last 10 minutes.
- Remove from oven. Sprinkle with flaky salt, drizzle with maple syrup if desired, and garnish with crispy sage and pepitas. Serve hot or warm.
Notes
Don’t overcrowd the pan to ensure caramelization. Watch the butter closely to avoid burning. The squash is done when a fork slides in easily but it still holds its shape. Leftovers can be stored in the fridge for up to 4 days and taste even better the next day.
Nutrition
- Serving Size: 1 squash half
- Calories: 200
- Sugar: 8
- Sodium: 300
- Fat: 12
- Saturated Fat: 7
- Carbohydrates: 20
- Fiber: 4
- Protein: 3
Keywords: brown butter, honeynut squash, roasted squash, easy side dish, fall recipe, 30-minute recipe


