My neighbor wasn’t trying to impress anyone. Honestly, I’d stopped by to return a measuring cup I’d borrowed three weeks prior—the kind of errand you put off until you’re out of excuses. But the smell hit me before I even got to her screen door. Warm cinnamon, bubbling fruit, that nutty scent of butter melting into oats. It smelled like October had decided to live in her kitchen. She was bent over the stove, stirring something in a tiny cast iron skillet, and she barely looked up. “Oh, that? It’s just apple crisp. For me and the husband.” Just apple crisp. Like it was nothing. But let me tell you, that “nothing” had me lingering at her doorway for a solid ten minutes, trying to figure out how to ask for the recipe without sounding like a total creep.
The thing is, I’ve made big apple crisps before. The kind that feeds a crowd, sits on a buffet table, and gets picked at for days. But this was different. This was personal. It was a small, perfect little dessert for two people, made in a pan that fit right in her palm. No leftovers. No waste. Just a warm, bubbly moment shared over two spoons. I mean, maybe you’ve been there—you want something cozy and sweet, but you don’t need a whole 9×13 pan of it. You just want enough for you and one other person, or honestly, just for yourself on a quiet Tuesday night. That’s the magic of this small-batch apple crisp.
I kept thinking about that pan for days. The way the topping was extra crunchy, the apples soft but not mushy. She finally texted me the recipe—scribbled on a napkin, of course—and I’ve been making it ever since. It’s become my go-to for those evenings when I want something special without going overboard. And every time I make it, I remember that casual afternoon, the smell of cinnamon pulling me in, and how the best recipes often come from people who don’t think they’re doing anything special at all.
Why You’ll Love This Recipe
Let’s be real—there are a million apple crisp recipes out there. But this one? It’s different. It’s built for two, which means no sad leftovers sitting in the fridge for a week, and no temptation to eat an entire pan by yourself (though I won’t judge if you do). Here’s why this cozy small-batch apple crisp for two is about to become your fall favorite:
- Perfectly Portioned: This recipe makes exactly two generous servings. It’s ideal for date night, a quiet evening, or treating yourself without the guilt of a full-sized dessert.
- Simple Pantry Ingredients: You probably have everything you need right now. Apples, butter, oats, flour, brown sugar, cinnamon. No fancy trips to a specialty store required.
- Ready in Under an Hour: From start to finish, you’re looking at about 45 minutes. The apples soften while the topping gets golden and crunchy. It’s fast comfort food.
- Customizable for Any Diet: Swap in gluten-free oats and a gluten-free flour blend, and you’ve got a gluten-free dessert. Use coconut oil instead of butter for a dairy-free version. It’s flexible.
- Foolproof Texture: The secret is in the topping—it’s got that perfect balance of crispy, buttery, and slightly chewy. No soggy tops here.
I’ve tested this recipe at least a dozen times, tweaking the ratio of oats to flour, the amount of butter, the type of apple. And I can tell you with confidence: this is the version that works every single time. It’s the kind of dessert that makes you close your eyes after the first bite, not because it’s fancy, but because it tastes like home.
What Ingredients You Will Need
This cozy small-batch apple crisp for two uses simple, wholesome ingredients that come together to create something truly special. No weird additives, no hard-to-find items—just real food that tastes amazing. Here’s what you’ll need:
For the Apple Filling
- 2 medium apples (about 300g total) — peeled, cored, and sliced into ¼-inch thick pieces. I recommend Honeycrisp, Granny Smith, or a mix of both. The tartness of Granny Smith balances the sweetness beautifully, while Honeycrisp adds natural sweetness and holds its shape well.
- 2 tablespoons (25g) granulated sugar — just enough to sweeten the apples without overpowering their natural flavor.
- 1 tablespoon (8g) all-purpose flour — this helps thicken the juices as the apples bake, creating that luscious, syrupy filling.
- ½ teaspoon ground cinnamon — the star spice here. I prefer Saigon cinnamon for its bold, warm flavor.
- 1 tablespoon (15ml) lemon juice — freshly squeezed is best. It prevents the apples from browning and adds a bright note that cuts through the sweetness.
- Pinch of salt — just a tiny bit to enhance all the flavors.
For the Crisp Topping
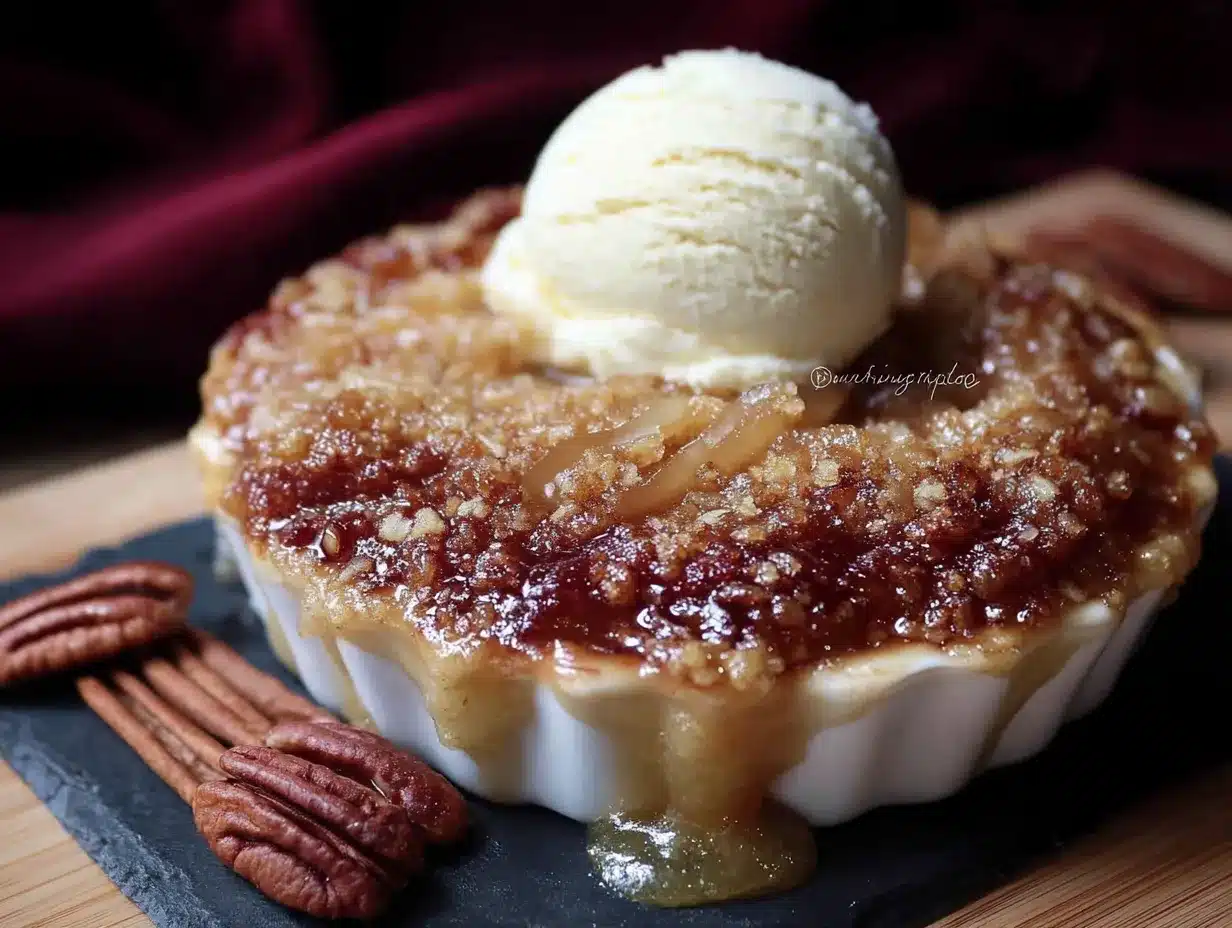
- ¼ cup (30g) old-fashioned rolled oats — not quick oats. Old-fashioned oats give the topping that hearty, chewy texture that’s essential for a good crisp. I recommend Bob’s Red Mill or Quaker.
- ¼ cup (31g) all-purpose flour — this creates the crumbly, streusel-like base for the topping.
- ¼ cup (50g) packed light brown sugar — dark brown sugar works too, but light brown gives a milder molasses flavor that lets the apples shine.
- ¼ teaspoon ground cinnamon — for extra warmth in the topping.
- Pinch of salt — don’t skip it. Salt makes the sweetness pop.
- 3 tablespoons (42g) cold unsalted butter — cut into small cubes. Cold butter is key for a flaky, crumbly topping. If you only have salted butter, reduce the added salt to just a tiny pinch.
- 2 tablespoons (28g) chopped pecans or walnuts (optional) — for extra crunch. I love pecans here, but walnuts are fantastic too.
One thing I’ve learned: the quality of your apples really matters. I once used mealy Red Delicious apples, and the filling turned into a sad, watery mess. Stick with firm, crisp apples, and you’ll be rewarded with a perfect texture every time.
Equipment Needed
You don’t need a fancy kitchen to make this small-batch apple crisp. Here’s what you’ll need:
- Two 6-ounce (180ml) ramekins or one small 5-inch cast iron skillet — ramekins are perfect for individual servings, while a small skillet gives that rustic, shareable look. I’ve used both, and honestly, the skillet version feels cozier.
- Mixing bowls — one medium bowl for the apple filling, one small bowl for the topping.
- Chef’s knife and cutting board — for peeling and slicing the apples.
- Measuring cups and spoons — accuracy matters in a small batch, so measure carefully.
- Pastry cutter or fork — to cut the butter into the dry ingredients. You can also use your fingertips, but work quickly so the butter stays cold.
- Baking sheet — place your ramekins or skillet on a baking sheet to catch any bubbly overflow. Trust me on this one.
If you don’t have ramekins, you can use oven-safe small bowls or even a muffin tin. I once used a small foil pie pan in a pinch, and it worked fine—just keep an eye on the baking time, as foil conducts heat differently.
Preparation Method
Making this cozy small-batch apple crisp for two is straightforward, but a few little tricks make all the difference. Follow these steps, and you’ll have a perfect dessert every time.
- Preheat your oven to 375°F (190°C). Place a baking sheet on the middle rack. This preheats the sheet, which helps the bottoms of the ramekins crisp up nicely.
- Prepare the apples. Peel, core, and slice your apples into ¼-inch thick pieces. I like to slice them into half-moons, but you can also dice them into ½-inch cubes. Just keep the pieces uniform so they cook evenly. Place the sliced apples in a medium bowl.
- Make the filling. Add the granulated sugar, 1 tablespoon flour, ½ teaspoon cinnamon, lemon juice, and a pinch of salt to the bowl with the apples. Toss everything together with a spatula or your hands until the apples are evenly coated. Let this sit for 5 minutes while you make the topping. This resting time lets the apples release a little juice, which creates that lovely syrupy sauce as they bake.
- Make the crisp topping. In a small bowl, combine the rolled oats, ¼ cup flour, brown sugar, ¼ teaspoon cinnamon, and a pinch of salt. Stir with a fork to break up any clumps of brown sugar. Add the cold butter cubes. Use a pastry cutter or your fingertips to work the butter into the dry ingredients until the mixture looks like coarse crumbs with some pea-sized butter pieces still visible. If you’re using nuts, stir them in now. Don’t overwork the mixture—you want some texture, not a paste.
- Assemble the crisps. Divide the apple mixture evenly between your two ramekins or pour it into your small skillet. Sprinkle the topping evenly over the apples, pressing down gently to make sure it sticks. Don’t pack it too tight—you want those little crumbles to stay separate and get crunchy.
- Bake. Place the ramekins or skillet on the preheated baking sheet. Bake for 25 to 30 minutes, until the filling is bubbly and the topping is golden brown. If the topping is browning too quickly, tent loosely with foil for the last 5 minutes. My oven runs hot, so I usually check at the 22-minute mark.
- Cool slightly before serving. Let the crisp rest on a wire rack for at least 10 minutes. This allows the filling to set up a bit—if you dig in too soon, it’ll be runny. The wait is worth it, I promise.
- Serve warm. Top with a scoop of vanilla ice cream, a dollop of whipped cream, or a drizzle of heavy cream. The contrast between the warm, spiced apples and the cold, creamy topping is pure magic.
A quick note: if you’re using a cast iron skillet, the crisp will cook a little faster because the skillet retains heat so well. Start checking at 20 minutes. And don’t forget to use oven mitts—that handle gets dangerously hot.
Cooking Tips & Techniques
Over the years, I’ve made plenty of mistakes with apple crisp. Like the time I used quick oats and ended up with a topping that tasted like cardboard. Or the time I forgot the lemon juice, and my apples turned an unappetizing brown. Here’s what I’ve learned so you don’t have to make the same errors:
- Use cold butter. This is non-negotiable. Warm butter will melt into the flour mixture, creating a dense, greasy topping instead of those beautiful, flaky crumbles. If your kitchen is warm, pop the butter in the freezer for 10 minutes before cutting it in.
- Don’t overmix the topping. You want some butter pieces to remain visible—about the size of small peas. These little pockets of butter melt in the oven, creating steam pockets that make the topping light and crunchy.
- Choose the right apples. A mix of tart and sweet gives the best flavor. Granny Smith + Honeycrisp is my go-to combo. Avoid Red Delicious or Gala, which turn mushy and bland when baked.
- Let the filling rest. That 5-minute rest after tossing the apples with sugar and flour is crucial. It gives the apples time to macerate slightly, releasing natural juices that combine with the flour to create a thick, glossy syrup.
- Use a baking sheet. I cannot stress this enough. Even with the best intentions, apple crisp bubbles over. A baking sheet saves your oven from a sticky, burnt-sugar mess.
- Check for doneness. The crisp is ready when the filling is visibly bubbling around the edges and the topping is deep golden brown. If you’re unsure, insert a knife into the center—the apples should be tender but not mushy.
One more thing: if you’re making this for a special occasion, double the recipe and bake it in a 9-inch pie plate. It works perfectly and feeds four people comfortably. Just increase the baking time by 5 to 10 minutes.
Variations & Adaptations
This cozy small-batch apple crisp for two is incredibly versatile. Here are some ways to make it your own:
- Gluten-Free Version: Substitute the all-purpose flour with a 1:1 gluten-free baking flour blend (I like King Arthur Measure for Measure). Use certified gluten-free oats. The texture will be slightly less tender, but it’s still delicious.
- Dairy-Free Version: Replace the butter with cold coconut oil or a plant-based butter stick. I’ve used Miyoko’s European Style Cultured Vegan Butter with great results. The topping will be a bit less rich, but still satisfying.
- Spiced Apple Crisp: Add ¼ teaspoon of ground ginger and a pinch of nutmeg to the apple filling. For the topping, add ⅛ teaspoon of cardamom. It gives the crisp a warm, chai-like flavor that’s perfect for chilly evenings.
- Pear or Apple-Pear Crisp: Swap one apple for a ripe but firm Bosc or Anjou pear. Pears add a delicate sweetness and a slightly different texture. Just be careful not to overbake, as pears soften faster than apples.
- Berry-Apple Crisp: Toss ¼ cup of fresh or frozen cranberries, blueberries, or raspberries into the apple mixture. The berries add a pop of tartness and a beautiful color. If using frozen berries, don’t thaw them first—just add them straight from the freezer.
- Nut-Free Version: Simply omit the pecans or walnuts. You can add an extra tablespoon of oats or flour to the topping to compensate, but honestly, it’s fine without them.
I once made a version with sliced almonds in the topping and a splash of bourbon in the filling. It was a little indulgent for a Tuesday night, but sometimes that’s exactly what you need. Don’t be afraid to experiment—this recipe is forgiving.
Serving & Storage Suggestions
This small-batch apple crisp is best served warm, straight from the oven. The contrast between the hot, bubbly filling and a cold topping is what makes it so irresistible. Here’s how to serve and store it:
- Serving Temperature: Let the crisp cool for 10 to 15 minutes after baking. This allows the filling to thicken slightly, so it doesn’t run all over the plate. Serve it warm, not piping hot.
- Toppings: A scoop of vanilla bean ice cream is the classic choice, but a dollop of lightly sweetened whipped cream or a drizzle of heavy cream works beautifully too. For a dairy-free option, try coconut whipped cream or a scoop of oat milk ice cream.
- Pairings: This crisp pairs wonderfully with a cup of hot coffee, a mug of spiced chai, or a glass of cold milk. For a grown-up treat, serve it with a small glass of bourbon, calvados, or a late-harvest riesling.
- Storage: If you have leftovers (unlikely, but possible), cover the ramekins tightly with plastic wrap or transfer the crisp to an airtight container. Store in the refrigerator for up to 3 days. The topping will lose some of its crunch, but the flavor will still be great.
- Reheating: To reheat, place the crisp in a 350°F (175°C) oven for 10 to 15 minutes, until warmed through. You can also microwave individual portions for 30 to 45 seconds, but the topping won’t be as crispy. For best results, reheat in a toaster oven or air fryer at 350°F for 5 minutes.
- Freezing: You can freeze the unbaked crisp for up to 3 months. Assemble the crisp in a freezer-safe ramekin or dish, but don’t bake it. Wrap tightly in plastic wrap and then foil. To bake from frozen, add 10 to 15 minutes to the baking time and cover with foil for the first half of baking.
One thing I love about this recipe: the flavors actually deepen after a day in the fridge. The second day, the apples are even more tender and the spices have melded together beautifully. It’s a great make-ahead dessert for a special dinner.
Nutritional Information & Benefits
While this cozy small-batch apple crisp for two is definitely a treat, it does have some redeeming qualities. Here’s a rough nutritional breakdown per serving (without ice cream or whipped cream):
| Nutrient | Amount Per Serving |
|---|---|
| Calories | 310 |
| Total Fat | 13g |
| Saturated Fat | 7g |
| Carbohydrates | 49g |
| Fiber | 5g |
| Sugar | 33g |
| Protein | 3g |
| Sodium | 120mg |
Apples are a good source of fiber and vitamin C, and oats provide soluble fiber that’s great for heart health. The butter and sugar are what make this a dessert, of course, but it’s a balanced indulgence. If you’re watching your sugar intake, you can reduce the sugar in the filling to 1½ tablespoons without sacrificing too much sweetness. The lemon juice helps brighten the flavor, so you won’t miss that extra sweetness as much as you think.
This recipe is naturally vegetarian and can be made gluten-free and dairy-free with the substitutions mentioned above. It contains nuts if you add the pecans or walnuts, and it contains wheat (gluten) if using regular flour. Always check your labels if you’re cooking for someone with allergies.
Conclusion
This cozy small-batch apple crisp for two has become my go-to fall dessert, and I think it’s going to become yours too. It’s simple, honest, and deeply satisfying—the kind of recipe that doesn’t try to be fancy, but ends up being exactly what you need. Whether you’re making it for a date night, a quiet evening with a good book, or just because you deserve something sweet, this crisp delivers every single time.
Don’t be afraid to make it your own. Swap the apples for pears, add a handful of cranberries, or throw in some extra spices. The beauty of a small batch is that there’s very little risk—if something doesn’t work, you haven’t wasted a lot of ingredients. And honestly, even a “failed” apple crisp is still pretty delicious.
I’d love to hear how yours turns out. Did you try a variation? Did you eat the whole thing in one sitting? (No judgment here.) Drop a comment below and let me know. And if you loved this recipe, share it with a friend who needs a little cozy dessert in their life. Happy baking!
Frequently Asked Questions
Can I use quick oats instead of old-fashioned oats?
You can, but the texture won’t be as good. Quick oats are more finely processed and will absorb liquid faster, resulting in a softer, less crunchy topping. Old-fashioned oats give that hearty, chewy texture that makes a crisp so satisfying. Stick with old-fashioned if you can.
What’s the best apple for apple crisp?
I recommend using a mix of tart and sweet apples. Granny Smith apples hold their shape well and provide a nice tang, while Honeycrisp or Fuji apples add natural sweetness. A 50/50 mix is my go-to. Avoid Red Delicious, Gala, or McIntosh, which can turn mushy when baked.
Can I make this in advance?
Yes! You can assemble the crisp (without baking) up to 24 hours in advance. Cover and refrigerate the assembled ramekins. When you’re ready to bake, let them sit at room temperature for 15 minutes while the oven preheats, then bake as directed. You may need to add 5 extra minutes to the baking time.
How do I prevent the topping from getting soggy?
The key to a crunchy topping is cold butter and not overmixing. Make sure your butter is straight from the fridge, and work it into the dry ingredients just until you have coarse crumbs. Also, avoid pressing the topping down too firmly on the apples. Loose, craggy crumbles get crunchier than compact ones.
Can I double this recipe?
Absolutely. To serve four, simply double all the ingredients and bake the crisp in an 8-inch square baking dish or a 9-inch pie plate. Increase the baking time by 5 to 10 minutes, and keep an eye on the topping. If it starts browning too quickly, tent with foil for the last 10 minutes of baking.
Pin This Recipe!
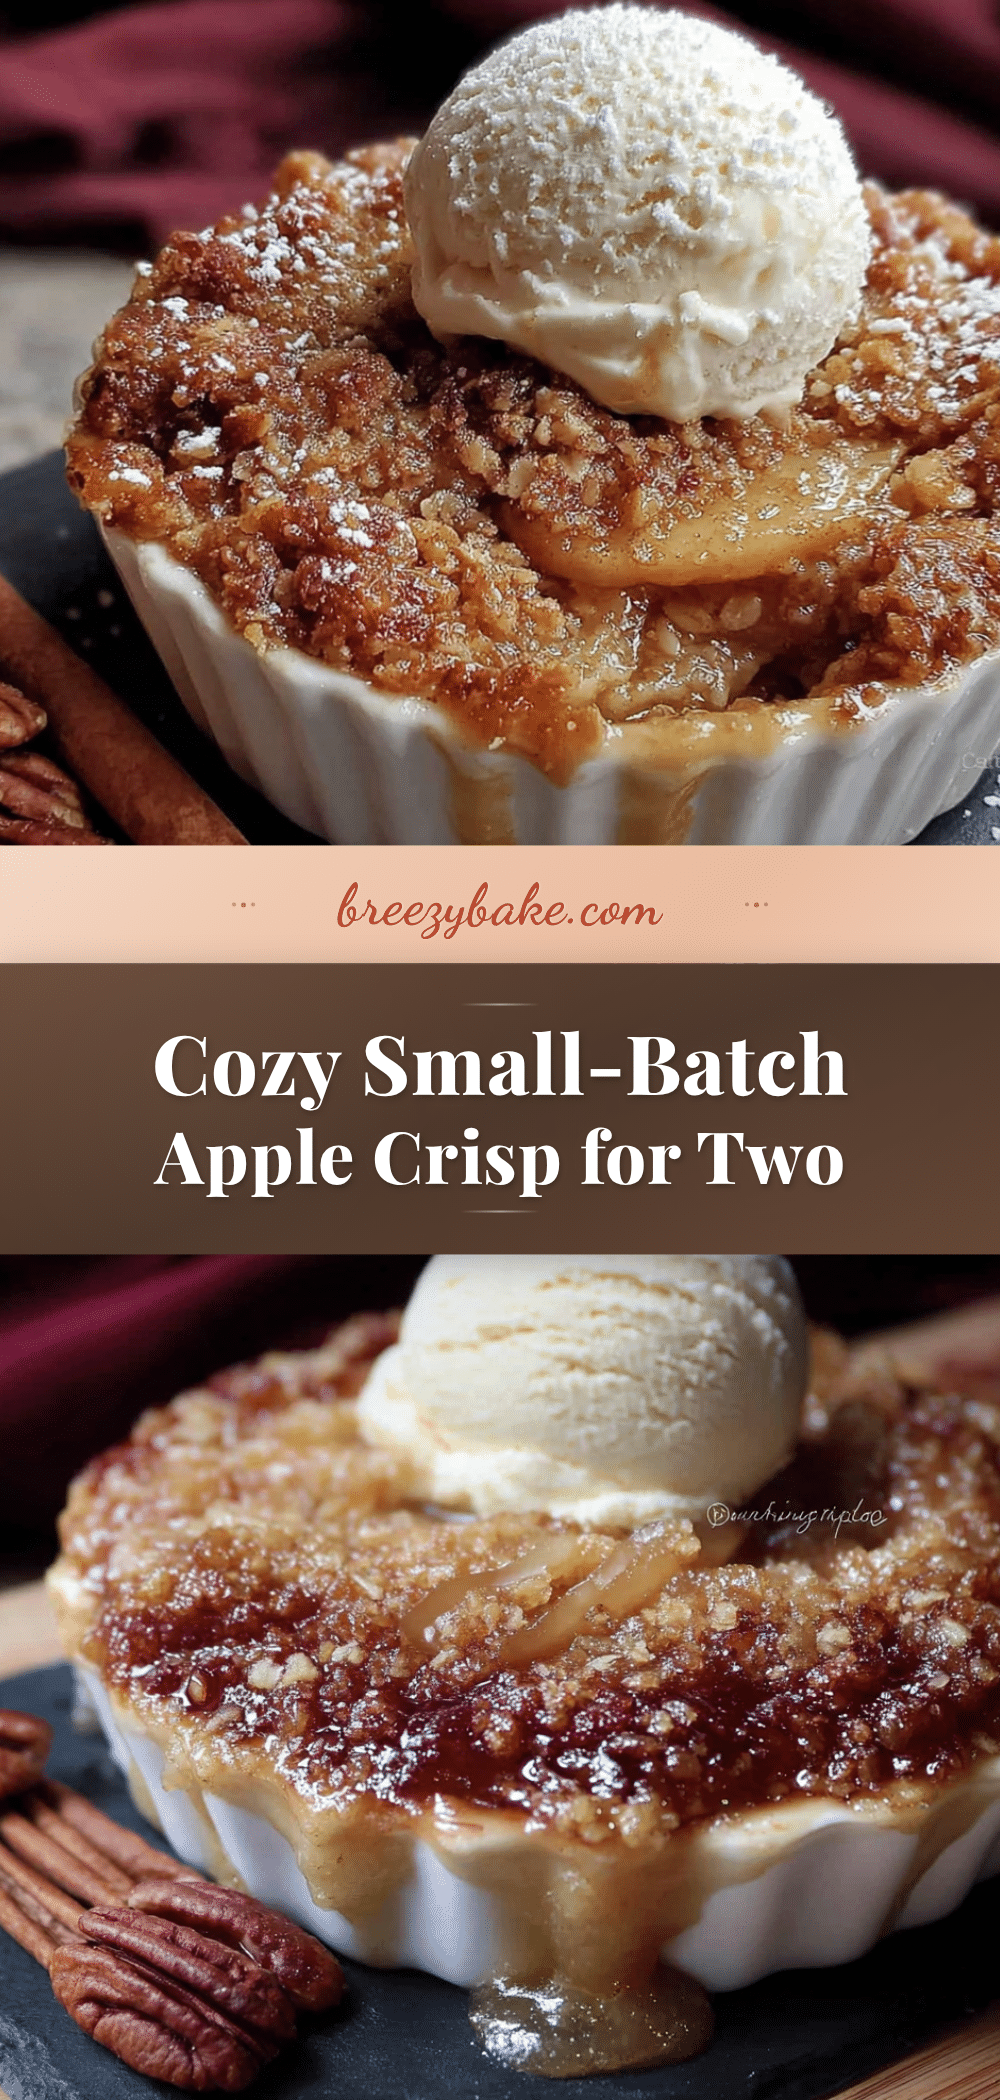
Cozy Small-Batch Apple Crisp for Two: Easy Fall Dessert

A perfectly portioned apple crisp for two, featuring tender spiced apples and a crunchy oat topping. Ready in under an hour, this cozy dessert is ideal for date night or a quiet evening.
- Prep Time: 15 minutes
- Cook Time: 30 minutes
- Total Time: 45 minutes
- Yield: 2 servings 1x
- Category: Dessert
- Cuisine: American
Ingredients
- 2 medium apples (about 300g total), peeled, cored, and sliced into ¼-inch thick pieces (Honeycrisp, Granny Smith, or a mix)
- 2 tablespoons (25g) granulated sugar
- 1 tablespoon (8g) all-purpose flour
- ½ teaspoon ground cinnamon
- 1 tablespoon (15ml) lemon juice
- Pinch of salt
- ¼ cup (30g) old-fashioned rolled oats
- ¼ cup (31g) all-purpose flour
- ¼ cup (50g) packed light brown sugar
- ¼ teaspoon ground cinnamon
- Pinch of salt
- 3 tablespoons (42g) cold unsalted butter, cut into small cubes
- 2 tablespoons (28g) chopped pecans or walnuts (optional)
Instructions
- Preheat your oven to 375°F (190°C). Place a baking sheet on the middle rack.
- Prepare the apples: Peel, core, and slice apples into ¼-inch thick pieces. Place in a medium bowl.
- Make the filling: Add granulated sugar, 1 tablespoon flour, ½ teaspoon cinnamon, lemon juice, and a pinch of salt to the apples. Toss to coat. Let sit for 5 minutes.
- Make the crisp topping: In a small bowl, combine rolled oats, ¼ cup flour, brown sugar, ¼ teaspoon cinnamon, and a pinch of salt. Add cold butter cubes. Use a pastry cutter or fingertips to work butter into dry ingredients until mixture resembles coarse crumbs with some pea-sized butter pieces. Stir in nuts if using.
- Assemble the crisps: Divide apple mixture evenly between two 6-ounce ramekins or pour into a small 5-inch cast iron skillet. Sprinkle topping evenly over apples, pressing down gently.
- Bake: Place ramekins or skillet on the preheated baking sheet. Bake for 25 to 30 minutes, until filling is bubbly and topping is golden brown. If topping browns too quickly, tent loosely with foil for the last 5 minutes.
- Cool slightly: Let crisp rest on a wire rack for at least 10 minutes before serving.
- Serve warm: Top with vanilla ice cream, whipped cream, or a drizzle of heavy cream.
Notes
Use cold butter for a flaky topping. Let the filling rest for 5 minutes to create a syrupy sauce. For a gluten-free version, use gluten-free oats and a 1:1 gluten-free flour blend. For dairy-free, substitute butter with cold coconut oil or plant-based butter. The crisp can be assembled up to 24 hours in advance and refrigerated before baking.
Nutrition
- Serving Size: 1 ramekin (about 1/2
- Calories: 310
- Sugar: 33
- Sodium: 120
- Fat: 13
- Saturated Fat: 7
- Carbohydrates: 49
- Fiber: 5
- Protein: 3
Keywords: apple crisp, small batch, dessert for two, fall dessert, easy apple crisp, cozy dessert


