Three cans of pumpkin puree staring at me from the pantry shelf. I’d bought them on a whim back in September, convinced I’d be that person who makes pumpkin bread every single weekend. Spoiler alert: I wasn’t. By mid-November, those cans had become silent judges of my overly ambitious baking plans. And then my sister texted—she was coming over in two hours with the kids, and could I whip up something “fall-ish” for dessert?
Panic. Pure, unfiltered panic. I had butter, cream cheese, and a vague memory of a cheesecake bar I’d seen on Pinterest three years ago. No graham crackers for a crust. No springform pan. Just me, those judgmental pumpkin cans, and a stubborn refusal to serve store-bought cookies. So I grabbed a box of shortbread cookies I’d stashed for emergencies, softened the cream cheese on the radiator (don’t judge, it works), and started throwing things together. The result was so absurdly good that I actually texted my sister to tell her I’d made up the recipe on the spot. She didn’t believe me until she tasted one.
These creamy pumpkin cheesecake swirl bars were born from a chaotic afternoon and a pantry that refused to cooperate. They’re the kind of dessert that makes you look like you planned it all along—even when you absolutely didn’t. The pumpkin layer is spiced just right, the cheesecake is silky without being heavy, and that swirl? It’s the part where you get to feel like an artist, dragging a knife through the batter and watching magic happen. Honestly, this might be the best accident that ever happened in my kitchen.
Why You’ll Love This Recipe
Let me tell you why these bars have become my most-requested fall dessert. I’ve tested this recipe at least seven times (yes, really), tweaking the spice ratio and the baking time until everything clicked perfectly. Here’s what makes them special:
- No Special Equipment Needed — You don’t need a springform pan or a stand mixer. Just a regular 9×9 baking dish and some elbow grease. I made these in a tiny apartment kitchen with a hand mixer that’s older than my nephew.
- Pantry-Friendly Ingredients — Canned pumpkin, cream cheese, eggs, butter, sugar, and spices. That’s it. No weird extracts or hard-to-find items. You probably have most of this stuff right now.
- Perfect for Fall Gatherings — These bars disappear at Thanksgiving, Friendsgiving, Halloween parties, and random Tuesday nights when you need something cozy. I brought them to a potluck last month and three people asked for the recipe before the night ended.
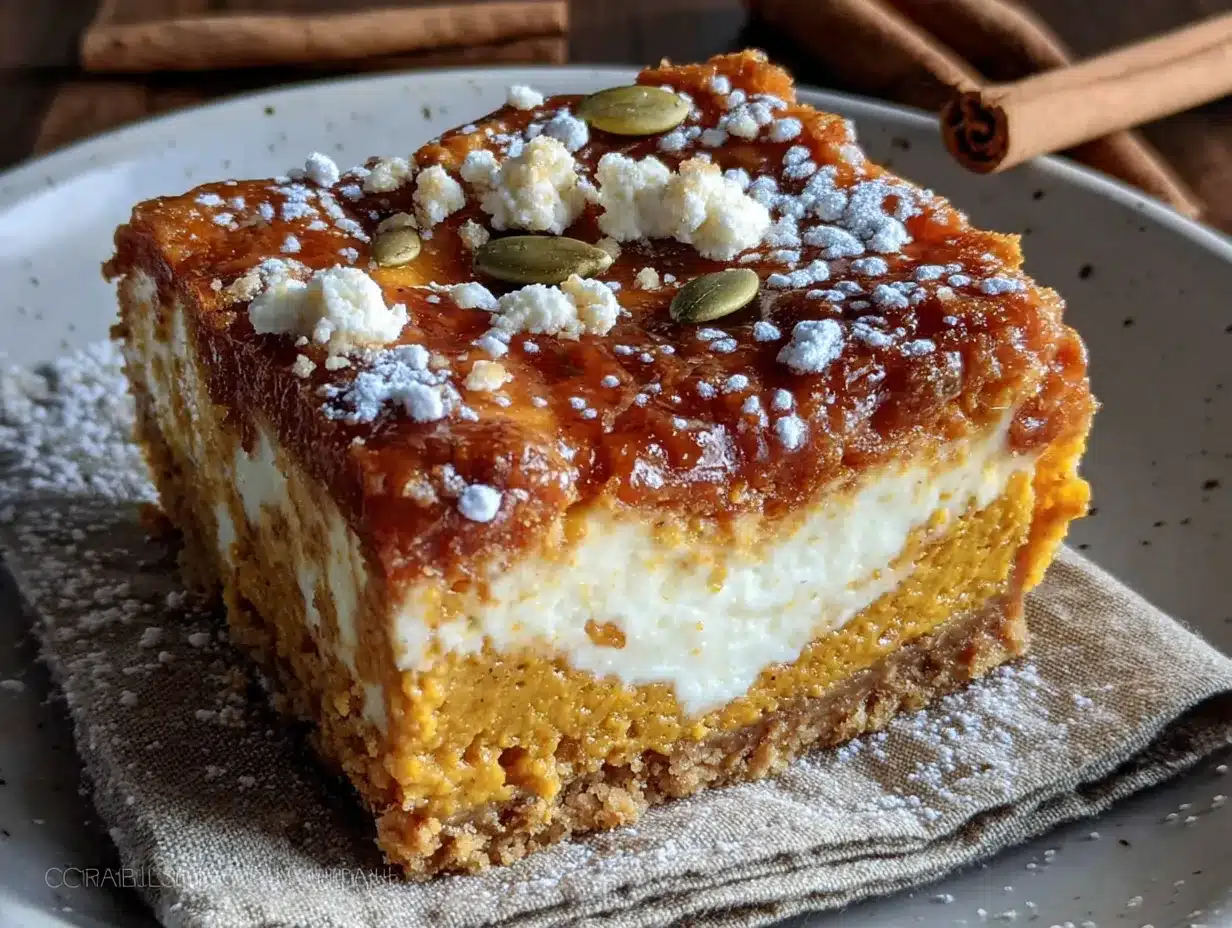
- Crowd-Pleasing Texture — The shortbread crust stays buttery and crisp, the pumpkin layer is almost pudding-like, and the cheesecake swirl adds that tangy richness that makes you close your eyes after the first bite.
- Make-Ahead Friendly — These bars actually taste better the next day. The flavors meld together overnight, and the texture firms up perfectly. You can make them a day ahead without any stress.
What sets these apart from other pumpkin cheesecake bars is the crust. Instead of the usual graham cracker situation, we’re using buttery shortbread cookies blitzed into crumbs. It adds a subtle vanilla note that plays beautifully with the pumpkin spice. Plus, the swirl technique I’ll show you creates those gorgeous marbled layers that look like you spent hours on them—when really, it takes about thirty seconds.
These bars are the kind of dessert that makes people say “wow” without you having to break a sweat. And honestly? That’s my favorite kind of recipe.
What Ingredients You Will Need
This recipe uses simple, humble ingredients that come together to create something genuinely special. Most of these are pantry staples, especially if you’re a fall baking enthusiast like me. Here’s what you’ll need and why each one matters.
For the Shortbread Crust
- 2 cups (200g) shortbread cookie crumbs — I use Walkers shortbread cookies, blitzed in a food processor until fine. You can also use vanilla wafers or graham crackers in a pinch, but shortbread gives the best buttery flavor.
- 5 tablespoons (70g) unsalted butter, melted — Use real butter here, not margarine. It makes a difference in the crust’s texture and flavor. Let it cool slightly before mixing with the crumbs.
- 2 tablespoons (25g) granulated sugar — Just a little extra sweetness to complement the buttery crumbs.
- Pinch of salt — Balances the sweetness and enhances the butter flavor.
For the Pumpkin Layer
- 1 can (15 oz or 425g) pumpkin puree — Not pumpkin pie filling! Make sure you grab 100% pure pumpkin puree. I prefer Libby’s for consistent texture, but store brands work fine too.
- 2 large eggs, room temperature — Room temperature eggs blend more smoothly into the batter. If you forgot to take them out, place them in a bowl of warm water for 5 minutes.
- 1/2 cup (100g) packed light brown sugar — Brown sugar adds moisture and a deeper, almost caramel-like sweetness that pairs beautifully with pumpkin. I’ve tried dark brown sugar too, and it works—it just gives a slightly more molasses-forward flavor.
- 1/4 cup (50g) granulated sugar — Balances the brown sugar and adds a bit of structure.
- 1/4 cup (60ml) heavy cream — Adds richness and a silky texture. You can substitute whole milk, but the filling won’t be quite as luxurious.
- 1 teaspoon vanilla extract — Pure vanilla extract is worth splurging on here. It rounds out the spices beautifully.
- 1 1/2 teaspoons pumpkin pie spice — If you don’t have pumpkin pie spice, mix 1 teaspoon cinnamon, 1/2 teaspoon ginger, 1/4 teaspoon nutmeg, and a pinch of cloves. I make my own blend every fall and store it in a little jar.
- 1/2 teaspoon cinnamon — Because you can never have too much cinnamon in a pumpkin recipe.
- 2 tablespoons (16g) all-purpose flour — Helps stabilize the pumpkin layer so it doesn’t become too watery. Gluten-free all-purpose flour works perfectly here too.
For the Cheesecake Swirl
- 8 oz (226g) cream cheese, softened — Full-fat cream cheese is non-negotiable here. Low-fat versions contain more water and won’t create that luscious swirl texture. Let it sit on the counter for at least 30 minutes before using.
- 1/4 cup (50g) granulated sugar — Just enough to sweeten the cream cheese without overwhelming the tanginess.
- 1 large egg yolk, room temperature — The yolk adds richness and helps the swirl set properly. Save the egg white for an omelet or add it to the pumpkin layer if you want.
- 1/2 teaspoon vanilla extract — Enhances the cream cheese flavor.
- 1 tablespoon all-purpose flour — Prevents the cheesecake swirl from cracking as it bakes.
One note about ingredients: I’ve tested this recipe with dairy-free cream cheese and it worked okay, but the swirl wasn’t as pronounced. If you’re dairy-free, look for a brand that’s specifically formulated for baking, like Kite Hill or Violife. For a gluten-free version, simply use gluten-free shortbread cookies and gluten-free all-purpose flour. The texture stays remarkably similar.
Equipment Needed
You don’t need a fancy kitchen to make these bars. Here’s what I used during my chaotic first attempt and what I recommend now:
- 9×9 inch baking pan — Glass, ceramic, or metal all work. I prefer a metal pan because it conducts heat evenly and gives a nicer crust. If you only have an 8×8 pan, the bars will be slightly thicker and need a few extra minutes of baking time.
- Parchment paper — Absolutely essential for easy removal. Cut two strips that overhang on opposite sides to create a sling. Trust me, trying to cut bars that are stuck to the pan is a special kind of frustration.
- Food processor or zip-top bag and rolling pin — For crushing the shortbread cookies. The food processor is faster, but a rolling pin over a bag works just fine if you’re willing to put in a little elbow grease.
- Medium mixing bowls (2-3) — One for the crust, one for the pumpkin layer, and one for the cheesecake swirl. I use glass bowls because they’re easy to clean and don’t retain odors.
- Hand mixer or stand mixer — A hand mixer is perfect here. You don’t need a stand mixer for these small batches. I actually prefer my hand mixer because it’s easier to control the speed and scrape down the sides.
- Rubber spatula — For scraping every last bit of batter into the pan. Also useful for creating the swirl pattern.
- Butter knife or skewer — For swirling the cheesecake into the pumpkin layer. A butter knife works perfectly; you don’t need anything fancy.
- Measuring cups and spoons — For accurate measurements. I cannot stress this enough—baking is a science, and eyeballing ingredients leads to inconsistent results.
If you’re on a budget, skip the food processor and crush the cookies by hand. I’ve done it many times when I didn’t feel like washing extra dishes. The texture is slightly more rustic, but the flavor is exactly the same.
Preparation Method
Let me walk you through this step by step. I’ve included all the little details I wish someone had told me the first time I made these.
Step 1: Prepare the Pan and Preheat
Preheat your oven to 350°F (175°C). Line your 9×9 baking pan with parchment paper, leaving about 2 inches of overhang on two opposite sides. This creates handles that let you lift the entire block of bars out once they’re cool. Lightly spray the parchment with non-stick cooking spray, just to be safe.
Step 2: Make the Crust
Place the shortbread cookies in your food processor and pulse until you have fine crumbs. You should have about 2 cups. Transfer to a medium bowl, add the melted butter, sugar, and salt, and stir with a fork until the mixture looks like wet sand. Press this mixture firmly into the bottom of your prepared pan. Use the bottom of a measuring cup to really pack it down—a loose crust will fall apart when you cut the bars. Bake for 10 minutes, then set aside to cool slightly while you make the fillings.
Step 3: Make the Pumpkin Layer
In a medium bowl, whisk together the pumpkin puree, both sugars, and the heavy cream until smooth. Add the eggs one at a time, whisking gently after each addition. You don’t want to incorporate too much air here—just mix until combined. Add the vanilla, pumpkin pie spice, cinnamon, and flour. Whisk until the mixture is completely smooth and uniform. The batter should be thick but pourable, like a loose pudding. Set aside.
Step 4: Make the Cheesecake Swirl
In a separate bowl, beat the softened cream cheese with an electric mixer on medium speed until completely smooth—about 2 minutes. Scrape down the sides of the bowl with a rubber spatula. Add the sugar and beat for another minute until fluffy. Add the egg yolk, vanilla, and flour, and mix on low speed just until combined. Do not overmix, or the cheesecake will become too thin and won’t swirl properly.
Step 5: Assemble the Layers
Pour the pumpkin mixture over the pre-baked crust and spread it into an even layer with your spatula. Drop spoonfuls of the cheesecake mixture randomly over the top—you should have about 8 to 10 dollops. Here’s the fun part: take a butter knife or skewer and drag it through the batter in a figure-eight pattern. Don’t over-swirl! You want distinct ribbons of cheesecake and pumpkin, not a muddy mess. Five or six passes is plenty.
Step 6: Bake to Perfection
Bake at 350°F (175°C) for 35 to 40 minutes. The edges should be set and slightly puffed, but the center should still have a slight jiggle when you gently shake the pan. This is the sweet spot—overbaking will make the bars dry and crack. I start checking at the 32-minute mark because every oven runs differently. Let the bars cool completely on a wire rack, then refrigerate for at least 4 hours (overnight is better) before cutting. This chilling step is crucial for clean slices.
Cooking Tips & Techniques
After making these bars more times than I care to count, I’ve collected a few tricks that make a real difference. Here are the ones I swear by:
Don’t skip the flour in both layers. I know it seems like a small amount, but it’s the secret to bars that hold their shape without being dense. The first time I made these, I forgot the flour in the pumpkin layer, and the bars turned out soupy in the center. Lesson learned.
Room temperature ingredients matter more than you think. Cold cream cheese creates lumps that no amount of mixing can fix. Cold eggs can cause the batter to separate. I learned this the hard way when I tried to rush the process and ended up with a grainy cheesecake swirl. Set everything out 30 minutes before you start mixing.
Use a sharp knife for cutting. Once the bars are fully chilled, run a large sharp knife under hot water, wipe it dry, and make your cuts. Clean the blade between each cut. This gives you those gorgeous, bakery-style edges that make people think you’re a professional. If you’re making these for a party, this step is worth the extra effort.
Watch your oven temperature. My oven runs about 25 degrees hot, so I’ve learned to use an oven thermometer. If your bars are browning too quickly on top but aren’t set in the center, tent them loosely with foil for the last 10 minutes of baking.
Let them chill completely. I know it’s tempting to cut into warm bars—I’ve burned my tongue doing exactly that. But warm bars are soft bars, and soft bars turn into a crumbly mess. Patience pays off here. I usually make these the night before I need them, and they’re always perfect the next day.
Variations & Adaptations
One of the best things about this recipe is how flexible it is. Here are some variations I’ve tried and loved:
Gluten-Free Version: Use gluten-free shortbread cookies (I like Schär’s brand) and swap the all-purpose flour with a gluten-free 1:1 baking flour. The texture is nearly identical. I’ve made this for my gluten-sensitive friend three times now, and she always asks for the leftovers to take home.
Vegan Adaptation: Use vegan cream cheese (Kite Hill works well), replace the eggs with flax eggs (1 tablespoon ground flaxseed mixed with 3 tablespoons water per egg), and use coconut cream instead of heavy cream. The texture is slightly less firm, but the flavor is still wonderful. I tested this version for a vegan potluck and it was the first dish to disappear.
Maple Pecan Twist: Add 1/4 cup maple syrup to the pumpkin layer (reduce the brown sugar by 2 tablespoons) and sprinkle 1/2 cup chopped pecans over the top before baking. The maple flavor pairs beautifully with the pumpkin spice, and the pecans add a lovely crunch. This is my go-to version for Thanksgiving.
Chocolate Pumpkin Swirl: Melt 1/4 cup dark chocolate chips and drizzle it over the cheesecake dollops before swirling. The chocolate and pumpkin combination is unexpectedly amazing. My niece calls these “pumpkin brownies” and requests them every Halloween.
Mini Bar Version: Press the crust mixture into a mini muffin tin (lined with mini parchment liners) and reduce the baking time to 15-18 minutes. These are perfect for parties or lunchbox surprises. Just be prepared for them to disappear quickly.
Serving & Storage Suggestions
These bars are delicious at room temperature, but I actually prefer them cold straight from the fridge. The texture is firmer, and the flavors seem more pronounced. If you want to serve them at a party, let them sit at room temperature for about 15 minutes before serving—this takes the chill off without making them too soft.
For presentation, I like to dust the tops with a light sprinkle of cinnamon or pumpkin pie spice. A dollop of whipped cream and a drizzle of caramel sauce takes them from “homemade bars” to “dessert that looks like it came from a bakery.” If I’m feeling fancy, I’ll add a few candied pecans on top.
These bars pair beautifully with a hot cup of coffee, a spiced chai latte, or even a glass of cold milk. For an adult twist, serve them alongside a bourbon-spiked coffee or a glass of dessert wine like Sauternes.
Storage Instructions: Store the bars in an airtight container in the refrigerator for up to 5 days. Layer them between sheets of parchment paper to prevent sticking. I’ve found that the flavor actually improves after the first day as the spices meld together.
Freezing Instructions: These bars freeze beautifully. Wrap individual bars tightly in plastic wrap, then place them in a freezer-safe bag or container. They’ll keep for up to 3 months. To thaw, transfer to the refrigerator overnight or let sit at room temperature for about 30 minutes. I always keep a stash in my freezer for unexpected guests or late-night cravings.
Nutritional Information & Benefits
Here’s the estimated nutritional breakdown per bar (based on 16 servings):
| Nutrient | Amount per Bar |
|---|---|
| Calories | 245 |
| Total Fat | 14g |
| Saturated Fat | 8g |
| Cholesterol | 65mg |
| Sodium | 160mg |
| Total Carbohydrates | 28g |
| Dietary Fiber | 1g |
| Sugars | 18g |
| Protein | 4g |
| Vitamin A | 70% DV |
| Calcium | 4% DV |
| Iron | 6% DV |
These bars are a good source of Vitamin A thanks to the pumpkin puree, which supports eye health and immune function. Pumpkin also provides fiber and antioxidants like beta-carotene. The cream cheese adds calcium and protein, while the shortbread crust… well, it adds happiness. Everything in moderation, right?
If you’re watching your sugar intake, you can reduce the sugar in the pumpkin layer by 2 tablespoons without affecting the texture too much. The bars won’t be quite as sweet, but the pumpkin and spice flavors will shine through more.
Conclusion
These creamy pumpkin cheesecake swirl bars are everything I want in a fall dessert—comforting, beautiful, and surprisingly easy to make. They’ve saved me more times than I can count, from last-minute dinner parties to holiday gatherings where I needed something that looked impressive without requiring hours of work.
What I love most about this recipe is how forgiving it is. The first time I made it, I was scrambling, using ingredients I wasn’t sure would work together, and it still turned out amazing. That’s the kind of recipe I want in my back pocket—one that delivers consistent results even when the kitchen is chaos.
I’d love to hear how these turn out for you! Did you add your own twist? Did they disappear as fast as mine always do? Drop a comment below and let me know. And if you’re looking for more fall dessert inspiration, you might enjoy my mint mocha cookie bars or these creamy mint cream cookie swirl squares for a different seasonal twist. Happy baking, friends—I’m rooting for you and your pumpkin bars!
Frequently Asked Questions
Can I use fresh pumpkin instead of canned?
Yes, but you’ll need to roast and puree it first, then strain it through cheesecloth to remove excess water. Fresh pumpkin has more moisture than canned, which can make the bars soggy. I’ve done it before and it works, but canned pumpkin is more consistent and saves a lot of time.
Why did my cheesecake swirl sink into the pumpkin layer?
This usually happens if the cheesecake mixture is too thin or the pumpkin layer is too warm when you add the dollops. Make sure your cream cheese is properly softened but not warm, and let the pumpkin mixture sit at room temperature for a few minutes before assembling. Also, don’t overmix the cheesecake batter.
Can I use a different crust?
Absolutely! Graham cracker crumbs, vanilla wafer crumbs, or even crushed ginger snaps all work beautifully. If you use ginger snaps, you might want to reduce the sugar in the crust slightly since they’re already sweet and spiced. I’ve made this with Biscoff cookies too, and the caramel notes are incredible.
How do I know when the bars are done baking?
The edges should be set and slightly puffed, but the center should still jiggle when you gently shake the pan. It will continue to set as it cools. If you insert a toothpick near the center, it should come out with a few moist crumbs attached—not wet batter, but not completely clean either.
Can I double this recipe for a 9×13 pan?
Yes! Simply double all the ingredients and bake in a 9×13 inch pan. You’ll need to increase the baking time to about 45-50 minutes. The bars will be slightly thinner, so keep an eye on them toward the end. I’ve done this for large gatherings and it works perfectly.
Pin This Recipe!
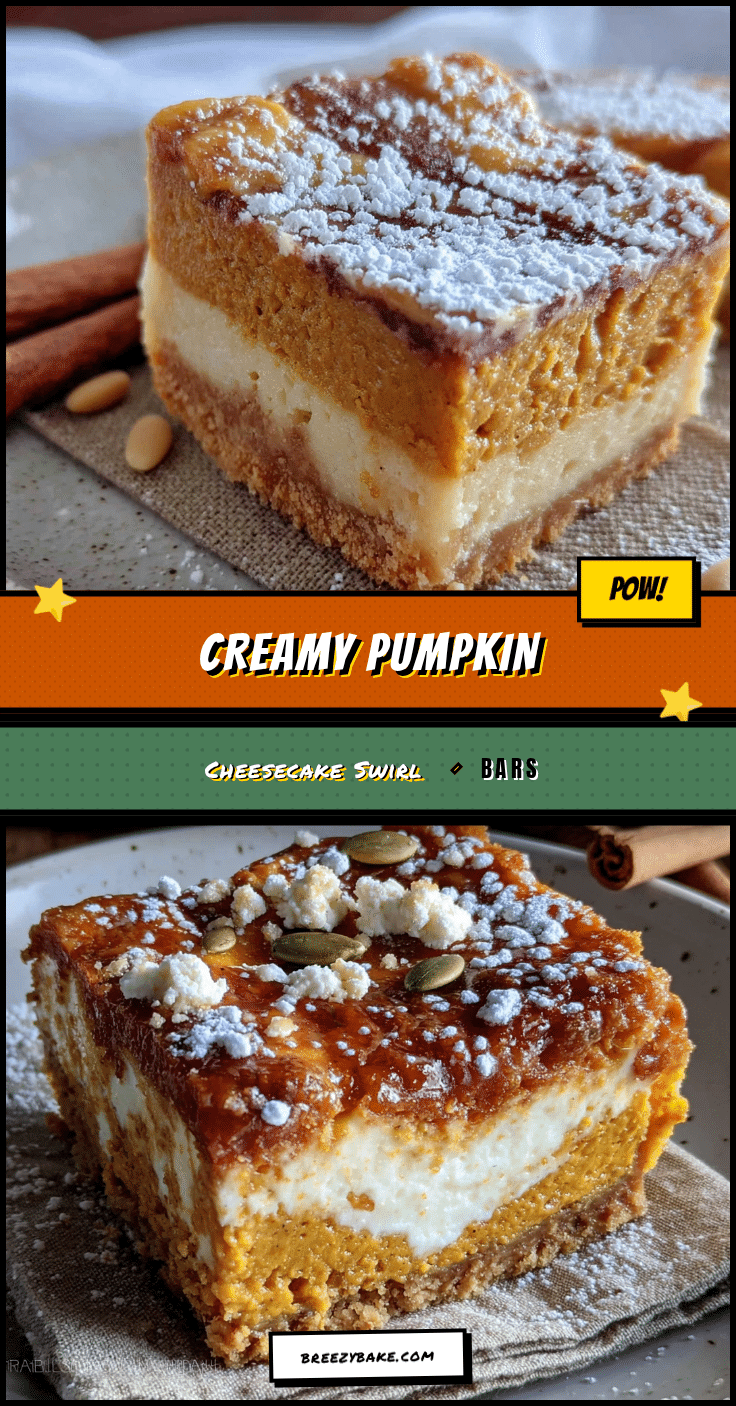
Creamy Pumpkin Cheesecake Swirl Bars: Best Easy Fall Dessert
These creamy pumpkin cheesecake swirl bars are the perfect fall dessert, featuring a buttery shortbread crust, a spiced pumpkin layer, and a tangy cheesecake swirl. They’re easy to make with pantry-friendly ingredients and no special equipment needed.
- Prep Time: 20 minutes
- Cook Time: 35 minutes
- Total Time: 4 hours 55 minutes (includes chilling)
- Yield: 16 servings 1x
- Category: Dessert
- Cuisine: American
Ingredients
- 2 cups (200g) shortbread cookie crumbs
- 5 tablespoons (70g) unsalted butter, melted
- 2 tablespoons (25g) granulated sugar
- Pinch of salt
- 1 can (15 oz or 425g) pumpkin puree
- 2 large eggs, room temperature
- 1/2 cup (100g) packed light brown sugar
- 1/4 cup (50g) granulated sugar
- 1/4 cup (60ml) heavy cream
- 1 teaspoon vanilla extract
- 1 1/2 teaspoons pumpkin pie spice
- 1/2 teaspoon cinnamon
- 2 tablespoons (16g) all-purpose flour
- 8 oz (226g) cream cheese, softened
- 1/4 cup (50g) granulated sugar
- 1 large egg yolk, room temperature
- 1/2 teaspoon vanilla extract
- 1 tablespoon all-purpose flour
Instructions
- Preheat your oven to 350°F (175°C). Line a 9×9 inch baking pan with parchment paper, leaving about 2 inches of overhang on two opposite sides. Lightly spray the parchment with non-stick cooking spray.
- Make the crust: Pulse shortbread cookies in a food processor until fine crumbs form. Transfer to a medium bowl, add melted butter, sugar, and salt, and stir until the mixture looks like wet sand. Press firmly into the bottom of the prepared pan. Bake for 10 minutes, then set aside to cool slightly.
- Make the pumpkin layer: In a medium bowl, whisk together pumpkin puree, both sugars, and heavy cream until smooth. Add eggs one at a time, whisking gently after each addition. Add vanilla, pumpkin pie spice, cinnamon, and flour. Whisk until smooth and uniform. Set aside.
- Make the cheesecake swirl: In a separate bowl, beat softened cream cheese with an electric mixer on medium speed until smooth (about 2 minutes). Add sugar and beat for another minute until fluffy. Add egg yolk, vanilla, and flour, and mix on low speed just until combined.
- Assemble: Pour the pumpkin mixture over the pre-baked crust and spread into an even layer. Drop spoonfuls of the cheesecake mixture randomly over the top (8 to 10 dollops). Use a butter knife or skewer to drag through the batter in a figure-eight pattern, making 5-6 passes.
- Bake at 350°F (175°C) for 35 to 40 minutes. The edges should be set and slightly puffed, but the center should still have a slight jiggle. Let cool completely on a wire rack, then refrigerate for at least 4 hours (overnight is better) before cutting.
Notes
Don’t skip the flour in both layers—it helps the bars hold their shape. Room temperature ingredients are crucial for a smooth texture. Use a sharp knife dipped in hot water for clean cuts. Bars taste even better the next day. For a gluten-free version, use gluten-free shortbread cookies and gluten-free all-purpose flour.
Nutrition
- Serving Size: 1 bar
- Calories: 245
- Sugar: 18
- Sodium: 160
- Fat: 14
- Saturated Fat: 8
- Carbohydrates: 28
- Fiber: 1
- Protein: 4
Keywords: pumpkin cheesecake bars, fall dessert, pumpkin bars, cheesecake swirl, shortbread crust, easy dessert


