It was 11:47 PM on a Tuesday that felt like it had been Monday twice, and I had one of those ridiculous cravings—you know the kind, where your brain demands something sweet, salty, and crunchy all at once, and nothing else will do. I’d just put the kids to bed after a dinner that nobody really loved (chicken again, and yes, they let me know), and I was wandering the kitchen in my socks, opening cabinets like something magical might appear. I didn’t have the fancy chocolate or the expensive sprinkles that a “real” candy bark recipe would call for, but I had a bag of candy corn from last Halloween that I’d hidden from my husband, some white chocolate chips I’d bought on a whim, and a vague memory of a Pinterest fail I’d seen years ago. Honestly, I was tired and a little impulsive, and I thought, “What’s the worst that could happen?”
So I melted those chips in the microwave, dumped the candy corn on top, and crossed my fingers. The first batch came out a little lumpy—okay, a lot lumpy—but the taste? I mean, let me tell you, it was like a fall festival in my mouth. The kids found it the next morning (I’d hidden it behind the coffee can, but they have radar for sugar), and they devoured it before I could even get a proper photo. That’s when I knew this easy 3-ingredient candy corn bark was something special. It’s not fancy, it’s not complicated, and it’s definitely not going to win any beauty contests, but it’s the kind of treat that makes everyone in the house happy without costing a fortune or requiring a trip to three different stores. Maybe you’ve been there—tired, craving something sweet, and just needing a win that doesn’t involve a complicated recipe or a sink full of dishes. This candy corn bark is that win.
Why You’ll Love This Recipe
I’ve made a lot of fall treats over the years, from pumpkin bread that turned out like a brick to caramel apples that were more trouble than they were worth. This easy 3-ingredient candy corn bark is the one I keep coming back to, and here’s why it’s earned a permanent spot in my kitchen:
- Quick & Easy: From start to finish, you’re looking at about 15 minutes of active work. The hardest part is waiting for it to set in the fridge, and even that’s only 30 minutes. Perfect for when the kids suddenly announce they need a treat for tomorrow’s school party (not that that’s ever happened to me, ha).
- Simple Ingredients: Three ingredients. That’s it. No fancy extracts, no special equipment, no hunting down obscure items at a specialty store. You probably have all of this in your pantry right now, or at least two out of three.
- Perfect for Fall Gatherings: This candy corn bark is a hit at Halloween parties, Thanksgiving dessert tables, or just a random Tuesday when you need a little seasonal cheer. It’s also great for classroom treats, potlucks, or movie nights.
- Crowd-Pleaser: I’ve watched picky eaters, adults who claim they don’t like sweets, and even my dad (who is notoriously hard to impress) go back for seconds. The combination of creamy white chocolate and crunchy candy corn is just irresistible.
- Unbelievably Delicious: The texture is what gets me—smooth, creamy white chocolate with little pops of chewy candy corn. It’s simple, but it hits that sweet-salty-crunchy spot better than anything complicated.
What makes this version different from all the other candy bark recipes out there? It’s the ratio. I’ve tested this a dozen times, and I’ve found the perfect balance where the candy corn is evenly distributed without overwhelming the chocolate. Plus, I’ve got a trick for melting the white chocolate so it’s smooth and glossy, not grainy or seized. This isn’t just another recipe—it’s the one I’ve perfected through trial and error, so you don’t have to learn the hard way.
This treat is the kind that makes you close your eyes after the first bite. It’s comfort food for the fall season—simple, affordable, and soul-soothing. Perfect for impressing your kids without stress, or turning a regular afternoon into something memorable.
What Ingredients You Will Need
This easy 3-ingredient candy corn bark uses simple, everyday ingredients to deliver big flavor and satisfying crunch without any fuss. Here’s what you’ll need:
For the Bark:
- 12 ounces white chocolate chips or white melting wafers (I prefer Ghirardelli white chocolate chips for the smoothest melt, but any brand works—just avoid white “baking chips” that are actually vanilla-flavored and won’t melt well)
- 1 cup candy corn (regular or autumn mix—I like the Brach’s brand for the classic flavor, and the autumn mix adds a nice color variety with the little pumpkins and ears of corn)
- 1 tablespoon coconut oil or vegetable shortening (optional, but highly recommended—this helps the white chocolate melt smoothly and gives the bark a nice snap when you break it)
Ingredient Tips & Substitutions:
- White Chocolate: If you’re dairy-free, look for dairy-free white chocolate chips. I’ve used Enjoy Life brand with good results—just add the coconut oil to help it melt. For a richer flavor, you can use high-quality white chocolate bars chopped into pieces, but chips are easier and work perfectly.
- Candy Corn: This is the star of the show, so don’t skimp here. You can use regular candy corn, the autumn mix with little pumpkins, or even try it with candy corn flavored mellowcreme pumpkins. I’ve also made this with the chocolate-flavored candy corn, and it’s good but less classic. For a fun twist, try using the “Indian corn” variety that has the brown tips—it adds a nice caramel flavor.
- Coconut Oil: This is optional, but I really recommend it. It prevents the white chocolate from seizing (which is when it turns into a clumpy mess) and gives the bark a beautiful shine. You can also use vegetable shortening or even a little butter in a pinch, but coconut oil is my go-to.
- Optional Add-Ins: While this is a 3-ingredient recipe, you can easily jazz it up with a sprinkle of sea salt on top (trust me on this one), some crushed pretzels for extra crunch, or a drizzle of melted dark chocolate for a pretty contrast. But honestly, it’s perfect as is.
I always keep a bag of candy corn in my pantry starting in September, and white chocolate chips are a staple in my baking drawer. This is one of those recipes where the whole is truly greater than the sum of its parts—simple ingredients, but the result is magical.
Equipment Needed
One of the best things about this easy 3-ingredient candy corn bark is that you don’t need any fancy equipment. Here’s what you’ll need:
- Microwave-safe bowl (medium-sized, preferably glass or ceramic—I use a Pyrex measuring cup because the spout makes pouring easier)
- Baking sheet (a standard half-sheet pan works perfectly)
- Parchment paper or silicone baking mat (absolutely essential—without it, your bark will stick to the pan and you’ll be scraping it off in sad little pieces)
- Spatula or offset spatula (for spreading the chocolate evenly—a regular rubber spatula works fine, but an offset spatula gives you a smoother surface)
- Knife (for breaking the bark into pieces once it’s set)
Budget-Friendly Alternatives: If you don’t have a silicone baking mat, parchment paper is cheap and works just as well. No offset spatula? No problem—just use the back of a spoon or a butter knife to spread the chocolate. I’ve made this in a pinch using a dinner plate lined with wax paper (though parchment is better because wax paper can melt a little with hot chocolate).
My Personal Experience: I’ve made this bark with everything from a fancy marble slab (don’t ask—it was a phase) to a dollar store baking sheet, and honestly, the results were the same every time. The only thing that matters is the parchment paper. Don’t skip it.
Preparation Method
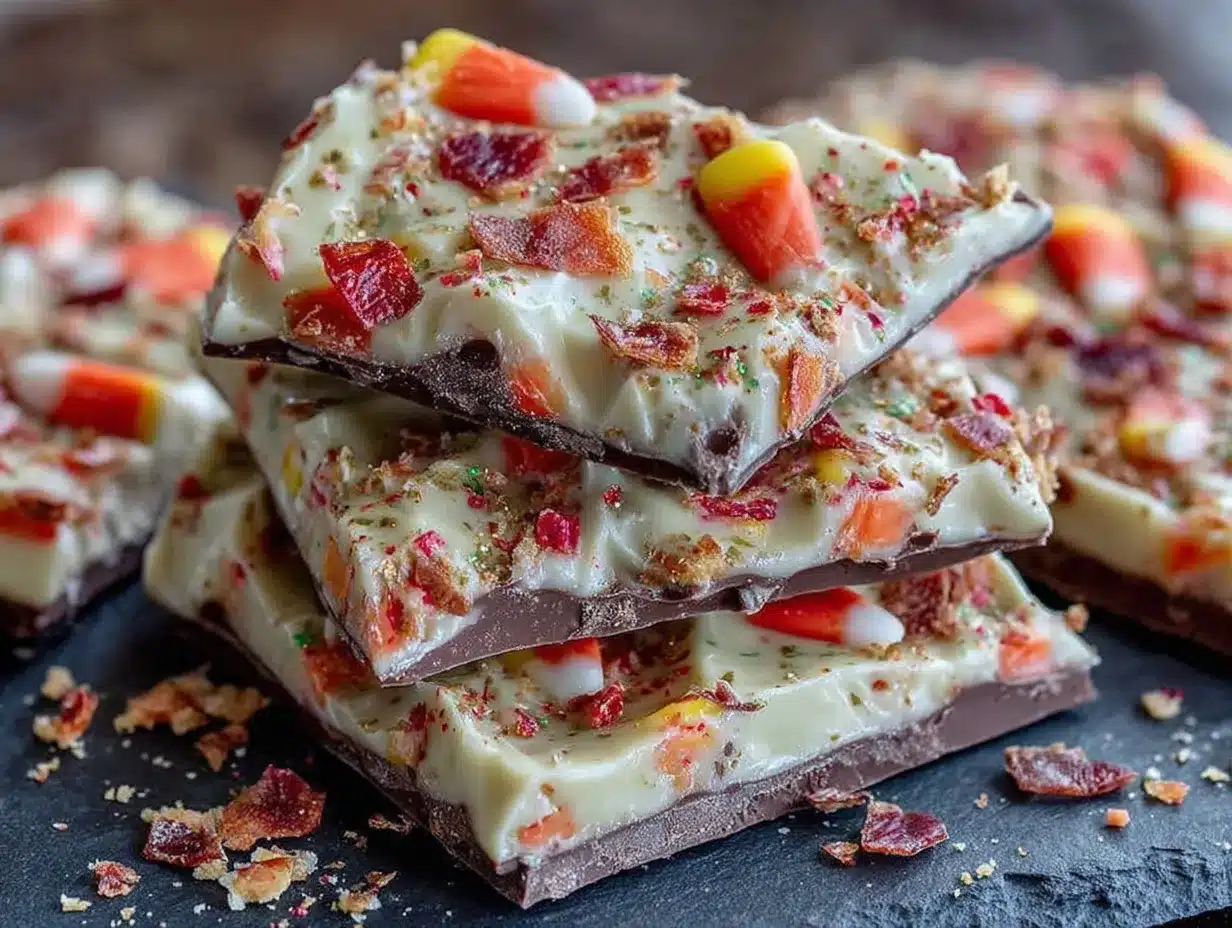
Let’s get to the fun part. This easy 3-ingredient candy corn bark comes together in just a few simple steps. I’ll walk you through each one so you get perfect results every time.
- Prep your pan. Line your baking sheet with parchment paper or a silicone baking mat. Make sure the paper is smooth and flat—if it curls up at the edges, you can use a little dab of butter to stick it down. Set the pan aside for now.
- Melt the white chocolate. Place your 12 ounces of white chocolate chips in a microwave-safe bowl. If you’re using the coconut oil (which I highly recommend), add it now. Microwave in 30-second intervals on medium power (not high—this is important!), stirring well after each interval. White chocolate is finicky and can burn easily, so don’t rush this step. After about 1-2 minutes total, the chips should be mostly melted with a few small lumps—just keep stirring and the residual heat will melt them completely. If you need a few more seconds, go for it, but be careful. The chocolate should be smooth, glossy, and warm to the touch but not hot.
- Troubleshooting tip: If your white chocolate looks grainy or clumpy, you’ve overheated it. Don’t panic—you can sometimes save it by stirring in a little more coconut oil or a teaspoon of heavy cream. If it’s really bad, you might need to start over. This is why I always use the coconut oil—it’s like insurance against seizing.
- Add the candy corn. Measure out 1 cup of candy corn and set aside about ¼ cup for the top. Gently fold the remaining ¾ cup into the melted white chocolate. Stir just until the candy corn is evenly distributed—you don’t want to overmix and break the candy corn into tiny pieces. The heat from the chocolate will soften the candy corn slightly, which is perfect for the texture.
- Spread the mixture. Pour the chocolate-candy corn mixture onto your prepared baking sheet. Use your spatula to spread it into an even layer, about ¼ to ½ inch thick. Don’t worry about making it perfect—rustic is part of the charm here. I usually aim for a rough rectangle shape, but honestly, it can be any shape you want.
- Add the topping. Sprinkle the reserved ¼ cup of candy corn over the top, pressing gently so they stick. This is where you can get creative—arrange them in a pattern, scatter them randomly, or even spell out a word if you’re feeling fancy. I like to add a few extra pieces around the edges because that’s where everyone fights over the bark.
- Set the bark. Place the baking sheet in the refrigerator for at least 30 minutes, or until the chocolate is completely firm and set. If you’re in a hurry, you can pop it in the freezer for 15 minutes, but watch it carefully—white chocolate can get too hard and lose its creamy texture if frozen too long.
- Break into pieces. Once the bark is fully set, remove it from the fridge and peel it off the parchment paper. Place it on a cutting board and break it into irregular pieces with your hands—or use a knife if you prefer cleaner edges. I like to leave some pieces big and some small, like a mosaic of deliciousness.
- Sensory cue: When you break the bark, you should hear a clean snap—that’s how you know it’s set perfectly. The white chocolate should be firm but not rock-hard, and the candy corn should be slightly chewy against the smooth chocolate.
And that’s it! Twenty minutes of work, thirty minutes of waiting, and you’ve got a gorgeous, delicious fall treat that looks like you spent hours on it.
Cooking Tips & Techniques
After making this easy 3-ingredient candy corn bark more times than I can count (and ruining a few batches along the way), I’ve learned a few things that make the process foolproof. Here are my best tips:
Don’t Overheat the White Chocolate
This is the number one mistake I see people make. White chocolate has a lower melting point than dark or milk chocolate, and it’s much more sensitive to heat. If you microwave it on high for too long, it will seize up into a grainy, clumpy mess that’s impossible to work with. Always use medium power and short intervals, and stir between each one. When you think it’s almost done, stop microwaving and just stir—the residual heat will finish the job.
Room Temperature Matters
If your kitchen is really warm (like, summer-in-the-south warm), you might need to let the bark set in the fridge a little longer. On the flip side, if your kitchen is cold, the chocolate might start to set before you’ve finished spreading it. I’ve found that a cool room (around 68-70°F) is ideal. If it’s too warm, you can pop the baking sheet in the fridge for a few minutes halfway through spreading.
My Biggest Failure (And What I Learned)
The first time I made this, I was in a hurry and used the “melt” setting on my microwave. Within 45 seconds, my white chocolate was a scorched, lumpy disaster. I tried to salvage it by adding more coconut oil, but it was too late. I had to throw the whole thing away and start over. Now I’m religious about using 50% power and short intervals. Learn from my mistake—patience is your friend here.
Timing and Multitasking
This recipe is perfect for multitasking. While the chocolate is melting, you can line your pan and measure out your candy corn. While the bark is setting in the fridge, you can clean up your workspace or start on another recipe. The active time is so short that you can easily fit this into a busy afternoon.
Consistency Tips
For the best texture, make sure your candy corn is fresh. Stale candy corn will be hard and crunchy instead of chewy, and it won’t have that nice soft texture against the creamy chocolate. If your candy corn is a little old, you can soften it by spreading it on a baking sheet and warming it in a 200°F oven for 5 minutes. Let it cool completely before using.
Variations & Adaptations
One of the things I love about this easy 3-ingredient candy corn bark is how easy it is to adapt. Here are some of my favorite variations:
Chocolate Lover’s Version
Swap the white chocolate for milk chocolate or dark chocolate chips. The combination of rich chocolate and sweet candy corn is surprisingly good—kind of like a candy bar. I’ve made this with semi-sweet chips, and the slight bitterness balances the sweetness perfectly. My kids prefer the milk chocolate version, but I’m partial to dark chocolate myself.
Salty-Sweet Twist
This is my personal favorite variation. After you spread the bark, sprinkle a generous pinch of flaky sea salt (like Maldon) over the top. The salt cuts through the sweetness and makes the whole thing taste more sophisticated. I’ve brought this version to adult gatherings and it’s always a hit—nobody believes it’s just three ingredients.
Fall Harvest Bark
Add ¼ cup of dried cranberries and ¼ cup of chopped pecans or walnuts along with the candy corn. This gives the bark a more complex texture and a lovely tartness that balances the sweet chocolate. I make this version for Thanksgiving, and it looks beautiful on a dessert table with all the red and brown colors.
Dietary Adaptations
To make this dairy-free, use dairy-free white chocolate chips and skip the coconut oil (or use a dairy-free margarine). For a gluten-free version, just make sure your candy corn is certified gluten-free—most brands are, but it’s always worth checking the label. This recipe is naturally egg-free and nut-free (unless you add nuts), so it’s great for school treats.
Method Variation
If you don’t have a microwave, you can melt the white chocolate in a double boiler. Fill a small saucepan with an inch of water, bring it to a simmer, and place a heatproof bowl on top (make sure the bottom doesn’t touch the water). Add the chocolate and coconut oil, and stir until melted. This method takes a little longer, but it gives you more control and reduces the risk of burning.
Serving & Storage Suggestions
This easy 3-ingredient candy corn bark is best served at room temperature, which lets the white chocolate soften slightly and the candy corn stay chewy. If you’ve stored it in the fridge, let it sit out for about 10 minutes before serving.
Presentation Ideas:
- Arrange the pieces on a platter or in a decorative bowl for a Halloween or fall party
- Place pieces in cellophane bags tied with orange or black ribbon for party favors
- Stack pieces in a mason jar for a cute homemade gift
- Crush a few pieces and sprinkle over ice cream or yogurt for a fun topping
Storage Instructions:
- Room Temperature: Store in an airtight container at room temperature for up to 1 week. The bark will stay fresh and crisp.
- Refrigerator: Store in an airtight container in the fridge for up to 2 weeks. This is a good option if your kitchen is warm or humid.
- Freezer: This bark freezes beautifully! Place pieces in a single layer on a baking sheet and freeze until solid, then transfer to a freezer-safe bag or container. It will keep for up to 3 months. Thaw at room temperature for about 15 minutes before serving.
Reheating: You don’t really need to reheat this bark, but if you want to soften it slightly (for a more gooey texture), you can microwave it for 5-10 seconds. Just watch it carefully so the chocolate doesn’t melt completely.
Flavor Development: Interestingly, the flavor of this bark actually improves after a day or two. The candy corn and white chocolate meld together, and the texture becomes more cohesive. I’ve found that it’s even better on day two—if it lasts that long in your house.
Nutritional Information & Benefits
Let’s be real—this easy 3-ingredient candy corn bark is a treat, not a health food. But here’s the estimated nutritional information for a typical serving (about 1 ounce, or roughly one piece):
- Calories: 120-140
- Fat: 6-8g
- Carbohydrates: 18-20g
- Sugar: 16-18g
- Protein: 1-2g
Health Highlights:
- Portion Control: Because this bark is broken into pieces, it’s easy to enjoy a small serving without overindulging. One or two pieces is usually enough to satisfy a sweet craving.
- Kid-Friendly: This treat is perfect for kids because it’s simple, fun, and doesn’t contain any artificial colors (if you choose natural candy corn) or common allergens like nuts or eggs.
- Mindful Indulgence: I believe in enjoying treats in moderation. This bark is a way to celebrate the fall season without going overboard—it’s a small pleasure that brings a lot of joy.
Dietary Considerations:
- Contains dairy (unless using dairy-free chocolate)
- May contain traces of soy (check your chocolate labels)
- Naturally gluten-free (verify candy corn label)
- Nut-free (unless you add nuts)
I always tell my readers: life is about balance. Enjoy this bark as a fun fall treat, pair it with a healthy meal, and don’t stress about the numbers. A little sweetness makes the everyday moments special.
Conclusion
This easy 3-ingredient candy corn bark is proof that you don’t need a long list of ingredients or hours in the kitchen to create something truly special. It’s the kind of recipe that saves you on a busy afternoon, impresses your kids without any fuss, and makes you feel like a kitchen hero with almost no effort.
I love this recipe because it’s so forgiving. You can customize it, adapt it, and make it your own without worrying about ruining it. It’s a blank canvas for your fall creativity—add sprinkles, drizzle with chocolate, or keep it classic. There’s no wrong way to make it.
So go ahead—raid your pantry, melt some chocolate, and make this bark with your kids. I promise you’ll have fun, make a mess, and end up with a treat that everyone will love. And when you do, I’d love to hear about it. Drop a comment below and tell me how your batch turned out, or share a photo on Pinterest with your favorite variation. Happy fall, friends—now go make some magic with three simple ingredients!
Frequently Asked Questions
Can I use milk chocolate instead of white chocolate?
Absolutely! Milk chocolate or even dark chocolate works great in this recipe. The flavor will be richer and less sweet, which some people prefer. Just follow the same melting instructions—chocolate is chocolate, but white chocolate is more delicate, so dark and milk chocolate are actually easier to work with.
How do I prevent the white chocolate from seizing?
The key is low and slow heat. Always microwave on 50% power in 30-second intervals, stirring well between each one. Adding a tablespoon of coconut oil or vegetable shortening also helps stabilize the chocolate and prevents it from seizing. Never add water—even a drop can cause chocolate to seize up instantly.
Can I make this candy corn bark ahead of time?
Yes! This bark is perfect for making ahead. It stays fresh for up to a week at room temperature or two weeks in the fridge. You can even freeze it for up to three months. Just make sure it’s in an airtight container to keep it fresh and crisp.
What can I add to this bark for extra flavor?
There are so many options! Try adding a sprinkle of sea salt, crushed pretzels for crunch, dried cranberries for tartness, or chopped nuts like pecans or walnuts. You can also drizzle melted dark chocolate over the top for a beautiful contrast. The possibilities are endless.
Is this recipe safe for school treats?
Yes, with a few caveats. This recipe is naturally nut-free and egg-free, which makes it great for classrooms with allergy restrictions. However, always check the labels on your white chocolate and candy corn to make sure they’re processed in a nut-free facility if that’s a concern. Also, it’s gluten-free as long as your candy corn is certified gluten-free.
Pin This Recipe!
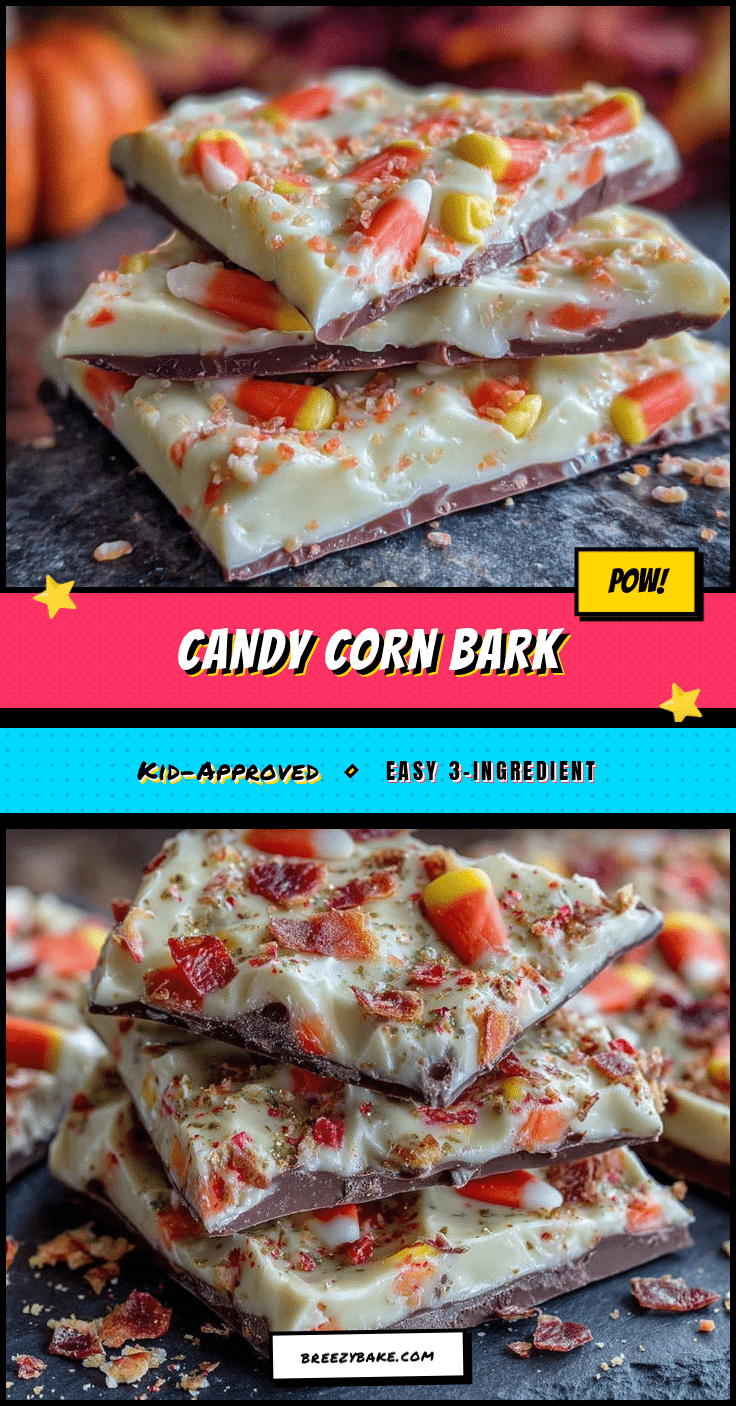
Easy 3-Ingredient Candy Corn Bark: Best Kid-Approved Fall Treat

This easy 3-ingredient candy corn bark is a quick and simple fall treat made with white chocolate and candy corn. Perfect for Halloween parties, Thanksgiving dessert tables, or a last-minute sweet craving.
- Prep Time: 15 minutes
- Cook Time: 0 minutes
- Total Time: 45 minutes
- Yield: 12 servings 1x
- Category: Dessert
- Cuisine: American
Ingredients
- 12 ounces white chocolate chips or white melting wafers
- 1 cup candy corn (regular or autumn mix)
- 1 tablespoon coconut oil or vegetable shortening (optional, but recommended)
Instructions
- Line a baking sheet with parchment paper or a silicone baking mat.
- Place white chocolate chips and coconut oil (if using) in a microwave-safe bowl. Microwave in 30-second intervals on medium power, stirring after each, until smooth and glossy (about 1-2 minutes total).
- Reserve 1/4 cup of candy corn for topping. Gently fold the remaining 3/4 cup candy corn into the melted white chocolate until evenly distributed.
- Pour the mixture onto the prepared baking sheet and spread into an even layer, about 1/4 to 1/2 inch thick.
- Sprinkle the reserved candy corn over the top, pressing gently to adhere.
- Refrigerate for at least 30 minutes, or until completely firm.
- Once set, peel off parchment paper and break into irregular pieces. Serve at room temperature.
Notes
For best results, use high-quality white chocolate chips and fresh candy corn. Adding coconut oil helps prevent the white chocolate from seizing and gives the bark a nice snap. Store in an airtight container at room temperature for up to 1 week, or refrigerate for up to 2 weeks. Freezes well for up to 3 months.
Nutrition
- Serving Size: 1 ounce (about 1 pie
- Calories: 130
- Sugar: 17
- Sodium: 20
- Fat: 7
- Saturated Fat: 4
- Carbohydrates: 19
- Protein: 1
Keywords: candy corn bark, fall treat, Halloween dessert, 3-ingredient recipe, white chocolate bark


