I was standing in the middle of the parking lot at my local grocery store last Tuesday when the strangest thing happened. A woman walked by carrying one of those iconic green cups, and the scent of brown sugar and coffee hit me like a freight train—and suddenly I was fourteen years old, sitting at my aunt Noni’s worn wooden kitchen table in her tiny apartment above the laundromat. She’d pour me a cup of her overly strong drip coffee, then stir in a heaping spoonful of dark brown sugar because she said white sugar was “for people who don’t know any better.” She’d top it with this frothy, warm milk she’d heat in a saucepan until it was almost too hot to handle. I never liked coffee back then—too bitter. But that sweet, creamy concoction? That was different. That was magic.
Fast forward to my adult life, and I’ve spent years trying to capture that exact feeling again. You know the one—where a single sip makes you feel like everything is right in the world, even if only for a minute. The Starbucks brown sugar oat milk shaken espresso came close, honestly. Real close. But at nearly six bucks a pop, it wasn’t exactly sustainable for someone who wanted that feeling every single morning. I mean, let’s be real—that adds up fast. So I did what any slightly obsessed home cook would do: I went into my kitchen, determined to crack the code.
It took me about six tries to get it right. The first batch was too watery. The second was too bitter. The third? I accidentally used vanilla oat milk instead of plain, and honestly, it was a happy accident because that version is now my go-to on lazy Sundays. But this version—the one I’m sharing with you today—is the one that made my husband look up from his phone and say, “Wait, you made this?” That’s when I knew I had it. This copycat recipe is smooth, rich, and has that signature shaken froth that makes every sip feel like a treat. No fancy equipment required. No barista skills needed. Just a few simple ingredients and a little bit of patience.
Why You’ll Love This Recipe
Let me tell you, I’ve tested this recipe more times than I care to admit. I’ve made it for brunch with friends, for quiet mornings when I need a pick-me-up, and even for my neighbor Carol who swears she can taste the difference between homemade and store-bought. Spoiler alert: she couldn’t. And that’s the whole point. This isn’t just another coffee recipe—it’s the one that actually delivers on the promise of tasting like the real thing.
- Quick & Easy: Comes together in under 5 minutes, which is faster than waiting in line at the drive-thru. Seriously, I timed it.
- Simple Ingredients: You probably already have most of these in your pantry. No weird syrups or obscure extracts needed.
- Perfect for Hosting: Make a batch for your next brunch or dinner party. Your guests will think you hired a barista.
- Crowd-Pleaser: I’ve served this to coffee snobs and casual drinkers alike, and everyone asks for the recipe.
- Unbelievably Delicious: The combination of bold espresso, sweet brown sugar, and creamy oat milk is pure comfort in a glass.
What makes this recipe different from the dozens of other copycat versions out there? It’s the technique. Most recipes skip the shaking step or use the wrong ratio of ice to liquid. I spent hours experimenting with different shaking times, ice cube sizes, and even the type of oat milk. The result is a drink that has that same velvety texture and balanced sweetness as the original—without the premium price tag.
This recipe is the kind that makes you close your eyes after the first sip. It’s comfort in a cup, reimagined for your own kitchen. Perfect for impressing guests without breaking a sweat, or turning a regular Tuesday morning into something special.
What Ingredients You Will Need
This recipe uses simple, everyday ingredients that come together to create something truly special. The magic is in the balance—each component plays a specific role in delivering that signature flavor and texture. Here’s what you’ll need:
- 2 shots (about 2 ounces) of espresso: Freshly brewed is best, but you can use strong brewed coffee in a pinch. I personally use a Nespresso machine, but a stovetop moka pot works beautifully too.
- 2 tablespoons brown sugar: Dark brown sugar gives a deeper, molasses-like flavor that mimics the Starbucks version perfectly. Light brown sugar works too, but the flavor will be slightly milder.
- 1 cup oat milk: Barista-style oat milk (like Oatly or Califia Farms) creates the creamiest texture. Regular oat milk works, but it won’t be as rich. For a dairy-free option, this is already vegan-friendly.
- Ice cubes: Use large cubes if you can—they melt slower and won’t water down your drink as quickly.
- Optional: 1/4 teaspoon vanilla extract: This adds a subtle warmth that complements the brown sugar beautifully. I add it about half the time, depending on my mood.
- Optional: A pinch of cinnamon: For garnish or stirred in for a hint of spice. It’s not traditional, but it’s delicious.
When it comes to the brown sugar, I recommend using a brand like Domino or Wholesome Sweeteners for consistent results. The molasses content can vary between brands, and you want that rich, caramel-like sweetness. For the oat milk, I’ve found that Oatly Barista Edition gives the most authentic texture, but Califia Farms Barista Blend is a close second. If you’re shopping at a store that carries store-brand oat milk, just check the label—you want one with a higher fat content for that creamy mouthfeel.
One note on the espresso: if you don’t have an espresso machine, you can make a strong batch of coffee using a French press or even instant espresso powder. Just use about 2 teaspoons of instant espresso dissolved in 2 ounces of hot water. It’s not exactly the same, but it gets the job done in a pinch.
Equipment Needed
You don’t need a fancy espresso machine or a professional cocktail shaker to make this recipe. Here’s what you’ll need:
- A cocktail shaker or a mason jar with a tight-fitting lid: This is essential for creating that signature froth. I’ve used both, and honestly, a mason jar works just as well as a shaker. Just make sure the lid is secure before you start shaking.
- A small saucepan or milk frother: For warming the oat milk if you prefer a hot version. I use a small saucepan on the stove, but a microwave-safe cup works too.
- A measuring spoon: For precise brown sugar measurements. I’ve eyeballed it before, and trust me, it’s worth measuring.
- A glass or mug: A 12-ounce glass works perfectly for serving. I like using a clear glass so you can see the beautiful layers.
- Optional: A kitchen scale: If you want to be extra precise with your espresso measurements. I use mine occasionally, but it’s not necessary.
If you don’t have a cocktail shaker, don’t worry. A mason jar with a lid is my go-to alternative. I actually prefer it because it’s easier to clean and I can see how the mixture is coming along. Just make sure you hold the lid firmly while shaking—I’ve had a few near-misses with hot liquid escaping!
Preparation Method

Follow these steps carefully, and you’ll have a drink that rivals anything from the coffee shop. Trust the process—each step is designed to build flavor and texture.
- Brew your espresso: Start by brewing 2 shots of espresso (about 2 ounces total). If you’re using a stovetop moka pot, this takes about 5 minutes. If you’re using a Nespresso machine, it’s ready in seconds. Set it aside to cool slightly while you prepare the other ingredients.
- Combine the brown sugar and hot espresso: In your cocktail shaker or mason jar, add the brown sugar and the hot espresso. Stir until the sugar is completely dissolved. This is a crucial step—if the sugar isn’t fully dissolved, you’ll end up with grainy bits at the bottom of your drink. I’ve made this mistake before, and it’s not pleasant.
- Add the ice: Fill the shaker or jar with ice cubes. Use about 5-6 large cubes, or enough to fill it about halfway. The ice helps chill the espresso quickly and creates that lovely froth when you shake it.
- Shake it like you mean it: Secure the lid tightly and shake vigorously for about 15-20 seconds. You’ll hear the ice clinking around, and the mixture should become frothy and slightly lighter in color. This is where the magic happens—the shaking aerates the espresso and creates that signature texture.
- Prepare your glass: Fill your serving glass with fresh ice cubes. I like to use a 12-ounce glass for the perfect ratio of coffee to milk.
- Pour the shaken espresso over the ice: Strain the espresso mixture into the glass, leaving the ice from the shaker behind. You should see a beautiful layer of foam on top.
- Add the oat milk: Slowly pour the oat milk over the back of a spoon to create layers. This isn’t strictly necessary, but it looks pretty and helps control how the milk mixes with the espresso. For a hot version, warm the oat milk in a saucepan before adding it.
- Stir and enjoy: Give it a gentle stir to combine the layers, or leave them intact for a visual effect. Take a sip and adjust the sweetness if needed. I like to add a pinch of cinnamon on top for a little extra flair.
Pro tip: If you’re making this for a crowd, you can scale the recipe easily. Just multiply the ingredients by the number of servings and shake in batches. I’ve made this for brunch parties before, and it’s always a hit. Just remember to shake each batch fresh—don’t try to make a giant batch in one shaker, or the froth won’t develop properly.
Cooking Tips & Techniques
I’ve learned a few things the hard way so you don’t have to. Here are my top tips for nailing this recipe every single time:
- Don’t skip the dissolving step: I know it’s tempting to just throw everything in the shaker and go, but trust me—dissolving the brown sugar in the hot espresso first makes a huge difference. Undissolved sugar will settle at the bottom of your glass, leaving you with a bitter top and a cloyingly sweet bottom.
- Use large ice cubes: Smaller ice cubes melt faster and will water down your drink. I keep a bag of large ice cubes in my freezer specifically for this recipe. If you don’t have large cubes, just use fewer small ones and drink it quickly.
- Shake with confidence: Don’t be shy with the shaking. You want to hear the ice rattling around. If you’re worried about the lid coming off, hold it down with your thumb. I’ve had a few close calls, but a firm grip solves the problem.
- Temperature matters: For the best texture, make sure your espresso is hot when you dissolve the sugar, but let it cool slightly before adding ice. If the espresso is too hot, it will melt the ice too quickly and dilute the flavor.
- Experiment with oat milk brands: Not all oat milks are created equal. Barista-style blends have a higher fat content and emulsifiers that create a creamier texture. If your drink tastes watery, try switching brands.
One of my biggest failures happened when I was making this for a dinner party. I was rushing and forgot to dissolve the sugar completely. The first sip was bitter, the last sip was syrupy sweet, and I had to remake the entire batch. My friends were kind about it, but I learned my lesson. Now I always take that extra 30 seconds to stir properly.
Variations & Adaptations
This recipe is incredibly versatile, and I’ve played around with it more times than I can count. Here are some of my favorite variations:
- Hot Version: Skip the ice altogether. Dissolve the brown sugar in hot espresso, then pour it into a mug. Warm the oat milk and froth it if you have a frother, then pour it over the espresso. It’s like a cozy hug in a mug on a cold morning.
- Vanilla Twist: Add 1/4 teaspoon of vanilla extract to the shaker along with the brown sugar. It adds a subtle floral note that pairs beautifully with the oat milk. I discovered this by accident when I grabbed the wrong bottle, and now it’s my go-to.
- Iced Latte Version: If you don’t have a shaker, you can still make this. Just stir the brown sugar into the hot espresso until dissolved, then pour it over ice and add the oat milk. It won’t be as frothy, but it’ll still taste great.
- Dairy-Free Variations: This recipe is already dairy-free, but you can swap the oat milk for almond milk, soy milk, or coconut milk. Just note that the texture will be different—almond milk is thinner, while coconut milk adds a subtle tropical flavor.
- Spiced Version: Add a pinch of cinnamon, nutmeg, or even pumpkin pie spice to the shaker. It’s perfect for fall and makes your kitchen smell amazing.
My personal favorite variation is the vanilla twist with a splash of cinnamon on top. I stumbled upon it one Sunday morning when I was out of plain brown sugar and only had vanilla-infused sugar from a baking project. It was a happy accident that I’ve since recreated on purpose.
Serving & Storage Suggestions
This drink is best enjoyed fresh, but there are a few ways to make it work for your schedule. Here’s what I’ve learned:
- Serving Temperature: Serve immediately over fresh ice for the best texture. If you’re making it hot, serve it right after adding the warm milk.
- Presentation: I like to serve this in a clear glass so the layers are visible. It’s a small touch that makes it feel special, especially when I’m hosting. Add a cinnamon stick or a straw for extra flair.
- What to Serve Alongside: This pairs beautifully with a simple pastry, like a croissant or a slice of banana bread. For brunch, I serve it with scrambled eggs and fresh fruit.
- Storage: You can make the espresso and brown sugar mixture ahead of time and store it in the fridge for up to 24 hours. Just shake it with ice and add the oat milk when you’re ready to drink. The flavor will still be great, though the froth won’t be as pronounced.
- Reheating: If you’ve made a cold version and want to turn it into a hot drink, just microwave the oat milk and pour it over the espresso mixture. It’s not quite the same as fresh, but it works in a pinch.
One thing I’ve noticed is that the flavors actually deepen slightly after sitting for about 10 minutes. The brown sugar and espresso meld together beautifully. So if you’re making this for a party, you can prep the espresso mixture a few minutes ahead and shake it right before serving.
Nutritional Information & Benefits
While this is definitely a treat, it’s worth noting that this homemade version is actually healthier than the Starbucks original. Here’s a rough breakdown per serving:
- Calories: Approximately 180-220 (depending on the oat milk brand)
- Fat: 4-6 grams
- Carbohydrates: 30-35 grams
- Sugar: 18-22 grams (mostly from the brown sugar and natural sugars in the oat milk)
- Protein: 2-3 grams
- Caffeine: About 150 mg (from 2 shots of espresso)
The Starbucks version has about 250 calories and 34 grams of sugar, so this homemade version saves you about 70 calories and 12 grams of sugar. Plus, you’re controlling the quality of the ingredients. The oat milk provides some fiber and iron, while the espresso gives you a nice energy boost without the jitters if you’re used to caffeine.
If you’re watching your sugar intake, you can reduce the brown sugar to 1 tablespoon or use a sugar substitute like monk fruit sweetener. Just note that the flavor will be slightly different. This recipe is naturally dairy-free and can be made gluten-free by ensuring your oat milk is certified gluten-free (some brands process oats in facilities that handle wheat).
Conclusion
Honestly, this recipe has become a staple in my kitchen for a reason. It’s quick, it’s delicious, and it makes me feel like I’m treating myself without the guilt of spending five bucks every morning. Every time I take that first sip, I’m transported back to my aunt Noni’s kitchen, but with a modern twist that feels entirely my own.
I’d love for you to try this and make it your own. Maybe you’ll add a splash of vanilla, a pinch of cinnamon, or even a drizzle of caramel. The beauty of this recipe is that it’s a canvas for your creativity. So go ahead—shake it up, pour it over ice, and take a moment to enjoy the simple pleasure of a perfectly balanced coffee drink.
If you make this, I’d love to hear about it. Drop a comment below and let me know how it turned out, or share your own twist on the recipe. And if you’re looking for more coffee-inspired recipes, check out our iced vanilla latte or our homemade caramel syrup for another delicious treat. Happy sipping!
Frequently Asked Questions
Can I use regular milk instead of oat milk?
Absolutely! While oat milk gives the most authentic texture, you can use any milk you prefer. Whole milk will be creamier, while skim milk will be lighter. Just keep in mind that the flavor will be slightly different.
How do I make this without an espresso machine?
No problem! Use 2 teaspoons of instant espresso powder dissolved in 2 ounces of hot water, or brew a strong cup of coffee using a French press. The key is to use a concentrated coffee so the flavor doesn’t get diluted by the milk and ice.
Can I make this ahead of time for a party?
Yes! You can prepare the espresso and brown sugar mixture up to 24 hours in advance and store it in the fridge. When you’re ready to serve, just shake it with ice and add the oat milk. The froth won’t be as thick, but it’ll still taste great.
Why is my drink watery?
This usually happens if the ice melts too quickly. Use large ice cubes and make sure your espresso has cooled slightly before adding the ice. Also, avoid shaking for too long—15-20 seconds is plenty.
Can I use a different sweetener?
Definitely! Maple syrup, honey, or agave nectar all work well. Just note that liquid sweeteners will change the texture slightly, so you may need to adjust the amount. Start with 1 tablespoon and add more to taste.
Pin This Recipe!
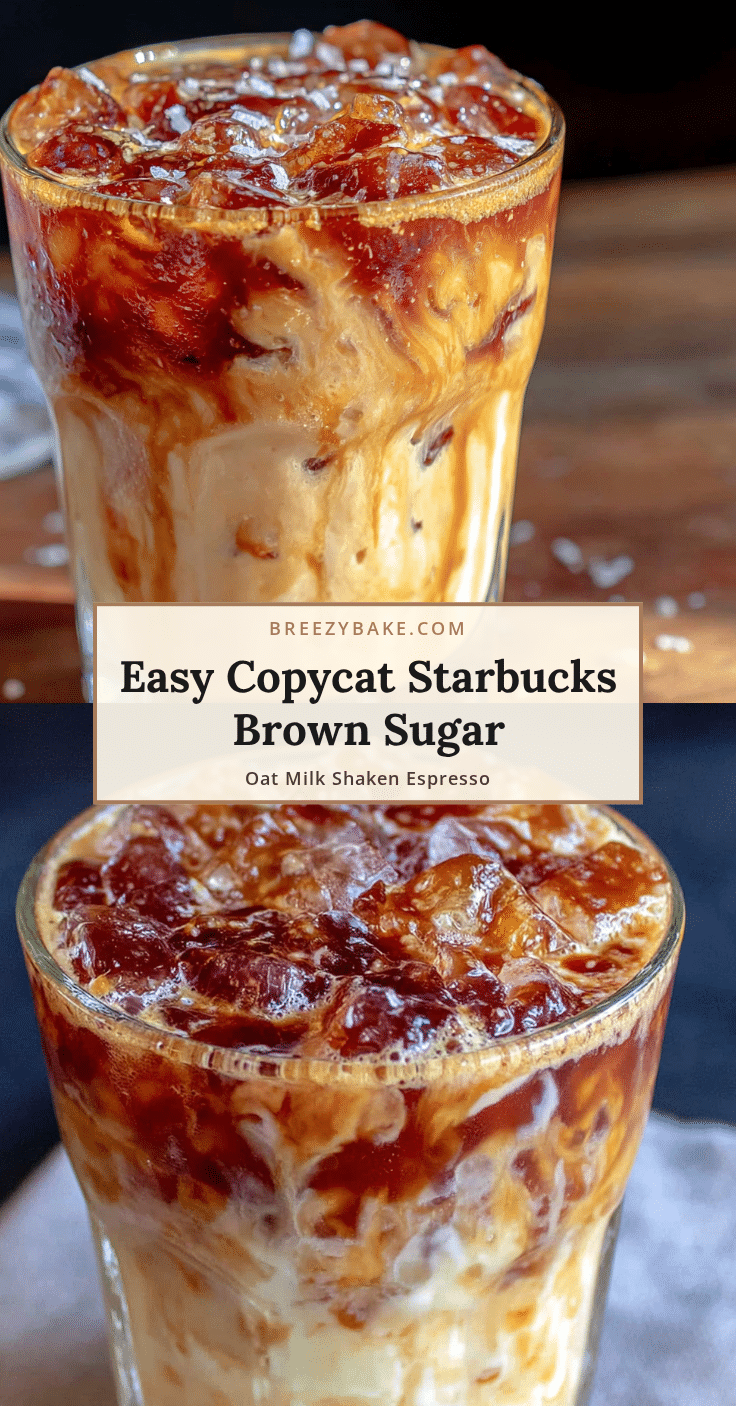
Easy Copycat Starbucks Brown Sugar Oat Milk Shaken Espresso

This homemade version of the popular Starbucks drink is smooth, rich, and has that signature shaken froth. Made with simple ingredients and ready in under 5 minutes, it’s a budget-friendly way to enjoy your favorite coffee shop treat at home.
- Prep Time: 5 minutes
- Cook Time: 0 minutes
- Total Time: 5 minutes
- Yield: 1 serving 1x
- Category: Beverage
- Cuisine: American
Ingredients
- 2 shots (about 2 ounces) espresso
- 2 tablespoons brown sugar (dark preferred)
- 1 cup oat milk (barista-style recommended)
- Ice cubes (large preferred)
- 1/4 teaspoon vanilla extract (optional)
- Pinch of cinnamon (optional, for garnish)
Instructions
- Brew 2 shots of espresso (about 2 ounces total). Set aside to cool slightly.
- In a cocktail shaker or mason jar, combine the brown sugar and hot espresso. Stir until the sugar is completely dissolved.
- Fill the shaker or jar with ice cubes (about 5-6 large cubes).
- Secure the lid tightly and shake vigorously for 15-20 seconds until frothy and slightly lighter in color.
- Fill a serving glass with fresh ice cubes.
- Strain the shaken espresso mixture into the glass, leaving the ice from the shaker behind.
- Slowly pour the oat milk over the back of a spoon to create layers (or simply pour it in).
- Stir gently to combine, or leave layers intact. Add a pinch of cinnamon on top if desired. Enjoy immediately.
Notes
For best results, use barista-style oat milk (like Oatly Barista Edition) for a creamier texture. Dissolve the brown sugar completely in hot espresso to avoid graininess. Use large ice cubes to prevent dilution. If you don’t have an espresso machine, use 2 teaspoons of instant espresso powder dissolved in 2 ounces of hot water. The recipe can be scaled for multiple servings, but shake each batch fresh for proper froth development.
Nutrition
- Serving Size: 1 drink (12 ounces)
- Calories: 180220
- Sugar: 1822
- Sodium: 100150
- Fat: 46
- Saturated Fat: 0.51
- Carbohydrates: 3035
- Fiber: 12
- Protein: 23
Keywords: brown sugar oat milk shaken espresso, copycat Starbucks, iced coffee, espresso drink, oat milk coffee, homemade coffee


