“Can you make the chicken less soggy this time? You know, the one that falls apart in my lunchbox?” — and that was it. My kid’s exact words after a particularly disappointing school lunch had me rethinking the whole chicken wrap game. It wasn’t just about packing food but making sure it stayed crispy and tasty from morning until lunchtime. Honestly, that little complaint sparked a whole new approach in my kitchen and led me to perfect these Easy Crispy Chicken Caesar Wraps for Kid-Friendly Lunches.
So there I was, juggling a morning rush, trying to whip up something quick and satisfying that wouldn’t turn into a soggy mess by noon. The smell of the crisp chicken frying was comforting, but the real victory was the crunch that held up, bite after bite. The creamy Caesar dressing, crunchy romaine, and a sprinkle of Parmesan tied it all together like a cozy little package. It wasn’t fancy, but it was exactly what my kid needed—something familiar that felt special and stayed fresh.
This recipe stuck with me because it’s not just about feeding kids; it’s about making lunches that don’t lose their charm by the time they’re eaten. You know how it is—sometimes lunches turn into sad, limp reminders of what they should’ve been. These wraps? They bring a little joy back to lunch hour, and honestly, that makes all the difference.
Why You’ll Love This Recipe
This recipe has been tested and tweaked through countless school mornings and picky eaters, so you can trust it’ll deliver every time. Here’s why it’s become a staple in my lunchbox arsenal:
- Quick & Easy: Ready in about 30 minutes, perfect for busy parents who need a fuss-free lunch solution.
- Simple Ingredients: Nothing fancy or hard to find—just everyday pantry staples and fresh produce.
- Perfect for Kid-Friendly Lunches: The crispy chicken and familiar Caesar flavors appeal to even the pickiest eaters.
- Crowd-Pleaser: My kid’s friends always ask for these wraps, so you know they’re a hit.
- Unbelievably Delicious: The contrast between crunchy chicken and creamy Caesar dressing makes every bite satisfying.
What sets this recipe apart is the trick I learned to keep the chicken crispy all day—a light coating and a quick pan-fry that locks in the crunch without weighing down the wrap. Plus, blending the dressing just right so it’s creamy but not soggy means these wraps feel fresh, even hours later.
Honestly, it’s the kind of recipe that makes you pause after the first bite and think, “Yep, this is a keeper.” Whether you’re packing school lunches or quick dinners, these wraps bring comfort and ease without any stress.
What Ingredients You Will Need
This recipe uses simple, wholesome ingredients to deliver bold flavor and satisfying texture without the fuss. Most are pantry staples, and you can find fresh romaine and Parmesan at any grocery store. Here’s what you’ll need:
- For the Crispy Chicken:
- 2 boneless, skinless chicken breasts, sliced into strips (about 1 lb / 450 g)
- 1 cup all-purpose flour (120 g) – for a gluten-free option, use almond flour or gluten-free flour blend
- 2 large eggs, beaten (room temperature for better coating)
- 1 cup panko breadcrumbs (100 g) – I recommend Kikkoman for best crunch
- 1 tsp garlic powder
- 1 tsp paprika
- Salt and pepper to taste
- 2 tbsp olive oil or avocado oil for frying
- For the Caesar Dressing:
- ½ cup mayonnaise (use light mayo if preferred)
- 2 tbsp grated Parmesan cheese
- 1 tbsp lemon juice (freshly squeezed)
- 1 tsp Dijon mustard
- 1 garlic clove, minced or grated
- Salt and pepper to taste
- For the Wraps:
- 4 large flour tortillas (10-inch / 25 cm) – whole wheat works well too
- 2 cups chopped romaine lettuce (about 100 g)
- Optional: sliced cherry tomatoes or cucumber for extra crunch and freshness
When selecting chicken, I usually pick thinner breasts or slice them myself for even cooking. For the panko breadcrumbs, the larger flakes give that satisfying crunch my kid loves. If you want to swap out mayo, Greek yogurt works nicely for a lighter dressing, just adjust the seasoning to taste.
Equipment Needed
- Large skillet or non-stick frying pan – I prefer a cast iron skillet for even heat and crispiness, but a good non-stick pan works fine too.
- Mixing bowls – one for flour, one for egg wash, one for breadcrumbs.
- Whisk or fork – for beating eggs and mixing the dressing.
- Sharp knife and cutting board – for slicing chicken and chopping lettuce.
- Measuring cups and spoons – for precise ingredient amounts.
- Paper towels – to drain excess oil from fried chicken strips.
If you don’t have a cast iron skillet, a stainless steel pan works well but make sure it’s hot before adding oil to prevent sticking. For quick clean-up, I often use silicone spatulas and keep a splatter guard handy to avoid mess. Budget-friendly tip: disposable parchment paper helps when prepping the breading station.
Preparation Method

- Prepare the breading station: In one bowl, place the flour mixed with garlic powder, paprika, salt, and pepper. In the second bowl, beat the eggs. In the third bowl, place the panko breadcrumbs.
- Coat the chicken strips: Dip each chicken strip first into the flour mixture, shaking off excess, then into the eggs, and finally coat well with panko breadcrumbs. Set aside on a plate.
- Heat the oil: Warm 2 tablespoons of oil in a large skillet over medium heat until shimmering but not smoking—this usually takes about 2 minutes.
- Fry the chicken strips: Carefully place the coated chicken into the hot oil in a single layer (work in batches if needed). Cook for about 3-4 minutes per side, flipping gently, until golden brown and cooked through (internal temperature of 165°F or 74°C). The smell of the garlic and paprika will fill the kitchen.
- Drain the chicken: Transfer cooked chicken strips onto a plate lined with paper towels to soak up excess oil. Let them rest for a few minutes to maintain crispiness.
- Make the Caesar dressing: In a small bowl, whisk together mayonnaise, Parmesan, lemon juice, Dijon mustard, garlic, salt, and pepper. Taste and adjust seasoning as needed. The dressing should be creamy with a bright, tangy finish.
- Assemble the wraps: Lay out the tortillas flat. Spread a generous spoonful of the Caesar dressing evenly across each one. Add a handful of chopped romaine lettuce, arrange 3-4 crispy chicken strips on top, and optionally, add sliced cherry tomatoes or cucumbers for extra freshness.
- Wrap it up: Fold in the sides of the tortilla and roll tightly from one end to the other like a burrito. If packing for later, wrap each in parchment or foil to keep everything secure.
Pro tip: When frying, don’t overcrowd the pan—this helps the chicken stay crispy. Also, letting the chicken rest a bit before assembling prevents the wrap from getting soggy too fast. If you’re in a hurry, you can bake the chicken strips at 425°F (220°C) for 15-20 minutes, flipping halfway, but frying gives that unbeatable crunch.
Cooking Tips & Techniques
Getting that perfect crispy crust without greasy heaviness took some trial and error. Here are some tips I learned along the way:
- Pat chicken dry: Before breading, make sure your chicken strips are patted dry. Excess moisture makes the breading slip off or turn soggy.
- Use panko breadcrumbs: They create a lighter, crunchier coating than regular breadcrumbs. For extra flavor, you can mix in a little grated Parmesan.
- Maintain oil temperature: Medium heat works best. Too hot, and the crust burns before the chicken cooks; too low, and the breading soaks up oil and becomes greasy.
- Don’t skip the resting step: Let the chicken cool slightly on paper towels. It firms up the crust and keeps it crispy longer in the wrap.
- Mix dressing fresh: Make the Caesar dressing right before assembling to keep it bright and tangy, avoiding any sogginess.
One time, I made the mistake of stacking wet lettuce under the chicken, and the wrap turned limp within minutes. Lesson learned: always layer the dressing, then lettuce, then chicken to keep things crisp. Also, multitasking by prepping the dressing while the chicken fries saves precious morning minutes.
Variations & Adaptations
This recipe is pretty flexible and can be adjusted to suit different tastes and dietary needs. Here are a few ideas:
- For a low-carb option: Swap the flour tortillas for large lettuce leaves or low-carb wraps. The crispy chicken shines just as well wrapped in crisp greens.
- Spice it up: Add a pinch of cayenne or smoked paprika to the breadcrumb mix for a mild kick that kids might surprisingly love.
- Vegetarian twist: Use crispy baked tofu or cauliflower bites instead of chicken, coated the same way with panko and spices.
- Seasonal additions: In summer, add sliced avocado or fresh corn kernels for extra texture and freshness.
- Dairy-free dressing: Substitute mayonnaise with vegan mayo and skip the Parmesan or use a dairy-free cheese alternative.
Personally, I once swapped in crispy buffalo chicken strips when hosting a casual lunch—it was a hit but kept the wrap structure intact. For a fun variation, try pairing these wraps with my healthy chicken veggie skillet wraps for a colorful, wholesome meal combo.
Serving & Storage Suggestions
These wraps are best served fresh and slightly warm, but they hold up surprisingly well for packed lunches. Here’s how to keep them tasting great:
- Serving: Cut the wraps diagonally for a nice presentation and easier eating. Pair with crunchy veggie sticks or fruit slices for a balanced lunch.
- Storing: Wrap each tightly in parchment paper or foil and keep refrigerated. The wraps stay crisp for up to 24 hours if packed carefully.
- Reheating: If you want to warm them up, unwrap and heat the chicken strips separately in a skillet or toaster oven for a few minutes, then reassemble to avoid sogginess.
- Flavor development: The dressing and chicken meld nicely after a few hours, making the flavor more pronounced without losing texture.
For a complete meal, I sometimes serve these wraps alongside a fresh salad or some homemade baked chips. If you’re looking for something sweet to round out lunch, these wraps go surprisingly well with a light dessert like the creamy strawberry cream puff bars—a treat that’s both kid-friendly and easy to pack.
Nutritional Information & Benefits
Each wrap provides a balanced mix of protein, healthy fats, and fiber, making it a nourishing choice for growing kids. Estimated nutritional values per wrap:
| Calories | Approximately 400-450 kcal |
|---|---|
| Protein | Around 30 grams |
| Fat | 15-20 grams (mostly from healthy oils and mayo) |
| Carbohydrates | 30-35 grams |
| Fiber | 3-5 grams (from lettuce and whole-wheat tortilla if used) |
The chicken offers lean protein essential for muscle growth, while the romaine adds vitamins A and K. Using homemade Caesar dressing means you avoid preservatives and control sodium. This recipe is naturally gluten-free if you swap flour and tortillas accordingly. Just watch out for egg and dairy allergies in the dressing and coating.
From a wellness perspective, this wrap fuels busy kids with satisfying crunch and flavor, making lunchtime less of a chore and more of a moment to enjoy.
Conclusion
This Easy Crispy Chicken Caesar Wraps for Kid-Friendly Lunches recipe is a reliable, tasty way to keep lunches exciting without the hassle. It’s quick to prepare, uses ingredients you likely have on hand, and stands up to the challenges of midday munching. I love it because it solves a real problem—keeping chicken crispy and delicious hours after cooking, which is a game changer in my family’s lunch routine.
Feel free to tweak the toppings and dressing to fit your kid’s tastes; that’s part of the fun. Whether you pack it for school, work, or a casual dinner, these wraps bring comfort and crunch that’s hard to beat.
Let me know how your wraps turn out or any cool variations you try. Sharing those little tweaks is what makes cooking together so rewarding. Here’s to lunchboxes that actually excite the kids (and maybe even the grownups)!
FAQs
How do I keep the chicken crispy without frying?
You can bake the breaded chicken strips at 425°F (220°C) for 15-20 minutes, flipping halfway through. While baking won’t be quite as crunchy as frying, it’s a healthier alternative that still tastes great.
Can I make the wraps ahead of time?
Yes! Assemble the wraps but wrap them tightly in parchment and refrigerate. For best texture, keep the dressing and lettuce separate and add them just before eating if possible.
What can I use instead of Caesar dressing?
Ranch dressing or a simple mixture of Greek yogurt with lemon juice and garlic works well as a substitute if you want a milder or lighter flavor.
Are these wraps freezer-friendly?
It’s best not to freeze fully assembled wraps because the lettuce and dressing get soggy. You can freeze cooked chicken strips separately and thaw them before assembling fresh wraps.
Can I add other veggies to the wraps?
Absolutely! Sliced cucumbers, shredded carrots, or bell peppers add crunch and nutrition. Just keep the veggies dry to avoid sogginess.
Pin This Recipe!
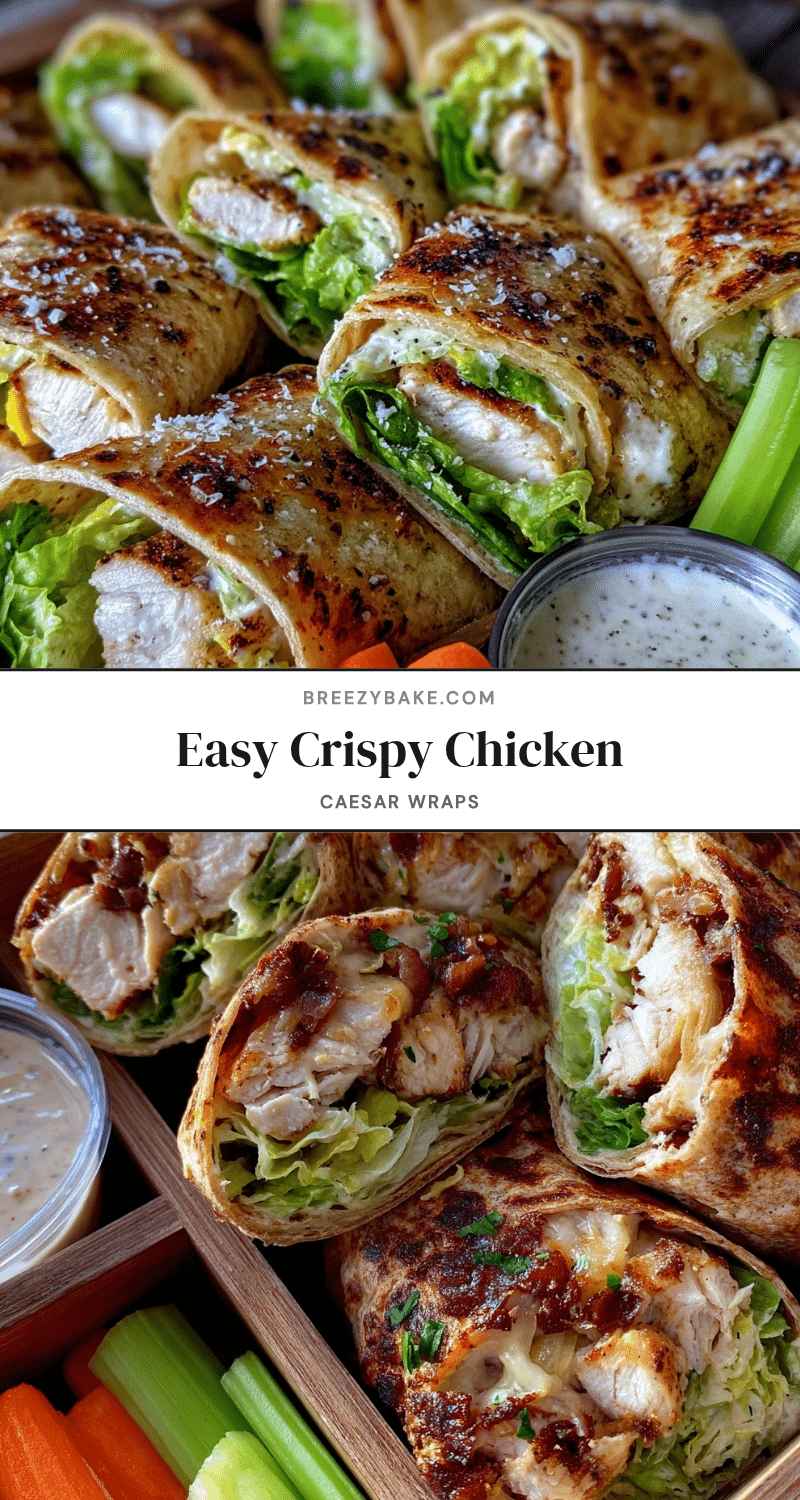
Easy Crispy Chicken Caesar Wraps

A quick and kid-friendly recipe featuring crispy chicken strips, creamy Caesar dressing, and fresh romaine lettuce wrapped in a soft tortilla. Perfect for lunches that stay fresh and crunchy.
- Prep Time: 15 minutes
- Cook Time: 15 minutes
- Total Time: 30 minutes
- Yield: 4 servings 1x
- Category: Main Course
- Cuisine: American
Ingredients
- 2 boneless, skinless chicken breasts, sliced into strips (about 1 lb / 450 g)
- 1 cup all-purpose flour (120 g) – for gluten-free option, use almond flour or gluten-free flour blend
- 2 large eggs, beaten (room temperature)
- 1 cup panko breadcrumbs (100 g)
- 1 tsp garlic powder
- 1 tsp paprika
- Salt and pepper to taste
- 2 tbsp olive oil or avocado oil for frying
- ½ cup mayonnaise (light mayo optional)
- 2 tbsp grated Parmesan cheese
- 1 tbsp lemon juice (freshly squeezed)
- 1 tsp Dijon mustard
- 1 garlic clove, minced or grated
- Salt and pepper to taste
- 4 large flour tortillas (10-inch / 25 cm) – whole wheat works well too
- 2 cups chopped romaine lettuce (about 100 g)
- Optional: sliced cherry tomatoes or cucumber for extra crunch and freshness
Instructions
- Prepare the breading station: In one bowl, mix flour with garlic powder, paprika, salt, and pepper. In a second bowl, beat the eggs. In a third bowl, place the panko breadcrumbs.
- Coat the chicken strips: Dip each strip first into the flour mixture, shaking off excess, then into the eggs, and finally coat well with panko breadcrumbs. Set aside on a plate.
- Heat 2 tablespoons of oil in a large skillet over medium heat until shimmering but not smoking (about 2 minutes).
- Fry the chicken strips in a single layer, cooking 3-4 minutes per side until golden brown and cooked through (internal temperature 165°F / 74°C). Work in batches if needed.
- Drain cooked chicken strips on paper towels and let rest for a few minutes to maintain crispiness.
- Make the Caesar dressing: Whisk together mayonnaise, Parmesan, lemon juice, Dijon mustard, garlic, salt, and pepper in a small bowl. Adjust seasoning to taste.
- Assemble the wraps: Lay tortillas flat, spread a generous spoonful of Caesar dressing evenly on each, add chopped romaine lettuce, arrange 3-4 crispy chicken strips on top, and optionally add sliced cherry tomatoes or cucumbers.
- Fold in the sides of the tortilla and roll tightly from one end to the other like a burrito. Wrap in parchment or foil if packing for later.
Notes
Pat chicken dry before breading to prevent sogginess. Use panko breadcrumbs for extra crunch. Maintain medium oil temperature to avoid greasy or burnt crust. Let chicken rest on paper towels after frying to keep crispiness. Make dressing fresh before assembling to avoid soggy wraps. For a healthier alternative, bake chicken strips at 425°F (220°C) for 15-20 minutes, flipping halfway.
Nutrition
- Serving Size: 1 wrap
- Calories: 425
- Sugar: 2
- Sodium: 550
- Fat: 18
- Saturated Fat: 3.5
- Carbohydrates: 32
- Fiber: 4
- Protein: 30
Keywords: crispy chicken wraps, Caesar wraps, kid-friendly lunch, chicken Caesar wrap, easy lunch recipe, crispy chicken, school lunch ideas


