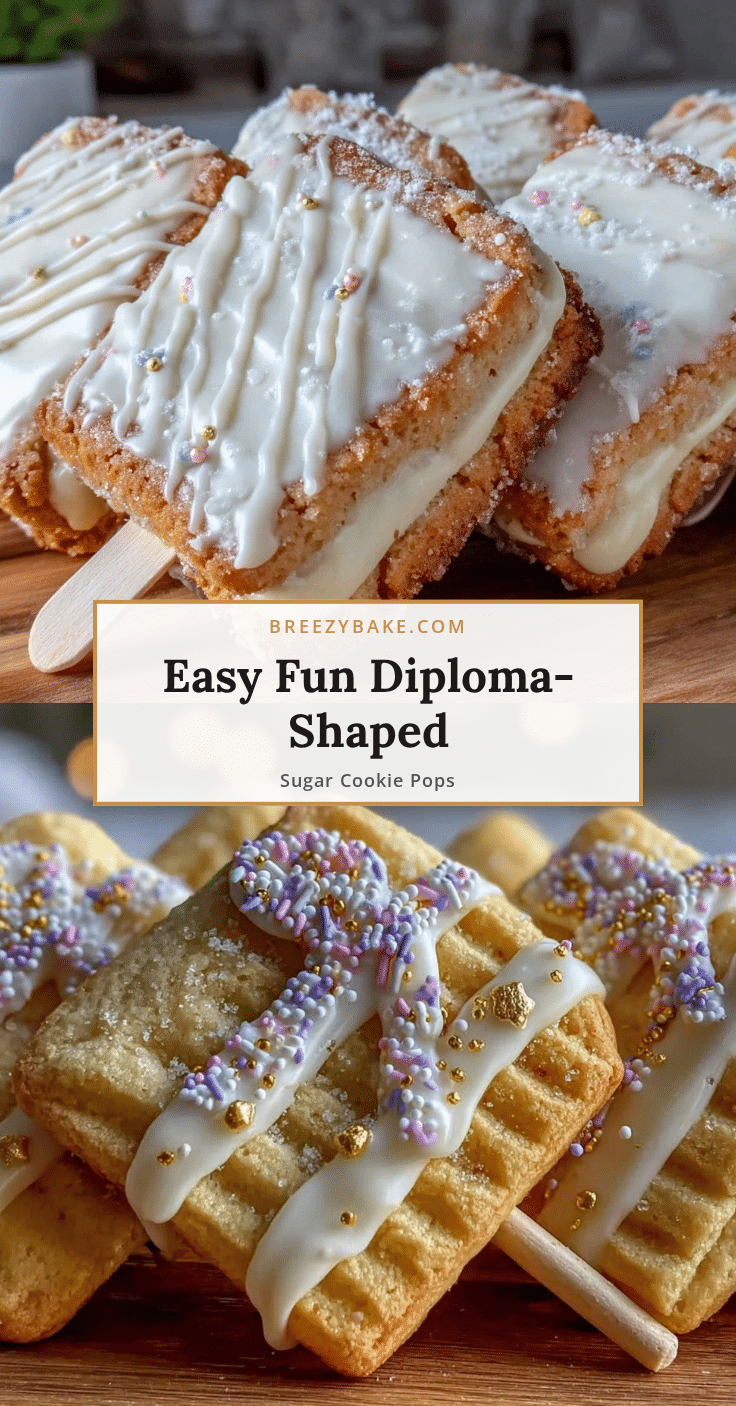
“Can you believe these little diploma cookies? They actually turned out better than I expected,” my friend Lisa said while eyeing the tray of Easy Diploma-Shaped Sugar Cookie Pops I had just pulled from the oven. Honestly, I was skeptical at first—cookie pops shaped like diplomas? It sounded too cutesy for me. But after a hectic morning juggling last-minute celebration prep (because, well, life tosses curveballs), these cookies became my secret weapon.
I whipped up the dough on a whim, thinking it’d be a quick fix for a last-minute graduation party. The simplicity surprised me. The dough rolled out smoothly, and cutting out the little diploma shapes was oddly satisfying. Plus, the pops made them super fun to hand out—no plates, no mess, just sweet little awards everyone could grab and smile at.
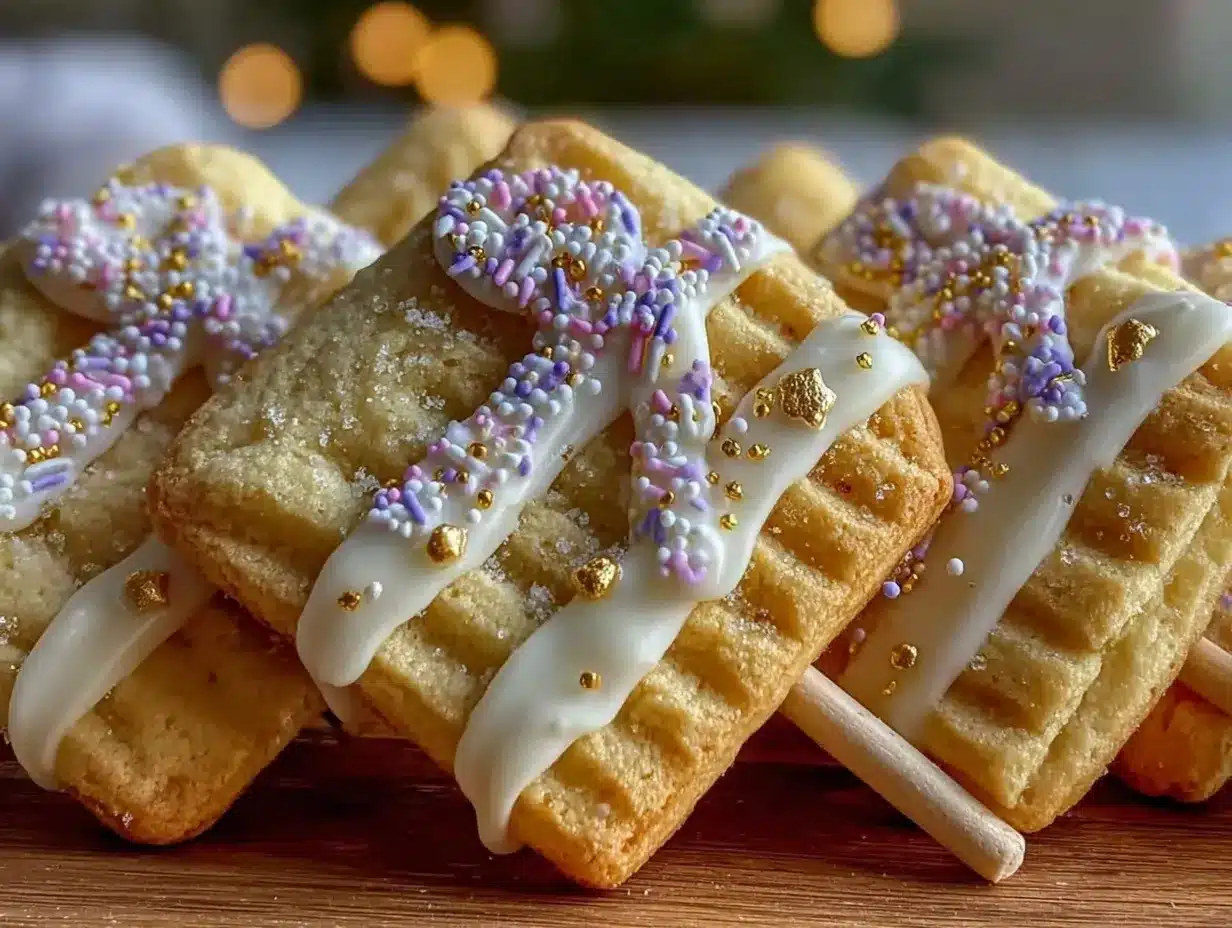
That day, as the kids and adults munched happily, I realized this recipe wasn’t just a novelty. It was approachable, charming, and something that brought a little extra joy to the celebrations. The subtle vanilla scent, the crisp edges, the soft center—honestly, they felt like a mini victory in cookie form. These Easy Diploma-Shaped Sugar Cookie Pops have stuck around in my baking rotation ever since, especially when I want to add a personal touch without fuss. There’s something about those tiny edible diplomas that makes the moment just a bit sweeter.
Why You’ll Love This Recipe
After making these Easy Diploma-Shaped Sugar Cookie Pops a handful of times, I can confidently say they’re a crowd-pleaser for all the right reasons. Here’s why this recipe quickly became a favorite for celebrations:
- Quick & Easy: You can mix, roll, cut, and bake these cookies in under an hour, perfect for last-minute parties or when you’re squeezing baking into a busy schedule.
- Simple Ingredients: No need for specialty items—basic pantry staples like flour, sugar, butter, and vanilla come together to create delicious results.
- Perfect for Celebrations: Whether it’s graduation, a promotion, or a milestone achievement, these diploma-shaped pops add a festive vibe that’s fun and personal.
- Crowd-Pleaser: Kids love the fun shape and the popsicle stick presentation, while adults appreciate the buttery, soft-centered sugar cookie flavor.
- Unbelievably Delicious: The combination of a crisp edge and tender bite with just the right sweetness makes these cookies irresistible.
What sets these diploma cookies apart? It’s the clever use of popsicle sticks that turns ordinary sugar cookies into handheld treats, making them easier to serve and eat at any party. Plus, the icing decoration step is simple enough to customize, so you can make them as fancy or as casual as you like. This isn’t just another sugar cookie recipe—it’s a playful, memorable way to celebrate achievements that feels both thoughtful and fun.
Honestly, after one bite, you might find yourself closing your eyes just a little, savoring that perfect balance of crisp and chew. These pops bring a little extra joy, and that’s exactly why they stick around in my recipe box.
What Ingredients You Will Need
This recipe uses straightforward, wholesome ingredients that come together to create a classic sugar cookie base with a subtle sweetness and tender texture. Most are pantry staples, so no last-minute grocery runs needed!
- All-purpose flour (2 ¾ cups / 345 grams): Provides the structure for the cookies; sifted for a smooth dough.
- Baking powder (1 teaspoon): Gives just enough lift for a light texture without puffing the cookies up too much.
- Salt (½ teaspoon): Balances the sweetness and enhances flavor.
- Unsalted butter (1 cup / 227 grams, softened): The heart of the cookie’s rich, buttery flavor. I recommend using a high-quality brand like Kerrygold for the best results.
- Granulated sugar (1 cup / 200 grams): Sweetens the dough and helps achieve a slight crispness on the edges.
- Large eggs (1, room temperature): Adds moisture and binds the dough.
- Pure vanilla extract (1 ½ teaspoons): For that warm, comforting aroma and depth of flavor.
- Powdered sugar (for the icing): To mix with milk or lemon juice for a simple glaze or royal icing to decorate the diplomas.
- Food coloring (optional): White for the diploma base, and black or gold for details—perfect for making the diplomas pop.
- Popsicle sticks: Essential for turning cookies into pops. Make sure they’re food-safe and about 4-5 inches long.
For the icing, I usually keep it simple with powdered sugar, a splash of milk, and a drop of vanilla. If you want to get fancy, you can use royal icing, which dries harder and is great for detailed decorations. I once swapped the popsicle sticks for lollipop sticks during a supply shortage, and that worked just fine too.
If you’re looking to customize, almond flour can be used for a gluten-free twist, though the texture will be slightly different. For a dairy-free option, swap the butter with coconut oil or plant-based margarine and use a dairy-free milk for the icing.
Equipment Needed
- Mixing bowls: A large one for dry ingredients and another for creaming butter and sugar.
- Electric mixer or stand mixer: Speeds up the creaming process and ensures a smooth dough.
- Rolling pin: For evenly flattening the dough to about ¼ inch (6 mm) thickness.
- Diploma-shaped cookie cutter: Ideally around 3-4 inches long. If you don’t have one, a sharp knife to carefully cut rectangles with a triangular flap works fine.
- Baking sheets: Lined with parchment paper or silicone mats to prevent sticking.
- Popsicle sticks: Inserted carefully before baking or right after removing from the oven while cookies are still warm.
- Cooling racks: For letting the cookies cool completely before decorating.
- Spoons or piping bags: For applying icing and details.
I find that a silicone baking mat makes cleanup a breeze and helps keep cookies from spreading too much. If you don’t have a rolling pin, a clean wine bottle works in a pinch (trust me, I’ve been there). For icing, a simple zip-top bag with a tiny corner snipped off works just as well as a fancy piping bag.
Preparation Method
- Mix dry ingredients: In a medium bowl, whisk together 2 ¾ cups (345 grams) of all-purpose flour, 1 teaspoon baking powder, and ½ teaspoon salt. Set aside.
- Cream butter and sugar: In a large bowl, beat 1 cup (227 grams) softened unsalted butter with 1 cup (200 grams) granulated sugar until light and fluffy, about 3-4 minutes. This step is key for that tender crumb.
- Add egg and vanilla: Beat in 1 large room-temperature egg and 1 ½ teaspoons pure vanilla extract until fully combined.
- Combine wet and dry: Gradually add the flour mixture to the butter mixture, mixing on low speed until just incorporated. Avoid overmixing to keep cookies tender.
- Chill the dough: Wrap the dough in plastic and refrigerate for at least 30 minutes. This firms up the butter and makes rolling easier.
- Preheat oven: Set to 350°F (175°C) and line baking sheets with parchment paper or silicone mats.
- Roll out dough: On a lightly floured surface, roll dough to about ¼ inch (6 mm) thickness. Try to keep it even for uniform baking.
- Cut shapes: Use a diploma-shaped cookie cutter (about 3-4 inches long). If you don’t have one, cut rectangles roughly 3 x 2 inches and trim one short side into a triangle flap to mimic a diploma.
- Insert popsicle sticks: Carefully press a popsicle stick into the bottom of each cookie, about halfway in. If the dough is too firm, bake the cookies first and insert sticks immediately after removing from the oven while still warm.
- Bake: Place cookies on prepared sheets and bake for 10-12 minutes, until edges are lightly golden but centers remain pale.
- Cool completely: Transfer cookies to wire racks. Don’t decorate until fully cool to prevent icing from melting.
- Decorate: Mix powdered sugar with a little milk and vanilla to make a smooth glaze or prepare royal icing. Use white icing for the diploma base and pipe details with black or gold. Personalize with names or simple congratulatory messages.
- Let icing set: Allow decorated cookies to dry at room temperature for several hours or overnight before serving or packaging.
Pro tip: If you notice your dough sticking too much while rolling, pop it back in the fridge for 10 minutes. Also, I like to bake a test cookie first to check if my oven runs hot or cool, adjusting time accordingly.
Cooking Tips & Techniques
One thing I learned early on with these sugar cookie pops is that chilling the dough is non-negotiable. It keeps the cookies from spreading and helps maintain those crisp diploma edges. I once skipped this step in a rush, and the cookies puffed up too much, losing that neat shape.
When inserting the popsicle sticks, if the dough is cold and firm, it can crack. So either insert the sticks just before baking or right after baking while the cookie is still warm and pliable. This little timing trick saved me from broken sticks more than once.
For icing, patience is key. Thin glaze spreads easily but dries soft, while royal icing dries hard and allows for intricate details. I usually use a thicker royal icing for the diploma cord and lettering, so it holds shape better.
Timing-wise, I like to bake in batches and decorate as the cookies cool. Multitasking like this speeds up the whole process and keeps things fresh without the icing drying out prematurely.
And don’t underestimate the power of a light dusting of flour on the rolling surface and rolling pin. It keeps the dough from sticking without adding too much extra flour, which can toughen cookies.
Variations & Adaptations
If you want to mix things up with these diploma cookie pops, here are some ideas I’ve tried or thought would be fun:
- Flavor twists: Add lemon zest or almond extract to the dough for a fresh change. A pinch of cinnamon or nutmeg adds warmth perfect for fall graduations.
- Gluten-free option: Substitute with a gluten-free all-purpose flour blend. I’ve used Bob’s Red Mill 1-to-1 with success, though the texture is a bit more crumbly.
- Decorating themes: Instead of traditional white diplomas, try pastel colors for a springtime celebration or school colors using food coloring for the icing.
- Chocolate-dipped edges: Dip the finished cookies partially in melted chocolate for a classy, indulgent touch—similar to how I’ve enjoyed chocolate-dipped strawberry treats.
- Alternative shapes: If diplomas aren’t on your list, try graduation cap shapes or stars for a related celebration twist.
Personally, I once swapped the popsicle sticks for colorful paper straws during a party, which kids loved for the added fun factor. And if you want to check out more playful cookie ideas, my Pink Velvet Cookie Crumble Board is a fantastic crowd-pleaser with a fun twist.
Serving & Storage Suggestions
These sugar cookie pops are best served at room temperature, so the icing isn’t too hard or sticky. They make adorable party favors or table treats, and their stick format means no forks or plates—just grab and enjoy.
Pair them with a chilled glass of lemonade or a light tea for a refreshing combo. They also complement other celebratory desserts like the creamy strawberry cream puff bars I often make for parties.
To store, keep the cookie pops in an airtight container at room temperature for up to 3 days. If you need longer storage, they freeze well for up to 2 months—just thaw fully before serving to preserve that tender crumb.
When reheating, avoid the microwave as it can melt the icing. Instead, let frozen cookies come to room temperature naturally. Over time, the flavors mellow and the cookie softens slightly, making them even more pleasant to nibble on.
Nutritional Information & Benefits
Each diploma-shaped sugar cookie pop delivers approximately 120-140 calories, depending on the size and amount of icing. The cookies are moderate in fat, primarily from butter, providing a satisfying richness.
While sugar cookies aren’t exactly health food, the recipe uses real butter and eggs, which bring protein and essential fatty acids. Using quality vanilla extract and real ingredients means no artificial additives.
If you’re watching sugar intake, you can reduce the granulated sugar slightly or opt for natural sweeteners in the icing. The recipe is naturally gluten-containing but adaptable with gluten-free flour blends.
From a wellness perspective, these cookies fit well as an occasional treat—offering comfort and joy during meaningful celebrations without overindulgence.
Conclusion
These Easy Diploma-Shaped Sugar Cookie Pops are the kind of recipe that feels like a little celebration in every bite. They’re approachable, charming, and just the right mix of fun and tradition for marking milestones. Plus, their handheld design makes them a standout on any dessert table.
Feel free to customize the decorations or flavors to fit your personal style or event theme. I love how these cookies turn a simple sugar cookie into a memorable keepsake that people actually ask for again.
Whether you’re hosting a graduation party, congratulating a friend, or just want a sweet way to say “You did it,” these pops deliver with ease and charm. I hope you find as much joy making and sharing them as I have. If you try this recipe, I’d love to hear about your decorating twists or party stories!
Happy baking—and here’s to celebrating all the wins, big and small.
FAQs
- Can I make the cookie dough ahead of time? Yes! The dough can be refrigerated for up to 24 hours before rolling and cutting, which can make the process smoother.
- How do I keep the cookies from spreading too much? Chilling the dough before baking and ensuring your oven temperature is accurate helps maintain shape.
- Can I use a different shape instead of a diploma? Absolutely! Graduation caps, stars, or any shape you like can work with this dough recipe.
- Is it better to insert the popsicle sticks before or after baking? Both ways work, but inserting before baking is easier if the dough is pliable; otherwise, insert right after baking while cookies are warm.
- How long does the icing take to dry? Depending on thickness, royal icing can take 2-4 hours to harden; glaze dries faster but remains soft.
Pin This Recipe!
Easy Diploma-Shaped Sugar Cookie Pops Recipe for Perfect Celebrations
These diploma-shaped sugar cookie pops are a quick, easy, and charming treat perfect for celebrations like graduations. They feature a crisp edge, soft center, and fun popsicle stick presentation for easy serving.
- Prep Time: 15 minutes
- Cook Time: 12 minutes
- Total Time: 45 minutes
- Yield: 24 cookie pops 1x
- Category: Dessert
- Cuisine: American
Ingredients
- 2 ¾ cups (345 grams) all-purpose flour
- 1 teaspoon baking powder
- ½ teaspoon salt
- 1 cup (227 grams) unsalted butter, softened
- 1 cup (200 grams) granulated sugar
- 1 large egg, room temperature
- 1 ½ teaspoons pure vanilla extract
- Powdered sugar (for icing)
- Milk or lemon juice (for icing)
- Food coloring (optional, white for base, black or gold for details)
- Popsicle sticks (4-5 inches, food-safe)
Instructions
- In a medium bowl, whisk together flour, baking powder, and salt. Set aside.
- In a large bowl, beat softened butter and granulated sugar until light and fluffy, about 3-4 minutes.
- Beat in the egg and vanilla extract until fully combined.
- Gradually add the flour mixture to the butter mixture, mixing on low speed until just incorporated. Avoid overmixing.
- Wrap the dough in plastic and refrigerate for at least 30 minutes.
- Preheat oven to 350°F (175°C) and line baking sheets with parchment paper or silicone mats.
- Roll dough on a lightly floured surface to about ¼ inch (6 mm) thickness.
- Cut shapes using a diploma-shaped cookie cutter (3-4 inches) or cut rectangles about 3 x 2 inches and trim one short side into a triangle flap.
- Carefully press a popsicle stick halfway into the bottom of each cookie. If dough is too firm, bake cookies first and insert sticks immediately after removing from oven while warm.
- Bake cookies for 10-12 minutes until edges are lightly golden but centers remain pale.
- Transfer cookies to wire racks to cool completely before decorating.
- Mix powdered sugar with a little milk and vanilla to make a glaze or prepare royal icing. Use white icing for the diploma base and pipe details with black or gold. Personalize as desired.
- Allow decorated cookies to dry at room temperature for several hours or overnight before serving or packaging.
Notes
Chill dough for at least 30 minutes to prevent spreading. Insert popsicle sticks before baking if dough is pliable, or immediately after baking while cookies are warm. Use royal icing for detailed decorations and allow icing to dry fully before serving. Dough can be refrigerated up to 24 hours before rolling. For gluten-free, substitute with gluten-free flour blend. For dairy-free, use coconut oil or plant-based margarine and dairy-free milk for icing.
Nutrition
- Serving Size: 1 cookie pop
- Calories: 130
- Sugar: 10
- Sodium: 90
- Fat: 7
- Saturated Fat: 4
- Carbohydrates: 18
- Fiber: 0.5
- Protein: 1.5
Keywords: sugar cookies, diploma cookies, graduation treats, cookie pops, easy sugar cookies, celebration cookies, handheld desserts