That first bite — the way the bread gives just a little, soft and slightly squished, before you hit the salty-sweet pocket of ham and melty cheese — still takes me straight to the backseat of my mom’s minivan. I was maybe seven, soccer practice just ended, and she’d hand me a brown paper bag with an Uncrustable inside, still slightly thawed from the freezer. It was the perfect after-school peace offering. And honestly? I still crave that exact feeling. That reliable, no-drama, perfectly portable little sandwich.
But here’s the thing — I’m not seven anymore. And those store-bought pouches? They’re convenient, sure, but they can be a little, well, bland. The bread gets gummy. The filling can be skimpy. And I started wondering if I could make something even better at home. Something that tasted just as nostalgic, but with real ingredients and a little more love. So I got to work in my kitchen, testing and tweaking, until I landed on these Easy Ham and Cheese Uncrustable Copycat Sandwiches. They’re everything you remember, but better. Way better.
These aren’t just a quick lunch option — they’re a little time capsule. And once you see how simple they are to throw together, you’ll never go back to the boxed version. Trust me on this one.
Why You’ll Love This Recipe
Let me tell you why these copycat sandwiches have become a staple in my house. I’ve tested this recipe about a dozen times — tweaking the bread thickness, the cheese-to-ham ratio, even the crimping method — to make sure every single bite is as good as the one you remember from childhood.
- So Quick & Easy : You can make a whole batch in under 15 minutes. Seriously. Faster than driving to the store.
- Simple Ingredients : Just bread, ham, cheese, and a little butter. You probably have everything right now.
- Perfect for Busy Mornings : Grab one from the freezer, toss it in a lunchbox, and go. No fuss.
- Crowd-Pleaser : My picky nephew devoured three in one sitting. Three! Kids and adults both love them.
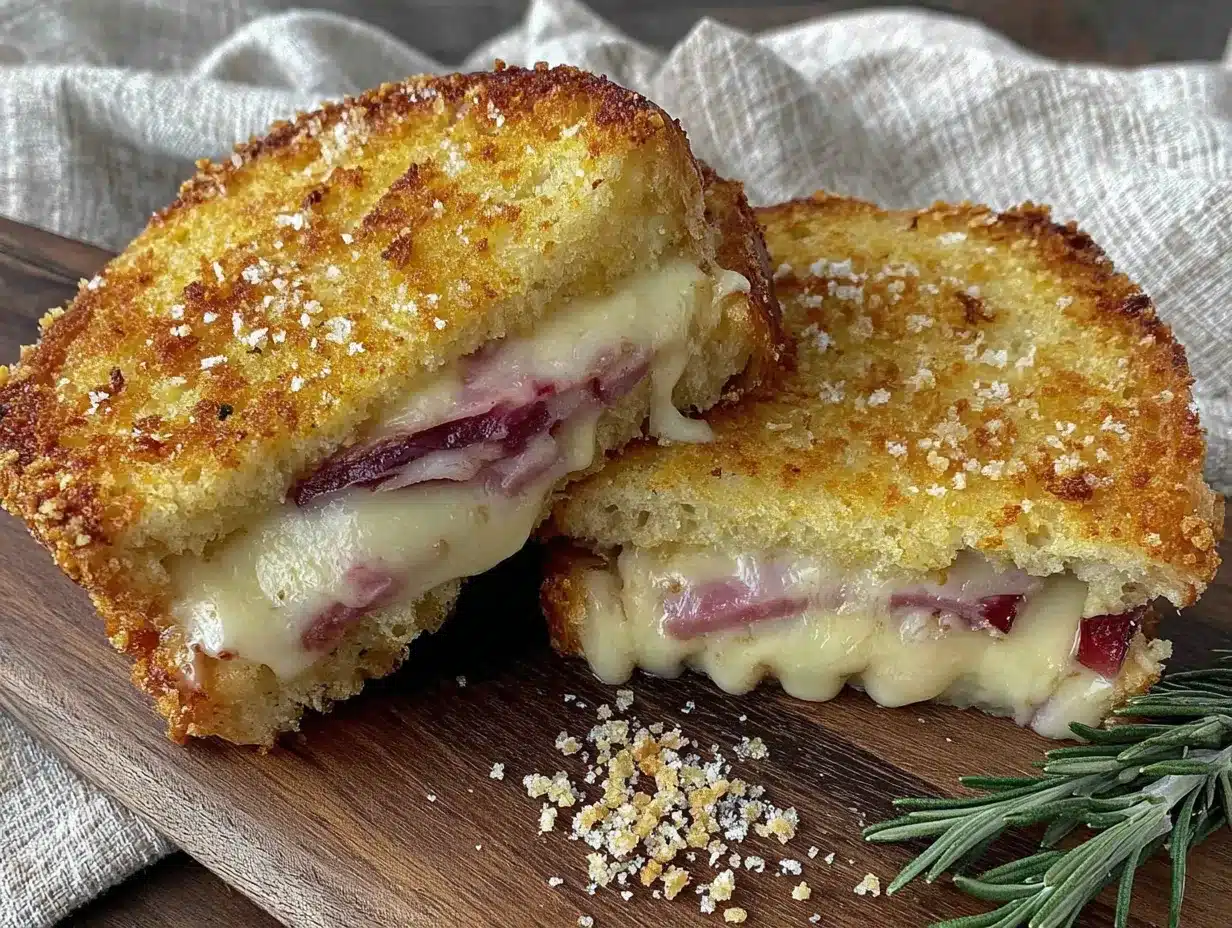
- Unbelievably Delicious : The bread stays soft, the cheese gets perfectly melty, and the ham adds that salty bite. It’s comfort food in a pocket.
What makes this recipe different from the dozens of other copycat versions out there? It’s the technique. I use a simple trick — lightly buttering the outside of the bread before pressing — that gives the crust a golden, slightly crispy edge while keeping the inside soft and pillowy. Plus, I’ve nailed the perfect cheese-to-ham ratio so every bite has that ideal balance. This isn’t just another version. It’s the best version.
This recipe is the kind that makes you close your eyes after the first bite. It’s nostalgia on a plate, but made with real food. Perfect for packing school lunches, grabbing before a road trip, or just treating yourself to a little taste of childhood.
What Ingredients You Will Need
This recipe uses simple, everyday ingredients to create those familiar, comforting flavors. You don’t need anything fancy — just good-quality basics that work together perfectly.
- 8 slices of soft white bread — I prefer a classic brand like Wonder Bread or a good store-brand white bread. The key is softness. It needs to be pliable enough to press and seal without cracking. Avoid crusty or dense artisan breads here.
- 4 ounces of thinly sliced deli ham — Look for honey ham or smoked ham for the best flavor. I like Boar’s Head or Hillshire Farm. Thinner slices press and seal better than thick-cut.
- 4 slices of American cheese — This is non-negotiable for the authentic taste and meltability. American cheese gets perfectly gooey without becoming greasy. If you must substitute, use a good melting cheese like provolone or mild cheddar, but the texture won’t be quite the same.
- 2 tablespoons of salted butter, softened — This is my secret weapon for that lightly crispy, golden crust. Softened butter spreads much easier than cold butter. You can use unsalted butter and add a pinch of salt if you prefer.
Ingredient Tips & Sourcing: For the best results, use bread that’s fresh but not too fresh. Day-old bread actually presses and seals a little better than super-fresh bread because it has slightly less moisture. If your bread is very fresh, you can leave the slices out on the counter for 10-15 minutes before assembling. I also recommend using full-fat American cheese slices from the deli counter rather than the individually wrapped singles — they melt more evenly and taste much better.
Substitution Guidance: Need a gluten-free option? Use your favorite soft gluten-free white bread. For a dairy-free version, use dairy-free cheese slices and vegan butter. Turkey slices work great in place of ham, and you can even use roast beef for a different flavor profile. The technique stays the same no matter what fillings you choose.
Equipment Needed
You don’t need any fancy gadgets for this recipe, which is part of the beauty. Here’s what you’ll need:
- Rolling pin — A standard rolling pin works perfectly. If you don’t have one, a clean wine bottle or even a smooth water bottle will do the trick.
- Round cookie cutter or large glass — You need something about 4-5 inches in diameter to cut the bread into rounds. A wide-mouth mason jar ring works great too.
- Fork — For crimping the edges. A regular dinner fork is all you need.
- Baking sheet — To hold the assembled sandwiches while you work, and for freezing if you’re making a batch.
- Parchment paper — Helps prevent sticking during freezing.
- Skillet or griddle — For toasting the sandwiches. A non-stick skillet works best.
I’ve tried making these with a sandwich press and honestly? A simple skillet gives you more control over the browning. Plus, it’s one less appliance to clean. If you do have a panini press, you can use it on low heat — just watch closely so the bread doesn’t get too crispy.
Preparation Method
Let’s get to the fun part. These come together so fast, you’ll wonder why you ever bought the boxed ones.
- Prepare your work surface. Lay out all your ingredients and equipment. Soften your butter by leaving it out for about 15 minutes, or microwave it for 5-7 seconds. You want it spreadable, not melted.
- Flatten the bread. Take one slice of bread and use your rolling pin to gently flatten it to about half its original thickness. Don’t press too hard — you just want it thin enough to seal easily. Repeat with all 8 slices. This step is crucial for getting that thin, compact Uncrustable texture.
- Cut the bread into rounds. Using your round cookie cutter or glass, cut each flattened bread slice into a circle. Press firmly and twist slightly to get a clean cut. Save the bread scraps for breadcrumbs or croutons — waste not!
- Assemble the sandwiches. Lay out 4 of the bread rounds. Place one slice of American cheese on each round, folding it slightly if needed to fit within the bread. Top with about 1 ounce of ham (roughly 2-3 thin slices), folding the ham to fit neatly. Place the remaining 4 bread rounds on top.
- Seal the edges. This is the most important step. Use your fork to press down firmly around the entire edge of each sandwich, creating a crimped seal. Go around twice to make sure it’s really sealed — you don’t want any cheese leaking out during cooking. The crimp should be about ¼ inch deep.
- Butter the outsides. Spread a thin, even layer of softened butter on the top and bottom of each sealed sandwich. Don’t skip this — it’s what gives you that golden, slightly crispy exterior. Use about ½ teaspoon of butter per side.
- Toast the sandwiches. Heat a non-stick skillet or griddle over medium heat. Place the buttered sandwiches in the skillet, leaving space between them. Cook for 2-3 minutes per side, until golden brown and the cheese is melty. You’ll know they’re ready when the bread is golden and you can see a little cheese starting to peek out at the edges.
- Cool slightly before serving. Let the sandwiches rest on a cutting board for 2-3 minutes before cutting or serving. This helps the cheese set just a bit so it doesn’t all ooze out when you bite into it.
Pro tip: If you’re making a big batch, you can freeze the uncooked, unbuttered sandwiches at this point. Just place them on a parchment-lined baking sheet, freeze until solid (about 2 hours), then transfer to a freezer bag. When you’re ready to eat, thaw in the fridge overnight, then butter and toast as directed.
Cooking Tips & Techniques
After many, many test batches (and a few cheese explosions), here’s what I’ve learned:
Don’t overfill. I know it’s tempting to pile on the ham and cheese, but too much filling makes it impossible to seal the edges properly. Stick to the amounts listed — you’ll get a perfect ratio in every bite.
The butter temperature matters. If your butter is too cold, it’ll tear the bread. Too warm, and it’ll soak in and make the bread soggy. Softened butter that spreads like room-temperature cream cheese is your sweet spot.
Watch your heat. Medium heat is perfect. Too high, and the outside will burn before the cheese melts. Too low, and the bread will dry out before it gets golden. If you’re unsure, err on the side of lower heat and cook a little longer.
Press gently while cooking. Use a spatula to gently press down on the sandwich while it’s cooking. This helps the cheese melt evenly and gives you that flat, compact shape. Don’t squish it — just a gentle press.
I once tried to rush the process by using high heat. The outside was practically black in under a minute, and the cheese inside was still cold and solid. My kids still tease me about the “charcoal sandwiches.” Learn from my mistake and be patient with the heat.
Variations & Adaptations
Once you’ve mastered the basic recipe, the possibilities are endless. Here are some of my favorite variations:
- Turkey and Swiss : Swap the ham for thinly sliced turkey and use Swiss cheese instead of American. Add a thin smear of Dijon mustard for extra flavor.
- Nutella and Banana : For a sweet version, skip the ham and cheese. Spread a thin layer of Nutella on the bread, add a few thin banana slices, and seal. Butter and toast as directed. These are dangerously good.
- Pepperoni Pizza : Use mozzarella cheese and a few slices of pepperoni. Add a teaspoon of pizza sauce in the center before sealing. Dip in warm marinara for the full experience.
- Gluten-Free Option : Use your favorite soft gluten-free white bread. The technique works exactly the same — just be gentle when rolling and sealing, as gluten-free bread can be more delicate.
- Dairy-Free Version : Use dairy-free cheese slices and vegan butter. I’ve had good results with brands like Violife and Miyoko’s.
My personal favorite variation? A ham and cheese with a thin layer of strawberry jam inside. The sweet and salty combo is incredible. It sounds weird, but trust me — it works.
Serving & Storage Suggestions
These sandwiches are best served warm, right after toasting. The cheese is perfectly melty, the bread is soft with a slightly crispy edge — it’s pure comfort.
For serving: Cut the sandwich in half or into quarters for little hands. Serve with a side of fruit, baby carrots, or a handful of chips for a complete lunch. They’re also perfect alongside a warm bowl of tomato soup for dipping.
For storage: Let any leftover cooked sandwiches cool completely, then wrap them individually in plastic wrap. Store in the refrigerator for up to 3 days. To reheat, pop them in a toaster oven or skillet for a few minutes until warm and crispy again. The microwave works in a pinch, but the bread won’t be as crispy.
For freezing: As I mentioned, you can freeze the uncooked, unbuttered sandwiches. They’ll keep in the freezer for up to 3 months. When you’re ready to eat, thaw in the fridge overnight, then butter and toast. Or you can cook them straight from frozen — just add an extra minute or two to the cooking time.
The flavors actually meld together beautifully after a few hours in the fridge. Sometimes I’ll make a batch the night before and just toast them in the morning. The ham and cheese have time to get cozy, and the result is even more flavorful.
Nutritional Information & Benefits
Here’s the estimated nutritional breakdown for one sandwich (using the ingredients listed):
- Calories: Approximately 320-350
- Protein: 16-18g
- Carbohydrates: 28-30g
- Fat: 16-18g
- Calcium: 20% DV (from the cheese)
- Iron: 10% DV (from the bread)
These sandwiches provide a good balance of protein, carbs, and fat to keep you full and satisfied. The ham offers a solid dose of protein and B vitamins, while the cheese adds calcium for strong bones. Using white bread gives you quick energy — perfect for busy kids (and adults) on the go.
For a lighter option, you can use reduced-fat cheese and lean ham. The texture and taste are still great, just slightly less indulgent.
Conclusion
These Easy Ham and Cheese Uncrustable Copycat Sandwiches are everything I loved about the store-bought version, but better. They’re made with real ingredients you can feel good about, they come together in minutes, and they freeze like a dream. Whether you’re packing school lunches, prepping for a busy week, or just craving a little taste of childhood, this recipe delivers every single time.
I’d love to hear how yours turn out! Did you try a fun variation? Did your kids gobble them up? Drop a comment below and let me know. And if you’re looking for more easy lunch ideas, you might also enjoy these healthy chicken veggie skillet wraps — they’re another go-to in my weekly rotation. Happy cooking, friend!
Frequently Asked Questions
Can I make these without a rolling pin?
Absolutely! If you don’t have a rolling pin, just use your hands to gently press and flatten the bread slices. A clean glass jar or even your palm works fine. The goal is just to thin the bread slightly so it seals better.
Why did my cheese leak out during cooking?
This usually happens if the edges aren’t sealed tightly enough. Make sure you’re pressing firmly with your fork and going around the edge twice. Also, don’t overfill the sandwich — too much cheese will inevitably find its way out.
Can I use whole wheat bread instead of white?
You can, but the texture will be a bit different. Whole wheat bread is denser and doesn’t press as thin. If you use it, look for a soft whole wheat variety and be gentle when rolling. The flavor is still great!
How long do these last in the freezer?
Uncooked, unbuttered sandwiches will keep in the freezer for up to 3 months. Just make sure they’re wrapped well to prevent freezer burn. I like to double-wrap them in plastic wrap and then place them in a freezer bag.
Can I make these in an air fryer?
Yes! Preheat your air fryer to 350°F. Place the buttered sandwiches in the basket in a single layer (don’t overcrowd). Cook for 4-5 minutes, flipping halfway through, until golden and melty. The air fryer gives them a nice even crispness.
Pin This Recipe!

Easy Ham and Cheese Uncrustables Copycat Recipe

These Easy Ham and Cheese Uncrustable Copycat Sandwiches are everything you remember from childhood, but better. Made with real ingredients and a simple technique, they come together in under 15 minutes and freeze perfectly for busy mornings.
- Prep Time: 10 minutes
- Cook Time: 6 minutes
- Total Time: 16 minutes
- Yield: 4 servings 1x
- Category: Lunch
- Cuisine: American
Ingredients
- 8 slices of soft white bread
- 4 ounces of thinly sliced deli ham (honey ham or smoked ham)
- 4 slices of American cheese
- 2 tablespoons of salted butter, softened
Instructions
- Prepare your work surface. Lay out all your ingredients and equipment. Soften your butter by leaving it out for about 15 minutes, or microwave it for 5-7 seconds. You want it spreadable, not melted.
- Flatten the bread. Take one slice of bread and use your rolling pin to gently flatten it to about half its original thickness. Don’t press too hard — you just want it thin enough to seal easily. Repeat with all 8 slices.
- Cut the bread into rounds. Using your round cookie cutter or glass, cut each flattened bread slice into a circle. Press firmly and twist slightly to get a clean cut. Save the bread scraps for breadcrumbs or croutons.
- Assemble the sandwiches. Lay out 4 of the bread rounds. Place one slice of American cheese on each round, folding it slightly if needed to fit within the bread. Top with about 1 ounce of ham (roughly 2-3 thin slices), folding the ham to fit neatly. Place the remaining 4 bread rounds on top.
- Seal the edges. Use your fork to press down firmly around the entire edge of each sandwich, creating a crimped seal. Go around twice to make sure it’s really sealed — you don’t want any cheese leaking out during cooking. The crimp should be about ¼ inch deep.
- Butter the outsides. Spread a thin, even layer of softened butter on the top and bottom of each sealed sandwich. Use about ½ teaspoon of butter per side.
- Toast the sandwiches. Heat a non-stick skillet or griddle over medium heat. Place the buttered sandwiches in the skillet, leaving space between them. Cook for 2-3 minutes per side, until golden brown and the cheese is melty.
- Cool slightly before serving. Let the sandwiches rest on a cutting board for 2-3 minutes before cutting or serving.
Notes
For best results, use bread that’s fresh but not too fresh. Day-old bread presses and seals better. If your bread is very fresh, leave slices out for 10-15 minutes before assembling. Use full-fat American cheese slices from the deli counter for better melting. To freeze, place uncooked, unbuttered sandwiches on a parchment-lined baking sheet, freeze until solid (about 2 hours), then transfer to a freezer bag. Thaw in fridge overnight, then butter and toast. For a lighter option, use reduced-fat cheese and lean ham.
Nutrition
- Serving Size: 1 sandwich
- Calories: 335
- Sugar: 3
- Sodium: 950
- Fat: 17
- Saturated Fat: 9
- Carbohydrates: 29
- Fiber: 1
- Protein: 17
Keywords: ham and cheese uncrustables, copycat recipe, easy lunch, freezer-friendly, kid-friendly, homemade uncrustables


