Pumpkin guts everywhere. My fingers were literally stuck together with that slimy orange stringy stuff, and I was already regretting the whole “let’s carve pumpkins” idea I’d had an hour earlier. The kids had lost interest after drawing the faces, and there I was, elbow-deep in a sugar pumpkin wondering why I hadn’t just bought the pre-carved kit from the store. Then I looked at the bowl of seeds sitting on the counter—all rinsed and glistening—and remembered my grandmother’s old trick. She never let a single seed go to waste. Twenty minutes later, the whole house smelled like cinnamon and brown sugar, and those same kids who abandoned their pumpkins were fighting over the last handful of crispy cinnamon sugar pumpkin seeds. That’s the moment I knew this recipe was going to become a yearly tradition.
There’s something about that sweet crunch that just hits different. It’s not like the savory salted versions you see everywhere—though don’t get me wrong, I love those too. This one feels special. Like a treat you actually earned after wrestling with a pumpkin for twenty minutes. And honestly? It’s way easier than you’d think. No complicated steps, no fancy equipment. Just pure, addictive, cinnamon-sugar goodness that makes you wonder why you haven’t been doing this your whole life.
So if you’ve got a pumpkin—or even just a bag of raw pepitas from the store—you’re already halfway there. Let me show you how to turn those humble little seeds into the crunchiest, most irresistible fall snack you’ll ever make.
Why You’ll Love This Recipe
I’ve tested this recipe more times than I care to admit. Burnt batches, soggy batches, batches that somehow tasted like nothing at all. But after all that trial and error, I finally landed on a method that works every single time. Here’s why this version stands out:
- Quick & Easy : From start to finish, you’re looking at about 25 minutes. That’s it. No complicated techniques or waiting around.
- Simple Ingredients : You probably have everything in your pantry right now. Brown sugar, cinnamon, butter, salt. That’s the whole list.
- Perfect for Fall Gatherings : Halloween parties, Thanksgiving dinner, cozy movie nights—these seeds fit right in. I’ve even brought them to a cookie crumble dessert board before and they stole the show.
- Crowd-Pleaser : Kids devour them. Adults sneak handfuls when nobody’s looking. Trust me on this one.
- Unbelievably Delicious : The combination of crunchy texture and warm cinnamon sugar is pure comfort food magic. You’ll find yourself making excuses to eat them.
What makes this recipe different from all the others? It’s the method. Most recipes tell you to boil the seeds first or dry them overnight. Not this one. You get that perfect crunch without any of the fuss. And the cinnamon sugar coating? It actually sticks to the seeds instead of falling off in a sad little pile at the bottom of the bowl. That’s the kind of win we all need in the kitchen.
This is one of those recipes that makes you feel like you’ve discovered a secret. The kind you want to text your friends about. And the best part? You can whip up a batch while watching crispy chicken wing bites for game day—they cook at similar temperatures, so you can multitask like a pro.
What Ingredients You Will Need
This recipe keeps things simple. Just a handful of pantry staples that come together to create something genuinely special. Here’s what you’ll need and why each ingredient matters:
For the seeds:
- Fresh pumpkin seeds – About 1 cup, straight from your pumpkin carving session. Rinsed well and patted dry. The fresher, the better. If you don’t have a pumpkin on hand, raw pepitas from the store work perfectly too.
- Unsalted butter – 2 tablespoons, melted. I use unsalted so I can control the salt level myself. Kerrygold is my go-to brand for the richest flavor, but any good butter works.
For the coating:
- Brown sugar – 2 tablespoons, packed. Light or dark both work, but dark brown sugar gives you a deeper, almost caramel-like flavor. I’ve tested both and honestly, I slightly prefer dark.
- Granulated sugar – 1 tablespoon. This helps create that signature crunch. The brown sugar brings moisture and depth, while the white sugar adds that crackly texture.
- Ground cinnamon – 1 teaspoon. Quality matters here. I’ve tried cheap cinnamon and it just doesn’t pop the same way. Saigon cinnamon is my favorite—it’s stronger and sweeter than regular cassia cinnamon.
- Salt – ¼ teaspoon. Don’t skip this. It balances the sweetness and makes the whole thing taste more rounded. I use fine sea salt.
- Vanilla extract – ½ teaspoon. This is optional but highly recommended. It rounds out the flavors and makes everything taste more… complete. You know what I mean.
Ingredient tips from personal experience:
If you’re using fresh pumpkin seeds, make sure you get all the pumpkin guts off. I know, it’s annoying. But leftover stringy bits burn in the oven and taste bitter. Rinse them in a colander under cold water, then spread them out on a clean kitchen towel and pat them really dry. Wet seeds don’t get crispy—they steam instead.
For the butter, I’ve tried this with coconut oil for a dairy-free version and it worked okay, but honestly? Butter is better. The flavor is richer and the coating sticks better. If you’re dairy-free, use refined coconut oil so you don’t get that coconut taste competing with the cinnamon.
One more thing—if you’re doubling the recipe (and you probably will, trust me), use a larger baking sheet so the seeds aren’t crowded. Crowded seeds steam instead of roasting, and nobody wants soggy seeds.
Equipment Needed
You don’t need much for this recipe, which is part of the beauty. Here’s what you’ll need:
- Baking sheet – A standard half-sheet pan works perfectly. Line it with parchment paper for easy cleanup. I’ve forgotten the parchment before and spent ten minutes scrubbing—learn from my mistakes.
- Mixing bowl – Medium-sized, for tossing the seeds with the butter and sugar mixture.
- Spatula or wooden spoon – For stirring and spreading the seeds evenly on the baking sheet.
- Measuring spoons – For the sugar, cinnamon, and salt. Eyeballing it works in a pinch, but measuring gives you consistent results every time.
- Colander – For rinsing the seeds if you’re using fresh pumpkin seeds.
- Kitchen towel or paper towels – For drying the seeds thoroughly.
If you don’t have parchment paper, you can use a silicone baking mat or just grease the pan lightly with butter. The parchment just makes cleanup ridiculously easy. And if you’re using a dark non-stick baking sheet, keep an eye on the seeds—they brown faster on dark pans. I learned that the hard way with my first batch.
An air fryer also works for this recipe if you want to go that route. Set it to 300°F and cook for about 10-12 minutes, shaking the basket halfway through. The texture comes out slightly different—crispier on the outside, but a tiny bit chewier inside. Both methods are great, but the oven gives you a more even, all-over crunch.
Preparation Method
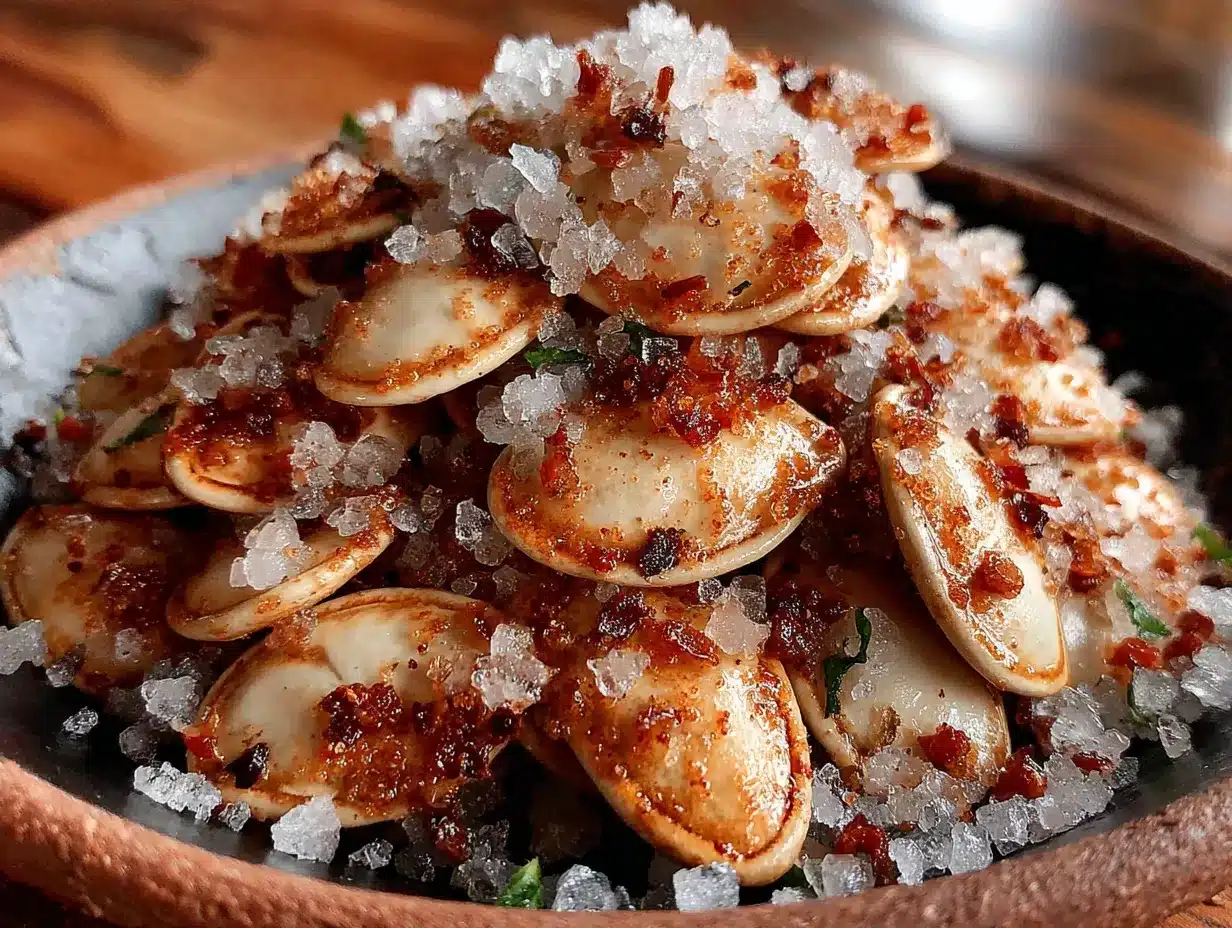
Alright, let’s get to the good part. Here’s exactly how to make these crispy cinnamon sugar pumpkin seeds:
- Preheat your oven to 300°F (150°C). Line a baking sheet with parchment paper. The low temperature is key here—it dries the seeds out slowly without burning the sugar coating.
- Prepare your pumpkin seeds. If using fresh seeds, rinse them in a colander under cold water, removing any pumpkin strings or pulp. Spread them on a clean kitchen towel and pat them very dry. You want them as dry as possible—any moisture left on the seeds will make them steam instead of roast.
- Melt the butter. In a medium microwave-safe bowl, melt 2 tablespoons of unsalted butter. About 30 seconds in the microwave should do it. Let it cool slightly—you don’t want it hot enough to cook the seeds when you toss them.
- Mix the coating. To the melted butter, add 2 tablespoons packed brown sugar, 1 tablespoon granulated sugar, 1 teaspoon ground cinnamon, ¼ teaspoon salt, and ½ teaspoon vanilla extract (if using). Stir until everything is combined and the sugar starts to dissolve slightly.
- Toss the seeds. Add the dried pumpkin seeds to the bowl and stir until every seed is coated in the cinnamon sugar mixture. Make sure you scrape the bottom of the bowl—sometimes the sugar settles there and you don’t want to waste any of it.
- Spread on the baking sheet. Pour the coated seeds onto the prepared baking sheet and spread them into a single layer. Don’t let them pile up on top of each other. If they’re crowded, they won’t get as crispy. Use your spatula to separate any clumps.
- Bake for 20-25 minutes. Place the baking sheet in the preheated oven and bake for 20-25 minutes, stirring halfway through. At the 10-minute mark, take the pan out and give the seeds a good stir with your spatula. This helps them cook evenly and prevents any burning on the edges.
- Check for doneness. The seeds are done when they’re golden brown and smell incredibly fragrant. They’ll still feel slightly soft when you take them out of the oven—that’s normal. They’ll continue to crisp up as they cool. If they look dark brown, you’ve gone too far. Aim for that warm golden color.
- Cool completely. Let the seeds cool on the baking sheet for at least 10-15 minutes. Don’t skip this step! They need this time to develop that signature crunch. If you try to eat them right away, they’ll still be a little soft in the center. Patience, my friend.
- Break apart and enjoy. Once cooled, break apart any clusters that formed during baking. Some clumping is totally normal and actually kind of nice—you get these little clusters of cinnamon-sugar goodness. Transfer to a bowl and try not to eat the entire batch in one sitting (I always fail at this part).
A few notes from my kitchen: Every oven runs a little differently. Your first batch might need a minute or two more or less than mine. Trust your nose and your eyes more than the timer. If you smell that cinnamon getting too toasty, check on them early. And if you’re using a convection oven, reduce the temperature by 25°F—convection ovens cook faster and more evenly.
Also, if you’re making these with kids, let them help with the stirring and spreading. It’s a fun, hands-on activity that makes them excited to try the finished product. Just keep an eye on them around the hot oven.
Cooking Tips & Techniques
After making these seeds more times than I can count, I’ve picked up a few tricks that make a real difference. Here’s what I wish someone had told me from the start:
The drying step matters more than you think. I know it’s tempting to skip the towel-drying and just toss wet seeds in the butter mixture. Don’t. Wet seeds steam in the oven, and steaming gives you chewy, sad seeds instead of crispy, glorious ones. Take the extra two minutes to pat them dry. Your future self will thank you.
Low and slow is the way to go. I tried making these at 350°F once because I was in a hurry. Big mistake. The sugar burned before the seeds had a chance to dry out properly. 300°F is the sweet spot—it dries the seeds out gradually while the sugar caramelizes into that perfect crunchy coating.
Stirring halfway through isn’t optional. I’ve forgotten to stir before, and the seeds on the edges of the pan got way darker than the ones in the middle. Set a timer for 10 minutes, stir them around, and put them back in. It takes five seconds and makes a huge difference.
Watch for the “cooling crunch.” This is the thing that trips most people up. When you pull the seeds out of the oven, they’ll still feel a little soft. That’s okay! They firm up as they cool. If you wait until they feel crispy in the oven, you’ve overcooked them. Trust the cooling process.
Don’t overcrowd the pan. I made this mistake with a double batch once, thinking I could just pile them all on one sheet. Nope. The seeds on the bottom steamed instead of roasted, and the whole batch came out uneven. Use two pans if you’re doubling, or bake in batches.
One more thing— if you’re making these for a party or gathering, they’re great paired with other snacks. I’ve served them alongside crispy loaded bacon cheeseburger tater tot casserole for a fun fall dinner party, and the sweet-salty combo was a hit.
Variations & Adaptations
One of the best things about this recipe is how easy it is to tweak. Here are some variations I’ve tried and loved:
Spiced Pumpkin Seeds – Add ¼ teaspoon each of ground ginger, nutmeg, and allspice along with the cinnamon. It gives you that classic pumpkin pie spice flavor that’s perfect for Thanksgiving. I made this version last year and my aunt asked for the recipe before she even finished her first handful.
Maple Cinnamon Seeds – Swap the brown sugar for 2 tablespoons of pure maple syrup. The flavor is slightly less sweet but has this deep, woodsy warmth that’s amazing. Just note that maple syrup makes the seeds a tiny bit stickier—they won’t be as crunchy, but they’re still delicious.
Savory-Sweet Combo – Reduce the brown sugar to 1 tablespoon and add ½ teaspoon of smoked paprika and a pinch of cayenne pepper. The smoky heat pairs beautifully with the sweet cinnamon. This is my husband’s favorite version—he calls them “campfire seeds.”
Chocolate Cinnamon Seeds – After the seeds have cooled, drizzle them with melted dark chocolate and let it set. The combination of crunchy cinnamon seeds and rich dark chocolate is absolutely addictive. I made these for a chocolate dipped strawberry coconut bars platter once and they disappeared first.
Air Fryer Version – If you don’t want to heat up your oven, the air fryer works great. Cook at 300°F for 10-12 minutes, shaking the basket halfway through. The texture is slightly different—a bit more crunchy on the outside—but still delicious. Just keep an eye on them because air fryers run hot.
Vegan Option – Use melted coconut oil or vegan butter instead of regular butter. I’ve tested this with both, and coconut oil gives a slightly different flavor while vegan butter is almost indistinguishable from the original. Just make sure your sugar is vegan-friendly (most are, but some brands use bone char in processing).
Gluten-Free – This recipe is naturally gluten-free! No substitutions needed. Just double-check your vanilla extract if you’re sensitive—some brands use alcohol derived from wheat.
Serving & Storage Suggestions
These crispy cinnamon sugar pumpkin seeds are versatile little things. Here’s how to serve and store them:
Serving temperature: Room temperature is best. The crunch is most satisfying when they’ve had time to cool completely. If you’re serving them warm, they’ll still taste great but won’t have that same crackly texture.
Presentation ideas: I like to serve them in a big wooden bowl or a mason jar for that rustic fall vibe. They also look gorgeous sprinkled over a bowl of vanilla ice cream or yogurt parfait. For parties, set them out in small cups so people can grab and go without making a mess.
What to serve them with: These seeds pair beautifully with hot apple cider, pumpkin spice lattes, or even a glass of cold milk. They’re also amazing on top of a fall salad with mixed greens, dried cranberries, and goat cheese. The sweet crunch adds so much texture.
Storage instructions: Store cooled seeds in an airtight container at room temperature for up to 2 weeks. I use a glass jar with a tight-fitting lid. Don’t refrigerate them—the moisture in the fridge will make them lose their crunch.
Freezing tips: You can freeze these seeds for up to 3 months. Let them cool completely, then transfer to a freezer-safe bag or container. When you’re ready to eat them, let them thaw at room temperature for about 15 minutes. They might lose a tiny bit of crunch, but they’re still delicious. I’ve also reheated frozen seeds in a 300°F oven for 5 minutes to refresh the texture.
How flavors develop: Honestly, these seeds are best within the first 3-4 days. That’s when the crunch is most intense and the cinnamon flavor is brightest. After about a week, they start to soften slightly. They’re still good—just not as crispy. If that happens, you can pop them back in a 300°F oven for 5 minutes to revive them.
Pro tip: If you’re making these for a party, make them the day before. They actually taste even better after sitting overnight—the flavors have time to meld and deepen. Just make sure they’re completely cool before you store them, or condensation will make them soggy.
Nutritional Information & Benefits
Let’s be real—these are a treat, not a health food. But they’re not as bad as you might think. Here’s the breakdown:
Estimated nutrition per serving (¼ cup):
- Calories: 180
- Total Fat: 12g
- Saturated Fat: 4g
- Carbohydrates: 16g
- Fiber: 2g
- Sugar: 10g
- Protein: 5g
- Sodium: 150mg
Health benefits of key ingredients: Pumpkin seeds are actually pretty nutritious. They’re packed with magnesium, zinc, and healthy fats. Magnesium is great for sleep and muscle recovery, while zinc supports your immune system—perfect for fall when everyone’s getting colds. The cinnamon adds antioxidants and may help with blood sugar regulation. So while these aren’t exactly a health food, you’re getting some good stuff with your sugar fix.
Dietary considerations: This recipe is naturally gluten-free and can be made vegan with a simple swap. It’s also nut-free, which makes it a safe option for school snacks or parties. The main allergens to watch for are dairy (from the butter) and possibly the vanilla extract if you’re sensitive.
My personal take: I don’t believe in labeling foods as “good” or “bad.” These seeds are a fun, seasonal treat that brings joy and crunch to your fall celebrations. Enjoy them in moderation, share them with friends, and don’t stress about the sugar content. Life’s too short for that.
Frequently Asked Questions
Can I use store-bought pepitas instead of fresh pumpkin seeds?
Absolutely! Raw pepitas work perfectly. Just skip the rinsing and drying steps, and toss them straight into the butter mixture. The cooking time might be slightly shorter since they’re already dry, so check them at the 15-minute mark.
Why are my pumpkin seeds chewy instead of crispy?
This usually happens for one of three reasons: they weren’t dried thoroughly before baking, they were overcrowded on the pan, or they weren’t baked long enough. Make sure to pat them really dry, spread them in a single layer, and bake until golden brown. Also, remember they’ll crisp up more as they cool.
Can I make these in an air fryer?
Yes! Set your air fryer to 300°F and cook for 10-12 minutes, shaking the basket halfway through. Keep an eye on them because air fryers can run hot. The texture will be slightly different—a bit crunchier on the outside—but still delicious.
How long do these stay fresh?
Stored in an airtight container at room temperature, they’ll stay fresh and crispy for up to 2 weeks. After that, they start to soften. If they lose their crunch, pop them back in a 300°F oven for 5 minutes to revive them.
Can I reduce the sugar in this recipe?
You can, but it will affect the texture and flavor. The sugar helps create that signature crunch and caramelized coating. If you reduce it too much, the seeds won’t be as crispy and the cinnamon flavor won’t pop as much. I’d recommend cutting it by no more than half if you’re watching your sugar intake.
Conclusion
These crispy cinnamon sugar pumpkin seeds are one of those recipes that feels like a secret worth sharing. They’re simple enough to make on a whim, special enough to serve at a party, and delicious enough to disappear in minutes. Every time I make them, I’m reminded that the best recipes often come from the most unexpected places—like a sink full of pumpkin guts and a last-minute decision to not let anything go to waste.
I hope you give these a try, whether you’re carving pumpkins with your kids, looking for a fun fall snack, or just want something sweet and crunchy to munch on. Feel free to play around with the spices and make them your own. That’s the beauty of a simple recipe—it leaves room for your creativity.
If you make these, I’d love to hear how they turned out. Leave a comment below, tag me in your photos, or share your own twist on the recipe. And if you’re looking for more fall-inspired treats, check out some of the other recipes on the blog. There’s always something new to try.
Happy snacking, my friend. You’ve earned it.
Pin This Recipe!
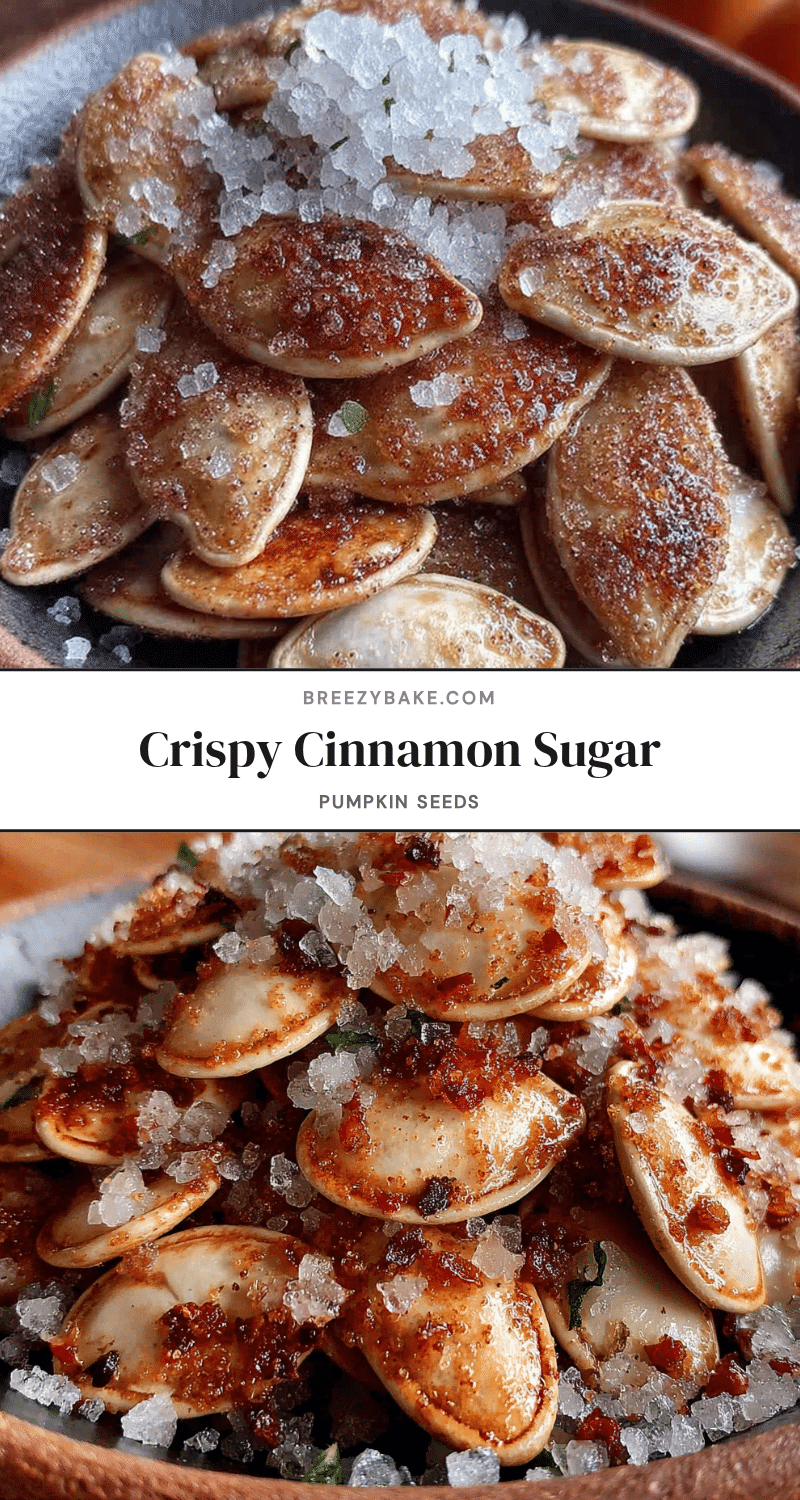
Easy Homemade Crispy Cinnamon Sugar Pumpkin Seeds

Transform fresh pumpkin seeds into a crunchy, addictive fall snack with a sweet cinnamon sugar coating. This quick and easy recipe is perfect for Halloween parties, Thanksgiving gatherings, or cozy movie nights.
- Prep Time: 10 minutes
- Cook Time: 25 minutes
- Total Time: 35 minutes
- Yield: 4 servings 1x
- Category: Snack
- Cuisine: American
Ingredients
- 1 cup fresh pumpkin seeds (or raw pepitas)
- 2 tablespoons unsalted butter, melted
- 2 tablespoons packed brown sugar (light or dark)
- 1 tablespoon granulated sugar
- 1 teaspoon ground cinnamon (preferably Saigon cinnamon)
- ¼ teaspoon fine sea salt
- ½ teaspoon vanilla extract (optional)
Instructions
- Preheat your oven to 300°F (150°C). Line a baking sheet with parchment paper.
- If using fresh seeds, rinse them in a colander under cold water, removing any pumpkin strings or pulp. Spread on a clean kitchen towel and pat very dry.
- In a medium microwave-safe bowl, melt 2 tablespoons of unsalted butter. Let it cool slightly.
- To the melted butter, add 2 tablespoons packed brown sugar, 1 tablespoon granulated sugar, 1 teaspoon ground cinnamon, ¼ teaspoon salt, and ½ teaspoon vanilla extract (if using). Stir until combined.
- Add the dried pumpkin seeds to the bowl and stir until every seed is coated.
- Pour the coated seeds onto the prepared baking sheet and spread into a single layer.
- Bake for 20-25 minutes, stirring halfway through at the 10-minute mark.
- The seeds are done when golden brown and fragrant. They will still feel slightly soft but will crisp up as they cool.
- Let the seeds cool on the baking sheet for at least 10-15 minutes.
- Once cooled, break apart any clusters and enjoy.
Notes
For best results, dry seeds thoroughly before baking to ensure crispiness. Low and slow roasting at 300°F prevents burning. Seeds will continue to crisp as they cool. Store in an airtight container at room temperature for up to 2 weeks. For a vegan option, use melted coconut oil or vegan butter.
Nutrition
- Serving Size: ¼ cup
- Calories: 180
- Sugar: 10
- Sodium: 150
- Fat: 12
- Saturated Fat: 4
- Carbohydrates: 16
- Fiber: 2
- Protein: 5
Keywords: pumpkin seeds, cinnamon sugar, fall snack, Halloween, Thanksgiving, crispy, easy, homemade


