The kitchen timer had just clicked off, and I was standing there in the dark at 9 PM on a Tuesday, spatula in hand, staring at a cake pan full of what looked like a sugary science experiment gone wonderfully right. It was late October, the kind of night where the wind rattles the windows just enough to make you pull your sweater tighter. And the only thing I wanted was a slice of that easy Halloween monster cookie cake I had thrown together on a whim.
Honestly, I hadn’t planned on making a monster. I was supposed to be making regular cookies. But the butter was too soft, the kids were hyped on candy corn, and somewhere between measuring the M&Ms and the chocolate chips, I just thought—why not pile it all into one pan and call it a monster? So I did. And that first bite? It was soft, chewy, packed with peanut butter, and studded with enough candy to make any goblin proud. It was the kind of accidental win that makes you feel like a kitchen genius when you were really just being lazy.
That cake has become our Halloween tradition. Not the fancy, frosted kind you see on magazine covers. Just a messy, glorious, sprinkle-covered sheet of pure joy. It is the dessert that says, “I tried, but I also want to have fun.” And honestly, that is the best kind of Halloween treat.
So if you are looking for a dessert that feels festive without the fuss, this easy monster cookie cake is it. Let me show you how to make it.
Why You Will Love This Recipe
I have tested this recipe about seven times now. Seven times, you guys. I have made it with crunchy peanut butter, creamy peanut butter, and even that weird all-natural stuff that separates in the jar. I have baked it in a round pan, a square pan, and once, in a pinch, a loaf pan (do not recommend). And after all that trial and error, I can tell you with confidence—this version is the one.
- Quick & Easy: From mixing bowl to oven in under 15 minutes. No chilling, no rolling, no fuss. Perfect for those “I need a Halloween dessert right now” moments.
- Simple Ingredients: You probably have most of these in your pantry already. Flour, sugar, eggs, peanut butter, and a bag of your favorite candy. No fancy extracts or hard-to-find decorations.
- Perfect for Halloween Parties: This cake is a crowd-pleaser in the best way. Kids love the candy overload, and adults love that it tastes like a giant, soft-baked cookie.
- Naturally Gluten-Free Friendly: With a simple swap of the flour, this recipe adapts beautifully for gluten-free diets. I have made it with a 1:1 gluten-free flour blend and no one could tell the difference.
- Unbelievably Delicious: The texture is the real star here. It is soft and chewy in the center, slightly crisp around the edges, and packed with peanut butter flavor that perfectly balances all that sweetness.
What makes this different from other Halloween desserts? It is not overly complicated. It does not require special decorating skills or a piping bag. It is honest, straightforward baking that delivers every single time. And when you take that first bite, warm from the oven with a glass of cold milk, you will understand why this is the only Halloween dessert I make anymore.
What Ingredients You Will Need
This recipe uses simple, everyday ingredients to create something that tastes anything but ordinary. The magic is in the combination of peanut butter and candy, but each component plays a role in getting that perfect chewy texture.
- Unsalted butter, softened: 1/2 cup (1 stick) — Make sure it is truly softened to room temperature. Cold butter will not cream properly with the sugars, and melted butter will change the texture entirely. I like using Land O’Lakes for consistent results.
- Peanut butter: 1/2 cup (about 130g) — Use creamy peanut butter for the smoothest texture. I prefer Jif or Skippy for this recipe because they have a bit of sugar and salt already, which helps the flavor. Natural peanut butter works but may make the cake slightly more crumbly.
- Granulated sugar: 1/2 cup (100g) — Adds sweetness and helps with browning.
- Light brown sugar, packed: 1/2 cup (100g) — This is crucial for moisture and that soft, chewy texture. Do not skip it or substitute with white sugar.
- Large egg: 1 — Room temperature is best. If you forgot to take it out of the fridge, place it in a bowl of warm water for 5 minutes.
- Vanilla extract: 1 teaspoon — Pure vanilla extract makes a difference here. Imitation will work, but the flavor will be noticeably less rich.
- All-purpose flour: 1 1/2 cups (about 190g) — Spoon and level your flour. Scooping directly from the bag can pack it down and make the cake dry. For a gluten-free version, use a 1:1 gluten-free baking flour blend like Bob’s Red Mill.
- Baking soda: 1 teaspoon — The leavening agent that gives the cake a little lift.
- Salt: 1/2 teaspoon — Balances the sweetness and enhances the peanut butter flavor.
- M&Ms: 1/2 cup — The classic monster cookie candy. I use the regular milk chocolate ones, but peanut M&Ms or mini M&Ms work great too. For Halloween, grab the orange, brown, and green bags.
- Semi-sweet chocolate chips: 1/2 cup — Adds pockets of melted chocolate throughout. You can swap with milk chocolate chips for a sweeter cake, or dark chocolate chips for a more grown-up flavor.
- Halloween sprinkles: 1/4 cup (optional, for topping) — The fun part! Use any mix of orange, black, and green sprinkles, or go wild with eyeball sprinkles for a truly monster look.
Pro tip: If you want extra monster vibes, add 1/4 cup of candy corn or chopped Reese’s Pieces to the mix. Just be careful not to overload the batter or the cake might not hold together.
Equipment Needed
You do not need a fancy kitchen to make this cake. Here is what you will need:
- 9-inch round or square cake pan — I prefer a metal pan for even baking. Glass pans work too, but you may need to add a few minutes to the baking time.
- Large mixing bowl — For creaming the butter and sugars.
- Electric hand mixer or stand mixer — You can mix by hand, but a mixer makes creaming the butter and sugar much easier and gives a better texture.
- Rubber spatula — For scraping down the bowl and folding in the candies.
- Measuring cups and spoons — Accurate measurements are key for baking.
- Parchment paper — Not strictly necessary, but it makes lifting the cake out of the pan a breeze. I never skip it.
- Cooling rack — Allows air to circulate around the cake so it cools evenly.
If you do not have a hand mixer, a wooden spoon and some elbow grease will work. I have made this cake by hand before, and while it took a little longer, it turned out just as delicious. Budget-friendly tip: a basic hand mixer costs around $15 and is one of the best investments for any home baker.
Preparation Method
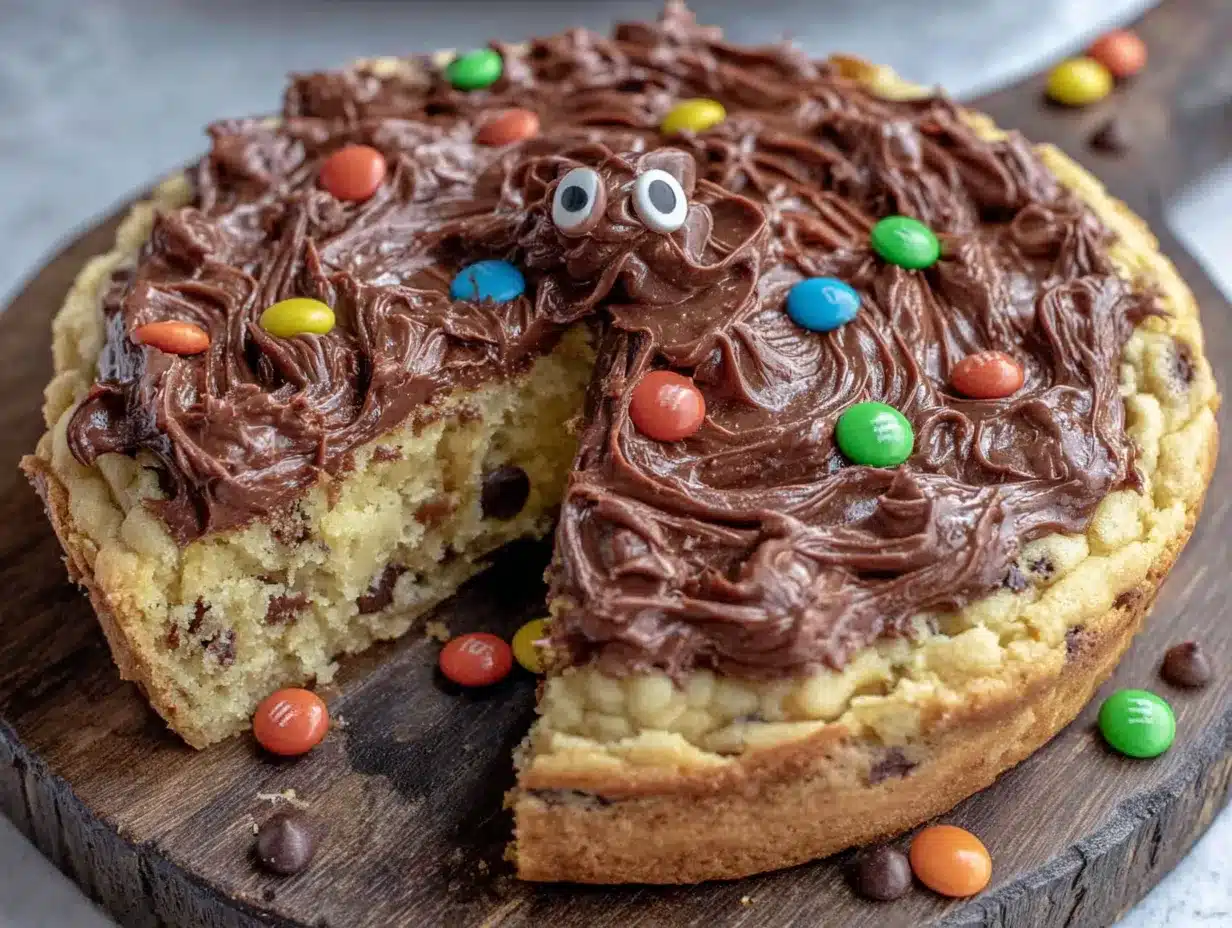
Alright, let us get baking. This is the fun part.
- Preheat your oven to 350°F (175°C). Line your 9-inch cake pan with parchment paper or lightly grease it with non-stick spray. I like to let the parchment hang over the edges a bit so I can lift the cake out easily later.
- In your large mixing bowl, cream together the softened butter, peanut butter, granulated sugar, and brown sugar. Beat on medium speed for about 2-3 minutes, until the mixture is light, fluffy, and pale in color. Scrape down the sides of the bowl halfway through. This step is important—do not rush it. Proper creaming incorporates air, which gives the cake a softer texture.
- Add the egg and vanilla extract. Beat on low speed until just combined. The mixture might look a little curdled at this point—that is totally normal. Do not panic.
- In a separate small bowl, whisk together the flour, baking soda, and salt. This ensures the leavening agent is evenly distributed. Nobody wants a pocket of baking soda in their cake.
- Gradually add the dry ingredients to the wet ingredients. Mix on low speed, adding about a third of the flour mixture at a time. Mix until just combined—overmixing at this stage will make the cake tough. You should see a few streaks of flour remaining.
- Fold in the M&Ms and chocolate chips. Use your rubber spatula for this. Gently fold until the candies are evenly distributed throughout the batter. The batter will be thick and slightly sticky—that is what we want.
- Transfer the batter to your prepared pan. Use the spatula to spread it evenly. The batter is thick, so you will need to press it into the corners. It does not need to be perfectly smooth—a rustic top is part of the charm.
- Sprinkle the Halloween sprinkles on top. Press them in gently so they stick to the batter. This is where you can get creative—add extra M&Ms, candy eyes, or even a drizzle of melted white chocolate after baking.
- Bake for 22-25 minutes. The cake is done when the edges are golden brown and set, but the center still looks slightly soft and puffed. A toothpick inserted into the center should come out with a few moist crumbs, not raw batter. Be careful not to overbake—this cake is meant to be soft and chewy, not dry.
- Let the cake cool in the pan for 10 minutes. Then, using the parchment paper, lift it out and transfer it to a cooling rack. Let it cool completely before slicing, if you can wait that long. I usually cannot.
Sensory cue: Your kitchen will smell like a peanut butter cookie dream. The top should be lightly golden, and the edges will look slightly crisp. When you press the center gently, it should spring back just a little.
Cooking Tips & Techniques
I have made every mistake you can imagine with this cake. Here is what I learned so you do not have to.
Do not overbake. This is the number one mistake. Because this is a “cake” that acts like a cookie, it is easy to leave it in the oven too long, thinking it needs to be fully set. It does not. The carryover heat will continue to cook the center after you pull it out. Trust the toothpick test—a few moist crumbs are perfect.
Use room temperature ingredients. Cold eggs or cold butter will not cream properly. If your butter is too cold, cut it into small cubes and microwave it in 5-second bursts until it is soft but not melted. Melted butter will change the texture and make the cake greasy.
Chill the dough if you have time. I know I said this recipe is quick, but if you can spare 20 minutes to chill the batter in the pan before baking, it will spread less and bake up thicker. I have done it both ways, and the chilled version is slightly chewier.
Press the candies into the top. As the cake bakes, the M&Ms and chocolate chips tend to sink into the batter. Before baking, I like to press a few extra M&Ms and sprinkles into the top of the batter so they stay visible. It makes the finished cake look more festive.
Let it cool completely before slicing. I know it is tempting, but warm cake is fragile. If you cut into it too soon, it will crumble. If you absolutely must have a warm slice (and I get it), use a sharp serrated knife and cut gently.
Variations & Adaptations
This recipe is incredibly forgiving. Here are some ways to make it your own.
- Gluten-Free: Substitute the all-purpose flour with a 1:1 gluten-free baking flour blend. I have used Bob’s Red Mill and King Arthur Measure for Measure with great results. The texture will be slightly more crumbly, but the flavor is spot on.
- Dairy-Free: Use vegan butter (like Earth Balance) and dairy-free chocolate chips. Check your M&Ms—the classic ones contain milk, but there are dairy-free alternatives available.
- Nut-Free: Replace the peanut butter with sunflower seed butter (like SunButter). The color will turn a little green from a natural reaction with the baking soda, but it tastes great. Just make sure your other ingredients are nut-free as well.
- Extra Monster Vibes: Fold in 1/4 cup of candy corn or chopped pretzels for a sweet-and-salty crunch. I tried this last Halloween and it was a huge hit with the kids.
- Chocolate Base: Replace 1/4 cup of the flour with unsweetened cocoa powder for a chocolate monster cookie cake. Reduce the M&Ms slightly and add white chocolate chips for contrast.
- Mini Version: Make this into monster cookie bars by pressing the batter into a 9×13 pan and baking for 18-20 minutes. Cut into squares and serve.
My personal favorite variation? I swap out the semi-sweet chips for white chocolate chips and add a handful of dried cranberries. It sounds weird, but the tartness of the cranberries cuts through the sweetness perfectly. It is my “adult” version when I do not want to share with the kids.
Serving & Storage Suggestions
This cake is best served at room temperature or slightly warm. If you want to reheat a slice, pop it in the microwave for about 10-15 seconds. The chocolate chips get all melty and wonderful.
For presentation, I like to place the whole cake on a festive Halloween platter and let everyone cut their own slice. It is casual and fun. You can also dust the top with a little powdered sugar for a slightly more polished look. Or, if you are really going for the monster theme, stick a few candy eyeballs on top with a dab of frosting.
This cake pairs beautifully with a tall glass of cold milk or a scoop of vanilla ice cream. For a grown-up twist, serve it alongside a cup of hot coffee or a dark beer like a stout—the bitterness balances the sweetness.
Storage: Store leftover cake in an airtight container at room temperature for up to 3 days. Do not refrigerate it—the fridge will dry it out and make the texture dense. If you live in a warm climate, you can refrigerate it, but let it come to room temperature before serving.
Freezing: This cake freezes beautifully. Wrap the completely cooled cake (whole or in slices) tightly in plastic wrap, then in a layer of aluminum foil. Freeze for up to 3 months. Thaw at room temperature for about an hour before serving. The texture will be just as good as fresh.
One thing I have noticed: the flavors actually get better on day two. The peanut butter and candy have time to meld together, and the texture becomes even chewier. If you can resist eating it all on day one, you are in for a treat.
Nutritional Information & Benefits
Let us be real—this is a treat. It is not health food. But that does not mean it cannot be part of a balanced life. Here is the estimated nutritional breakdown per slice (based on 8 servings):
| Nutrient | Amount per Slice |
|---|---|
| Calories | ~420 |
| Fat | 22g |
| Carbohydrates | 52g |
| Protein | 8g |
| Sugar | 35g |
| Fiber | 2g |
The peanut butter provides a decent amount of protein and healthy fats, which helps keep you fuller longer. The dark chocolate chips (if you use them) contain antioxidants. And honestly? Sometimes the best thing you can do for your mental health is eat a slice of cake and enjoy every single bite.
This recipe is naturally vegetarian and can easily be made gluten-free and dairy-free with substitutions. It contains peanuts, dairy, and gluten (unless modified). Always check your candy labels if you have allergies.
Conclusion
This easy Halloween monster cookie cake is the kind of dessert that makes you feel like a kid again. It is messy, it is fun, and it is absolutely delicious. No fancy techniques, no stress—just good old-fashioned baking with a spooky twist.
I love this recipe because it reminds me that cooking does not have to be perfect to be special. That Tuesday night, standing in the dark kitchen with a spatula in my hand, I was not trying to impress anyone. I was just trying to make something that tasted like Halloween. And you know what? It worked.
Now it is your turn. I want to see your monster cakes! Tag me in your photos, leave a comment below telling me what candy you used, or share your own twist on this recipe. Did you add candy corn? Use white chocolate chips? Make it gluten-free? I want to hear all about it.
Go ahead, get a little messy. Halloween only comes once a year, and this cake is worth every sprinkle.
Frequently Asked Questions
Can I use natural peanut butter?
Yes, but the texture may be slightly more crumbly. Natural peanut butter has less sugar and more oil, which can affect how the batter holds together. If you use it, make sure to stir it well before measuring, and do not be surprised if the cake is a little more delicate.
Can I make this ahead of time?
Absolutely. You can bake the cake a day ahead and store it at room temperature, tightly covered. The flavors actually get better overnight. You can also freeze it for up to 3 months.
Why did my cake turn out dry?
The most common reason is overbaking. Remember, this cake should look slightly underdone in the center when you pull it out. It will continue to cook as it cools. Also, make sure you measured your flour correctly—scooping directly from the bag can pack in too much flour.
Can I use a different pan size?
Yes, but you will need to adjust the baking time. An 8-inch pan will give you a thicker cake that needs about 5 extra minutes. A 9×13 pan will give you thinner bars that bake in about 18-20 minutes. Keep an eye on it and use the toothpick test.
How do I make this more festive for Halloween?
The easiest way is to use Halloween-themed M&Ms and sprinkles. You can also add candy eyeballs, drizzle melted white chocolate over the top, or press in a few gummy worms before baking for a truly creepy look. For a fun presentation, serve it on a black platter with fake spider webs around the edges.
Pin This Recipe!
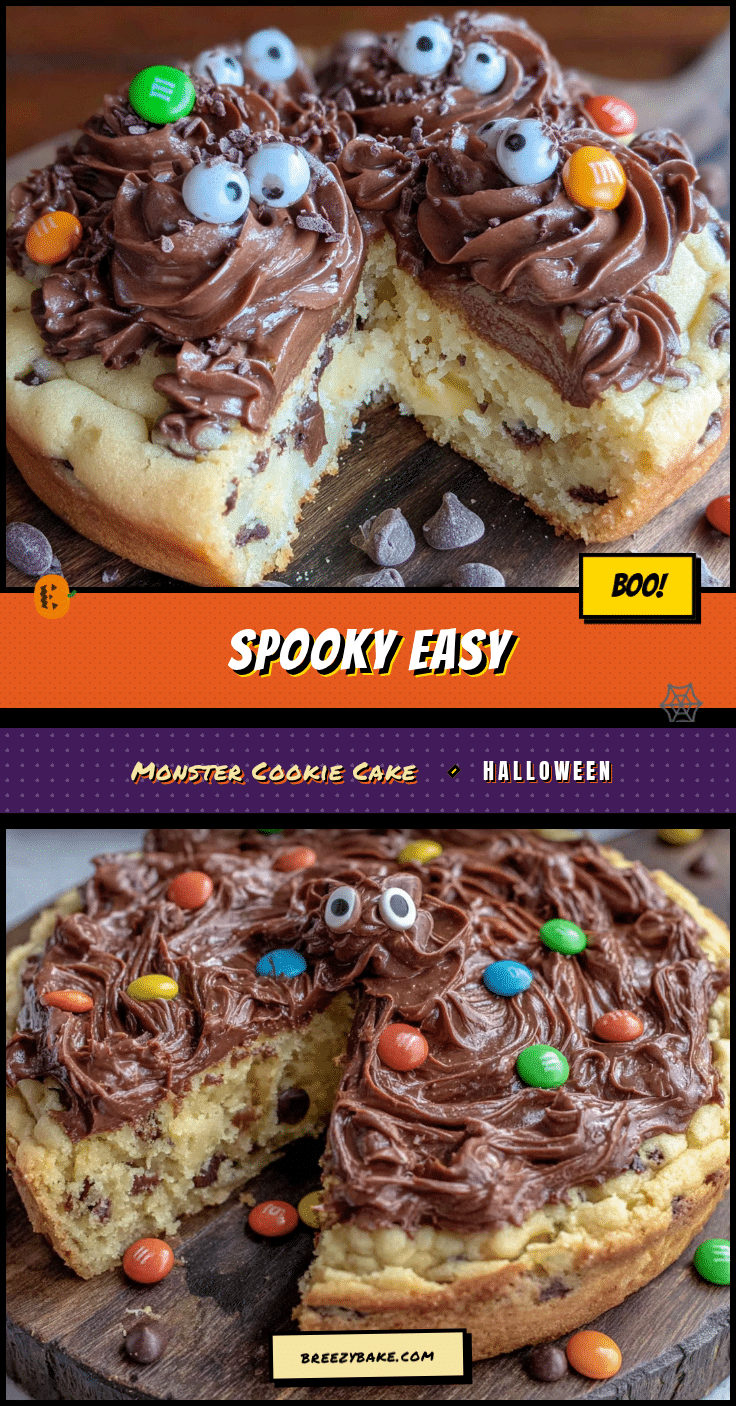
Easy Monster Cookie Cake: The Best Halloween Dessert
This easy Halloween monster cookie cake is a soft, chewy, peanut butter-packed sheet cake studded with M&Ms and chocolate chips. It’s a festive, no-fuss dessert that comes together in under 15 minutes and is perfect for Halloween parties.
- Prep Time: 15 minutes
- Cook Time: 25 minutes
- Total Time: 40 minutes
- Yield: 8 servings 1x
- Category: Dessert
- Cuisine: American
Ingredients
- 1/2 cup (1 stick) unsalted butter, softened
- 1/2 cup (about 130g) creamy peanut butter (e.g., Jif or Skippy)
- 1/2 cup (100g) granulated sugar
- 1/2 cup (100g) packed light brown sugar
- 1 large egg, room temperature
- 1 teaspoon pure vanilla extract
- 1 1/2 cups (about 190g) all-purpose flour (spooned and leveled)
- 1 teaspoon baking soda
- 1/2 teaspoon salt
- 1/2 cup M&Ms (regular milk chocolate or Halloween-themed)
- 1/2 cup semi-sweet chocolate chips
- 1/4 cup Halloween sprinkles (optional, for topping)
Instructions
- Preheat your oven to 350°F (175°C). Line a 9-inch round or square cake pan with parchment paper or lightly grease it with non-stick spray.
- In a large mixing bowl, cream together the softened butter, peanut butter, granulated sugar, and brown sugar. Beat on medium speed for 2-3 minutes until light, fluffy, and pale in color. Scrape down the sides of the bowl halfway through.
- Add the egg and vanilla extract. Beat on low speed until just combined. The mixture may look slightly curdled; that’s normal.
- In a separate small bowl, whisk together the flour, baking soda, and salt.
- Gradually add the dry ingredients to the wet ingredients, mixing on low speed and adding about a third of the flour mixture at a time. Mix until just combined—a few streaks of flour may remain.
- Fold in the M&Ms and chocolate chips using a rubber spatula until evenly distributed. The batter will be thick and slightly sticky.
- Transfer the batter to the prepared pan and spread it evenly with the spatula. Press it into the corners; a rustic top is fine.
- Sprinkle the Halloween sprinkles on top and press them in gently so they stick.
- Bake for 22-25 minutes. The cake is done when the edges are golden brown and set, but the center still looks slightly soft and puffed. A toothpick inserted into the center should come out with a few moist crumbs, not raw batter.
- Let the cake cool in the pan for 10 minutes. Then, using the parchment paper, lift it out and transfer it to a cooling rack. Let it cool completely before slicing.
Notes
Do not overbake; the center should look slightly underdone when you pull it out. Use room temperature ingredients for best results. Chilling the batter for 20 minutes before baking yields a thicker, chewier cake. Press extra candies into the top before baking for a more festive look. Let the cake cool completely before slicing to prevent crumbling.
Nutrition
- Serving Size: 1 slice (1/8 of cake
- Calories: 420
- Sugar: 35
- Sodium: 320
- Fat: 22
- Saturated Fat: 10
- Carbohydrates: 52
- Fiber: 2
- Protein: 8
Keywords: Halloween dessert, monster cookie cake, peanut butter cake, easy cake, cookie cake, Halloween recipe, no-fuss dessert


