Sunday afternoon, three in the afternoon, and the kitchen smelled like cinnamon and something brown-sugary baking. I wasn’t trying to impress anyone. I had a can of pumpkin puree in the pantry, a box of yellow cake mix that had been sitting there for months, and honestly, I just wanted something warm without a sink full of bowls. That’s when this easy pumpkin dump cake happened. And let me tell you, it changed my whole attitude about lazy baking.
I remember pulling it out of the oven and just standing there, fork in hand, taking a bite straight from the pan. The top was all crunchy and buttery, and underneath was this soft, spiced pumpkin layer that tasted like fall in a spoonful. No creaming butter, no sifting flour, no rolling dough. Just dump, sprinkle, bake, and eat. It felt almost too simple to be this good. But it was. And I’ve been making it ever since, especially when I need something that feels homemade but doesn’t demand a whole production.
This isn’t one of those fussy recipes you have to babysit. It’s the kind that lets you sit down with a cup of coffee while it bakes and actually enjoy the quiet. That’s rare, honestly. Most desserts ask for your attention every five minutes. This one just asks for a spoon and a little patience. And the crunchy topping? That’s the part that keeps people coming back for seconds, standing around the pan, asking what’s in it. They never believe it’s just four ingredients.
Why You’ll Love This Recipe
I’ve tested this easy pumpkin dump cake more times than I can count, and every time, it delivers. No fuss, no fail, just pure comfort. Here’s why this one stands out from the rest:
- Quick & Easy: From start to oven in under 10 minutes. Seriously. You just dump and sprinkle. No mixer required.
- Simple Ingredients: You probably have everything in your pantry right now. Canned pumpkin, cake mix, butter, and pecans. That’s it.
- Perfect for Fall Gatherings: Bring this to a potluck or Thanksgiving dinner, and watch it disappear. It’s the dessert nobody expects but everyone loves.
- Crowd-Pleaser: Kids go crazy for the crunchy topping, and adults love that it’s not overly sweet. It hits that perfect balance.
- Unbelievably Delicious: The texture is what gets you. A soft, almost pudding-like pumpkin base with a buttery, nutty, crunchy crust on top. It’s comfort food at its best.
What makes this recipe different? It’s the ratio, honestly. Most dump cakes end up soggy or too dry. I played around with the butter amount and the nut topping until I got that perfect crunchy layer that stays crispy even the next day. Plus, I add a pinch of salt to the topping that makes the whole thing taste more complex. It’s a tiny tweak, but it makes a big difference.
This isn’t just another dump cake. It’s the one that made my neighbor ask for the recipe twice. It’s the one I bring to Friendsgiving when I want to look like I tried harder than I actually did. And it’s the one I make on a random Tuesday when I need a little something sweet without a big cleanup. That’s the kind of recipe worth keeping.
What Ingredients You Will Need
This easy pumpkin dump cake uses simple, everyday ingredients to create something that tastes way more complicated than it is. No fancy baking supplies required. Here’s what you’ll need:
- Canned Pumpkin Puree (15 oz can): Make sure you grab pure pumpkin, not pumpkin pie filling. The filling has sugar and spices already added, which will throw off the balance. I prefer Libby’s for consistent texture, but any brand works. One can is all you need.
- Yellow Cake Mix (15.25 oz box): This is the magic ingredient. Just a standard box of yellow cake mix. Don’t use butter recipe or extra moist varieties—they change the texture. I’ve tried Duncan Hines and Betty Crocker, and both work great. You’re using the dry mix straight from the box, no preparing it.
- Unsalted Butter (1 cup, melted): Real butter makes a difference here. Margarine or spreads have too much water and won’t give you that crunchy topping. I melt mine in the microwave in 30-second bursts. Pour it evenly over the top—don’t stir it in. That’s the secret to the crunchy layer.
- Chopped Pecans (1 cup): These add the crunch factor. You can use walnuts if that’s what you have, but pecans have a buttery flavor that pairs perfectly with pumpkin. I buy them pre-chopped to save time, but chopping your own gives you bigger, more satisfying pieces. Toast them lightly in a dry pan for extra flavor if you have an extra minute.
- Optional Add-Ins: A teaspoon of cinnamon mixed into the pumpkin layer adds warmth. A pinch of flaky sea salt on top before baking makes the sweet and salty thing happen. Some people like a handful of chocolate chips sprinkled in, but I think it distracts from the pumpkin.
That’s literally it. Four ingredients if you stick to the basics, five or six if you want to get fancy. The beauty of this easy pumpkin dump cake is that it works with whatever you have. I’ve made it with spice cake mix instead of yellow, and it was amazing. I’ve skipped the nuts entirely and added a sprinkle of cinnamon sugar on top. It’s forgiving, which is exactly what a dump cake should be.
Equipment Needed
You don’t need a lot of fancy tools for this easy pumpkin dump cake. That’s the whole point. Here’s what you’ll need:
- 9×13 Baking Dish: A standard metal or glass baking dish works best. Glass lets you see the bottom layer, which is helpful for checking doneness. I use a Pyrex dish and it’s never let me down.
- Mixing Bowl: Just one bowl for whisking the pumpkin and eggs. Nothing fancy. A medium-sized bowl is perfect.
- Whisk or Spoon: To combine the pumpkin base. A whisk works faster, but a sturdy spoon gets the job done.
- Measuring Cups and Spoons: For the pumpkin and any optional spices. If you’re using a can of pumpkin, you don’t even need a measuring cup—just dump it in.
- Spatula: To spread the pumpkin layer evenly. Not strictly necessary, but it helps.
- Cooling Rack: Optional, but it helps the cake cool evenly without getting soggy on the bottom. I use mine every time.
That’s it. No mixer, no sifter, no rolling pin. This is the kind of recipe you can make in a friend’s kitchen without bringing half your own equipment. I’ve made it in a cabin with a rusty whisk and a fork—it still turned out perfect. If you don’t have a 9×13 dish, you can use a 10-inch cast iron skillet, but watch the baking time. It’ll cook a little faster.
Preparation Method
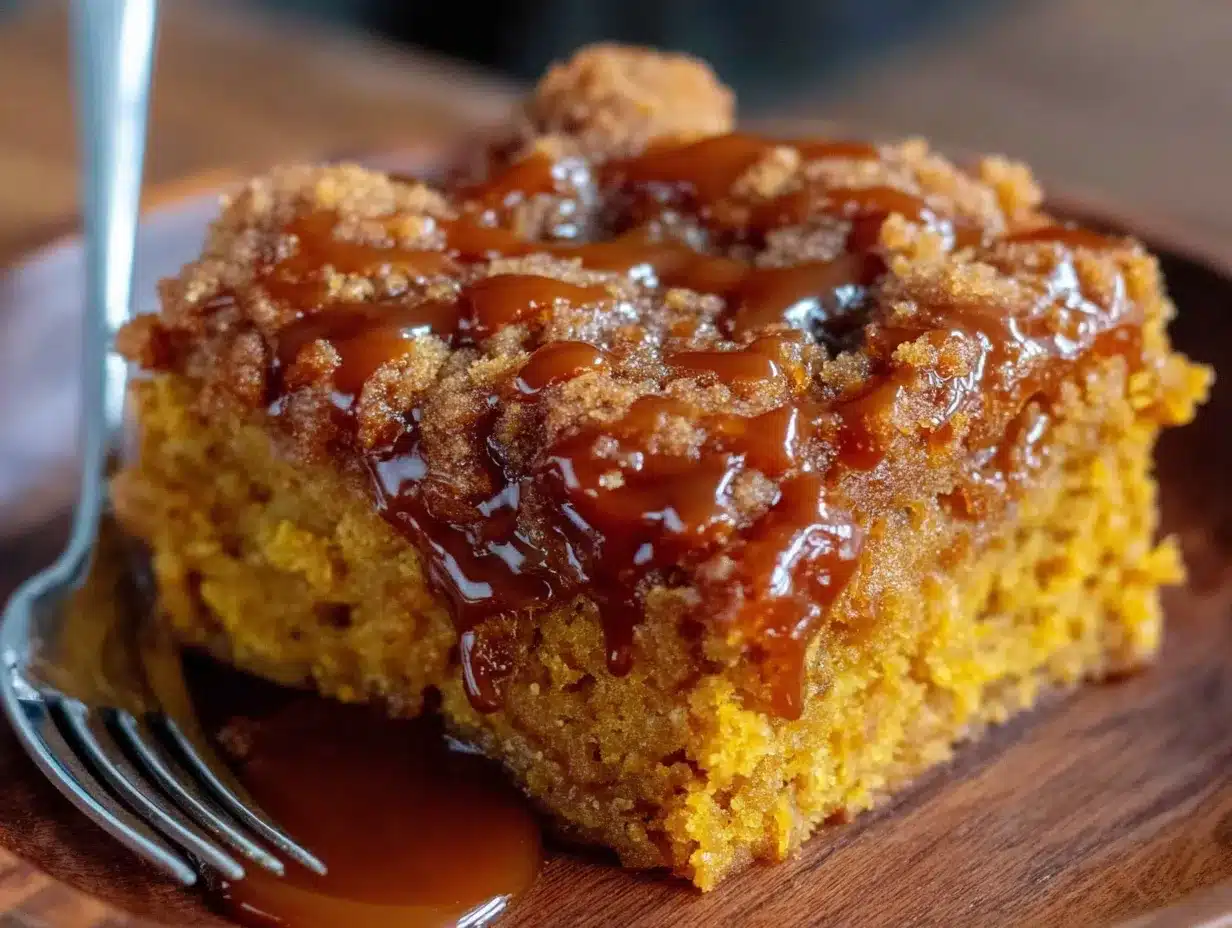
This easy pumpkin dump cake comes together in layers, and the order matters more than you’d think. Follow these steps, and you’ll have a perfect crunchy topping every time.
- Preheat your oven to 350°F (175°C). While it’s heating, grease your 9×13 baking dish with butter or non-stick spray. I use butter because it adds flavor to the edges, but spray works fine. Don’t skip this step—the pumpkin layer likes to stick.
- Make the pumpkin layer. In your mixing bowl, combine the 15 oz can of pumpkin puree with two large eggs. Whisk until smooth. It should look like thick, creamy orange pudding. If you’re adding cinnamon or pumpkin pie spice, whisk it in now. Don’t overmix—just until it’s combined. About 30 seconds of whisking is plenty.
- Spread the pumpkin mixture. Pour it into your prepared baking dish and spread it evenly with a spatula. It won’t look like much at this point—just a thin layer covering the bottom. That’s exactly right. It will puff up as it bakes.
- Sprinkle the cake mix. Open your box of yellow cake mix and sprinkle the dry powder evenly over the pumpkin layer. Don’t stir it in. Don’t tap it down. Just sprinkle it like you’re seasoning a steak. Make sure you get the corners and edges. Some people use the whole box, some leave a few tablespoons behind. I use the whole thing for a thicker topping.
- Add the pecans. Sprinkle your chopped pecans evenly over the cake mix layer. They’ll sink into the butter later, so don’t worry about them staying on top. Just scatter them around.
- Pour the melted butter. This is the most important step. Melt your 1 cup of unsalted butter and pour it as evenly as possible over the entire surface. Don’t dump it all in one spot—drizzle it back and forth like you’re making a pattern. The butter needs to reach every inch of the cake mix. If you miss a spot, you’ll end up with dry powder in your finished cake. I’ve learned this the hard way.
- Bake for 40-45 minutes. Place the dish on the middle rack. You’ll know it’s done when the top is golden brown and the edges are bubbling. The center should be set but still slightly jiggly—it will firm up as it cools. If the top is browning too fast after 30 minutes, tent it loosely with foil.
- Cool for at least 20 minutes. This is the hardest part. Let it sit on a cooling rack. The pumpkin layer needs time to set, and the crunchy topping needs to crisp up. If you dig in too soon, it’ll be a soupy mess. Trust me, I’ve done it. Twenty minutes is the minimum. An hour is better if you can wait.
One thing I’ve learned: the butter should be hot when you pour it. Cold butter won’t soak into the cake mix properly. I melt mine right before pouring, while the oven is preheating. Also, if you notice dry spots of cake mix after baking, you didn’t pour the butter evenly enough. It happens. Just scrape those bits off and enjoy the rest. Nobody will know.
Cooking Tips & Techniques
After making this easy pumpkin dump cake more times than I care to admit, I’ve picked up a few tricks that make the difference between good and unforgettable. Here’s what I’ve learned the hard way so you don’t have to.
The butter trick. Pouring melted butter over dry cake mix feels weird, I know. But here’s the thing: don’t stir it. Not even a little. The butter needs to sit on top and slowly soak down through the mix as it bakes. That’s what creates the crunchy topping. If you stir it in, you’ll end up with a soggy, cake-like texture instead of that crispy, buttery crust. Let the oven do the work.
Watch your oven temperature. Every oven runs a little differently. My old oven ran hot, and I’d get a burnt top with a raw center. Now I use an oven thermometer to make sure it’s actually at 350°F. If your top is browning too fast, lower the temperature to 325°F and bake a few minutes longer. Patience pays off here.
The nut situation. Pecans are my go-to, but I’ve made this with walnuts, almonds, and even crushed pretzels for a salty twist. Whatever you use, make sure they’re chopped into small, even pieces. Big chunks don’t get as crunchy and can burn before the cake is done. I give mine a rough chop even if they’re pre-chopped, just to even them out.
Timing is everything. This cake needs to rest. I know it’s tempting to scoop it up hot, but let it sit for at least 20 minutes. The pumpkin layer sets as it cools, and the topping gets crunchier. I once served it after 10 minutes, and it was more like pumpkin soup with croutons. Still delicious, but not the texture I was going for. Let it rest. You’ll thank me.
One more thing: If you’re making this ahead of time, don’t add the nuts until just before baking. They can get soft and lose their crunch if they sit on the dry cake mix too long. I learned this when I prepped a dish the night before and woke up to soggy pecans. Not the end of the world, but not ideal. Fresh nuts, fresh crunch.
Variations & Adaptations
This easy pumpkin dump cake is incredibly versatile. I’ve tried several variations over the years, and some of them became instant favorites. Here are a few ways to switch it up:
- Spice Cake Version: Swap the yellow cake mix for a box of spice cake mix. It adds cinnamon, nutmeg, and clove flavors that double down on the pumpkin spice. This is my personal favorite for Thanksgiving. It tastes like you spent hours layering spices, but you didn’t.
- Gluten-Free Option: Use a gluten-free yellow cake mix. I’ve tried several brands, and King Arthur’s works best. The texture is slightly different—a little more crumbly—but the flavor is spot on. Just make sure your pumpkin puree is certified gluten-free, just in case.
- Dairy-Free Adaptation: Substitute the butter with a high-quality vegan butter. I use Miyoko’s or Earth Balance. Avoid margarine with too much water content. The topping won’t be quite as crunchy, but it’s still delicious. I’ve served this to dairy-free friends and they didn’t miss a thing.
- Chocolate Pumpkin Dump Cake: Use a chocolate cake mix instead of yellow. The chocolate and pumpkin combo is surprisingly good. Add a handful of chocolate chips on top before pouring the butter for extra richness. This one is dangerous—I can’t stop eating it.
- Low-Sugar Version: Use a sugar-free yellow cake mix and skip the pecans (or use unsalted ones). The pumpkin layer is naturally low in sugar, so this works well. It’s not as decadent, but it satisfies that sweet tooth without the sugar crash.
I once made a version with a white cake mix and added dried cranberries and white chocolate chips. It was incredible. The tartness of the cranberries cut through the sweetness perfectly. Don’t be afraid to experiment—this recipe is forgiving enough to handle your wild ideas.
Serving & Storage Suggestions
This easy pumpkin dump cake is best served warm, but it’s also fantastic at room temperature. Here’s how to make the most of it:
Serving Temperature: I prefer it warm, about 20 minutes out of the oven. The pumpkin layer is soft and almost pudding-like, and the crunchy topping is still crisp. A scoop of vanilla ice cream on top is the classic move, and for good reason. The cold creaminess against the warm, crunchy cake is pure magic. Whipped cream works too, but ice cream is better.
Presentation: Scoop it into bowls with a large spoon—don’t try to cut it into neat squares. It’s a rustic dessert, and it looks better messy. Sprinkle a little cinnamon on top or drizzle with caramel sauce if you’re feeling fancy. For fall gatherings, I serve it in the baking dish with a big spoon and let people help themselves. It’s casual and welcoming.
Complementary Dishes: This cake pairs beautifully with a hot cup of coffee or spiced cider. If you’re serving it as part of a meal, it goes well after something savory like crispy loaded bacon cheeseburger tater tot casserole or a lighter option like healthy chicken veggie skillet wraps. For a full fall spread, pair it with a warm apple cider or a pumpkin spice latte.
Storage: Cover the baking dish with foil or transfer leftovers to an airtight container. It keeps at room temperature for up to 2 days, but I prefer it in the fridge. The topping stays crunchier when refrigerated. To reheat, pop a serving in the microwave for 20-30 seconds, or warm it in a 300°F oven for 10 minutes. The texture comes back beautifully.
Freezing: This cake freezes surprisingly well. Let it cool completely, then wrap the entire dish (or individual portions) in plastic wrap and foil. Freeze for up to 3 months. Thaw overnight in the fridge and reheat as above. I’ve done this for holiday prep, and nobody could tell it was frozen.
Flavor Development: Honestly, this cake tastes even better the next day. The flavors meld together, and the pumpkin layer gets creamier. I’ve been known to make it a day ahead on purpose. Just don’t tell anyone—they’ll think you slaved over it.
Nutritional Information & Benefits
Let’s be real: this easy pumpkin dump cake is a dessert, not a health food. But it does have some redeeming qualities. Here’s a rough estimate per serving (assuming 12 servings):
- Calories: 340
- Fat: 22g
- Carbohydrates: 36g
- Fiber: 3g
- Sugar: 18g
- Protein: 4g
Health Benefits: Pumpkin puree is packed with vitamin A, fiber, and antioxidants. It’s good for your eyes and your immune system. The pecans add healthy fats and a little protein, which helps balance the sugar rush. Plus, using canned pumpkin means you’re getting all that goodness year-round, not just in fall.
Dietary Considerations: This recipe can be made gluten-free and dairy-free with simple swaps. It’s naturally nut-free if you skip the pecans (though check your cake mix for nut contamination). It’s not low-carb or keto-friendly, but there are versions using almond flour if that’s your thing. For a lighter option, serve smaller portions with a big scoop of Greek yogurt instead of ice cream.
My Take: I don’t believe in guilt when it comes to dessert. This cake has real food ingredients—pumpkin, butter, nuts, eggs. It’s not processed junk. Enjoy it in moderation, savor every bite, and don’t overthink it. That’s my philosophy, anyway.
Conclusion
This easy pumpkin dump cake with crunchy topping is the kind of recipe that makes you look like a hero without actually trying. It’s simple enough for a weeknight, impressive enough for company, and forgiving enough for beginners. Four ingredients, ten minutes of prep, and you get a dessert that tastes like you spent hours in the kitchen. That’s a win in my book.
What I love most about this recipe is how it brings people together. I’ve made it for Thanksgiving dinners, casual potlucks, and quiet Sunday afternoons. Every time, someone asks for the recipe. Every time, they’re shocked it’s just four ingredients. And every time, I watch them take that first bite and close their eyes. That’s the moment that keeps me baking.
I’d love to hear how yours turns out. Did you add anything fun? Serve it with something unexpected? Leave a comment below and let me know. And if you’re looking for more easy, crowd-pleasing desserts, check out our decadent chocolate covered strawberry ice cream mousse cups or these creamy mint chip cream cheese bars for another quick treat. Happy baking, friends!
Frequently Asked Questions
Can I use pumpkin pie filling instead of pumpkin puree?
I wouldn’t recommend it. Pumpkin pie filling has sugar and spices already added, which will make your dump cake way too sweet and throw off the texture. Stick with 100% pure pumpkin puree. Your taste buds will thank you.
Why is my dump cake soggy in the middle?
This usually happens when the cake hasn’t baked long enough or the butter wasn’t distributed evenly. Make sure you bake until the edges are bubbling and the center is set but still slightly jiggly. Also, let it cool for at least 20 minutes before serving. Patience is key here.
Can I make this ahead of time?
Absolutely. You can assemble the entire dish (without the nuts) up to 24 hours ahead, cover it, and refrigerate. Add the nuts and bake just before serving. Or bake it completely, cool it, and reheat the next day. The flavors actually get better overnight.
What can I use instead of pecans?
Walnuts, almonds, or even crushed pretzels work great. If you need a nut-free version, try sunflower seeds or simply leave them out. The topping won’t be as crunchy, but it’ll still be delicious. You could also sprinkle on some granola for a different kind of crunch.
Can I double this recipe?
Yes! Use a 9×13 dish for a single batch or a larger 11×15 dish for a double batch. Just increase the baking time by about 10-15 minutes. Keep an eye on the top—if it’s browning too fast, tent it with foil. A double batch is perfect for big gatherings or holiday dinners.
Pin This Recipe!
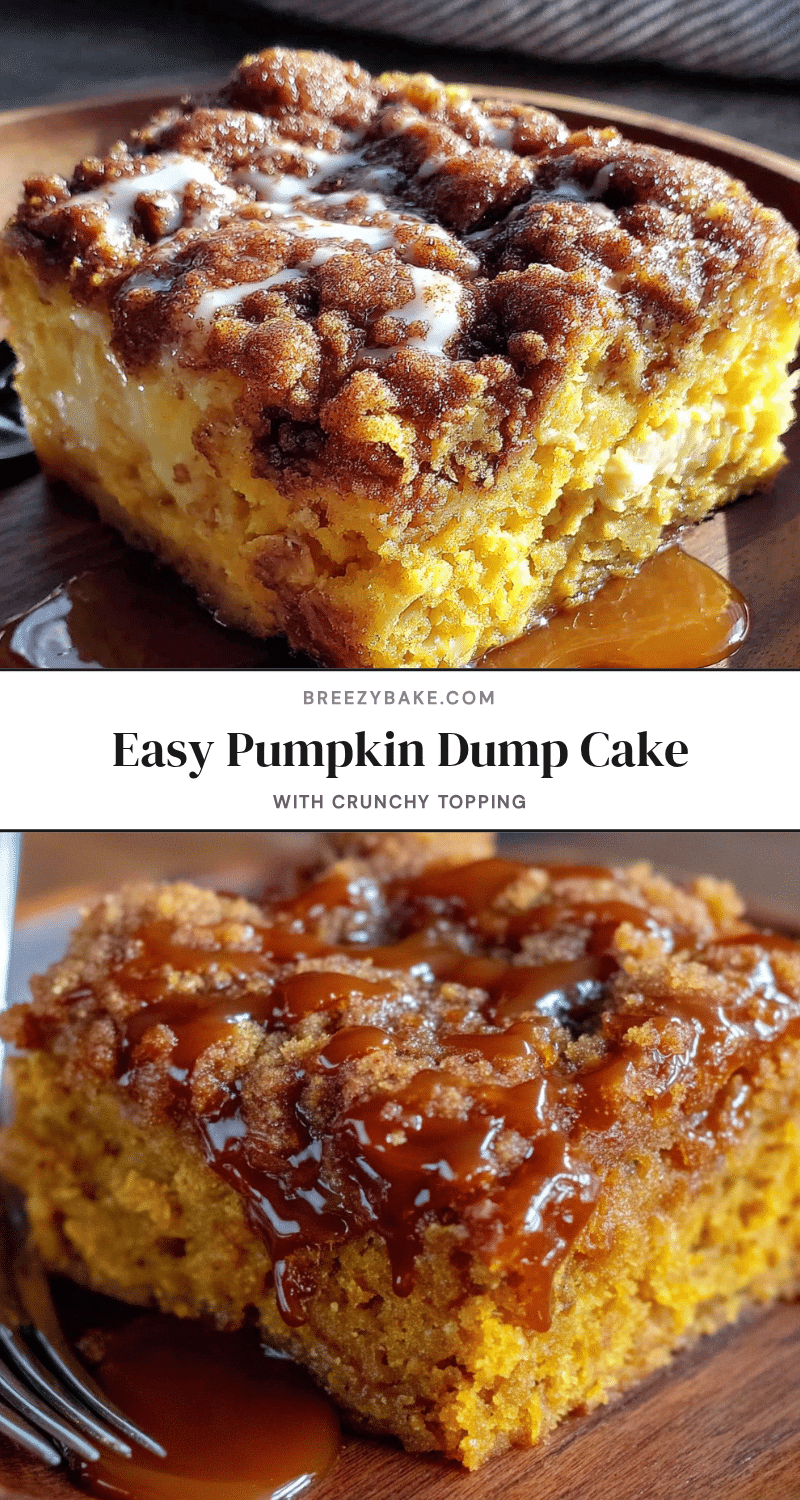
Easy Pumpkin Dump Cake: Best 4-Ingredient Dessert
This easy pumpkin dump cake is a simple, 4-ingredient dessert with a crunchy, buttery topping and a soft, spiced pumpkin layer. Perfect for fall gatherings or a quick weeknight treat, it requires no mixer and minimal cleanup.
- Prep Time: 10 minutes
- Cook Time: 40-45 minutes
- Total Time: 50-55 minutes
- Yield: 12 servings 1x
- Category: Dessert
- Cuisine: American
Ingredients
- 1 (15 oz) can pumpkin puree (not pumpkin pie filling)
- 1 (15.25 oz) box yellow cake mix
- 1 cup unsalted butter, melted
- 1 cup chopped pecans
- 2 large eggs
- 1 teaspoon cinnamon (optional)
- Pinch of flaky sea salt (optional)
Instructions
- Preheat oven to 350°F (175°C). Grease a 9×13 baking dish with butter or non-stick spray.
- In a mixing bowl, whisk together the pumpkin puree and eggs until smooth. If using cinnamon, whisk it in now.
- Spread the pumpkin mixture evenly in the prepared baking dish.
- Sprinkle the dry yellow cake mix evenly over the pumpkin layer. Do not stir.
- Sprinkle the chopped pecans evenly over the cake mix.
- Pour the melted butter evenly over the entire surface, making sure to cover all the cake mix.
- Bake for 40-45 minutes, until the top is golden brown and the edges are bubbling. If browning too fast, tent with foil after 30 minutes.
- Cool for at least 20 minutes before serving. The pumpkin layer will set as it cools.
Notes
Use 100% pure pumpkin puree, not pumpkin pie filling. Pour melted butter evenly to avoid dry spots. Let the cake cool for at least 20 minutes to allow the pumpkin layer to set. For best results, use real butter, not margarine. The cake can be made ahead and tastes even better the next day.
Nutrition
- Serving Size: 1 serving
- Calories: 340
- Sugar: 18
- Sodium: 320
- Fat: 22
- Saturated Fat: 10
- Carbohydrates: 36
- Fiber: 3
- Protein: 4
Keywords: pumpkin dump cake, easy pumpkin dessert, 4-ingredient dessert, fall dessert, dump cake recipe


