The jiggle. That perfect, soft, bouncy jiggle when you press one between your fingers—that’s what I was after. Not the sticky, store-bought gummy bear texture that clings to your teeth, but something gentler. Something that felt almost alive in your hand. I spent three weeks staring at pots of simmering berries, testing different gelatin ratios, and honestly, driving my family a little crazy with all the little wiggly samples on the counter. But when I finally lifted that first batch of homemade honey elderberry gummies out of the silicone mold and watched them tremble, I knew. This was it. This was the texture I’d been chasing.
The funny thing is, this whole adventure started because my youngest came home from school with yet another sniffle. I was tired of the syrups and the powders and the battles over taking “yucky” medicine. I wanted something that felt like a treat, not a chore. Something I could feel good about handing over. So I started researching elderberries—those tiny, dark purple powerhouses that have been used for centuries to support the immune system. And I thought, why not turn them into something a kid would actually ask for?
These gummies aren’t just about the immune boost, though. They’re about the ritual of making something with your own hands. The way the honey melts into the warm juice, the smell of simmering berries filling the kitchen, the patience required to let them set just right. It’s a small act of care that feels huge when you’re a parent trying to keep everyone healthy. I’ve made these for sick days, for school lunchboxes, and for those moments when you just need a little extra armor against whatever’s going around. And every single time, that jiggle makes me smile.
Why You’ll Love This Recipe
Let me tell you why these homemade honey elderberry gummies have become a non-negotiable staple in my kitchen. I’ve tested this recipe more times than I can count, and every batch has taught me something new. Here’s what makes them stand out:
- Naturally Sweetened : No corn syrup or refined sugar here. Just raw honey that brings its own immune-supporting properties and a gentle, floral sweetness that perfectly balances the tart elderberries.
- Kid-Approved Texture : The jiggle is real. These have that soft, pillowy bite that kids love, without being too firm or too sticky. My niece calls them “wiggly bears.”
- Immune-Boosting Powerhouse : Elderberries are packed with antioxidants and vitamins that help support your body’s natural defenses. Combined with honey and a touch of vitamin C, these little gummies pack a serious wellness punch.
- Simple, Clean Ingredients : You’ll recognize every single ingredient on the list. No artificial flavors, colors, or preservatives. Just real food doing its job.
- Fun to Make Together : This is a perfect kitchen project for kids. They can help stir, pour, and (most importantly) taste-test the final product. It turns a wellness routine into a bonding moment.
- Perfect for Lunchboxes & Travel : These hold up beautifully at room temperature, making them an easy addition to school lunches or road trip snacks. Just pop a few in a small container and you’re set.
This isn’t just another gummy recipe. It’s the result of trial and error, of batches that were too hard or too sticky, of learning that the temperature of your liquid matters more than you’d think. I’ve done the work so you don’t have to. And honestly? The first time your kid asks for their “healthy candy” instead of the real thing, you’ll feel like a superhero.
What Ingredients You Will Need
This recipe relies on a handful of simple, wholesome ingredients that work together to create a gummy that’s both delicious and functional. Here’s what you’ll need and why each one matters:
- Dried elderberries (½ cup) : These are the star of the show. Dried elderberries are widely available online or at health food stores. Look for deep purple, plump berries from a trusted source. I prefer Starwest Botanicals or Frontier Co-op for their consistent quality. Do not use fresh elderberries raw—they must be cooked to be safe.
- Water (2 cups) : Filtered water works best. Tap water with a strong chlorine taste can affect the final flavor of your syrup.
- Raw honey (¼ cup) : Choose a good-quality raw honey for maximum benefits. Local honey is fantastic if you can find it—it also helps with seasonal allergies. The flavor of the honey will come through, so pick one you love. If you’re making these for a child under one year old, substitute with maple syrup or agave.
- Gelatin (¼ cup or about 4 tablespoons) : This is what gives the gummies their signature jiggle. I use grass-fed beef gelatin from Vital Proteins or Great Lakes. It’s flavorless and sets beautifully. Do not use collagen peptides—they won’t set the same way.
- Vitamin C powder (optional, 1 teaspoon) : Adds a little extra immune support and a slight tang that brightens the flavor. You can also use a crushed vitamin C tablet. Totally optional but nice.
- Fresh lemon juice (1 tablespoon) : Helps preserve the gummies and adds a subtle brightness that balances the honey’s sweetness. Plus, it helps the vitamin C absorb better.
That’s it. Six ingredients, most of which you probably already have or can easily find. The simplicity is part of the beauty—no long list of things you’ll never use again. Just real, purposeful ingredients that do exactly what they’re supposed to do.
Equipment Needed
You don’t need a fancy kitchen to make these gummies, but a few specific tools will make the process smoother. Here’s what I use:
- Silicone gummy bear molds : These are non-negotiable for getting that fun shape. I’ve tried plastic molds and they’re a nightmare to unmold. Silicone is your friend. I got a set of four on Amazon for under ten dollars.
- Fine-mesh strainer or cheesecloth : You need this to strain out the cooked elderberries. A fine-mesh strainer works perfectly. If you only have a regular colander, line it with a couple layers of cheesecloth.
- Medium saucepan : For simmering the elderberries. Stainless steel or enameled cast iron works great. Avoid aluminum, which can react with the berries.
- Small bowl : For blooming the gelatin. A glass measuring cup works well too.
- Liquid measuring cup with spout : Makes pouring the mixture into the molds so much easier. A Pyrex one with a handle is ideal.
- Dropper or small pipette : Optional but helpful for filling the tiny molds without spilling. I use a turkey baster in a pinch.
- Whisk : For combining the gelatin with the warm liquid. A small whisk works better than a spoon for getting rid of lumps.
If you don’t have silicone molds, you can pour the mixture into a small glass dish and cut it into squares once set. They won’t look like bears, but they’ll taste just as good. I’ve done this when my molds were in the dishwasher, and honestly, squares are underrated.
Preparation Method
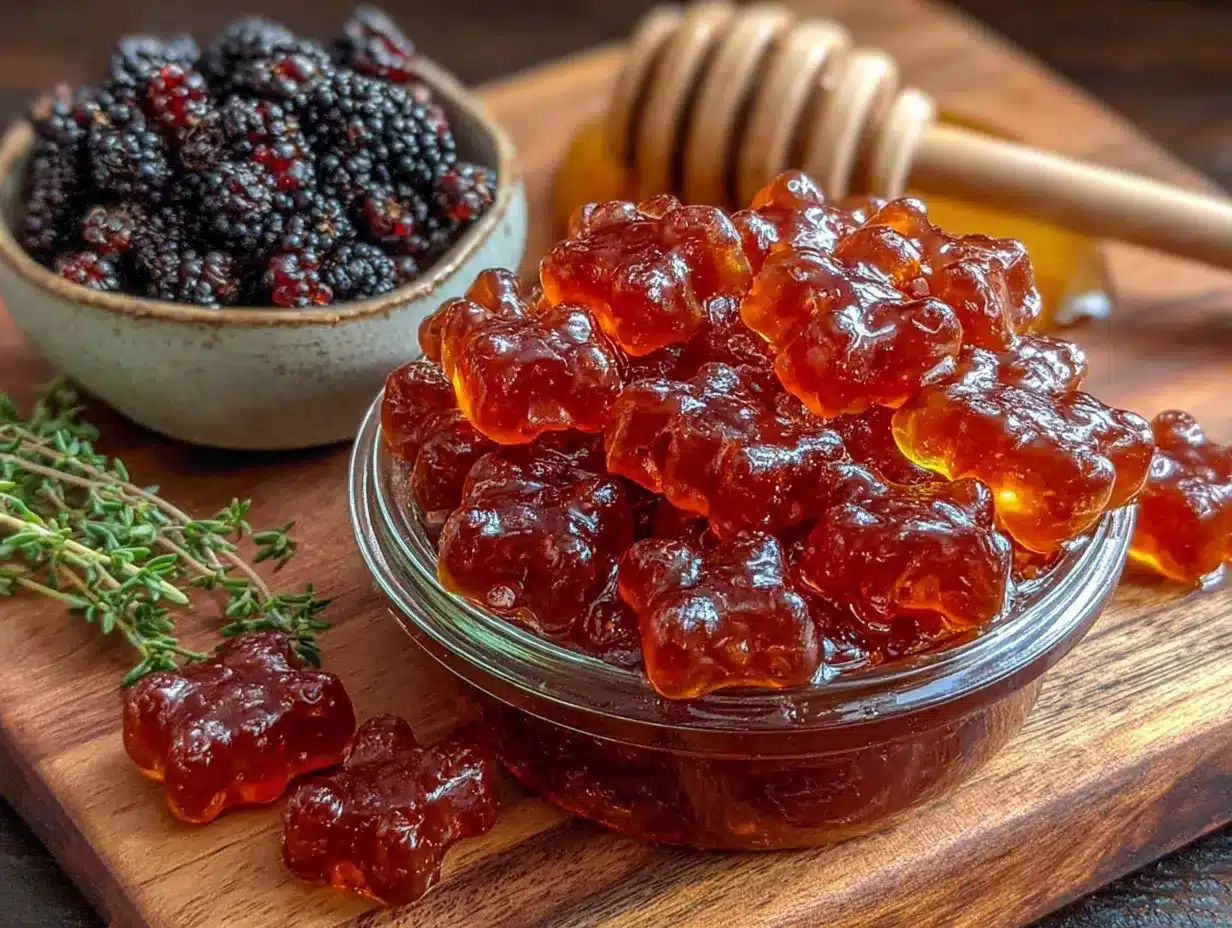
Making these gummies takes a little patience, but the process is straightforward. Here’s how I do it, step by step:
- Make the elderberry syrup : Combine the dried elderberries and 2 cups of water in a medium saucepan. Bring to a boil over medium-high heat, then reduce the heat to low and let it simmer, uncovered, for about 30 minutes. The liquid will reduce by about half and turn a deep, dark purple. Your kitchen will smell like a cozy fall day—enjoy it.
- Strain the berries : Place your fine-mesh strainer over a bowl or liquid measuring cup. Carefully pour the mixture through the strainer, pressing on the berries with the back of a spoon to extract all the liquid. Discard the berries (or compost them). You should have about 1 cup of concentrated elderberry syrup. Let it cool for 5-10 minutes until it’s warm but not hot.
- Bloom the gelatin : While the syrup cools, pour ¼ cup of the warm elderberry syrup into a small bowl. Sprinkle the gelatin evenly over the top. Do not stir yet. Let it sit for 5-10 minutes until the gelatin absorbs the liquid and looks like a thick, jiggly paste. This is called blooming, and it’s crucial for a smooth texture.
- Combine everything : Pour the remaining ¾ cup of warm elderberry syrup back into the saucepan. Add the honey, lemon juice, and vitamin C powder if using. Warm over low heat, whisking gently, until the honey dissolves completely. Do not let it boil—high heat can damage the honey’s beneficial properties.
- Incorporate the bloomed gelatin : Remove the saucepan from the heat. Add the bloomed gelatin and whisk gently but thoroughly until it’s completely dissolved. You should see no streaks or lumps. This usually takes about a minute of steady whisking. If you see any clumps, press them against the side of the pan with your whisk.
- Fill the molds : Carefully pour the mixture into your liquid measuring cup with a spout (or use a dropper). Fill each cavity of your silicone molds to the top. Don’t worry if you spill a little—it wipes right off. Work quickly, as the mixture will start to set as it cools.
- Refrigerate to set : Place the filled molds on a flat tray or plate (this makes them easier to move). Refrigerate for at least 2-3 hours, or until the gummies are firm to the touch. I usually leave them overnight for the best texture.
- Unmold and store : Once set, gently pop the gummies out of the molds. They should release easily. If they stick, let them sit at room temperature for a few minutes, then try again. Store in an airtight container in the refrigerator.
A few things I’ve learned the hard way: don’t skip the blooming step. I did once because I was in a hurry, and the gummies turned out grainy and weird. Also, make sure your syrup is warm but not hot when you add the gelatin—too hot and it can lose its setting power. Too cold and it won’t dissolve properly. Aim for that sweet spot where it feels warm on your wrist, like bathwater.
Cooking Tips & Techniques
Over the course of perfecting this recipe, I’ve made just about every mistake you can imagine. Let me save you some trouble:
- Temperature matters : Gelatin is finicky about temperature. If your liquid is too hot (above 180°F or so), it can weaken the gelatin’s setting ability. If it’s too cold, the gelatin won’t dissolve. I use an instant-read thermometer to check, but if you don’t have one, just make sure the liquid is warm enough that you can comfortably dip your finger in it.
- Don’t over-whisk : Once you add the bloomed gelatin, whisk gently. Vigorous whisking can incorporate air bubbles, which will leave little holes in your gummies. A few bubbles are fine, but if you want perfectly clear gummies, stir slowly and steadily.
- Grease your molds lightly : If you’re having trouble with sticking, spray your silicone molds with a tiny bit of coconut oil before filling. Wipe out the excess with a paper towel. This is usually unnecessary with good silicone, but it helps with older or cheaper molds.
- Work in batches : If you have multiple small molds, fill them one at a time and keep the remaining mixture warm by placing the saucepan in a bowl of warm water. The mixture will start to set as it cools, and you don’t want it to get too thick to pour.
- Patience is key : I know it’s tempting to check on them after an hour, but trust me—let them set fully. I once tried to unmold after 90 minutes and ended up with a sad pile of purple goo. Give them the full 2-3 hours, or better yet, make them the night before.
One of my biggest failures? I used too much honey once because I thought “more is better.” The gummies never set properly—they stayed soft and sticky, like a weird fruit leather. Stick to the measurements, at least the first time. You can always adjust later.
Variations & Adaptations
This recipe is incredibly flexible. Here are some of my favorite ways to switch it up:
- Berry Blend : Swap half the elderberries for dried blueberries or cherries. It changes the flavor profile and adds different antioxidants. I love this combination in the winter when I want extra immune support.
- Citrus Boost : Add the zest of one orange or lemon along with the juice. The essential oils in the zest add a bright, fresh note that pairs beautifully with the honey. Just make sure to use organic citrus if you’re using the zest.
- Ginger Kick : Add a 1-inch piece of fresh ginger, sliced, to the pot while simmering the elderberries. Strain it out with the berries. Ginger adds a gentle warmth and is great for digestion. My husband loves this version.
- Herbal Infusion : Add a cinnamon stick, a few cloves, or a star anise to the simmering berries. It gives the gummies a chai-like warmth that’s perfect for cold season. Just remember to strain everything out.
- Vegan Version : Substitute the gelatin with agar agar powder. Use 2 tablespoons of agar agar and follow the package instructions—it sets differently than gelatin and requires boiling. The texture will be firmer and less jiggly, but still delicious.
- Low-Sugar Option : Reduce the honey to 2 tablespoons and add a few drops of stevia or monk fruit sweetener to taste. The gummies will be less sweet but still enjoyable.
I once made a batch with fresh mint leaves steeped in the syrup, and it was surprisingly refreshing. Don’t be afraid to experiment—these are forgiving little gummies.
Serving & Storage Suggestions
These gummies are best enjoyed cold, straight from the fridge. The texture is firmer and more satisfying that way. I like to serve them on a small plate or in a little bowl, almost like a fancy candy dish. Kids love them in their lunchboxes—just pop a few in a small container with a lid.
For storage, keep them in an airtight container in the refrigerator. They’ll stay fresh for up to 2-3 weeks, though they rarely last that long in my house. You can also freeze them for up to 3 months. Just place them in a single layer on a baking sheet, freeze until solid, then transfer to a freezer bag. Thaw in the refrigerator overnight before eating.
A few things to note: the gummies will soften slightly at room temperature, so if you’re taking them on a picnic or to school, pack them with a small ice pack. The flavors actually deepen after a day or two in the fridge—the honey and elderberry meld together beautifully. I always think the second-day batch tastes better than the first.
These also make a lovely homemade gift. I’ve packed them in little glass jars with a ribbon and a tag that says “Immune Boost Gummies.” They’re always a hit with other parents, especially during cold and flu season. If you’re looking for another fun treat to pair with these, my Creamy Dr. Seuss Rainbow Cupcake Ice Cream Pops are a colorful, kid-friendly dessert that’s perfect for parties.
Nutritional Information & Benefits
These gummies aren’t just tasty—they’re genuinely good for you. Here’s a rough breakdown per serving (about 6-8 gummies):
- Calories : 45-60
- Carbohydrates : 10-12g
- Sugars : 8-10g (from honey and elderberries)
- Protein : 2-3g (from gelatin)
- Vitamin C : 10-15% DV (if using powder)
The real benefits go beyond the numbers. Elderberries are rich in antioxidants called anthocyanins, which help support the immune system and fight oxidative stress. Honey has antibacterial properties and can soothe sore throats. Gelatin is great for gut health, skin, hair, and nails. It’s a snack that actually works for you.
These gummies are naturally gluten-free, dairy-free, and nut-free, making them safe for most common allergies. The only potential allergen is honey, which can be substituted for those with sensitivities. Always check with your pediatrician before giving any herbal supplement to children, especially if they have underlying health conditions.
I love that I can give these to my kids without a second thought. They’re getting real nutrition in a form they actually enjoy. And honestly, I sneak a few myself every time I open the container. They’re just that good.
Conclusion
These homemade honey elderberry gummies have become a little ritual in our house. They’re not just a snack—they’re a small act of love, a way of saying “I want you to stay healthy” without saying a word. The process of making them is meditative, the result is rewarding, and knowing exactly what’s in them gives me peace of mind.
I hope you give them a try. Don’t stress about perfection—your first batch might not look like mine, and that’s totally okay. The jiggle will come with practice. The important thing is that you’re making something real for the people you care about. And if your kids ask for “gummy bears” by name, you’ll know you’ve won.
I’d love to hear how yours turn out. Did you try any variations? Did your kids love them? Drop a comment below and let me know. And if you’re looking for more wholesome snack ideas, check out my Healthy Chicken Veggie Skillet Wraps for a savory option that’s just as easy to make. Happy cooking, and here’s to staying well!
Frequently Asked Questions
Can I use fresh elderberries instead of dried?
I don’t recommend it. Fresh elderberries have a different water content and can be harder to work with. Dried elderberries are more concentrated and consistent. Plus, fresh elderberries must be cooked thoroughly to be safe, and the drying process already ensures they’re ready to use.
How many gummies should I give my child per day?
For general immune support, I give my kids 2-3 gummies per day. During cold season or if they’ve been exposed to something, I might up it to 4-5. Always start with a smaller amount to see how they tolerate it. And of course, check with your pediatrician for personalized advice.
Can I make these without a mold?
Absolutely. Pour the mixture into a small glass dish (like an 8×8 inch pan) lined with parchment paper. Refrigerate until set, then cut into small squares. They won’t be as cute, but they’ll taste exactly the same. I’ve done this many times when I couldn’t find my molds.
Why did my gummies turn out too hard?
This usually happens if you used too much gelatin or if the mixture boiled after adding the gelatin. Gelatin can become tough if overheated. Next time, make sure your liquid is warm but not hot when you add the bloomed gelatin, and stick to the measurements exactly.
Can I use flavored gelatin instead of plain?
I wouldn’t recommend it. Flavored gelatins usually contain added sugar, artificial flavors, and colors that defeat the purpose of making these at home. Plain gelatin lets the elderberry and honey flavors shine. If you want a different flavor, try the variations I mentioned above.
Pin This Recipe!
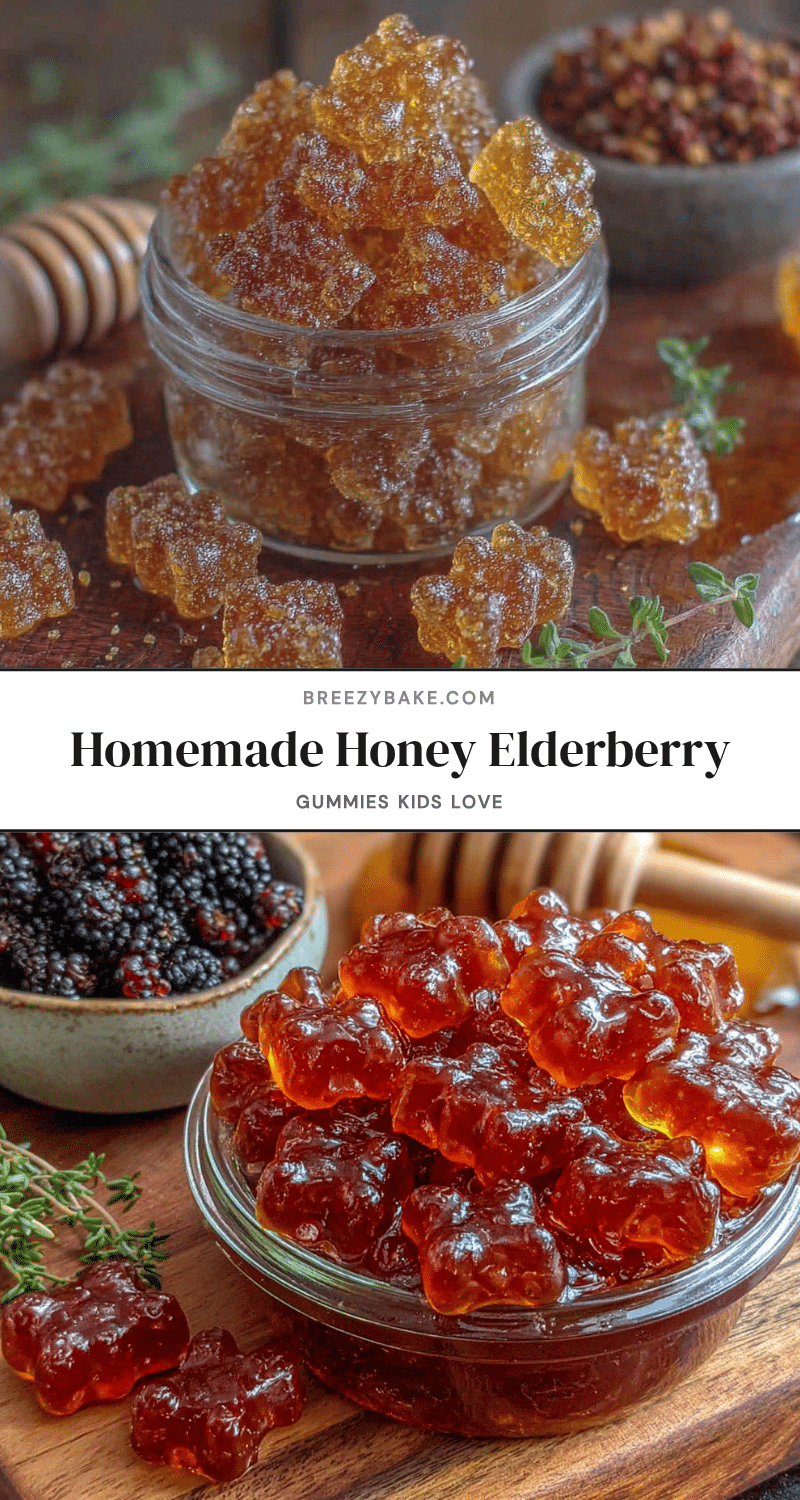
Homemade Honey Elderberry Gummies: The Best Immune Boosting Snack
These homemade honey elderberry gummies are a naturally sweetened, immune-boosting treat with a soft, pillowy jiggle that kids love. Made with simple, clean ingredients like dried elderberries, raw honey, and gelatin, they’re perfect for lunchboxes, travel, or a fun kitchen project with the family.
- Prep Time: 15 minutes
- Cook Time: 30 minutes
- Total Time: 45 minutes
- Yield: 4 servings 1x
- Category: Snack
- Cuisine: American
Ingredients
- ½ cup dried elderberries
- 2 cups water
- ¼ cup raw honey
- ¼ cup gelatin (about 4 tablespoons)
- 1 teaspoon vitamin C powder (optional)
- 1 tablespoon fresh lemon juice
Instructions
- Make the elderberry syrup: Combine the dried elderberries and 2 cups of water in a medium saucepan. Bring to a boil over medium-high heat, then reduce the heat to low and let it simmer, uncovered, for about 30 minutes. The liquid will reduce by about half and turn a deep, dark purple.
- Strain the berries: Place a fine-mesh strainer over a bowl or liquid measuring cup. Carefully pour the mixture through the strainer, pressing on the berries with the back of a spoon to extract all the liquid. Discard the berries. You should have about 1 cup of concentrated elderberry syrup. Let it cool for 5-10 minutes until it’s warm but not hot.
- Bloom the gelatin: While the syrup cools, pour ¼ cup of the warm elderberry syrup into a small bowl. Sprinkle the gelatin evenly over the top. Do not stir yet. Let it sit for 5-10 minutes until the gelatin absorbs the liquid and looks like a thick, jiggly paste.
- Combine everything: Pour the remaining ¾ cup of warm elderberry syrup back into the saucepan. Add the honey, lemon juice, and vitamin C powder if using. Warm over low heat, whisking gently, until the honey dissolves completely. Do not let it boil.
- Incorporate the bloomed gelatin: Remove the saucepan from the heat. Add the bloomed gelatin and whisk gently but thoroughly until it’s completely dissolved. You should see no streaks or lumps.
- Fill the molds: Carefully pour the mixture into a liquid measuring cup with a spout (or use a dropper). Fill each cavity of your silicone molds to the top. Work quickly, as the mixture will start to set as it cools.
- Refrigerate to set: Place the filled molds on a flat tray or plate. Refrigerate for at least 2-3 hours, or until the gummies are firm to the touch. I usually leave them overnight for the best texture.
- Unmold and store: Once set, gently pop the gummies out of the molds. They should release easily. If they stick, let them sit at room temperature for a few minutes, then try again. Store in an airtight container in the refrigerator.
Notes
Don’t skip the blooming step for a smooth texture. Ensure the syrup is warm but not hot when adding gelatin to avoid weakening its setting power. For vegan version, substitute gelatin with 2 tablespoons agar agar powder. Gummies can be stored in the refrigerator for up to 2-3 weeks or frozen for up to 3 months.
Nutrition
- Serving Size: 6-8 gummies
- Calories: 4560
- Sugar: 810
- Carbohydrates: 1012
- Protein: 23
Keywords: elderberry gummies, honey gummies, immune boosting gummies, homemade gummies, healthy gummies, kid-friendly gummies, natural gummies


