Introduction
It was 11:47 PM on a random Tuesday, and I had a desperate, undeniable need for something cold, sweet, and salty. I mean, the kind of craving that makes you open the freezer door three times in ten minutes, just hoping something magical has appeared. I didn’t have an ice cream maker—honestly, I’ve never owned one—and I definitely didn’t have the patience for a complicated custard situation. But I had a can of sweetened condensed milk, a carton of heavy cream, and a jar of salted caramel sauce that was technically meant for a different recipe entirely. And that’s when the idea arrived: what if I just… didn’t follow the rules?
Let me tell you, something about the late hour loosened my usual kitchen perfectionism. I wasn’t thinking about proper techniques or what the food bloggers would say. I just wanted ice cream, and I wanted it with that perfect balance of buttery caramel and flaky salt. So I grabbed my hand mixer, ignored the clock, and started whisking like a woman possessed. The cream got thick and billowy, the caramel swirled in like a dark ribbon, and I poured the whole thing into a loaf pan before shuffling off to bed at nearly 1 AM.
The next morning—okay, fine, it was afternoon—I pulled that pan out and took a spoon to the edge. And honestly? I almost cried. It was creamy, it was rich, it had those little pockets of salted caramel that hit you just when you least expect it. No machine, no eggs, no fuss. Just pure, unapologetic dessert magic. Maybe you’ve been there—standing in your kitchen at a ridiculous hour, convinced you’re about to fail, only to stumble onto something genuinely brilliant. This recipe stayed with me because it proved that the best things don’t need fancy equipment or a culinary degree. They just need a late-night craving and a little bit of nerve.
Why You’ll Love This No-Churn Salted Caramel Ice Cream
Look, I’ve tested a lot of ice cream recipes over the years. Some required constant stirring, others needed a thermometer, and a few just straight-up failed on me (we don’t talk about the crystallized disaster of 2019). This no-churn salted caramel version? It’s the one I keep coming back to, and here’s why you will too:
- Only 3 Ingredients: Heavy cream, sweetened condensed milk, and salted caramel sauce. That’s it. No eggs, no corn syrup, no weird stabilizers.
- No Machine Required: You don’t need an expensive ice cream maker. Just a bowl, a mixer, and a freezer. I’ve made this in a tiny apartment kitchen and a friend’s cramped vacation rental.
- Perfect for Hosting: This is the dessert that makes you look like a hero at dinner parties. You can make it days ahead, scoop it out of a pretty container, and watch your guests’ eyes go wide when they taste that salted caramel.
- Completely Customizable: Want it extra salty? Add more flaky salt. Want chunks of chocolate? Fold them in. This recipe is your blank canvas.
- Crowd-Pleasing Texture: It’s scoopable straight from the freezer—no thawing required—with that perfect creamy mouthfeel that rivals any store-bought brand.
I’ve brought this to potlucks, birthday dinners, and casual backyard barbecues. Every single time, someone asks for the recipe. And the best part? They never believe it only took me ten minutes of active work. This isn’t just another ice cream recipe—it’s your secret weapon for impressing guests without breaking a sweat.
What Ingredients You Will Need
This recipe relies on just three core ingredients, but each one plays a crucial role in creating that luscious, scoopable texture and rich flavor. Here’s what you need and why it matters:
For the Ice Cream Base
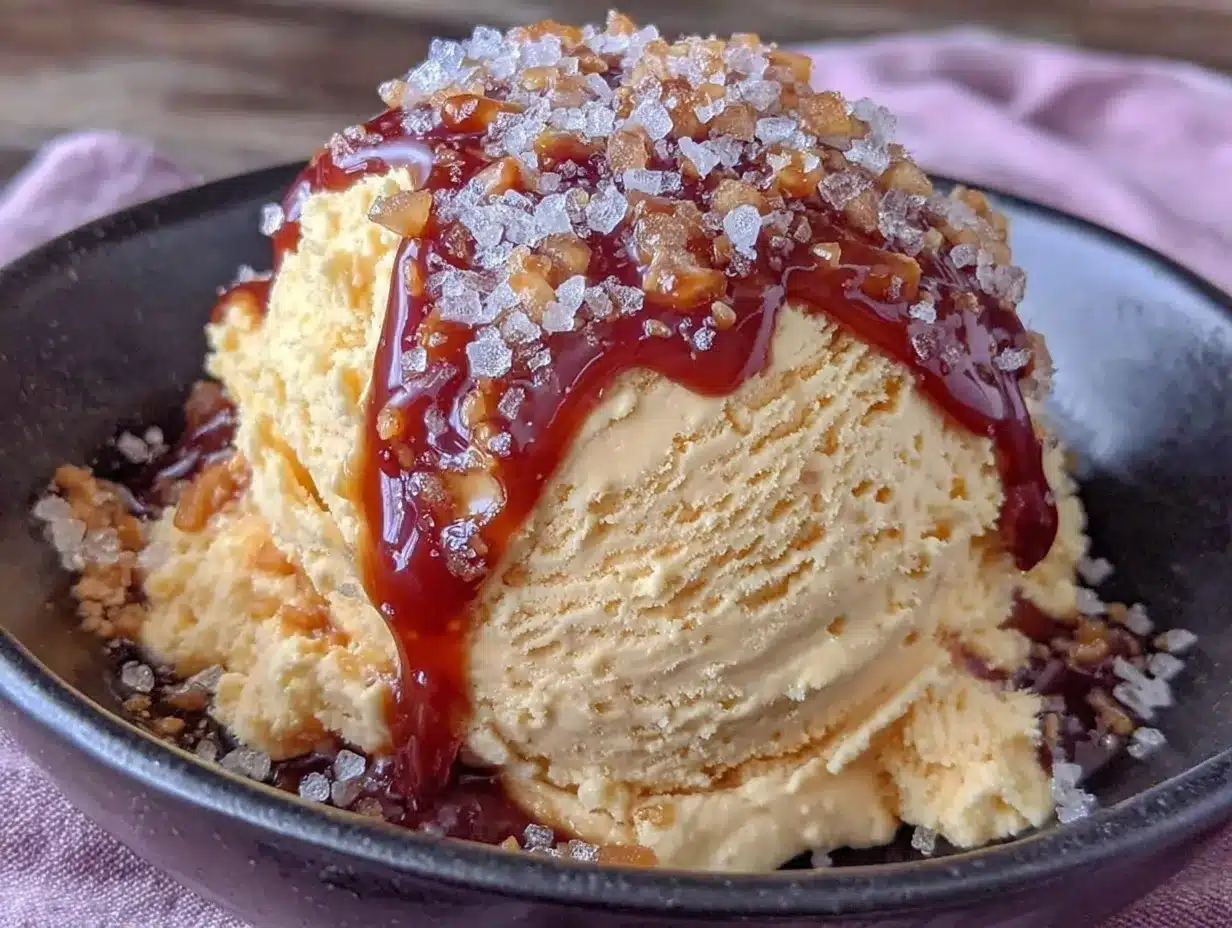
- 2 cups (480 ml) heavy whipping cream – This needs to be cold, straight from the fridge. Heavy cream with at least 36% milk fat works best for stiff peaks. I prefer Organic Valley or Horizon for consistent results.
- 1 can (14 oz / 397 g) sweetened condensed milk – This is the magic ingredient that makes no-churn ice cream possible. It adds sweetness, prevents ice crystals, and creates that creamy texture without cooking. Don’t substitute with evaporated milk—they’re not the same thing.
- 1/2 cup (120 ml) salted caramel sauce – Use a good quality store-bought version like Trader Joe’s or Stonewall Kitchen, or make your own if you’re feeling ambitious. The saltiness balances the sweetness of the condensed milk perfectly.
Optional Add-Ins for Extra Flair
- 1 teaspoon flaky sea salt – For sprinkling on top or folding in for extra salty crunch. Maldon is my go-to brand.
- 1/2 cup (85 g) chopped chocolate or toffee bits – Adds texture and makes it feel even more decadent.
- 1 teaspoon vanilla extract – Not strictly necessary, but it rounds out the caramel flavor beautifully.
Ingredient Selection Tips: When choosing your caramel sauce, look for one that lists cream and butter in the ingredients—not just corn syrup and artificial flavoring. The quality of your caramel directly affects the final taste. For the sweetened condensed milk, I’ve tried several brands and honestly, they all work fine. Just make sure it’s not expired (ask me how I know).
Substitution Guidance: If you need a dairy-free version, full-fat coconut cream can replace the heavy cream, and there are dairy-free sweetened condensed milk options available now. The texture will be slightly different—a bit icier—but still delicious. For a lighter version, some readers have had success with half-and-half, but I won’t lie: the texture won’t be as rich.
Equipment Needed
You don’t need a fancy kitchen to pull this off. Here’s what I use every time:
- Large mixing bowl – Glass or metal works best. Plastic can retain grease and prevent your cream from whipping properly.
- Hand mixer or stand mixer – A hand mixer is perfectly fine and easier to clean. I’ve used my trusty KitchenAid hand mixer for years. If you’re whisking by hand, prepare for a serious arm workout.
- Rubber spatula – For folding the caramel into the whipped cream without deflating it.
- Loaf pan (9×5 inch) or freezer-safe container – A standard loaf pan works beautifully and gives you those perfect scoopable slices. I also love using a wide, shallow dish for faster freezing.
- Plastic wrap or parchment paper – To cover the surface directly and prevent ice crystals from forming.
Budget-Friendly Options: Don’t have a hand mixer? You can absolutely whisk the cream by hand—it takes about 8-10 minutes of steady effort. I’ve done it when traveling and staying at a friend’s place without power tools. Consider it a pre-dessert arm workout.
Preparation Method
This is where the magic happens. Follow these steps carefully, and you’ll have ice cream that rivals any fancy creamery.
- Chill your bowl and cream: Pop your mixing bowl and beaters in the freezer for 10-15 minutes before you start. Cold equipment helps the cream whip up faster and hold its shape better. I learned this the hard way after a few flat, soupy failures.
- Whip the heavy cream: Pour the cold heavy cream into your chilled bowl. Beat on medium-high speed until stiff peaks form. This usually takes 3-5 minutes with a hand mixer. You’re looking for peaks that stand up straight when you lift the beaters—not droopy, not grainy. Stop immediately once you reach this stage; over-whipping turns cream into butter.
- Fold in the condensed milk: Gently pour the sweetened condensed milk over the whipped cream. Use your rubber spatula to fold it in with slow, sweeping motions. Cut through the center, scrape the bottom, and turn the bowl. Be gentle—you want to keep as much air in the mixture as possible. This takes about 2 minutes. The mixture should look thick, glossy, and uniform.
- Add the caramel swirl: Drizzle about 3/4 of your salted caramel sauce over the top. Use the spatula to fold it in with just 3-4 strokes. You want ribbons of caramel running through the mixture, not fully incorporated. A few streaks of white are totally fine—that’s where the caramel pockets will form.
- Layer into your container: Spoon half the mixture into your loaf pan or container. Drizzle with half the remaining caramel sauce and swirl lightly with a knife. Add the rest of the ice cream mixture, then top with the remaining caramel and a sprinkle of flaky sea salt if you’re using it.
- Cover and freeze: Press a piece of plastic wrap directly onto the surface of the ice cream. This prevents ice crystals from forming. Pop it in the freezer for at least 6 hours, but overnight is best. I’ve found that 8-12 hours gives you that perfect scoopable texture.
- Serve and enjoy: When you’re ready to serve, let the ice cream sit at room temperature for 5-10 minutes to soften slightly. Run your ice cream scoop under hot water for clean, beautiful scoops.
Pro Tip: If you’re making this for a party, prepare it two days ahead. The flavors meld and deepen over time, and you’ll have one less thing to worry about on the day of your gathering.
Cooking Tips & Techniques
After making this recipe probably two dozen times, I’ve collected a few hard-won lessons. Let me save you from my mistakes:
Don’t Over-Whip the Cream: I ruined my first batch by getting distracted and whipping the cream into butter. Watch it carefully—once you see those stiff peaks, stop immediately. The mixture should look like billowy clouds, not grainy yellow clumps.
Temperature Matters: Everything needs to be cold. Your cream, your bowl, even the room temperature. On hot summer days, I sometimes chill my mixture for 15 minutes in the fridge before folding in the caramel. It helps everything freeze more evenly.
The Caramel Situation: Not all caramel sauces are created equal. Some are too thin and will sink to the bottom. Others are too thick and won’t swirl properly. Look for a sauce that’s pourable at room temperature—like warm honey. If your caramel is too thick, warm it gently in the microwave for 10 seconds before adding it.
Timing for Hosting: Here’s my strategy: make the ice cream two days before your event. Freeze it overnight, then transfer it to a pretty serving container the next day. This gives it time to firm up perfectly and saves you from frantic last-minute prep while your guests are arriving.
Consistency Check: If your ice cream freezes rock-hard, don’t panic. Let it sit on the counter for 10-15 minutes before scooping. If it’s too soft after freezing, you might have over-whipped the cream or used a lower-fat cream. Adjust next time.
Variations & Adaptations
This recipe is incredibly forgiving, so feel free to make it your own. Here are some variations I’ve tried and loved:
- Chocolate Salted Caramel: Fold in 1/2 cup of mini chocolate chips or chopped dark chocolate along with the caramel. The bitterness of the chocolate plays beautifully with the sweet-salty caramel.
- Salted Caramel Coffee: Dissolve 1 tablespoon of instant espresso powder in 1 tablespoon of warm water and fold it into the condensed milk before adding it to the cream. It gives the ice cream a subtle mocha flavor that’s absolutely addictive.
- Vegan Version: Use full-fat coconut cream (chilled overnight) and a dairy-free sweetened condensed coconut milk. The texture is slightly different—a bit icier—but the flavor is still incredible. I’ve served this to dairy-free friends who couldn’t tell the difference.
- Boozy Salted Caramel: Add 2 tablespoons of bourbon or dark rum to the condensed milk before folding. The alcohol lowers the freezing point, so the ice cream stays softer and scoopable straight from the freezer. Plus, bourbon and caramel are a match made in heaven.
I once made a batch with crushed pretzels folded in for a sweet-salty-crunchy situation. It was a hit at a Super Bowl party, though the pretzels did soften a bit overnight. If you want that crunch, add the pretzels just before serving.
Serving & Storage Suggestions
How to Serve: Scoop this ice cream into pretty bowls or chilled glasses. Drizzle with extra salted caramel sauce and a sprinkle of flaky sea salt. For a dinner party, serve it alongside warm brownies or a slice of apple pie—the temperature contrast is divine. I also love serving it in mini waffle cones for a fun, casual vibe.
What to Serve With It: This ice cream pairs beautifully with:
- Warm chocolate chip cookies
- Fresh berries (the tartness cuts through the richness)
- A shot of espresso for dipping
- Grilled peaches or pineapple for a summer dessert
Storage Instructions: Keep the ice cream in an airtight container with plastic wrap pressed directly onto the surface. It will keep for up to 2 weeks in the freezer, though honestly, it never lasts that long in my house. If you’re making it for a party, you can prepare it up to a week in advance.
Reheating/Softening: If the ice cream freezes too hard, let it sit at room temperature for 10-15 minutes before scooping. You can also microwave the container on low power for 10-15 seconds to soften the edges.
Flavor Development: The caramel flavor actually deepens after 24-48 hours in the freezer. The salt mellows out and melds with the sweetness, creating a more complex, balanced taste. So don’t be afraid to make this ahead—it only gets better.
Nutritional Information & Benefits
Let’s be real: this is a treat, not a health food. But knowing what’s in it helps you enjoy it mindfully. Here’s the approximate breakdown per serving (based on 8 servings):
| Nutrient | Amount Per Serving |
|---|---|
| Calories | 380 |
| Total Fat | 24g |
| Saturated Fat | 15g |
| Carbohydrates | 38g |
| Sugar | 35g |
| Protein | 4g |
| Sodium | 180mg |
Health Highlights: On the bright side, this ice cream contains no artificial preservatives, stabilizers, or high-fructose corn syrup. The heavy cream provides calcium and vitamin A, and the caramel sauce (if you use a good one) contains real dairy and sugar rather than processed alternatives. If you’re watching your sugar intake, you can use a sugar-free sweetened condensed milk and a low-sugar caramel sauce—the texture will be slightly different, but it works.
Dietary Considerations: This recipe contains dairy and gluten (if your caramel sauce has gluten—check the label). It’s naturally egg-free, which is great for those with egg allergies. For a dairy-free version, see the variations section above.
Conclusion
This no-churn salted caramel ice cream is proof that you don’t need fancy equipment or a culinary degree to make something truly spectacular. It’s creamy, it’s indulgent, and it has that perfect balance of sweet and salty that keeps people coming back for seconds. Whether you’re hosting a dinner party, bringing dessert to a potluck, or just treating yourself on a quiet Tuesday night, this recipe delivers every single time.
I love this recipe because it reminds me that the best things in life are often the simplest. A few ingredients, a little patience, and suddenly you have something that makes people close their eyes and smile. So go ahead—make a batch, share it with the people you love, and don’t be surprised when they ask for the recipe. And when they do, send them my way, okay? I’d love to hear how your version turns out.
What’s your favorite way to customize this ice cream? Drop a comment below—I’m always looking for new ideas to try in my late-night kitchen experiments.
Frequently Asked Questions
Can I use half-and-half instead of heavy cream?
Technically yes, but the texture won’t be as rich and creamy. Heavy cream has a higher fat content, which creates that luscious mouthfeel and helps prevent ice crystals. If you use half-and-half, your ice cream will be icier and less scoopable. Stick with heavy cream for the best results.
How long does this ice cream need to freeze?
At least 6 hours, but overnight is ideal. I’ve found that 8-12 hours gives you the perfect scoopable texture. If you’re in a rush, you can spread the mixture in a shallow dish for faster freezing—it might be ready in 4-5 hours.
Can I make this without a mixer?
Absolutely! You can whip the cream by hand with a whisk. It takes about 8-10 minutes of steady whisking, but it’s totally doable. I’ve done it while camping (yes, I brought heavy cream camping—don’t judge). Just make sure your cream and bowl are very cold, and take breaks if your arm gets tired.
Why did my caramel sink to the bottom?
This usually happens if your caramel sauce is too thin or too warm when you add it. Make sure your caramel is at room temperature and has a thick, pourable consistency. Also, be gentle when folding—over-mixing can cause the caramel to settle. Next time, try drizzling the caramel in layers rather than folding it all in at once.
Can I double this recipe for a crowd?
Yes! This recipe doubles beautifully. Just make sure you have a large enough bowl to whip the cream (it expands quite a bit) and a bigger container for freezing. A 9×13 inch baking dish works great for a double batch. The freezing time might increase by an hour or two, so plan ahead.
PrintNo-Churn Salted Caramel Ice Cream: 3-Ingredient Easy Dessert

This no-churn salted caramel ice cream is creamy, rich, and made with just three ingredients. No ice cream maker required, perfect for satisfying late-night cravings or impressing guests.
- Prep Time: 10 minutes
- Cook Time: 0 minutes
- Total Time: 6 hours 10 minutes (includes freezing)
- Yield: 8 servings 1x
- Category: Dessert
- Cuisine: American
Ingredients
- 2 cups (480 ml) heavy whipping cream
- 1 can (14 oz / 397 g) sweetened condensed milk
- 1/2 cup (120 ml) salted caramel sauce
- 1 teaspoon flaky sea salt (optional)
- 1/2 cup (85 g) chopped chocolate or toffee bits (optional)
- 1 teaspoon vanilla extract (optional)
Instructions
- Chill your bowl and cream: Pop your mixing bowl and beaters in the freezer for 10-15 minutes before you start.
- Whip the heavy cream: Pour the cold heavy cream into your chilled bowl. Beat on medium-high speed until stiff peaks form, about 3-5 minutes.
- Fold in the condensed milk: Gently pour the sweetened condensed milk over the whipped cream. Use a rubber spatula to fold it in with slow, sweeping motions until thick, glossy, and uniform.
- Add the caramel swirl: Drizzle about 3/4 of your salted caramel sauce over the top. Fold it in with just 3-4 strokes, leaving ribbons of caramel.
- Layer into your container: Spoon half the mixture into a loaf pan or container. Drizzle with half the remaining caramel sauce and swirl lightly. Add the rest of the ice cream mixture, then top with remaining caramel and a sprinkle of flaky sea salt if using.
- Cover and freeze: Press plastic wrap directly onto the surface of the ice cream. Freeze for at least 6 hours, but overnight is best (8-12 hours).
- Serve and enjoy: Let the ice cream sit at room temperature for 5-10 minutes to soften slightly before scooping.
Notes
For best results, chill the bowl and cream before whipping. Do not over-whip the cream. Use a good quality salted caramel sauce that is pourable at room temperature. The ice cream can be stored for up to 2 weeks. For a dairy-free version, use full-fat coconut cream and dairy-free sweetened condensed milk.
Nutrition
- Serving Size: 1/8 of recipe
- Calories: 380
- Sugar: 35
- Sodium: 180
- Fat: 24
- Saturated Fat: 15
- Carbohydrates: 38
- Protein: 4
Keywords: no-churn ice cream, salted caramel, 3-ingredient dessert, easy ice cream, homemade ice cream, no machine


