My cousin claimed to hate Halloween food for as long as I can remember. The themed snacks, the creepy-cute cupcakes, the way everything had to look like eyeballs or guts—she wanted no part of it. “Just give me a regular burger,” she’d say every October, rolling her eyes at my aunt’s spiderweb dip. I figured that was just how she was. Some people love the holiday kitsch, and some people just don’t. Then last year, I made these Spooky Mummy Hot Dogs for a little pre-trick-or-treat gathering, honestly just to have something fun for the kids. I left the platter on the counter and walked away to answer the door. When I came back, my cousin was standing there, mid-bite, with a guilty look on her face and crescent roll dough hanging from her lip like a little pastry beard. She didn’t even try to deny it. She just pointed at the plate and mumbled, “Can I have another one?”
That’s the thing about these mummy hot dogs. They’re not trying too hard, you know? They’re not pretending to be fancy or complicated. They’re just good old hot dogs wrapped in flaky, buttery dough with little mustard eyes peeking out at you. Maybe you’ve been there—rolling your eyes at another “fun” Halloween recipe that looks better than it tastes. I get it. But these little guys actually deliver. The dough gets golden and crisp in the oven, the hot dog gets all juicy inside, and honestly, the whole thing comes together in about twenty minutes. It’s the kind of snack that makes everyone—even the Halloween food skeptics—reach for seconds before the first batch is gone.
Why You’ll Love This Recipe
I’ve tested this recipe about six times now, tweaking the dough thickness and the baking time until everything was just right. Here’s why these Spooky Mummy Hot Dogs have become my go-to for Halloween parties, classroom celebrations, and even lazy October dinners.
- Quick & Easy: From start to finish, you’re looking at about 20 minutes. That’s faster than ordering pizza, and way more fun. Perfect for those chaotic Halloween evenings when you’re juggling costumes and candy.
- Simple Ingredients: You probably already have crescent roll dough and hot dogs in your fridge or freezer right now. No special grocery trips, no obscure ingredients you’ll never use again. Just pantry staples that come together like magic.
- Perfect for Halloween Parties: These are the life of the party, honestly. Kids go absolutely wild for them, and adults sneak them when they think no one is looking. They’re great for classroom treats, potlucks, or just a fun dinner before trick-or-treating.
- Crowd-Pleaser: I’ve brought these to three different Halloween gatherings now, and every single time, the platter comes back empty. Even picky eaters who “don’t like hot dogs” somehow end up eating three.
- Unbelievably Delicious: The combination of salty, juicy hot dog wrapped in buttery, flaky golden dough is honestly hard to beat. And those little mustard eyes? They add just a tiny tang that ties everything together. It’s comfort food at its finest, with a spooky twist.
What makes this recipe different from all the other mummy hot dogs out there? It’s the little things. I’ve figured out the perfect dough-to-hot-dog ratio so you don’t end up with a mouthful of bread. I’ve also cracked the code on getting the dough to stay wrapped without unravelling in the oven—a problem that plagued my first few batches. And the mustard eyes? I’ve got a trick for keeping them right where you put them, so your mummies don’t end up looking like they’ve been crying yellow tears.
This isn’t just another Halloween snack. It’s the kind of recipe that makes you close your eyes after the first bite, even if you’re standing in a kitchen full of screaming kids and glittery decorations. It’s comfort food reimagined for the spookiest night of the year—faster than you’d expect, but with the same soul-soothing satisfaction that makes you reach for seconds.
What Ingredients You Will Need
This recipe uses simple, everyday ingredients to deliver big flavor and maximum fun without any fuss. Most of these are probably already sitting in your kitchen, which is exactly how Halloween snacks should be.
For the Mummy Hot Dogs
- 8 hot dogs (I recommend beef hot dogs for the best flavor—Oscar Mayer or Hebrew National are my go-to brands. They hold up well in the oven and don’t get rubbery.)
- 1 can (8 ounces) refrigerated crescent roll dough (Pillsbury is the classic choice here. The buttery layers are perfect for wrapping. You could also use crescent dough sheets if you want less perforation, but the regular rolls work just fine.)
- 1 large egg, beaten (for the egg wash—this gives the dough that gorgeous golden-brown color. You can also use milk or melted butter in a pinch.)
- Mustard, for the eyes (yellow mustard is traditional and gives that nice pop of color, but you can use ketchup, sriracha, or even candy eyes if you’re feeling extra festive.)
Ingredient Tips and Substitutions
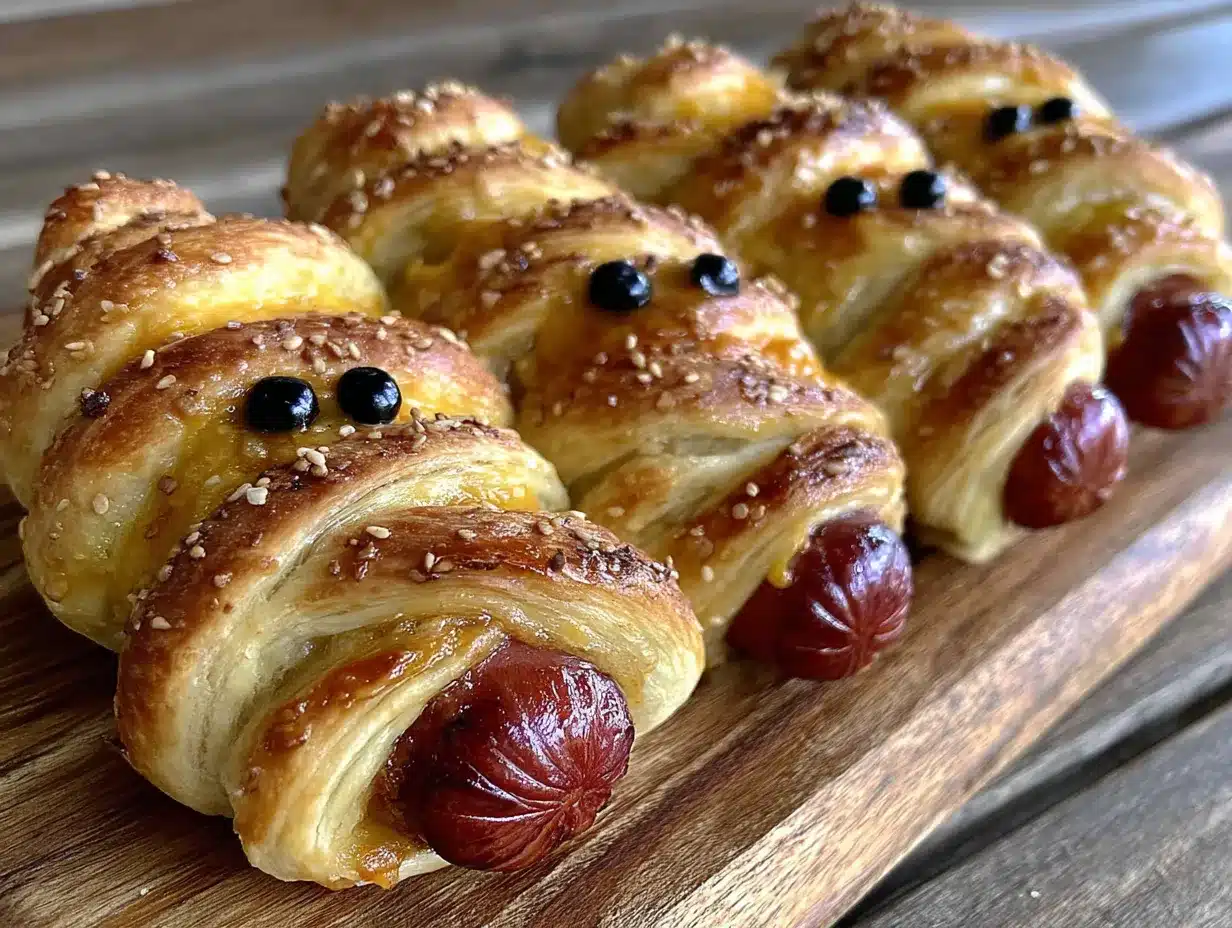
Let me share a few things I’ve learned from making these about a dozen times now. First, don’t skimp on the hot dog quality. I tried a cheaper brand once and they split open in the oven, which made the whole mummy look like it was having a very bad day. Stick with good-quality beef hot dogs for the best texture and flavor.
For the crescent roll dough, you can absolutely use the store-brand version if that’s what you have. I’ve tested both, and while Pillsbury does give a slightly flakier result, the generic version works perfectly fine. Just make sure the dough is cold when you’re working with it—warm dough gets sticky and hard to handle.
If you want to make these gluten-free, look for gluten-free crescent roll dough (it exists, and it works surprisingly well) and gluten-free hot dogs. For a dairy-free version, skip the egg wash and use olive oil or melted dairy-free butter instead. The dough itself is typically dairy-free, but double-check the label if that’s a concern.
For the eyes, I’ve experimented with all sorts of things. Yellow mustard is the classic choice because it stays put during baking and gives that nice yellow pop against the golden dough. Ketchup works too, but it tends to spread a bit more. If you’re making these for a party and want them extra cute, you can use little candy eyes from the baking aisle—just press them on after baking so they don’t melt.
Optional Add-Ins
- Shredded cheese: Wrap a thin strip of cheddar or mozzarella along with the hot dog for a cheesy center. It oozes out when you bite into it, which is both delicious and appropriately gooey for Halloween.
- Everything bagel seasoning: Sprinkle this on top before baking for extra flavor and texture. It gives the mummies a little crunch and makes them look even more rustic.
- Poppy seeds or sesame seeds: Another great topping option that adds visual interest and a nutty flavor.
Equipment Needed
You don’t need anything fancy for these Spooky Mummy Hot Dogs. Here’s what you’ll need:
- Baking sheet (a standard half-sheet pan works perfectly. Line it with parchment paper or a silicone baking mat for easy cleanup—trust me on this one, the mustard can get sticky.)
- Sharp knife or pizza cutter (for cutting the dough into strips. A pizza cutter makes quick work of this, but a sharp knife works just fine.)
- Pastry brush (for applying the egg wash. If you don’t have one, you can use a paper towel or even your fingers—I’ve done it in a pinch, and it works.)
- Small bowl (for beating the egg)
- Toothpicks (optional, but helpful for keeping the dough ends tucked in while baking. I’ve used them on particularly stubborn mummies.)
I’ve made these in all sorts of kitchens, from my fully stocked home setup to a friend’s barely-equipped apartment. The only thing that’s truly non-negotiable is the baking sheet. Everything else can be improvised. I once used a butter knife to cut the dough strips, and honestly, they turned out fine. Don’t let missing equipment stop you from making these.
Preparation Method
Alright, let’s get into the actual making of these little guys. I’ve broken this down step by step so even if you’ve never wrapped a mummy hot dog in your life, you’ll end up with something that looks properly spooky.
- Preheat your oven to 375°F (190°C). Line a baking sheet with parchment paper or a silicone baking mat. This is important—without it, the mustard can stick to the pan and make cleanup a nightmare. Ask me how I know.
- Prepare your hot dogs. Pat them dry with a paper towel. This helps the dough stick better. If your hot dogs are particularly long, you can cut them in half to make mini mummies—perfect for little hands or party platters. For standard-sized mummies, leave them whole.
- Open the crescent roll dough. Carefully unroll it onto a clean cutting board. You’ll notice it’s perforated into triangles. Press the seams together gently with your fingers to create a solid sheet of dough. Don’t press too hard—you want to keep the layers intact for that flaky texture.
- Cut the dough into strips. Using a sharp knife or pizza cutter, cut the dough lengthwise into thin strips, about 1/2 inch wide. I usually get about 6-8 strips per sheet of dough. The strips don’t have to be perfectly even—in fact, uneven strips give your mummies a more authentic “wrapped” look. I learned this the hard way after spending way too long trying to make every strip exactly the same width.
- Wrap the hot dogs. Take one hot dog and start wrapping a dough strip around it, slightly overlapping as you go. Leave a small gap at the top for the “face” area—about an inch of exposed hot dog. Tuck the end of the dough strip underneath the hot dog to secure it. Don’t wrap too tightly, or the dough won’t have room to expand as it bakes. I made this mistake the first time and ended up with mummies that looked strangled.
- Place the wrapped hot dogs on the baking sheet, leaving about an inch of space between each one. They’ll expand a bit as they bake, so give them room to breathe.
- Brush with egg wash. In your small bowl, beat the egg with a tablespoon of water. Using your pastry brush, gently brush the egg wash over each mummy. This is what gives them that beautiful golden-brown color. Don’t skip this step—I tried using just melted butter once, and the color was nowhere near as nice.
- Bake for 12-15 minutes, or until the dough is golden brown and the hot dogs are heated through. Keep an eye on them toward the end—ovens vary, and you don’t want them to get too dark. The kitchen will smell amazing at this point, by the way.
- Add the eyes. Remove the mummies from the oven and let them cool for about 2-3 minutes. Then, using a toothpick or the tip of a knife, dab two small dots of mustard onto the exposed hot dog area for the eyes. The heat from the hot dog will help the mustard stick. If you add the mustard before baking, it tends to dry out and look crusty—I learned this from a particularly sad batch of mummies with wrinkled yellow eyes.
- Serve immediately. These are best enjoyed warm, when the dough is still flaky and the hot dog is juicy. They’ll still be good at room temperature, but the first five minutes after baking are truly magical.
A few extra notes from my kitchen to yours: If the dough strips feel too sticky to handle, pop them in the fridge for five minutes. Cold dough is much easier to work with. Also, if you’re making a large batch, keep the unused dough strips covered with a damp paper towel so they don’t dry out.
Cooking Tips & Techniques
I’ve made a lot of mistakes with these Spooky Mummy Hot Dogs so you don’t have to. Here are the things I wish someone had told me before my first attempt.
The dough thickness matters more than you think. If you cut your strips too wide, you’ll end up with more dough than hot dog, which throws off the whole balance. Aim for strips that are about half an inch wide. Too thin, and they’ll break apart as you’re wrapping. Too thick, and you’ll have a bread-heavy mummy. Half an inch is the sweet spot.
Don’t overwork the dough. Crescent roll dough is delicate, and the more you handle it, the tougher it gets. When you’re pressing the seams together or cutting strips, work quickly and gently. I once spent too long trying to make perfect strips, and the dough got warm and sticky and started tearing. Not my finest moment.
Watch your oven like a hawk. The difference between perfectly golden mummies and burnt ones is about two minutes. Start checking at the 12-minute mark. You’re looking for a deep golden brown color—not pale, not dark. If your oven runs hot, check even earlier.
Let them rest before adding the eyes. I know you’ll be excited to get those mustard eyes on there, but if you add them right out of the oven, the heat will make the mustard runny and messy. Give them a couple of minutes to cool down. The mustard will stay exactly where you put it.
Make extra—seriously. I always double this recipe because these disappear faster than you’d expect. I’ve seen adults eat four or five in one sitting without blinking. They’re addictive in the best way.
Multitasking tip: While the first batch is baking, prep the second batch on another sheet of parchment paper. That way you can just slide the next batch onto the baking sheet as soon as the first one comes out. This keeps the assembly line moving smoothly.
Variations & Adaptations
One of the best things about these Spooky Mummy Hot Dogs is how customizable they are. Here are some variations I’ve tried and loved.
Cheesy Mummy Hot Dogs: Before wrapping the hot dog, cut a slit lengthwise down the center and stuff it with a strip of cheddar or mozzarella cheese. The cheese melts and oozes out during baking, which is both delicious and appropriately gruesome for Halloween. I tried this at a party last year and they were gone in minutes.
Spicy Mummy Hot Dogs: Spread a thin layer of sriracha or your favorite hot sauce on the hot dog before wrapping. Or use spicy jalapeño hot dogs for an extra kick. The heat cuts through the buttery dough beautifully.
Veggie Mummy Dogs: Use vegetarian or vegan hot dogs and dairy-free crescent roll dough. Brush with olive oil instead of egg wash. They bake up just as golden and delicious. I made these for a friend with dietary restrictions and she said they were the best Halloween snack she’d had in years.
Breakfast Mummy Sausages: Swap the hot dogs for breakfast sausage links. These make a fun Halloween morning treat before school or a spooky brunch centerpiece. The smaller size also works great for little hands.
Pigs in a Blanket Style: Cut the hot dogs into thirds and wrap each piece with a smaller strip of dough. These mini mummies are perfect for appetizer platters and disappear even faster than the full-sized version. I made these for a Halloween movie night and they were the first thing to go.
Serving & Storage Suggestions
These Spooky Mummy Hot Dogs are best served warm, right after the mustard eyes go on. The contrast between the hot, flaky dough and the cool mustard is part of the magic. Arrange them on a platter with some extra mustard or ketchup on the side for dipping. A little bowl of ranch dressing also works surprisingly well.
For a full Halloween spread, pair them with some creepy veggie sticks (think “witches’ fingers” made from carrot sticks with almond slivers for nails), a bowl of orange and black popcorn, and some spooky punch. They also go great with a side of baked beans or a simple green salad if you’re serving them as a meal.
Storage: If you have leftovers (which, honestly, is rare), store them in an airtight container in the refrigerator for up to 3 days. The dough will soften a bit, but they’re still delicious.
Reheating: The best way to reheat these is in the oven or toaster oven at 350°F (175°C) for about 5 minutes. This helps restore some of the flakiness. The microwave works in a pinch, but the dough will be soft rather than crispy. I’ve also reheated them in an air fryer at 350°F (175°C) for 3 minutes, and they came out beautifully crisp.
Freezing: You can freeze the unbaked wrapped mummies on a baking sheet until solid, then transfer them to a freezer bag. When you’re ready to bake, add a couple of extra minutes to the baking time. This is a great make-ahead option for busy Halloween nights.
Nutritional Information & Benefits
Let’s be real—these are a treat, not a health food. But here’s what you’re looking at per mummy hot dog (based on standard ingredients):
- Calories: Approximately 220-250
- Protein: 8-10 grams
- Fat: 14-16 grams
- Carbohydrates: 16-18 grams
- Fiber: 0-1 gram
- Sugar: 3-4 grams
On the positive side, hot dogs do provide a decent amount of protein, which makes these a more satisfying snack than something purely carb-based. The crescent roll dough offers some iron and B vitamins from the enriched flour. And honestly, the biggest benefit here might be the joy factor—food that makes people smile and brings everyone together around the table has its own kind of nutritional value.
Dietary Considerations: These are not gluten-free unless you use gluten-free dough and hot dogs. They contain dairy (in the dough and egg wash) unless you make substitutions. They are nut-free and soy-free with standard ingredients. Always check labels if you’re cooking for someone with allergies.
Conclusion
These Spooky Mummy Hot Dogs have become a Halloween tradition in my house, and I have a feeling they’ll become one in yours too. They’re the perfect blend of fun and delicious—the kind of recipe that makes everyone at the party stop and smile before they grab one. Or three.
What I love most about this recipe is how forgiving it is. Your strips don’t have to be perfect. Your mustard eyes don’t have to be symmetrical. Each mummy comes out a little different, and that’s part of the charm. They’re like little edible snowflakes, but spookier and way more delicious.
I’d love to hear how yours turn out! Did you try any fun variations? Did your kids help with the wrapping? Drop a comment below and let me know. And if you’re looking for more Halloween fun, be sure to check out my other spooky snacks. Happy Halloween, and happy eating!
Frequently Asked Questions
Can I make these Spooky Mummy Hot Dogs ahead of time?
Absolutely! You can wrap the hot dogs up to 24 hours in advance and keep them covered in the refrigerator. Just add the egg wash and bake right before serving. You can also freeze the unbaked wrapped mummies for up to a month—just bake straight from frozen, adding a few extra minutes to the cooking time.
What if I don’t have crescent roll dough?
No problem! You can use puff pastry (cut into thin strips), pizza dough (rolled thin), or even refrigerated biscuit dough (flattened and cut into strips). Each will give a slightly different texture, but they all work. Puff pastry gives the flakiest result, while pizza dough makes them more substantial.
Can I use turkey or chicken hot dogs?
Yes, turkey or chicken hot dogs work perfectly. They’re a bit leaner, so they won’t be quite as juicy as beef hot dogs, but the taste is still great. Just make sure to pat them dry before wrapping so the dough sticks properly.
How do I keep the dough from unravelling during baking?
Make sure you tuck the end of the dough strip underneath the hot dog before baking. You can also use a toothpick to secure the end if it’s being stubborn—just remember to remove it before serving. Placing the mummies seam-side down on the baking sheet also helps keep everything in place.
Can I make these in an air fryer instead of the oven?
Yes! Air fryer mummy hot dogs are amazing. Cook them at 350°F (175°C) for 8-10 minutes, checking halfway through. The air fryer gives them an extra-crispy exterior that’s hard to beat. Just make sure not to overcrowd the basket—work in batches if needed.
Pin This Recipe!
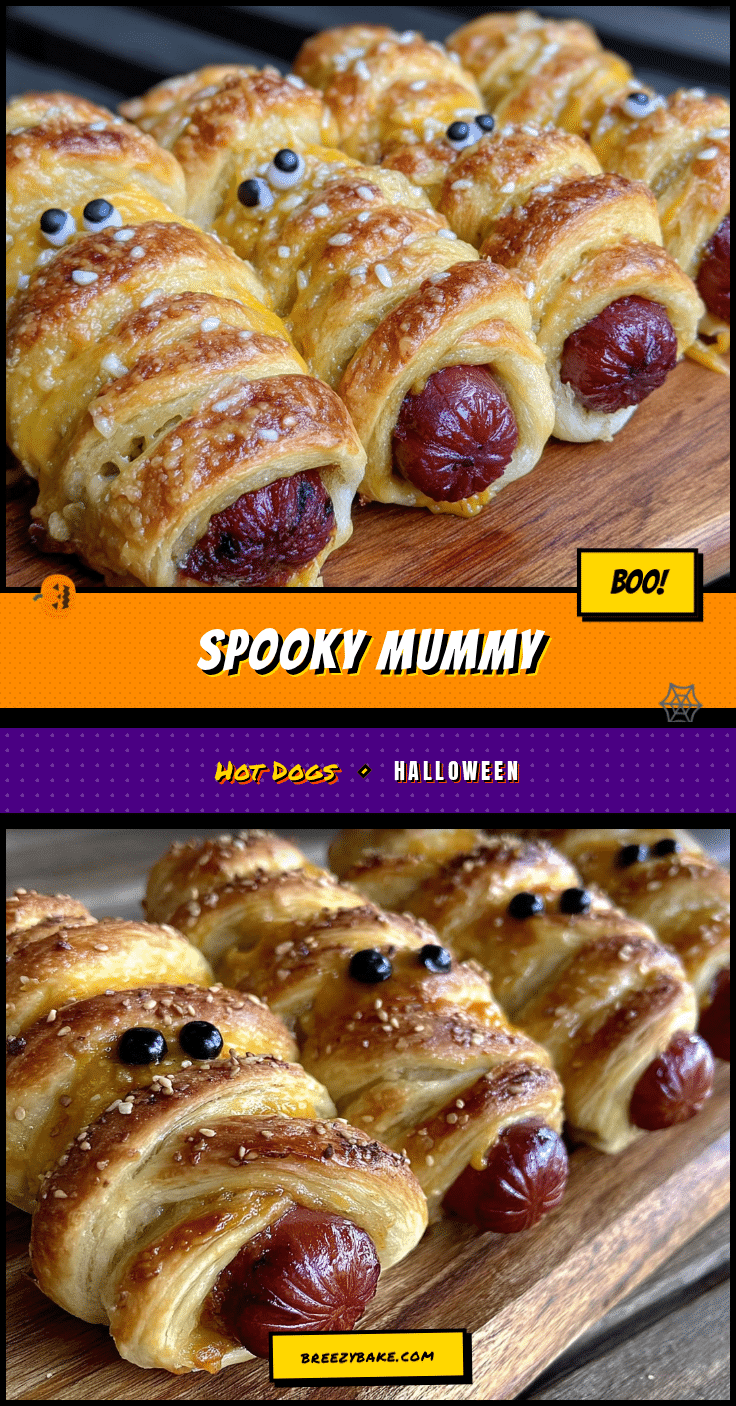
Spooky Mummy Hot Dogs: Easy Halloween Recipe
These Spooky Mummy Hot Dogs are a quick and easy Halloween snack made with hot dogs wrapped in flaky crescent roll dough, baked until golden, and finished with mustard eyes. Perfect for parties, classroom treats, or a fun dinner before trick-or-treating.
- Prep Time: 10 minutes
- Cook Time: 15 minutes
- Total Time: 25 minutes
- Yield: 8 servings 1x
- Category: Appetizer
- Cuisine: American
Ingredients
- 8 hot dogs (beef recommended, e.g., Oscar Mayer or Hebrew National)
- 1 can (8 ounces) refrigerated crescent roll dough (e.g., Pillsbury)
- 1 large egg, beaten (for egg wash)
- Mustard (yellow mustard for eyes; or ketchup, sriracha, candy eyes)
Instructions
- Preheat oven to 375°F (190°C). Line a baking sheet with parchment paper or a silicone baking mat.
- Pat hot dogs dry with a paper towel. Optionally cut in half for mini mummies.
- Unroll crescent roll dough onto a cutting board. Press seams together gently to form a solid sheet.
- Cut dough lengthwise into thin strips, about 1/2 inch wide (6-8 strips per sheet).
- Wrap a dough strip around each hot dog, slightly overlapping, leaving about 1 inch exposed at the top for the face. Tuck the end underneath to secure.
- Place wrapped hot dogs on the prepared baking sheet, about 1 inch apart.
- Brush each mummy with beaten egg wash (egg mixed with 1 tablespoon water).
- Bake for 12-15 minutes, until dough is golden brown and hot dogs are heated through.
- Remove from oven and let cool for 2-3 minutes. Using a toothpick or knife tip, dab two small dots of mustard onto the exposed hot dog area for eyes.
- Serve immediately while warm.
Notes
For best results, keep dough cold while working. If dough strips get sticky, refrigerate for 5 minutes. For cheesy mummies, slit hot dog lengthwise and stuff with cheese before wrapping. For air fryer, cook at 350°F (175°C) for 8-10 minutes. Unbaked wrapped mummies can be frozen for up to 1 month; bake straight from frozen, adding a few extra minutes.
Nutrition
- Serving Size: 1 mummy hot dog
- Calories: 235
- Sugar: 3
- Sodium: 580
- Fat: 15
- Saturated Fat: 5
- Carbohydrates: 17
- Protein: 9
Keywords: Halloween, hot dogs, mummy, crescent roll, easy, party snack, kids


